当前位置:网站首页>基于LNMP部署flask项目
基于LNMP部署flask项目
2022-07-06 09:34:00 【唐僧骑白马】
关于LNMP
LNMP是指一组通常一起使用来运行动态网站或者服务器的自由软件名称首字母缩写。L指Linux,N指Nginx,M一般指MySQL,也可以指MariaDB,P一般指PHP,也可以指Perl或Python。
一,安装python
1、安装python依赖环境
[[email protected] ~]# yum -y install openssl-devel bzip2-devel expat-devel gdbm-devel readline-devel sqline-devel
2、安装python
[[email protected] ~]# cd /usr/local/
[[email protected] local]# wget https://www.python.org/ftp/python/3.6.6/Python-3.6.6.tgz
3、解压python3.6
[[email protected] local]#tar -zxvf Python-3.6.6.tgz
[[email protected] local]# cd Python-3.6.6
4、配置并编译python3.6
[[email protected] Python-3.6.6]# ./configure --prefix=/usr/local/pyhton3
[[email protected] Python-3.6.6]# make
[[email protected] Python-3.6.6]# make install
5、建立python3和pip3的软链接
[[email protected] ~]# ln -s /usr/local/pyhton3/bin/python3.6 /usr/bin/python3
[[email protected] ~]# ln -s /usr/local/pyhton3/bin/pip3 /usr/bin/pip3
6、启动python,检查是否安装成功
[[email protected] ~]# python3
Python 3.6.6 (default, Oct  9 2019, 17:06:57)
[GCC 4.8.5 20150623 (Red Hat 4.8.5-11)] on linux
Type "help", "copyright", "credits" or "license" for more information.
>>> exit()
7、检查pip3版本
[[email protected] ~]# pip3 -V
pip 10.0.1 from /usr/local/pyhton3/lib/python3.6/site-packages/pip (python 3.6)
python和pip3安装成功后如下图所示
二、安装mysql数据库(MariaDB数据库)
1、在安装mysql前先调整yum与系统python版本
[[email protected] bin]# vim yum
[[email protected] bin]# vim /usr/libexec/urlgrabber-ext-down

[[email protected] bin]# whereis python
python: /usr/bin/python /usr/bin/python2.7 /usr/lib/python2.7 /usr/lib64/python2.7 /etc/python /usr/include/python2.7 /usr/share/man/man1/python.1.gz
2、安装mysql数据库
[[email protected] bin]# yum -y install mariadb-server
3、启动数据库服务
[[email protected] bin]# systemctl start mariadb.service
4、设置开机启动
[[email protected] bin]# systemctl enable mariadb.service
Created symlink from /etc/systemd/system/multi-user.target.wants/mariadb.service to /usr/lib/systemd/system/mariadb.service.
5、设置用户名和密码
[[email protected] bin]# mysqladmin -uroot password "root"
[[email protected] bin]# mysql -uroot -proot
6、查看数据库编码格式
MariaDB [(none)]> \s
7、退出数据库
MariaDB [(none)]> \q
8、修改数据库编码格式
[[email protected] bin]# vim /etc/my.cnf
添加character-set-server=utf8
9、重启服务
[[email protected] bin]# systemctl restart mariadb.service
10、再次查看数据库编码
MariaDB [(none)]> \s
只要数据库的相应编码格式为utf8就设置完成了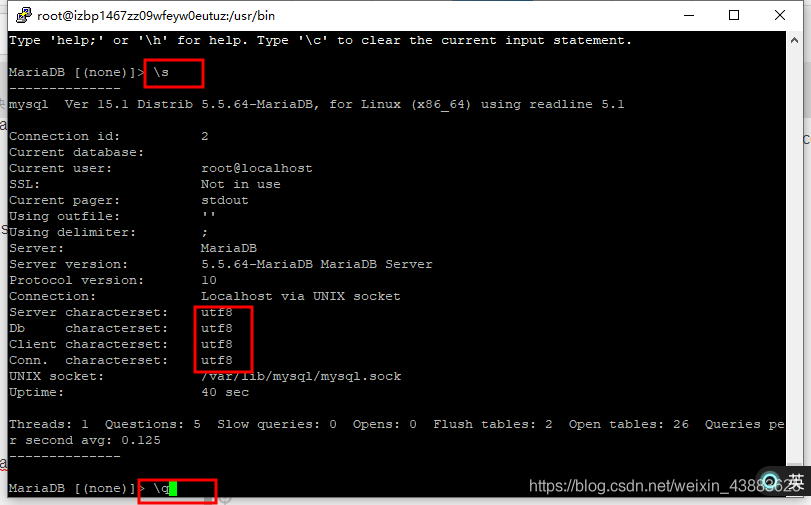
三、安装Nginx
1、下载Nginx
[[email protected] home]# wget http://nginx.org/download/nginx-1.13.7.tar.gz
2、安装Nginx依赖环境
[[email protected] ~]# yum -y install gcc gcc-c++ openssl-devel pcre-devel httpd-tools
3、解压Nginx
[[email protected] home]# tar -zxvf nginx-1.13.7.tar.gz
4、添加Nginx
[[email protected] nginx-1.13.7]# useradd nginx
5、配置Nginx
[[email protected] nginx-1.13.7]# ./configure --prefix=/usr/local/nginx --user=nginx --group=nginx --with-http_ssl_module --with-http_mp4_module --with-http_flv_module
6、编译Nginx
[[email protected] nginx-1.13.7]# make && make install
7、建立Nginx软链接
[[email protected] nginx-1.13.7]# ln -s /usr/local/nginx/sbin/nginx /usr/sbin/
8、启动Nginx
[[email protected] ~]# nginx
9、查看Nginx服务端口
[[email protected] ~]# netstat -anptu | grep nginx
tcp        0      0 0.0.0.0:80              0.0.0.0:*               LISTEN      19810/nginx: master
[[email protected] ~]#
四、部署flask项目
上传项目到服务器之前需要把flask的app.debug = False模式改为False,把数据库的连接信息改为Linux环境下的连接信息app.config["SQLALCHEMY_DATABASE_URI"] = "mysql+pymysql://root:[email protected]:3306/数据库名"
1、上传flask项目,数据库sql文件,项目的依赖环境(项目的依赖环境可以在Pycharm的交互环境下用freeze > req.txt生成)解压flask项目后进入项目目录查看包含文件
如果用xshell的话直接用rz命令就可以上传文件或目录
[[email protected] movies]# ls
app  app.py  managa.py  nginx.conf  req.txt  venv
2、安装flask项目依赖环境
[[email protected] home]# pip install -i http://pypi.douban.com/simple/ --trusted-host pypi.douban.com -r req.txt
3、进入数据库并创建一个项目所用的数据库
MariaDB [(none)]> create database move;
Query OK, 1 row affected (0.01 sec)
4、使用数据库
MariaDB [(none)]> use move
Database changed
MariaDB [move]>
5、导入项目所用的sql文件
MariaDB [move]> source /home/movie.sql
6、查看数据表
MariaDB [move]> show tables;
7、解压flask项目
[[email protected] home]# tar -zxvf movies.tar.gz
8、复制项目到/usr/local/nginx/html/
[[email protected] home]# cp -r movies /usr/local/nginx/html/
9、查看项目文件内容
[[email protected] movies]# ls
app  app.py  managa.py  nginx.conf  req.txt  venv
10、配置nginx.conf文件
[[email protected] movies]# vim nginx.conf
输入如下内容
worker_processes 4;
events {

    worker_connections 262140;
}
http {

    include mime.types;
    default_type application/octet-stream;
    sendfile on;
    keepalive_timeout 65;
    limit_conn_zone $binary_remote_addr zone=addr:5m;
    upstream movies {

        server 127.0.0.1:5001;
        server 127.0.0.1:5002;
        server 127.0.0.1:5003;
        server 127.0.0.1:5004;
    }
    server {

        listen 80;
        server_name localhost;
        location / {

            root html;
            index index.html index.htm;
            proxy_pass http://movies;
        }
        location ~ \.flv$ {

            flv;
            limit_conn addr 4;
            limit_rate 1024k;
            rewrite ^/static/uploads/(.+?).flv$ /movies/app/static/uploads/$1.flv permanent;
        }
        location ~ \.mp4$ {

            mp4;
            limit_conn addr 4;
            limit_rate 1024k;
            rewrite ^/static/uploads/(.+?).mp4$ /movies/app/static/uploads/$1.mp4 permanent;
        }
        error_page 500 502 503 504 /50x.html;
        location = /50x.html {

            root html;
        }
    }
}
11、进入Nginx所在的目录
[[email protected] movies]# cd ..
[[email protected] home]# ls
movies  movie.sql  movies.tar.gz  nginx  nginx-1.13.7  nginx-1.13.7.tar.gz  req.txt
12、复制项目里的nginx.conf到/usr/local/nginx/conf/目录下
[[email protected] home]# cp movies/nginx.conf /usr/local/nginx/conf/
cp: overwrite ‘/usr/local/nginx/conf/nginx.conf’? y
[[email protected] home]#
13、停止Nginx
[[email protected] home]# nginx -s stop
然后重启Nginx
[[email protected] home]# nginx
[[email protected] home]# netstat -anptu | grep nginx
14、进入/usr/local/nginx/html/movies/目录下的项目目录
[[email protected] home]# cd /usr/local/nginx/html/movies/
[[email protected] movies]# ls
app  app.py  managa.py  req.txt  venv
15、启动项目
[[email protected] movies]# nohup python managa.py runserver -h 127.0.0.1 -p 5001 &
[1] 20238
[[email protected] movies]# nohup: ignoring input and appending output to ‘nohup.out’
16、查看启动的Nginx端口
[[email protected] movies]# netstat -anptu | grep 500*
tcp        0      0 127.0.0.1:5001          0.0.0.0:*               LISTEN      20282/python3
tcp        0      0 127.0.0.1:5002          0.0.0.0:*               LISTEN      20285/python3
tcp        0      0 127.0.0.1:5003          0.0.0.0:*               LISTEN      20289/python3
[[email protected] movies]#
17、接下来在自己的电脑输入本机的ip地址就能访问flask项目了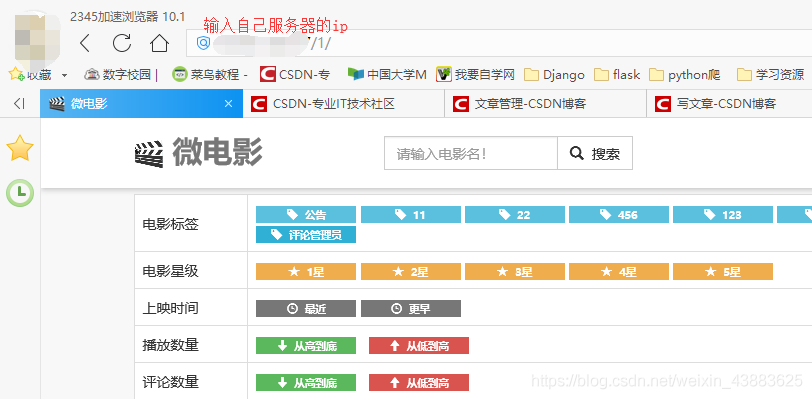
部署结束
边栏推荐
猜你喜欢


随机推荐
1. JVM入门介绍
数据仓库建模使用的模型以及分层介绍
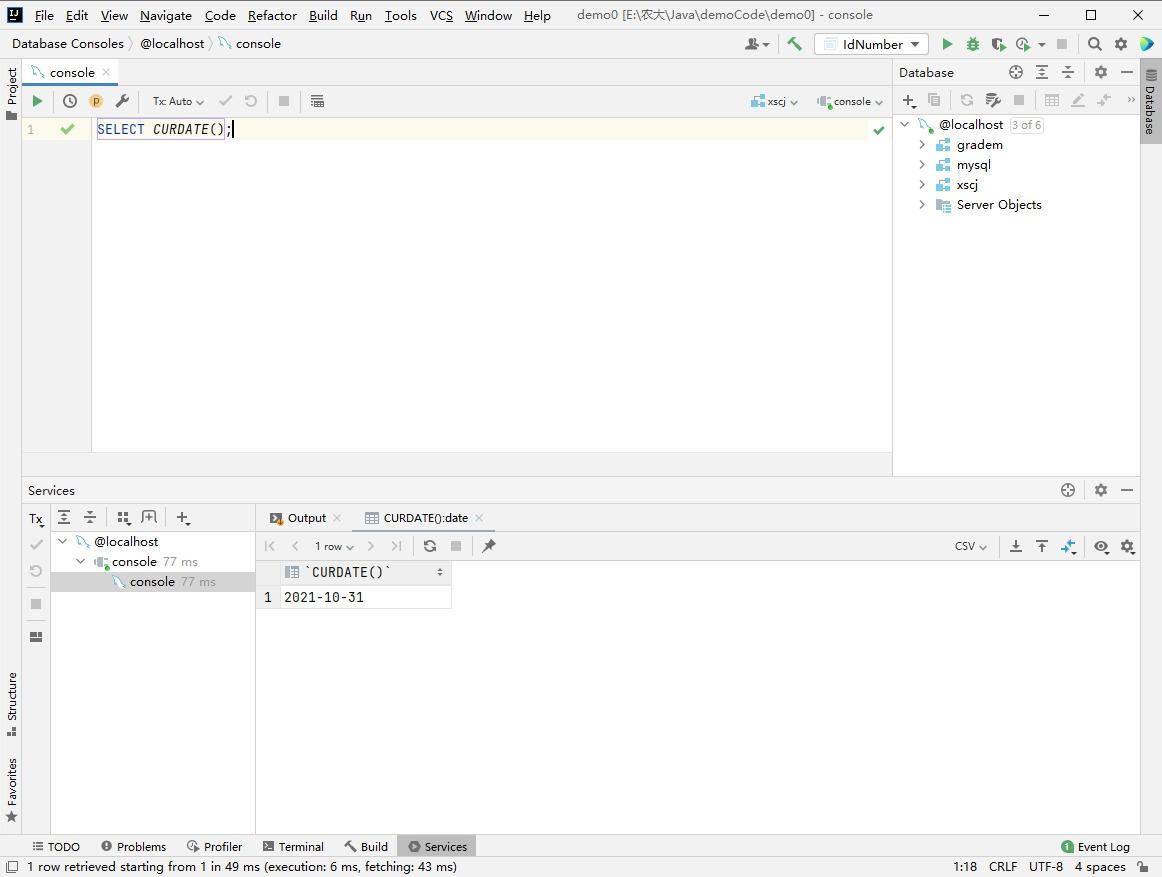
MySQL日期函数
Connect to LAN MySQL
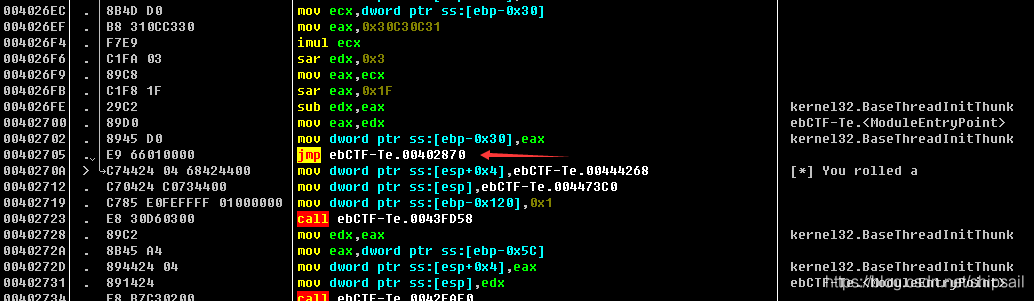
CTF reverse entry question - dice
学习投资大师的智慧
Von Neumann architecture
Only learning C can live up to expectations Top1 environment configuration
SQL tuning notes
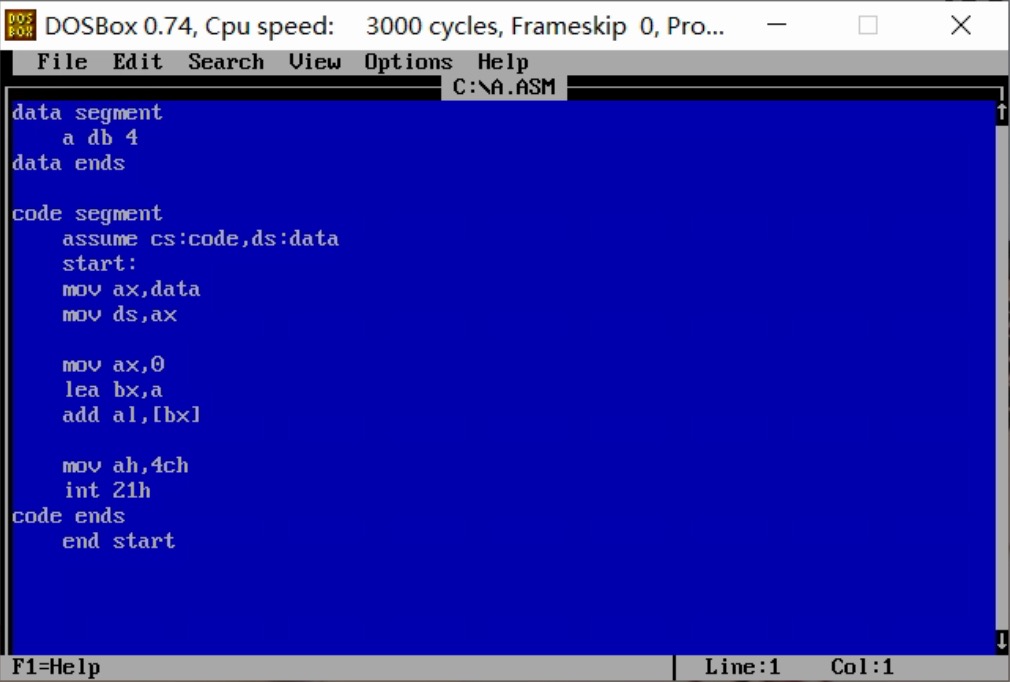
Logical operation instruction
Wu Jun's trilogy insight (V) refusing fake workers
[VNCTF 2022]ezmath wp
mysql 基本增删改查SQL语句
Serial serialold parnew of JVM garbage collector
Alibaba cloud server builds SVN version Library
8086 CPU internal structure
Activiti目录(三)部署流程、发起流程
arithmetic operation
Eight part essay that everyone likes
On the clever use of stream and map