当前位置:网站首页>express框架详解
express框架详解
2022-07-06 09:14:00 【进阶日记】
Express
使用express可以快速创建web网站服务器或者API接口服务器
1.创建express的web服务器
// 导入express
const express = require("express")
// 创建web服务器
const app = express()
// 启动web服务器
app.listen(8088,()=>{
	console.log('http://127.0.0.1:8088');
})
2. 监听get/post请求
// 监听GET请求并返回响应内容,第一个参数为请求的url
app.get('/get',(req,res)=>{
	//req.query获取请求是发送的参数
	console.log(req.query)//http://127.0.0.1:8088/get?name=zs&age=18
	//{ name: 'zs', age: '18' }
	// 调用express提供的res.send()方法,设置返回的JSON对象
	res.send({name:"zs",age:20,gender:"男"})
 })

// 监听POST请求并返回响应内容,第一个参数为请求的url
app.post('/post',(req,res)=>{
	// 调用express提供的res.send()方法,设置返回的JSON对象
	res.send({name:"zs",age:20,gender:"男"})
})

向http://127.0.0.1:8088/post发送请求返回值为
{   "name": "zs",
    "age": 20,
    "gender": "男"}
3.获取参数
//静态参数
app.get('/get',(req,res)=>{
	//req.query获取请求是发送的参数
	//http://127.0.0.1:8088/get?name=zs&age=18
	res.send(req.query)
	//{ name: 'zs', age: '18' }
 })

//动态参数
app.get('/getId/:id',(req,res)=>{
	//req.query获取请求是发送的参数
	//http://127.0.0.1:8088/getId/12
	res.send(req.params)
 })
 //返回
 {
    "id": "12"
}
//多个动态参数
app.get('/getId/:id/:name',(req,res)=>{
	//req.query获取请求是发送的参数
	//http://127.0.0.1:8088/getId/12/zs
	res.send(req.params)
 })
 //返回
 {
    "id": "12"
    "name":"zs"
}
4. 中间件
//app.use()作用为注册全局中间件,app.use('path',function())第一个参数为路径若为/可省略

express中间件分成三种
1.内置中间件 static
2.自定义中间件
3.第三方中间件 (body-parser) (拦截器)

app.use(express.static('public'))
app.use(express.static('dome'))
//可以直接访问到
http://127.0.0.1:8088/index.html
http://127.0.0.1:8088/index.css
http://127.0.0.1:8088/index.js

//会优先查找public文件中的index文件,如果找不到就找dome中的index文件

app.use('/public',express.static('public'))
//访问时要http://127.0.0.1:8088/public/index.html

//自定义全局生效的中间件 可以定义多个中间件,会按顺序调用中间件
app.use(function (req, res, next) {/*表示匹配任何路由*/
    console.log(new Date())
    next()/*表示匹配完成这个中间件就继续往下执行。*/
})
//局部中间件
let func = function (req, res, next) {/*表示匹配任何路由*/
    console.log(new Date())
    next()/*表示匹配完成这个中间件就继续往下执行。*/
}
//可以定义多个局部中间件
app.get('/',func1,func2,(req,res)=>{
	res.send('get router为:/')
})

//使用中间件来处理请求数据
app.use(express.json())
app.use(express.urlencoded({extended:false})

//使用第三方中间件 (body-parser) (拦截器)
1. npm install body-parser
//到如中间件
const parser = require("body-parser")
//注册中间件
app.use(parser.urlencoded({extended:false})

//nodejs内置querystring模块处理查询字符串将查询字符串转为对象格式
const qs = require("querystring")
console.log(qs.parse(str))
5. nodemon
能够不用频繁启动修改后的项目,nodemon会自动重启项目方便开发和测试
npm install -g nodemon

使用nodemon app.js来运行项目,不用node app.js
6. 路由
1. 原始方式挂载
const express = require("express")

const app = express();

// 挂载路由
app.get('/',(req,res)=>{
	res.send('get router为:/')
})

app.post('/',(req,res)=>{
	res.send('post router为:/')
})

app.listen(8088,()=>{
	console.log("http://127.0.0.1:8088");
})

2.使用express路由
//在router.js中创建路由对象
const express = require("express")
const router = express.Router();

// 挂载具体路由
router.get('/user/list',(rep,res)=>{
	res.send("GER user list")
})

router.post("/user/add",(req,res)=>{
	res.send("POST user add")
})

// 向外导出路由对象
module.exports = router

//在index.js中引用路由
const express = require("express")
const app = express()
// 导入路由模块
const router = require("./router")
// 注册路由模块
app.use(router)

app.listen(8088,()=>{
	console.log("http://127.0.0.1:8088");
})

//app.use('/api',router)//为路由添加统一前缀http://127.0.0.1:8088/api/user/add
7.编写get/post接口
const express = require("express");

const app = express()

const router = express.Router()
app.use(express.urlencoded({extended:false}))
router.get('/get',(req,res)=>{
	// 客户端发送的请求数据
	const query = req.query;

	res.send({
		status:0,//0表示成功,1表示失败
		msg:"GET请求成功",//状态的描述
		data:query//需要响应给客户端的数据
	})
})

router.post('/post',(req,res)=>{
	// 客户端发送的请求数据
	const body = req.body;
	// 配置解析表单数据的中间价
	res.send({
		status:0,//0表示成功,1表示失败
		msg:"POST请求成功",//状态的描述
		data:body//需要响应给客户端的数据
	})
})
app.use(router);
app.listen(8088,()=>{
	console.log("get请求");
})
8.cors跨域解决
const express = require("express");
const cors = require("cors")
const app = express()
//使用第三方中间件解决跨域
app.use(cors())

//自定义cors设置支持跨域的请求
var cors = function(req,res,next()){
  res.header('Access-Control-Allow-Origin', 'http://localhost:8088');//请求地址
  res.header('Access-Control-Allow-Methods', 'GET,PUT,POST,DELETE');//请求方式
  res.header('Access-Control-Allow-Headers', 'Content-Type');//请求头
  next()
  }
app.use(cors)
边栏推荐
猜你喜欢
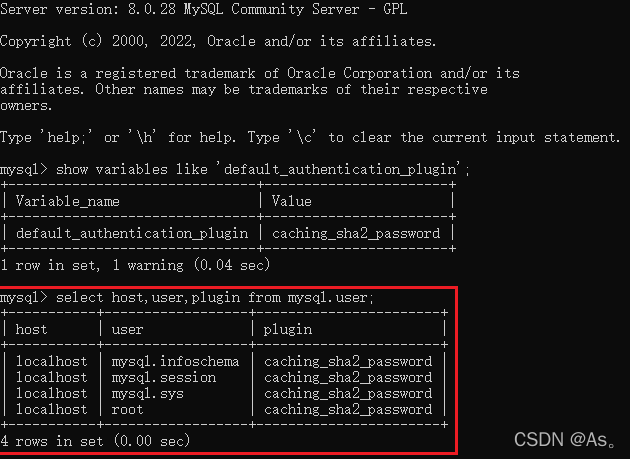
连接MySQL数据库出现错误:2059 - authentication plugin ‘caching_sha2_password‘的解决方法
机器学习--人口普查数据分析
vs2019 第一个MFC应用程序
Learning question 1:127.0.0.1 refused our visit

解决安装Failed building wheel for pillow
Machine learning -- census data analysis

double转int精度丢失问题

引入了junit为什么还是用不了@Test注解

Learn winpwn (3) -- sEH from scratch
图像识别问题 — pytesseract.TesseractNotFoundError: tesseract is not installed or it‘s not in your path
随机推荐
Machine learning -- census data analysis
Unable to call numpy in pycharm, with an error modulenotfounderror: no module named 'numpy‘
一键提取pdf中的表格
Software I2C based on Hal Library
安装numpy问题总结
MySQL与c语言连接(vs2019版)
【kerberos】深入理解kerberos票据生命周期
Integration test practice (1) theoretical basis
Codeforces Round #771 (Div. 2)
项目实战-后台员工信息管理(增删改查登录与退出)
Deoldify项目问题——OMP:Error#15:Initializing libiomp5md.dll,but found libiomp5md.dll already initialized.
01项目需求分析 (点餐系统)
Vs2019 desktop app quick start
Punctual atom stm32f103zet6 download serial port pin
Software testing - interview question sharing
Learn winpwn (3) -- sEH from scratch
Vs2019 first MFC Application
{一周总结}带你走进js知识的海洋
Basic use of redis
Learning question 1:127.0.0.1 refused our visit