当前位置:网站首页>cocos3——8. Implementation Guide for beginners
cocos3——8. Implementation Guide for beginners
2022-07-07 03:10:00 【Full stack programmer webmaster】
Hello everyone , I meet you again , I'm the king of the whole stack
1. use ClippingNode Clipping range
Write crop interface :
function createClipNode(node, stencil, inverted) {
    var clip_node = new cc.ClippingNode();
    //  Set the template node ( Is the area to be cropped )
    clip_node.stencil = stencil;
    //  Add nodes to be trimmed ( Display content )
    clip_node.addChild(node);
    if (inverted != undefined) {
        //  Set reverse ( Because we need to keep the content outside the template area , Cut out the content in the area )
        clip_node.setInverted(inverted);
    }

    clip_node._stencil = stencil;
    return clip_node;
}Create a clipping node in the guide layer :
    // create clip node
    var mask = cc.LayerColor.create(cc.color(0, 0, 0, ui.mask_a), ui.screen_width, ui.screen_height);
    var stencil = cc.LayerColor.create(cc.color.GREEN, 100, 100);
    stencil.ignoreAnchorPointForPosition(false);
    this.clip_node = createClipNode(mask, stencil, true);
this.addChild(this.clip_node, ui.mask_z);Here is the creation of a full screen black mask layer , Then cut it off stencil Region . To change the area , We just need to change stencil The position and size of .
Then write the trimmed function in the boot layer :
node.clipNode = function (ref) {
    this.clip_ref = ref;
    var stencil = this.clip_node.stencil;
    if (ref) {
        stencil.setAnchorPoint(ref.getAnchorPoint());
        stencil.setContentSize(ref.getContentSize());
        stencil.setPosition(ref.getParent().convertToWorldSpace(ref.getPosition()));
    } else {
        // set out of screen
        stencil.setPosition(cc.p(10000, 10000));
    }
}This function uses the reference node passed in ref The anchor point 、 size 、 Position to set the properties of the template , In this way, it can be trimmed according to the reference node .
2. Simple process of guidance
For simple boot implementation , It starts at the place where the guidance starts 、 Where the guidance ends .
And when to start 、 When will it come to an end? , Suppose the quantity is small and starts 、 If the ending conditions are special ,
You can find relevant places to start and end the guidance .
The assumptions are large and the conditions are relatively general ( example button The end of the incident 、 The sliding event ends ), Be able to condition Abstract words . Then configure .
Here is a simple way , First prepare the interface to guide the start and end .
First get the last boot steps from the file stream , Used here local storage:
// local storage
var storage = {
    ls: cc.sys.localStorage,
};

storage.set = function (key, value) {
    this.ls.setItem(key, value);
}

storage.get = function (key) {
    var value = this.ls.getItem(key);
    if (value != '') {
        return value;
    }
}

storage.remove = function (key) {
    this.ls.removeItem(key);
}

// global interface
var guide = {
    node: node,
};

// arrow: // 0 down, 1 right, 2 up, 3 left
guide.steps = [
    // 0
    {
        name: 'btn_right',
str: ' Please hold button, Control , Throw the sandbag into the red area .', arrow: 1, }, // ...];// Get the number of steps completed in the last boot guide.cur_step = storage.get('guide') || 0;Then prepare the interface for starting and ending boot :
guide.start = function (step) {
    if (step == this.cur_step) {
        console.log('guide start:', step, ',', this.cur_step);

        this.started = true;
        this._show(true);
        var info = this.steps[this.cur_step];
        this.node.updateData(info);
    }
}

guide.end = function (step) {
    if (!this.started) {
        return;
    }
    this.started = false;

    if (step == undefined) {
        step = this.cur_step;
    }
    if (step == this.cur_step) {
        console.log('guide end:', step, ',', this.cur_step);

        storage.set('guide', ++this.cur_step);
        this._show(false);
    }
}

guide._show = function (show) {
    if (show) {
        if (!this.node.getParent()) {
            this.node.init();
            ui.scene.addChild(this.node);
        }
    }
    this.node.visible = show;
}above guide Inside node It is the root node of the boot interface . Boot start guide.start When , Infer that the number of steps is the current step . Just guide the current step , Configured from above steps Get the text content to be guided .
And the name of the reference node ( The reference node will be hung to guide.start The current interface being called node Under the object )、 And arrows ( written words 、 I won't say more about the arrow display ). Then update the crop region 、 According to the text 、 Arrow, etc . Add the current number of steps at the end of the boot .
When actually designing each guide , For example, in Chapter i When you walk , Go to the beginning and call guide.start(i), When the guidance is over guide.end(i) You can .
Here is a simple single line guide , For simple
Novice guidance is enough .
Copyright notice : This article is the original article of the blogger . Blog , Do not reprint without permission .
Publisher : Full stack programmer stack length , Reprint please indicate the source :https://javaforall.cn/116793.html Link to the original text :https://javaforall.cn
边栏推荐
- Redis introduction complete tutorial: client case analysis
- Don't you know the relationship between JSP and servlet?
- INS/GPS组合导航类型简介
- QT common Concepts-1
- Contribution of Writing Series
- Summary of research status of inertial navigation calibration at home and abroad (abridged version)
- Matlab Error (Matrix dimensions must agree)
- mos管實現主副電源自動切換電路,並且“零”壓降,靜態電流20uA
- 掘金量化:通过history方法获取数据,和新浪财经,雪球同用等比复权因子。不同于同花顺
- Le tube MOS réalise le circuit de commutation automatique de l'alimentation principale et de l'alimentation auxiliaire, et la chute de tension "zéro", courant statique 20ua
猜你喜欢
Oauth2协议中如何对accessToken进行校验

Development of wireless communication technology, cv5200 long-distance WiFi module, UAV WiFi image transmission application
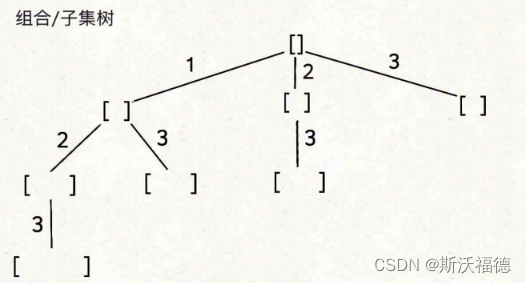
LeetCode 77:组合
杰理之播内置 flash 提示音控制播放暂停【篇】
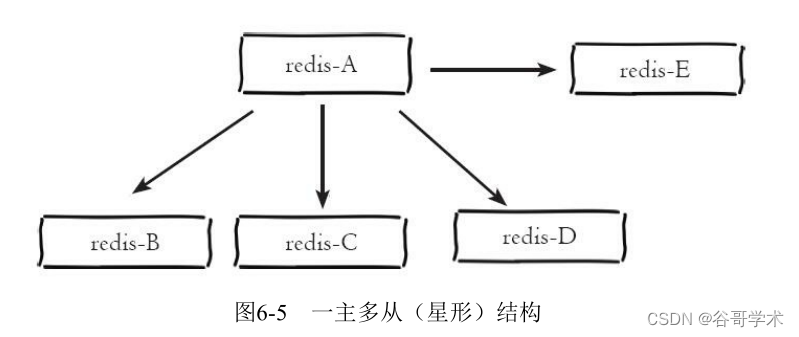
Redis getting started complete tutorial: replication topology
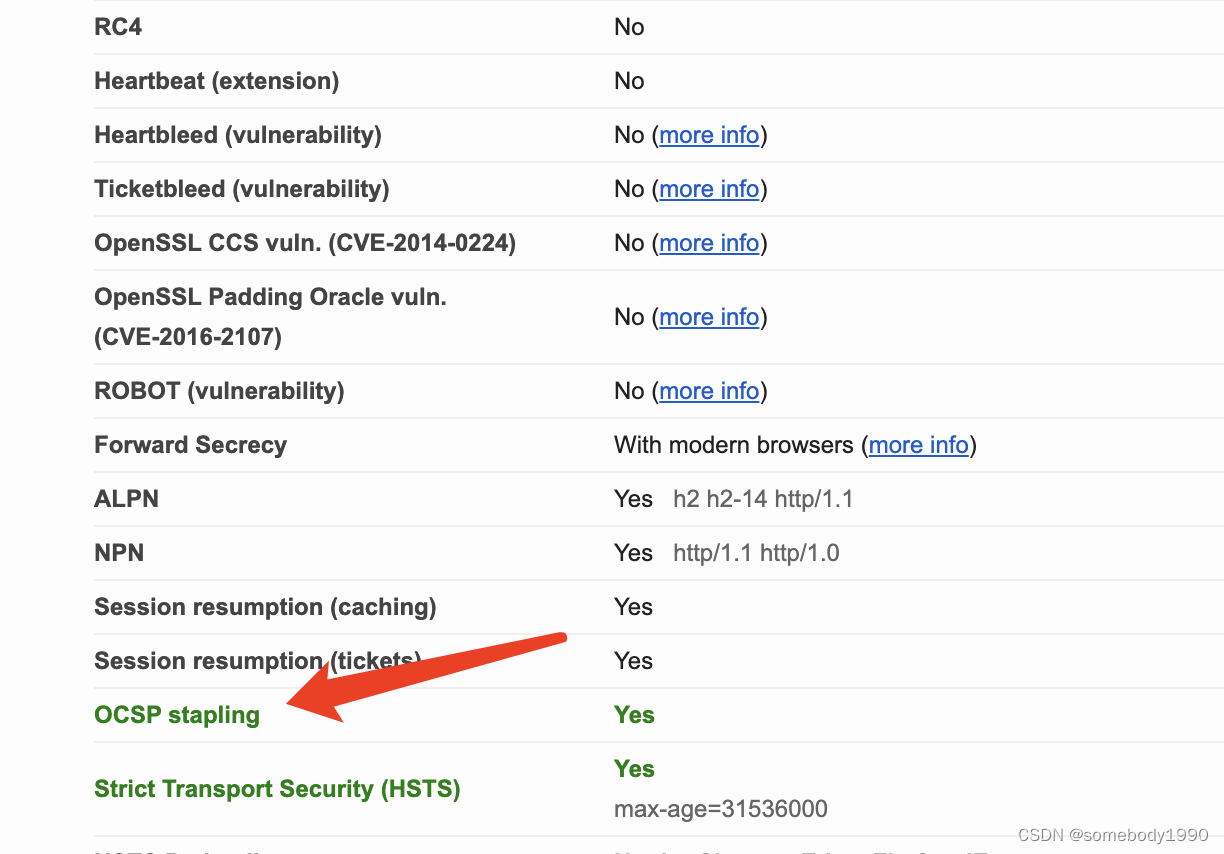
Cryptography series: detailed explanation of online certificate status protocol OCSP
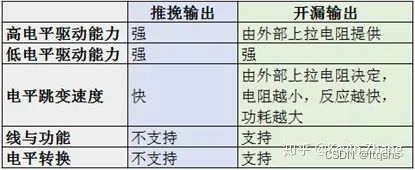
硬件之OC、OD、推挽解释
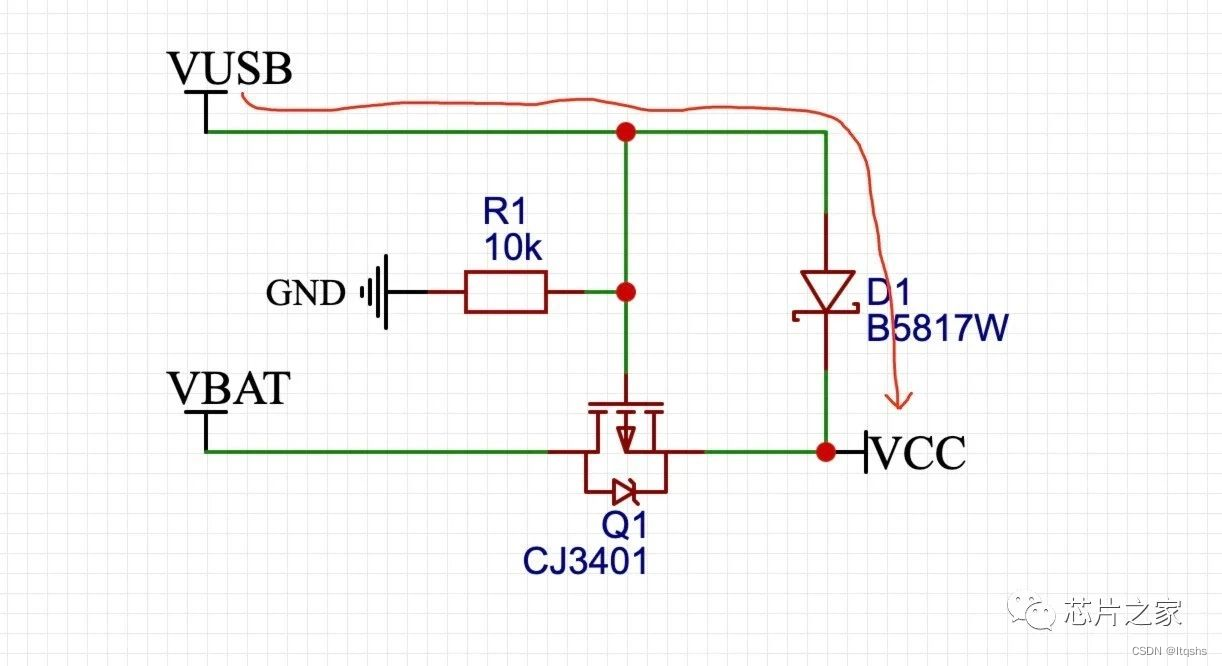
Le tube MOS réalise le circuit de commutation automatique de l'alimentation principale et de l'alimentation auxiliaire, et la chute de tension "zéro", courant statique 20ua

Another million qubits! Israel optical quantum start-up company completed $15million financing
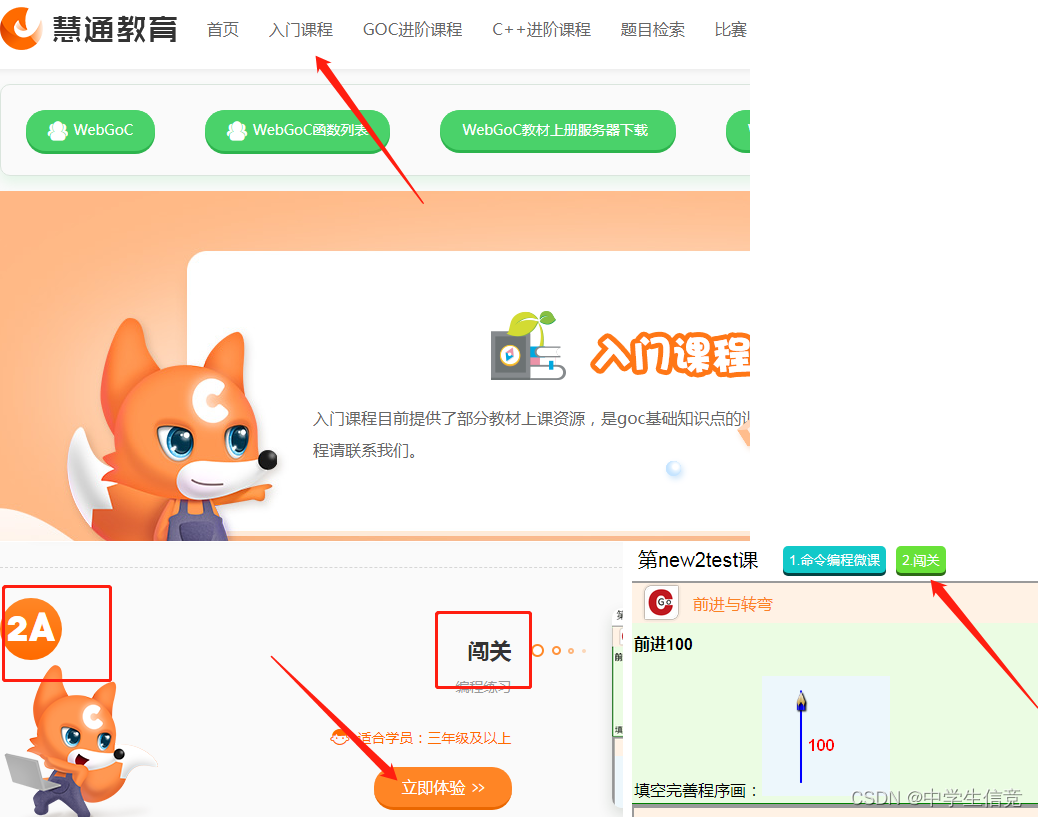
Huitong programming introductory course - 2A breakthrough
随机推荐
Left path cloud recursion + dynamic planning
新标杆!智慧化社会治理
uniapp适配问题
oracle连接池长时间不使用连接失效问题
Django数据库(SQlite)基本入门使用教程
腾讯云原生数据库TDSQL-C入选信通院《云原生产品目录》
Cocos2d-x Box2D物理引擎编译设置
Cglib agent in agent mode
Kubernetes源码分析(二)----资源Resource
The first symposium on "quantum computing + application of financial technology" was successfully held in Beijing
上个厕所的功夫,就把定时任务的三种调度策略说得明明白白
DOMContentLoaded和window.onload
opencv环境的搭建,并打开一个本地PC摄像头。
Code debugging core step memory
Intelligent static presence detection scheme, 5.8G radar sensing technology, human presence inductive radar application
Qt蓝牙:QBluetoothDeviceInfo
Form validation of uniapp
[software test] the most complete interview questions and answers. I'm familiar with the full text. If I don't win the offer, I'll lose
迷失在MySQL的锁世界
MOS transistor realizes the automatic switching circuit of main and auxiliary power supply, with "zero" voltage drop and static current of 20ua