当前位置:网站首页>Getting started with MySQL
Getting started with MySQL
2022-07-07 13:29:00 【MirrorYuChen】
1.MySQL install
Specific installation and configuration MySQL Tutorials can refer to resources [1].
2. Database query and creation
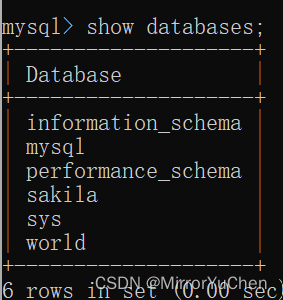
2.1 Database query
Through the following query instructions , You can query the created database
>> show databases;
2.2 Database creation
Database creation can be achieved by using the following command line :
>> create database [ Database name ]
Use the query instruction again , You can see the database that has been created .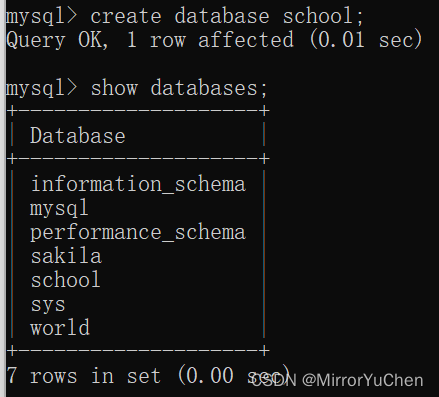
2.3 Database delete
Database deletion can be achieved by using the following command line :
>> drop database [ Database name ]
Use the query instruction again , You can see that the database has been deleted successfully .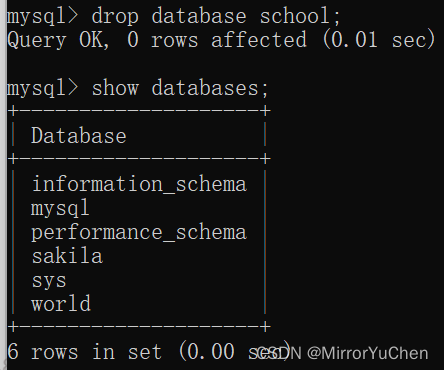
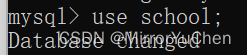
2.4 Database switching
When we create tables , You need to specify the database first , Then you can create , The database can be specified by the following instructions :
>> use [ Database name ];
3. Table creation 、 Delete 、 Insert and query
3.1 Table creation
The basic syntax for table creation is :
create table [ Table name ] (
	column1 datatype,
	column2 datatype,
	...
	columnN datatype,
	primary key(one or more colums)
);
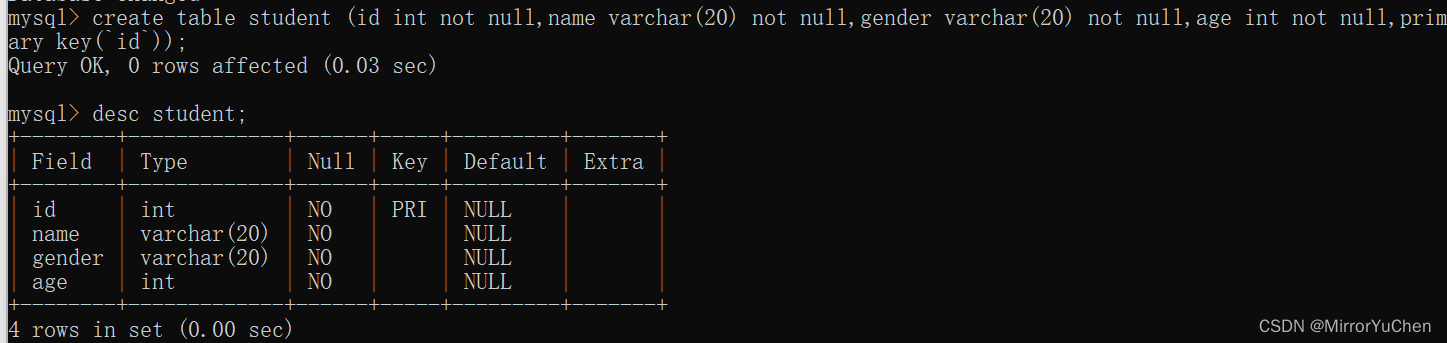
for instance , Create a student surface :
create table student (
	id int not null,
	name varchar(20) not null,
	gender varchar(20) not null,
	age int not null,
	primary key(`id`)
);
The latter part is the constraint on the current field , Such as not null Indicates that the current field cannot be NULL,primary key Used to set the primary key of the table .
You can use the following instructions to query the structure of the currently created table :
>> desc [ Table name ]
If you want to rename the table , You can use the following instructions :
>> rename [ The old name of the table ] to [ The new name of the table ];
3.2 Table delete
Table deletion is simple , You can use the following instructions
>> drop table [ Table name ];
3.3 Table insert
Table insertion uses the following instructions :
>> insert into [ Table name ] values ([ Table value ]);
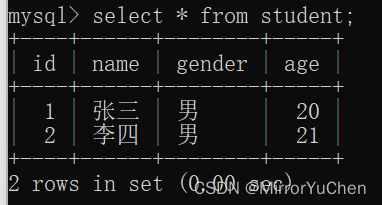
for example , The table created earlier student, Insert two rows of data into it :
>> insert into student values (1, ' Zhang San ', ' male ', 20);
>> insert into student values (2, ' Li Si ', ' male ', 21);
3.4 Table query
Table queries can use the following instructions :
>> select * from [ Table name ];
3.5 Table delete
The following instructions can be used to delete the data in the table :
>> delete from [ Table name ] where [ Delete the condition ]
Here is for the follow-up experiment , Insert a row of data first : Wang two pock marks , Then delete this line of data .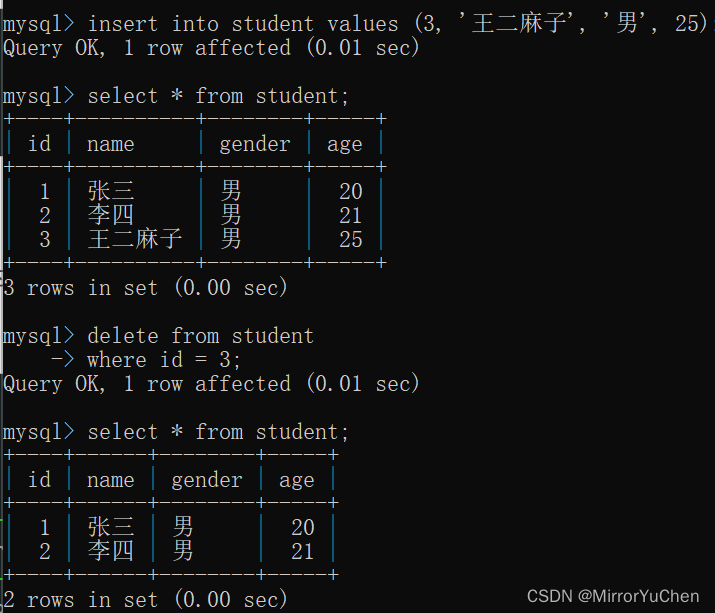
4. C++ Code to query the database
4.1 MySQL Library Configuration
If you are familiar with OpenCV The configuration process , This is very simple , There are three main steps :
(1) Library dll Path to the system environment variable , Restart the computer after adding , System variables take effect :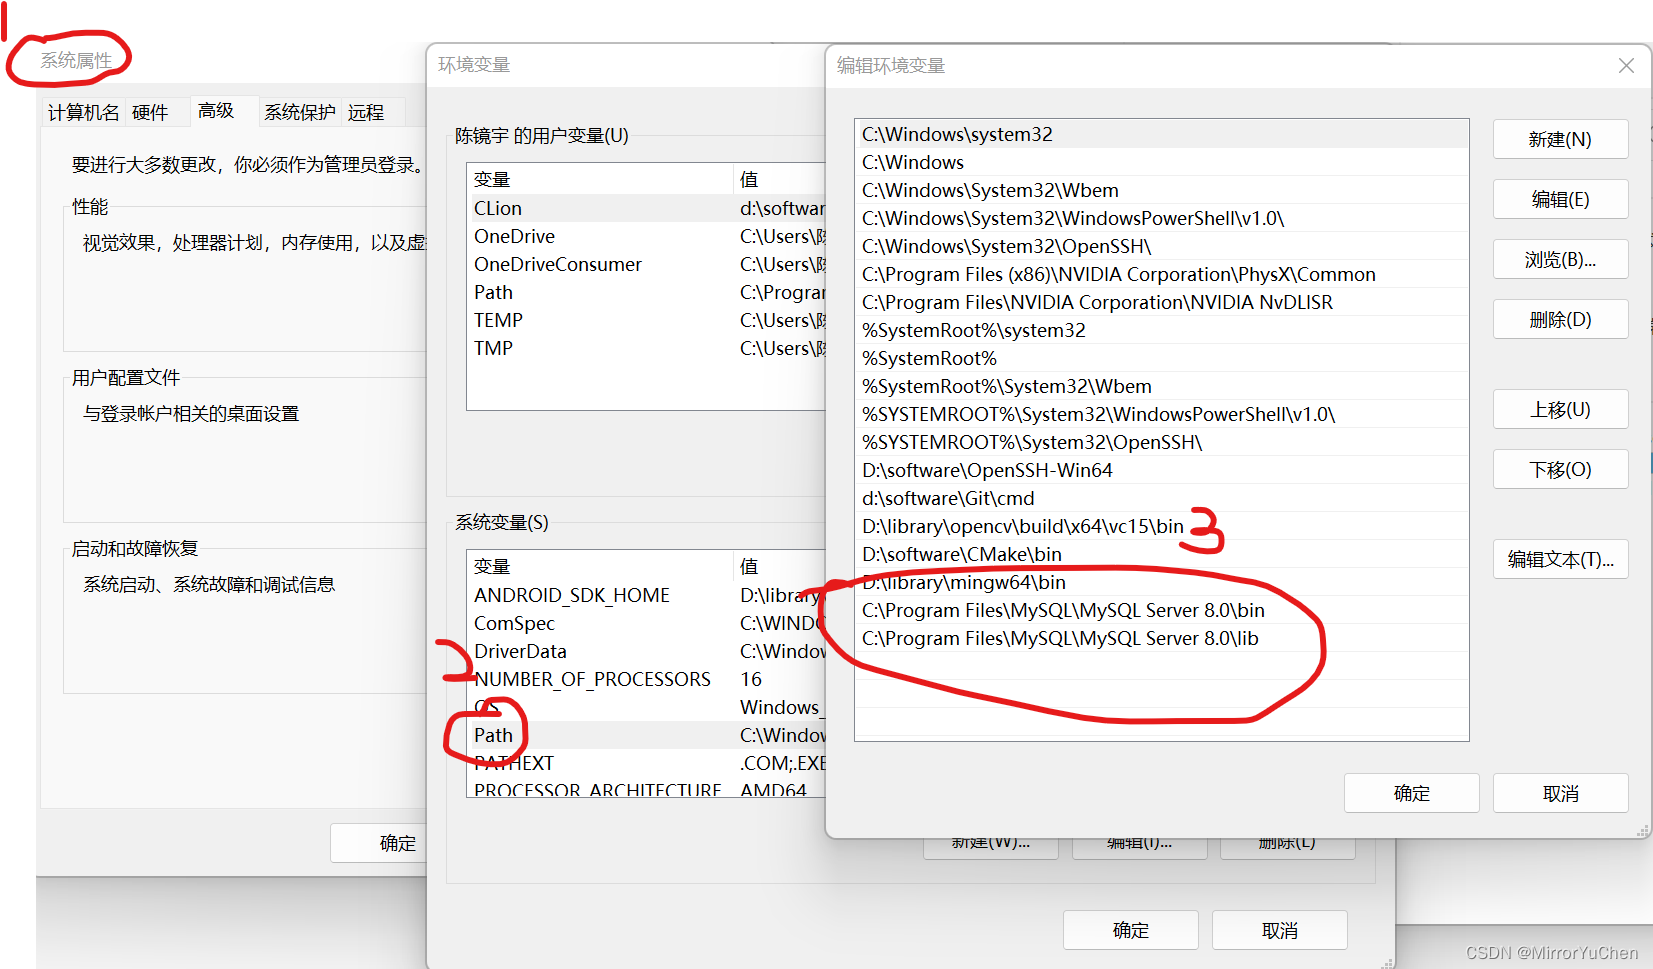
(2) Create a visual studio engineering , Notice to switch to x64 Environmental Science , Add main.cpp, To configure MySQL Of include Location :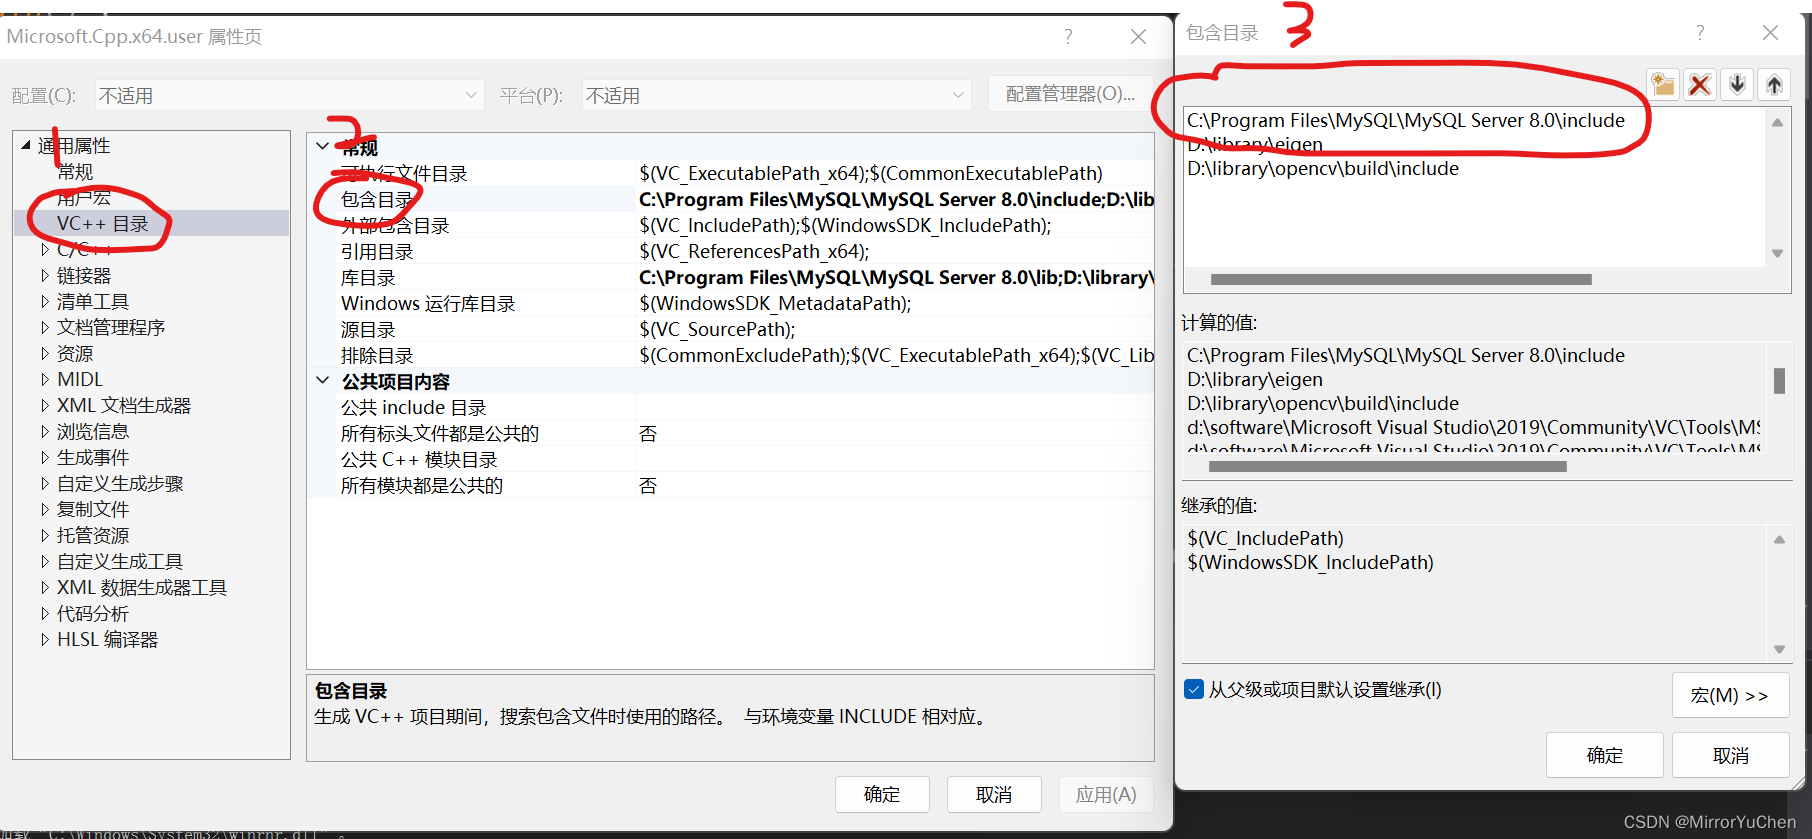
(3) To configure MySQL Of lib Location :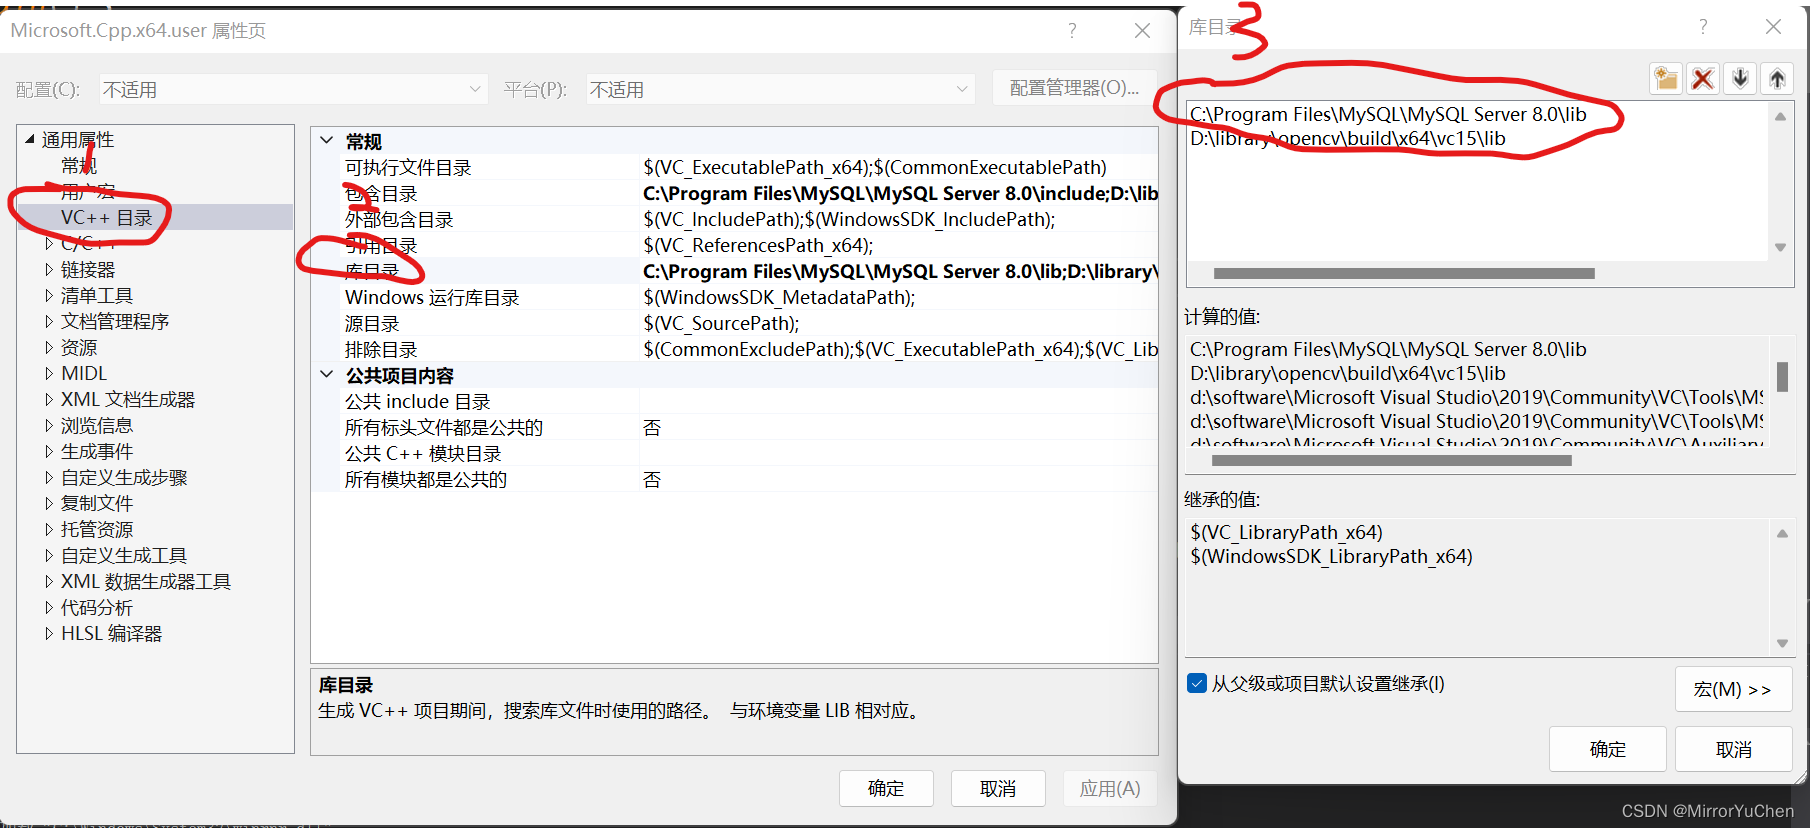
(4) Configure the library that the system needs to link :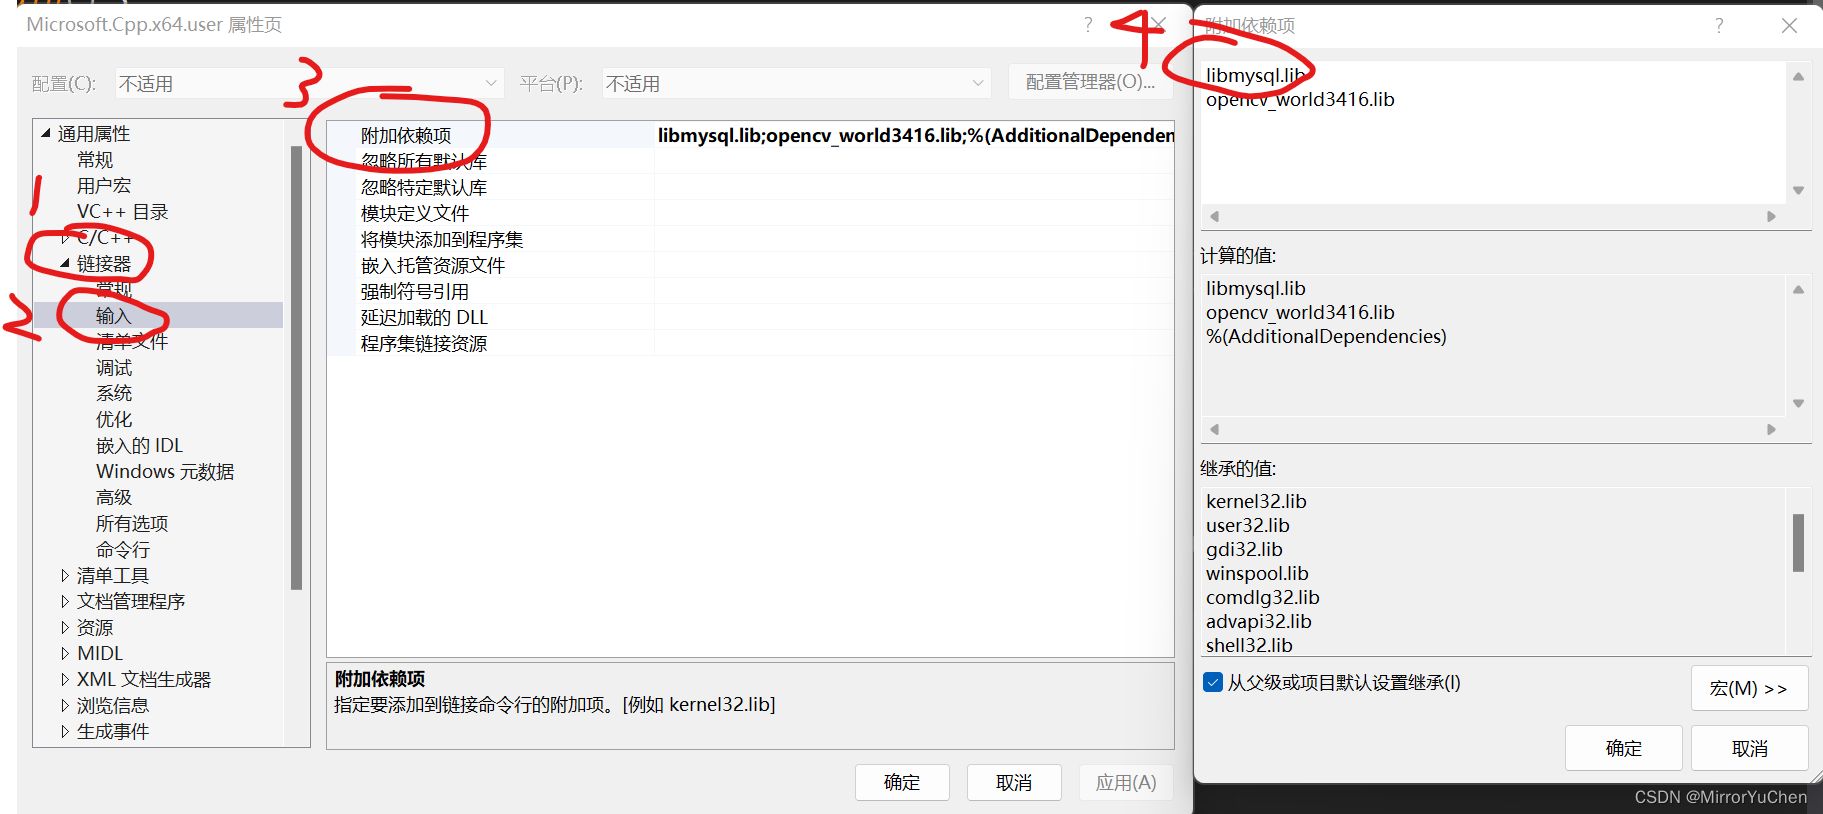
4.2 The test case
#include <mysql.h>
#include <stdio.h>

int main() {
	const char* host = "127.0.0.1";
	const char* user = "root";           //  Change this to your user name
	const char* passw = "123456";  //  Change this to your own password
	const char* db = "school";         //  Change this to access the database
	MYSQL mysql;

	// 1. Initialize database
	mysql_init(&mysql);

	// 2. Set character encoding
	mysql_options(&mysql, MYSQL_SET_CHARSET_NAME, "gbk");

	// 3. Connect to database
	if (mysql_real_connect(&mysql, host, user, passw, db, 3306, NULL, 0) == NULL) {
		printf(" The reason for the error :%s\n", mysql_error(&mysql));
		printf(" The connection fails !\n");
		exit(-1);
	}

	// 4. Query results
	int ret = mysql_query(&mysql, "select * from student;");   //  This should be changed to the table to be accessed
	printf("ret: %d.\n", ret);

	// 5. To get the results
	MYSQL_RES* res = mysql_store_result(&mysql);

	// 6. Print the query results
	MYSQL_ROW row;
	while (row = mysql_fetch_row(res)) {
		printf("%s ", row[0]); // ID
		printf("%s ", row[1]); // Name
		printf("%s ", row[2]); // gender
		printf("%s \n", row[3]); // age
	}

	// 7. Release result set
	mysql_free_result(res);

	// 8. Close the database
	mysql_close(&mysql);

	system("pause");
	return 0;
}
The operation results are as follows , You can see the same result as using the command line query :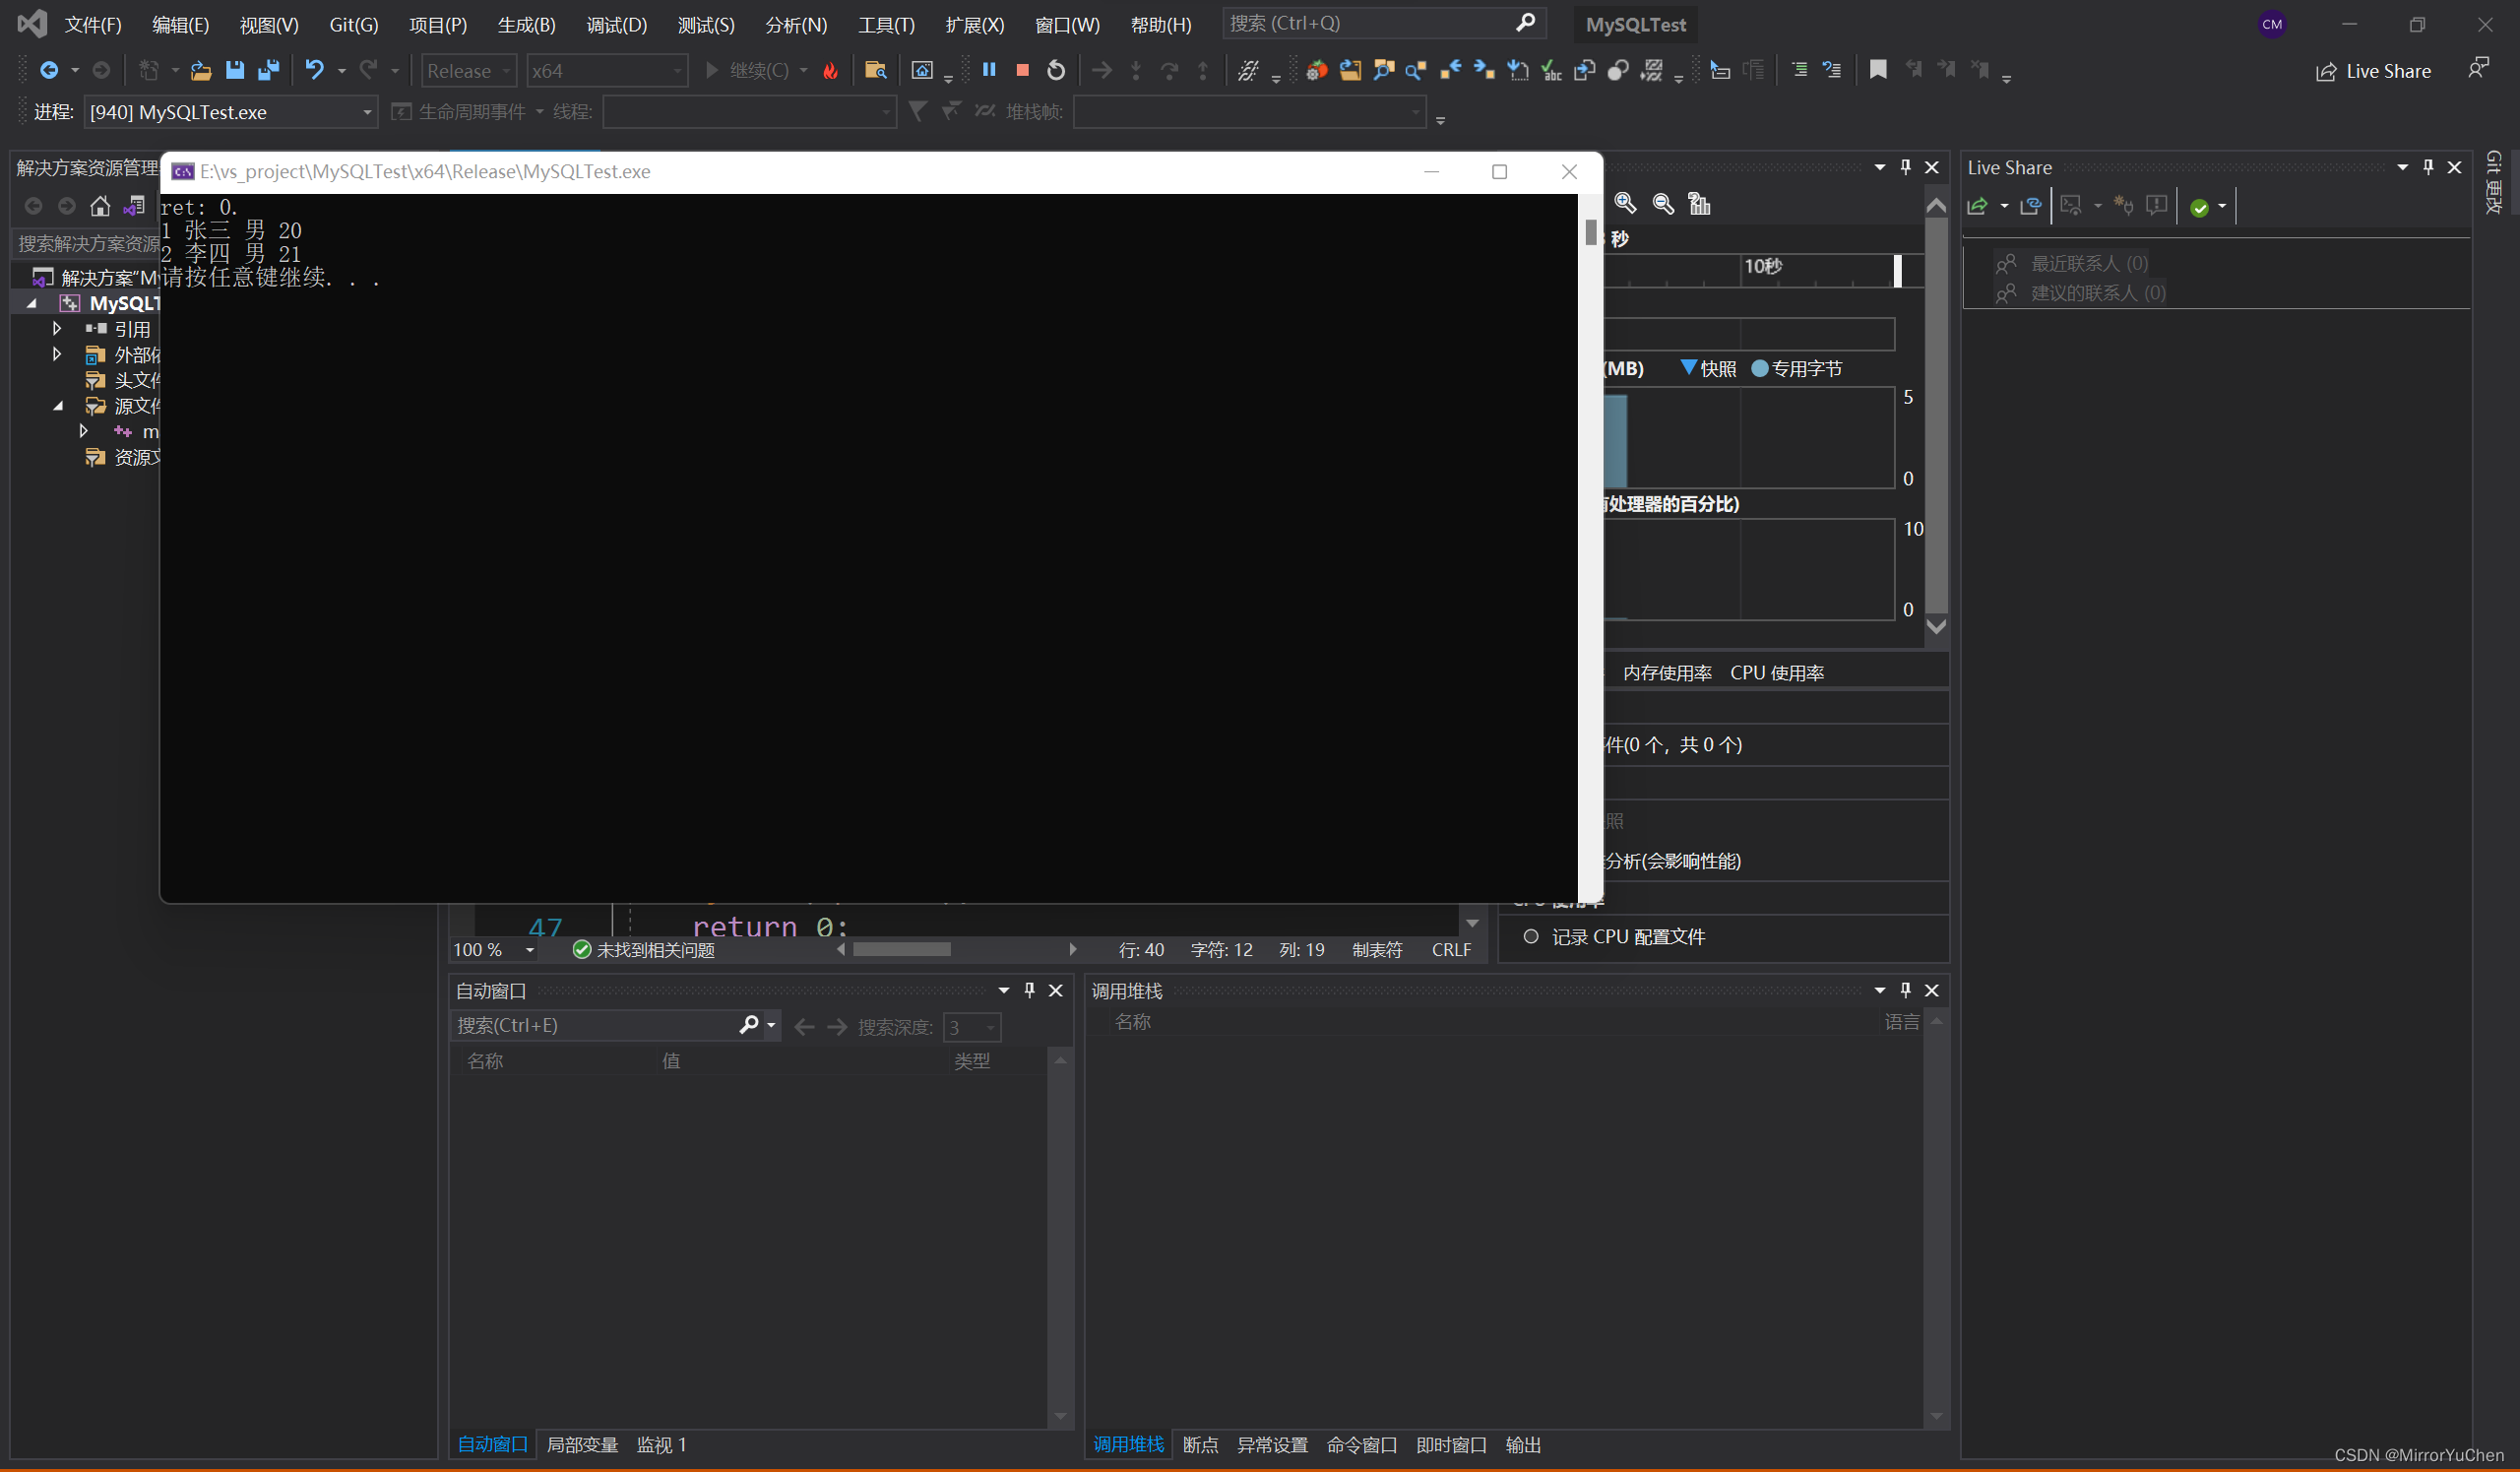
Enjoy!
Reference material
边栏推荐
- Cmake learning and use notes (1)
- ORACLE进阶(五)SCHEMA解惑
- Esp32 series column
- Split screen bug notes
- Scrapy教程经典实战【新概念英语】
- Practical case: using MYCAT to realize read-write separation of MySQL
- About the problem of APP flash back after appium starts the app - (solved)
- JNA学习笔记一:概念
- 单片机学习笔记之点亮led 灯
- How to make the new window opened by electorn on the window taskbar
猜你喜欢
![Scripy tutorial classic practice [New Concept English]](/img/bc/f1ef8b6de6bfb6afcdfb0d45541c72.png)


随机推荐
shell 批量文件名(不含扩展名)小写改大写
Isprs2021/ remote sensing image cloud detection: a geographic information driven method and a new large-scale remote sensing cloud / snow detection data set
解决缓存击穿问题
JS缓动动画原理教学(超细节)
Esp32 construction engineering add components
【学习笔记】zkw 线段树
一文读懂数仓中的pg_stat
MongoDB的导入导出、备份恢复总结
Initialization script
DETR介绍
QQ medicine, Tencent ticket
ESP32系列专栏
leecode3. 无重复字符的最长子串
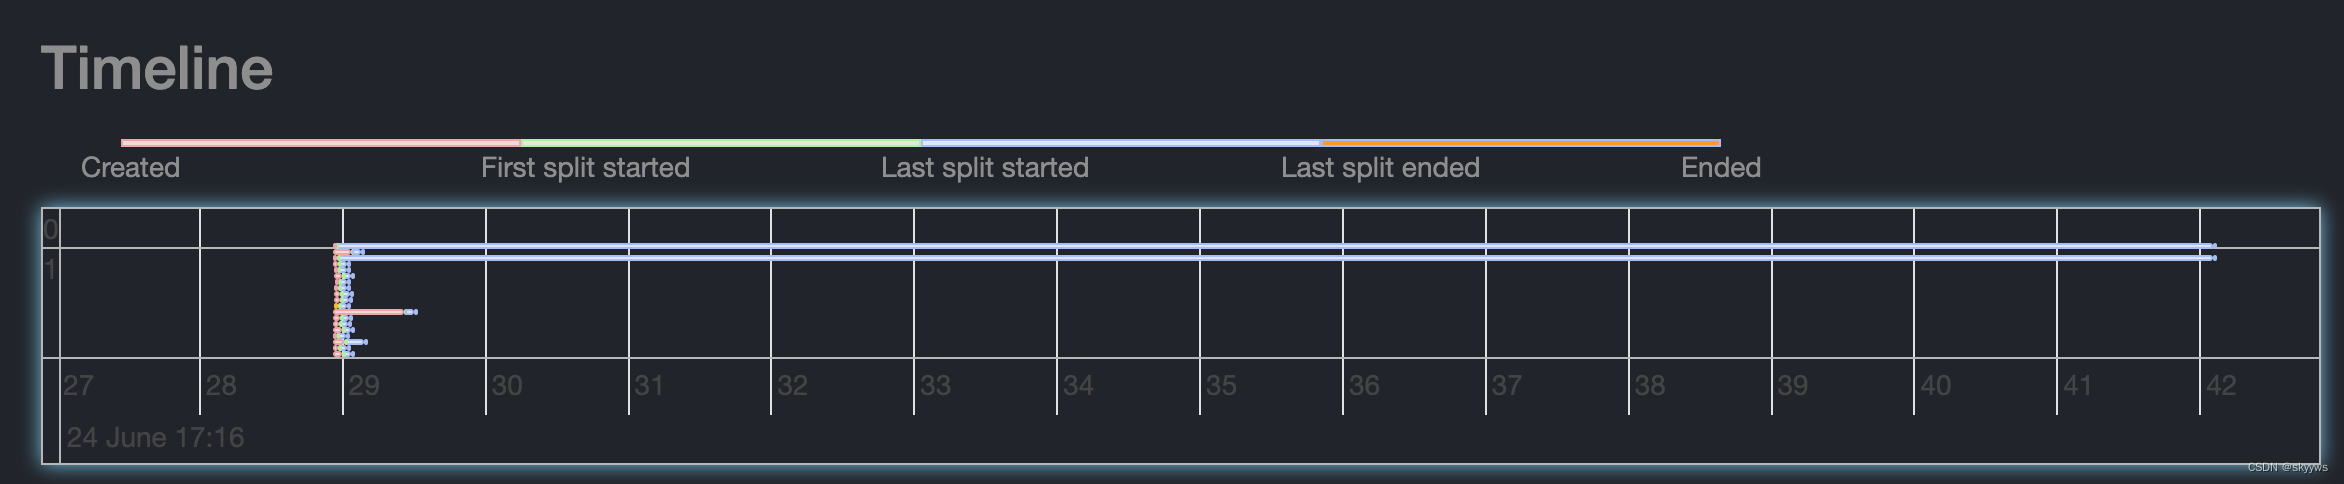
[Presto profile series] timeline use
工具箱之 IKVM.NET 项目新进展
ESP32 ① 编译环境
Vscode编辑器ESP32头文件波浪线不跳转彻底解决
Introduce six open source protocols in detail (instructions for programmers)
QQ的药,腾讯的票
PHP - laravel cache