当前位置:网站首页>10.CNN应用于手写数字识别
10.CNN应用于手写数字识别
2022-07-07 23:11:00 【booze-J】
代码运行平台为jupyter-notebook,文章中的代码块,也是按照jupyter-notebook中的划分顺序进行书写的,运行文章代码,直接分单元粘入到jupyter-notebook即可。整体代码给出的注释还是挺简单明了的。
1.导入第三方库
import numpy as np
from keras.datasets import mnist
from keras.utils import np_utils
from keras.models import Sequential
from keras.layers import Dense,Dropout,Convolution2D,MaxPooling2D,Flatten
from tensorflow.keras.optimizers import Adam
2.加载数据及数据预处理
# 载入数据
(x_train,y_train),(x_test,y_test) = mnist.load_data()
# (60000, 28, 28)
print("x_shape:\n",x_train.shape)
# (60000,) 还未进行one-hot编码 需要后面自己操作
print("y_shape:\n",y_train.shape)
# (60000, 28, 28) -> (60000,28,28,1)=(图片数目,图片高度,图片宽度,图片的通道数) reshape()中参数填入-1的话可以自动计算出参数结果 除以255.0是为了归一化
# 归一化很关键哈,可以大大减少计算量
x_train = x_train.reshape(-1,28,28,1)/255.0
x_test = x_test.reshape(-1,28,28,1)/255.0
# 换one hot格式
y_train = np_utils.to_categorical(y_train,num_classes=10)
y_test = np_utils.to_categorical(y_test,num_classes=10)
3.训练模型
# 定义顺序模型
model = Sequential()

# 第一个卷积层 注意第一层要写输入图片的大小 后面的层可以忽略
# input_shape 输入平面
# filters 卷积核/滤波器个数
# kernel_size 卷积窗口大小
# strides 步长
# padding padding方式 same/valid
# activation 激活函数
model.add(Convolution2D(
    input_shape=(28,28,1),
    filters=32,
    kernel_size=5,
    strides=1,
    padding="same",
    activation="relu"
))

# 第一个池化层
model.add(MaxPooling2D(
    pool_size=2,
    strides=2,
    padding="same"
))
# 第二个池化层
model.add(Convolution2D(filters=64,kernel_size=5,strides=1,padding="same",activation="relu"))
# 第二个池化层
model.add(MaxPooling2D(pool_size=2,strides=2,padding="same"))
# 把第二个池化层的输出扁平化为1维
model.add(Flatten())
# 第一个全连接层
model.add(Dense(units=1024,activation="relu"))
# Dropout 随机选用50%神经元进行训练
model.add(Dropout(0.5))
# 第二个全连接层
model.add(Dense(units=10,activation="softmax"))

# 定义优化器 设置学习率为1e-4
adam = Adam(lr=1e-4)

# 定义优化器,loss function,训练过程中计算准确率
model.compile(optimizer=adam,loss="categorical_crossentropy",metrics=["accuracy"])

# 训练模型
model.fit(x_train,y_train,batch_size=64,epochs=10)

# 评估模型
loss,accuracy=model.evaluate(x_test,y_test)

print("test loss:",loss)
print("test accuracy:",accuracy)
代码运行结果: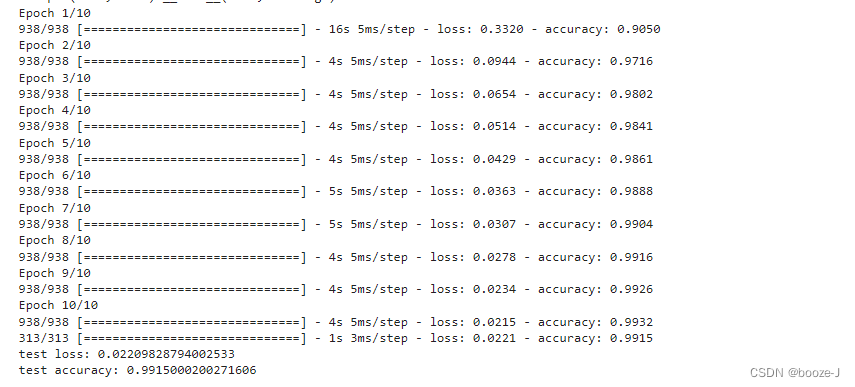
代码中需要注意的一些点,在代码注释中也给出了解释和提醒。
注意
- 搭建神经网络的第一层要写输入图片的大小 后面的层可以忽略
边栏推荐
猜你喜欢
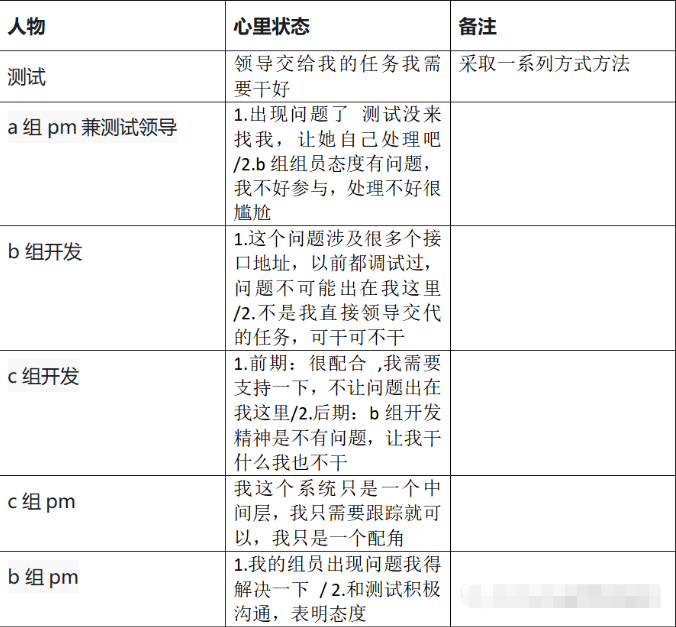
What if the testing process is not perfect and the development is not active?
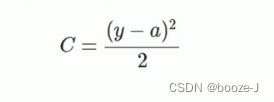
4.交叉熵
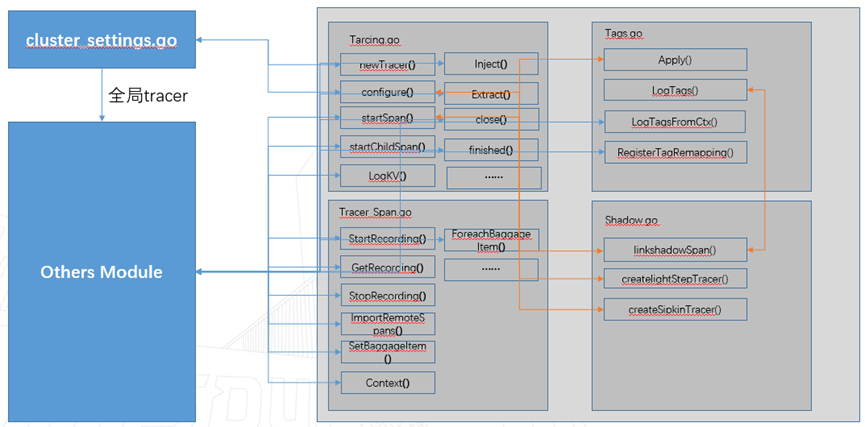
浪潮云溪分布式数据库 Tracing(二)—— 源码解析
5g NR system messages
What does interface testing test?

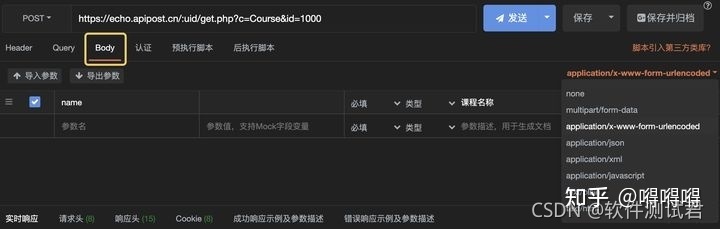
接口测试进阶接口脚本使用—apipost(预/后执行脚本)
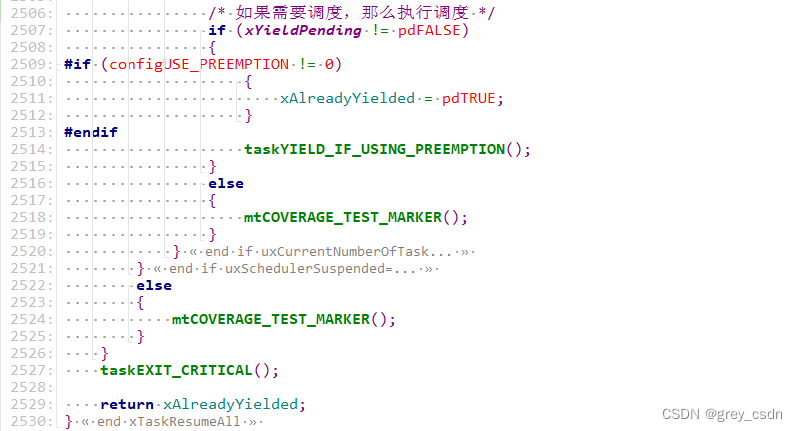
1293_ Implementation analysis of xtask resumeall() interface in FreeRTOS

RPA cloud computer, let RPA out of the box with unlimited computing power?
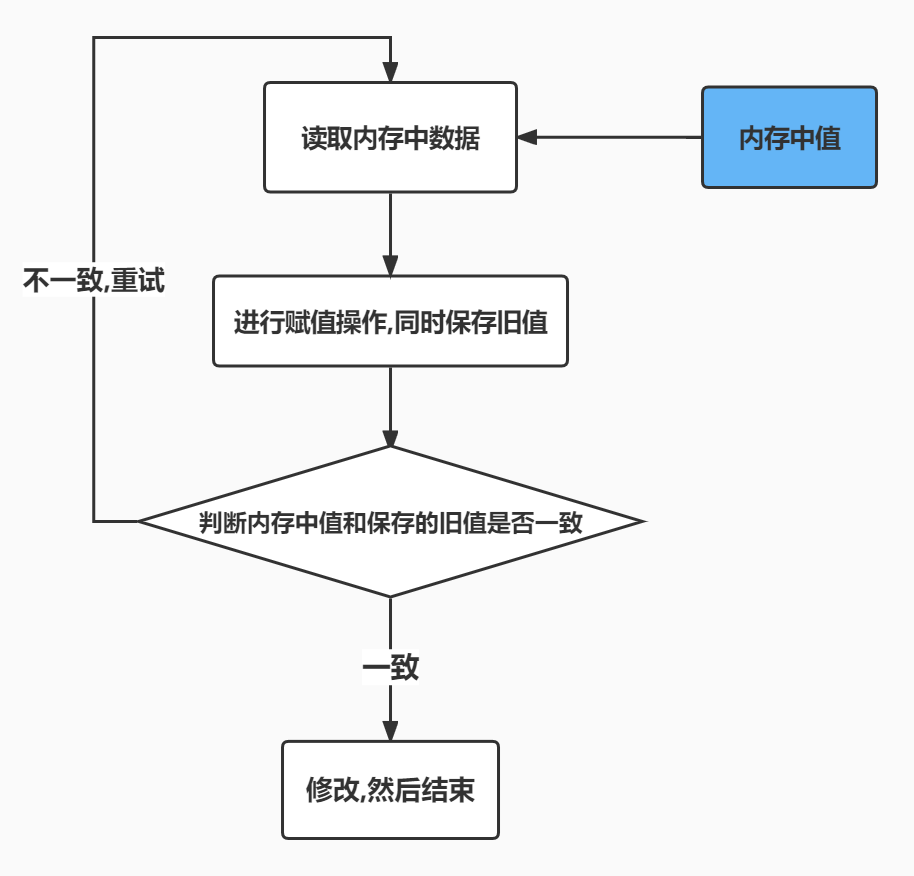
Reentrantlock fair lock source code Chapter 0
SDNU_ ACM_ ICPC_ 2022_ Summer_ Practice(1~2)
随机推荐
华泰证券官方网站开户安全吗?
22年秋招心得
v-for遍历元素样式失效
[note] common combined filter circuit
The standby database has been delayed. Check that the MRP is wait_ for_ Log, apply after restarting MRP_ Log but wait again later_ for_ log
攻防演练中沙盘推演的4个阶段
【obs】Impossible to find entrance point CreateDirect3D11DeviceFromDXGIDevice
他们齐聚 2022 ECUG Con,只为「中国技术力量」
Jemter distributed
韦东山第二期课程内容概要
Fofa attack and defense challenge record
[Yugong series] go teaching course 006 in July 2022 - automatic derivation of types and input and output
Jouer sonar
[Yugong series] go teaching course 006 in July 2022 - automatic derivation of types and input and output
8.优化器
Summary of weidongshan phase II course content
股票开户免费办理佣金最低的券商,手机上开户安全吗
Cve-2022-28346: Django SQL injection vulnerability
Qt添加资源文件,为QAction添加图标,建立信号槽函数并实现
取消select的默认样式的向下箭头和设置select默认字样