当前位置:网站首页>Light a light with stm32
Light a light with stm32
2022-07-05 05:29:00 【Bellerian】
One 、 Preface
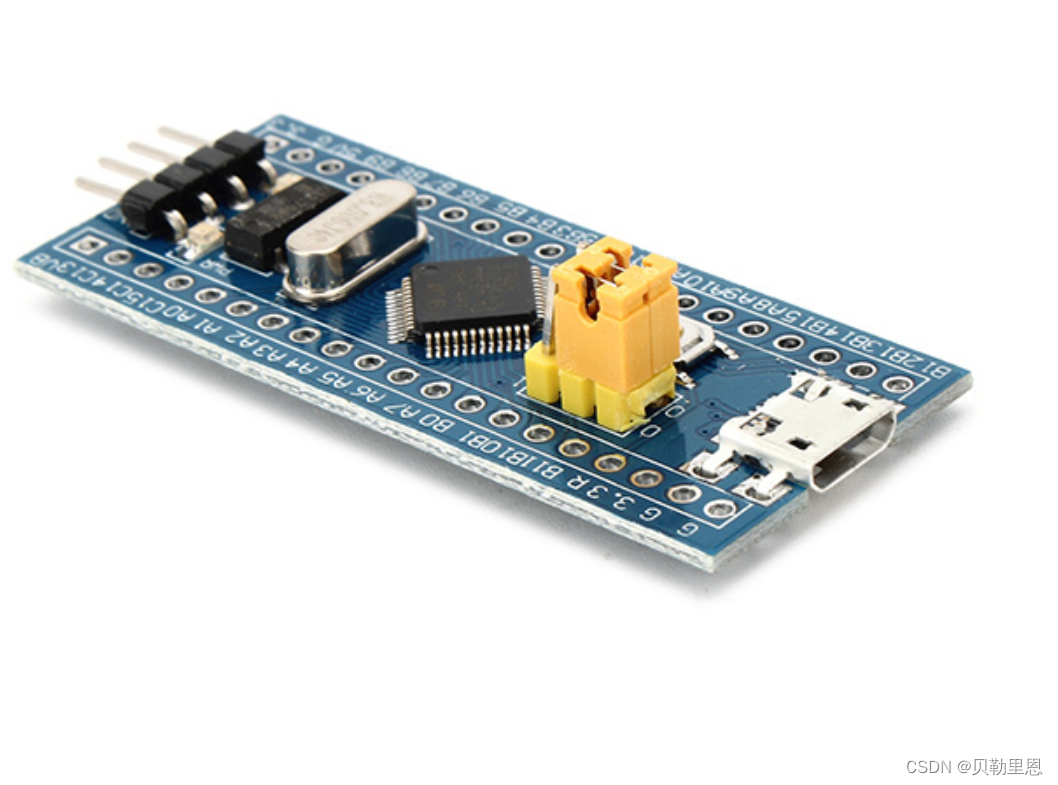
Single chip model :STM32F103C8T6
development environment :Keil5
Two 、 analysis
Want to control LED The lamp , Of course, through control STM32 Chip I/O Pin level to achieve . stay STM32 On chip ,I/O The pins can be set to various functions by software , Such as input or output , therefore I/O Pins are also called GPIO; On the chip GPIO Usually grouped , for example GPIOA、GPIOB、GPIOC wait .
therefore , control LED The steps of can be roughly divided into the following steps :
- GPIO There are many port pins ----- It is necessary to select the specific pin to be controlled ;
- GPIO So rich in functions ----- You need to configure specific functions ;
- control LED On and off of ----- Set up GPIO The output voltage ;
Reference resources 《STM32 Reference manual 》, as follows :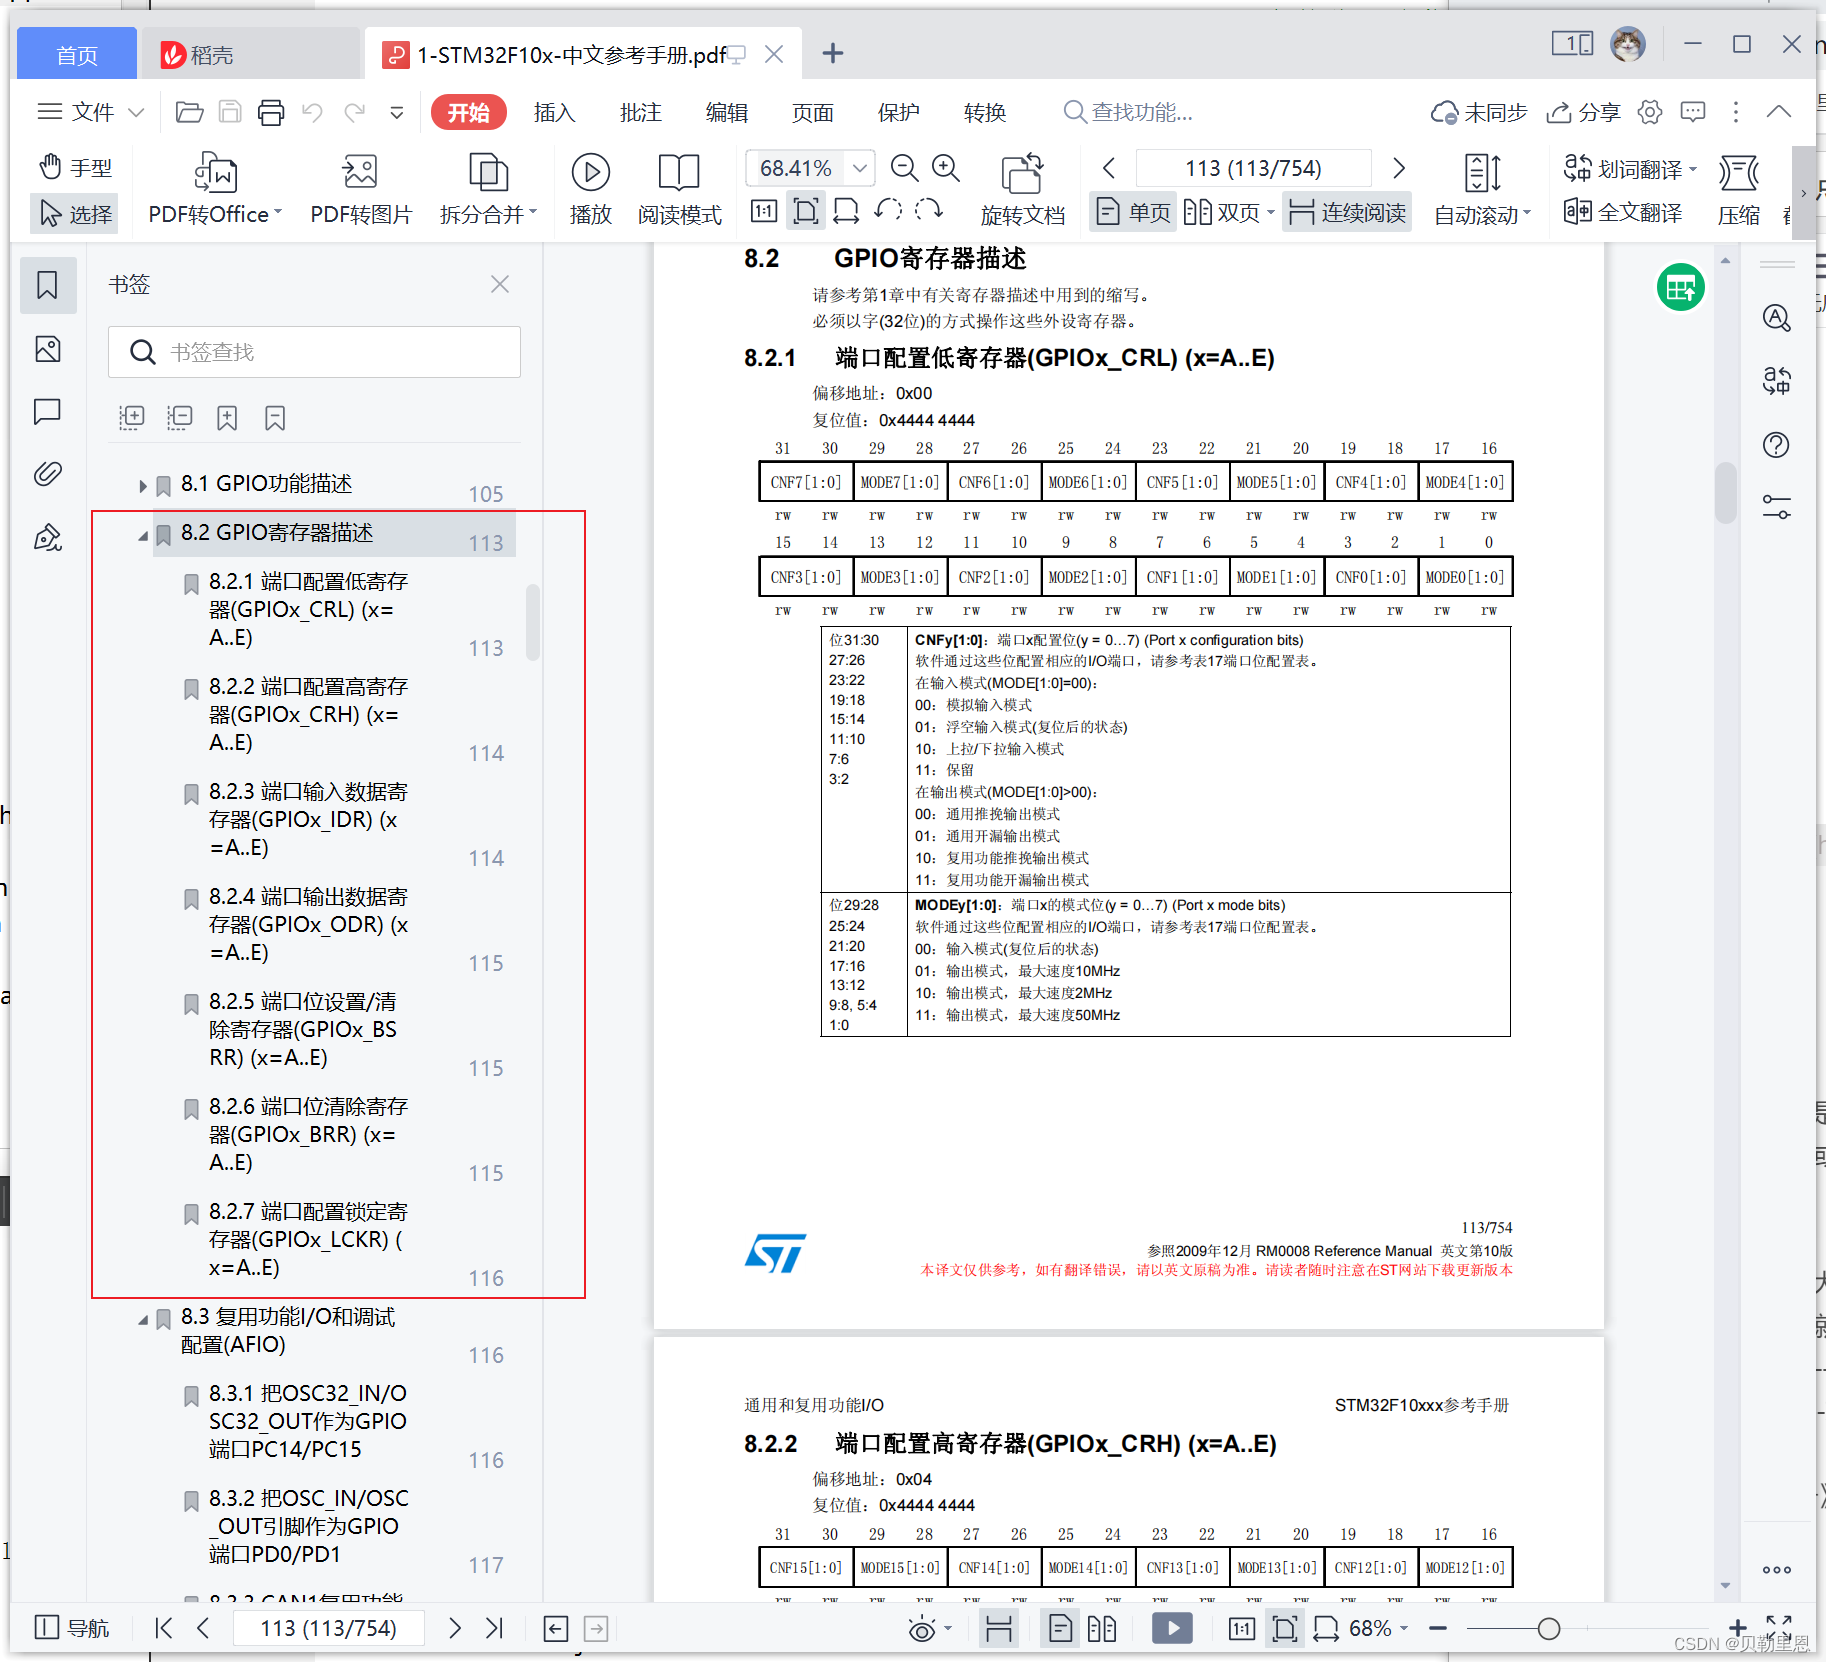
GPIO The functions of registers are briefly summarized as follows :
- Configuration register : selected GPIO Specific functions , The most basic, such as choosing as input or output port ;
- Data register : Save the GPIO The input level of or the level to be output ;
- Bit control register : Set the data of a pin to 1 or 0, Control the level of the output ;
- Lock register : After setting a locking pin , You cannot modify its configuration ;
But we use library development , Basically, it will not be controlled by directly operating registers GPIO,《stm32f10x.h》 This document puts STM32 All registers of are address mapped , for example :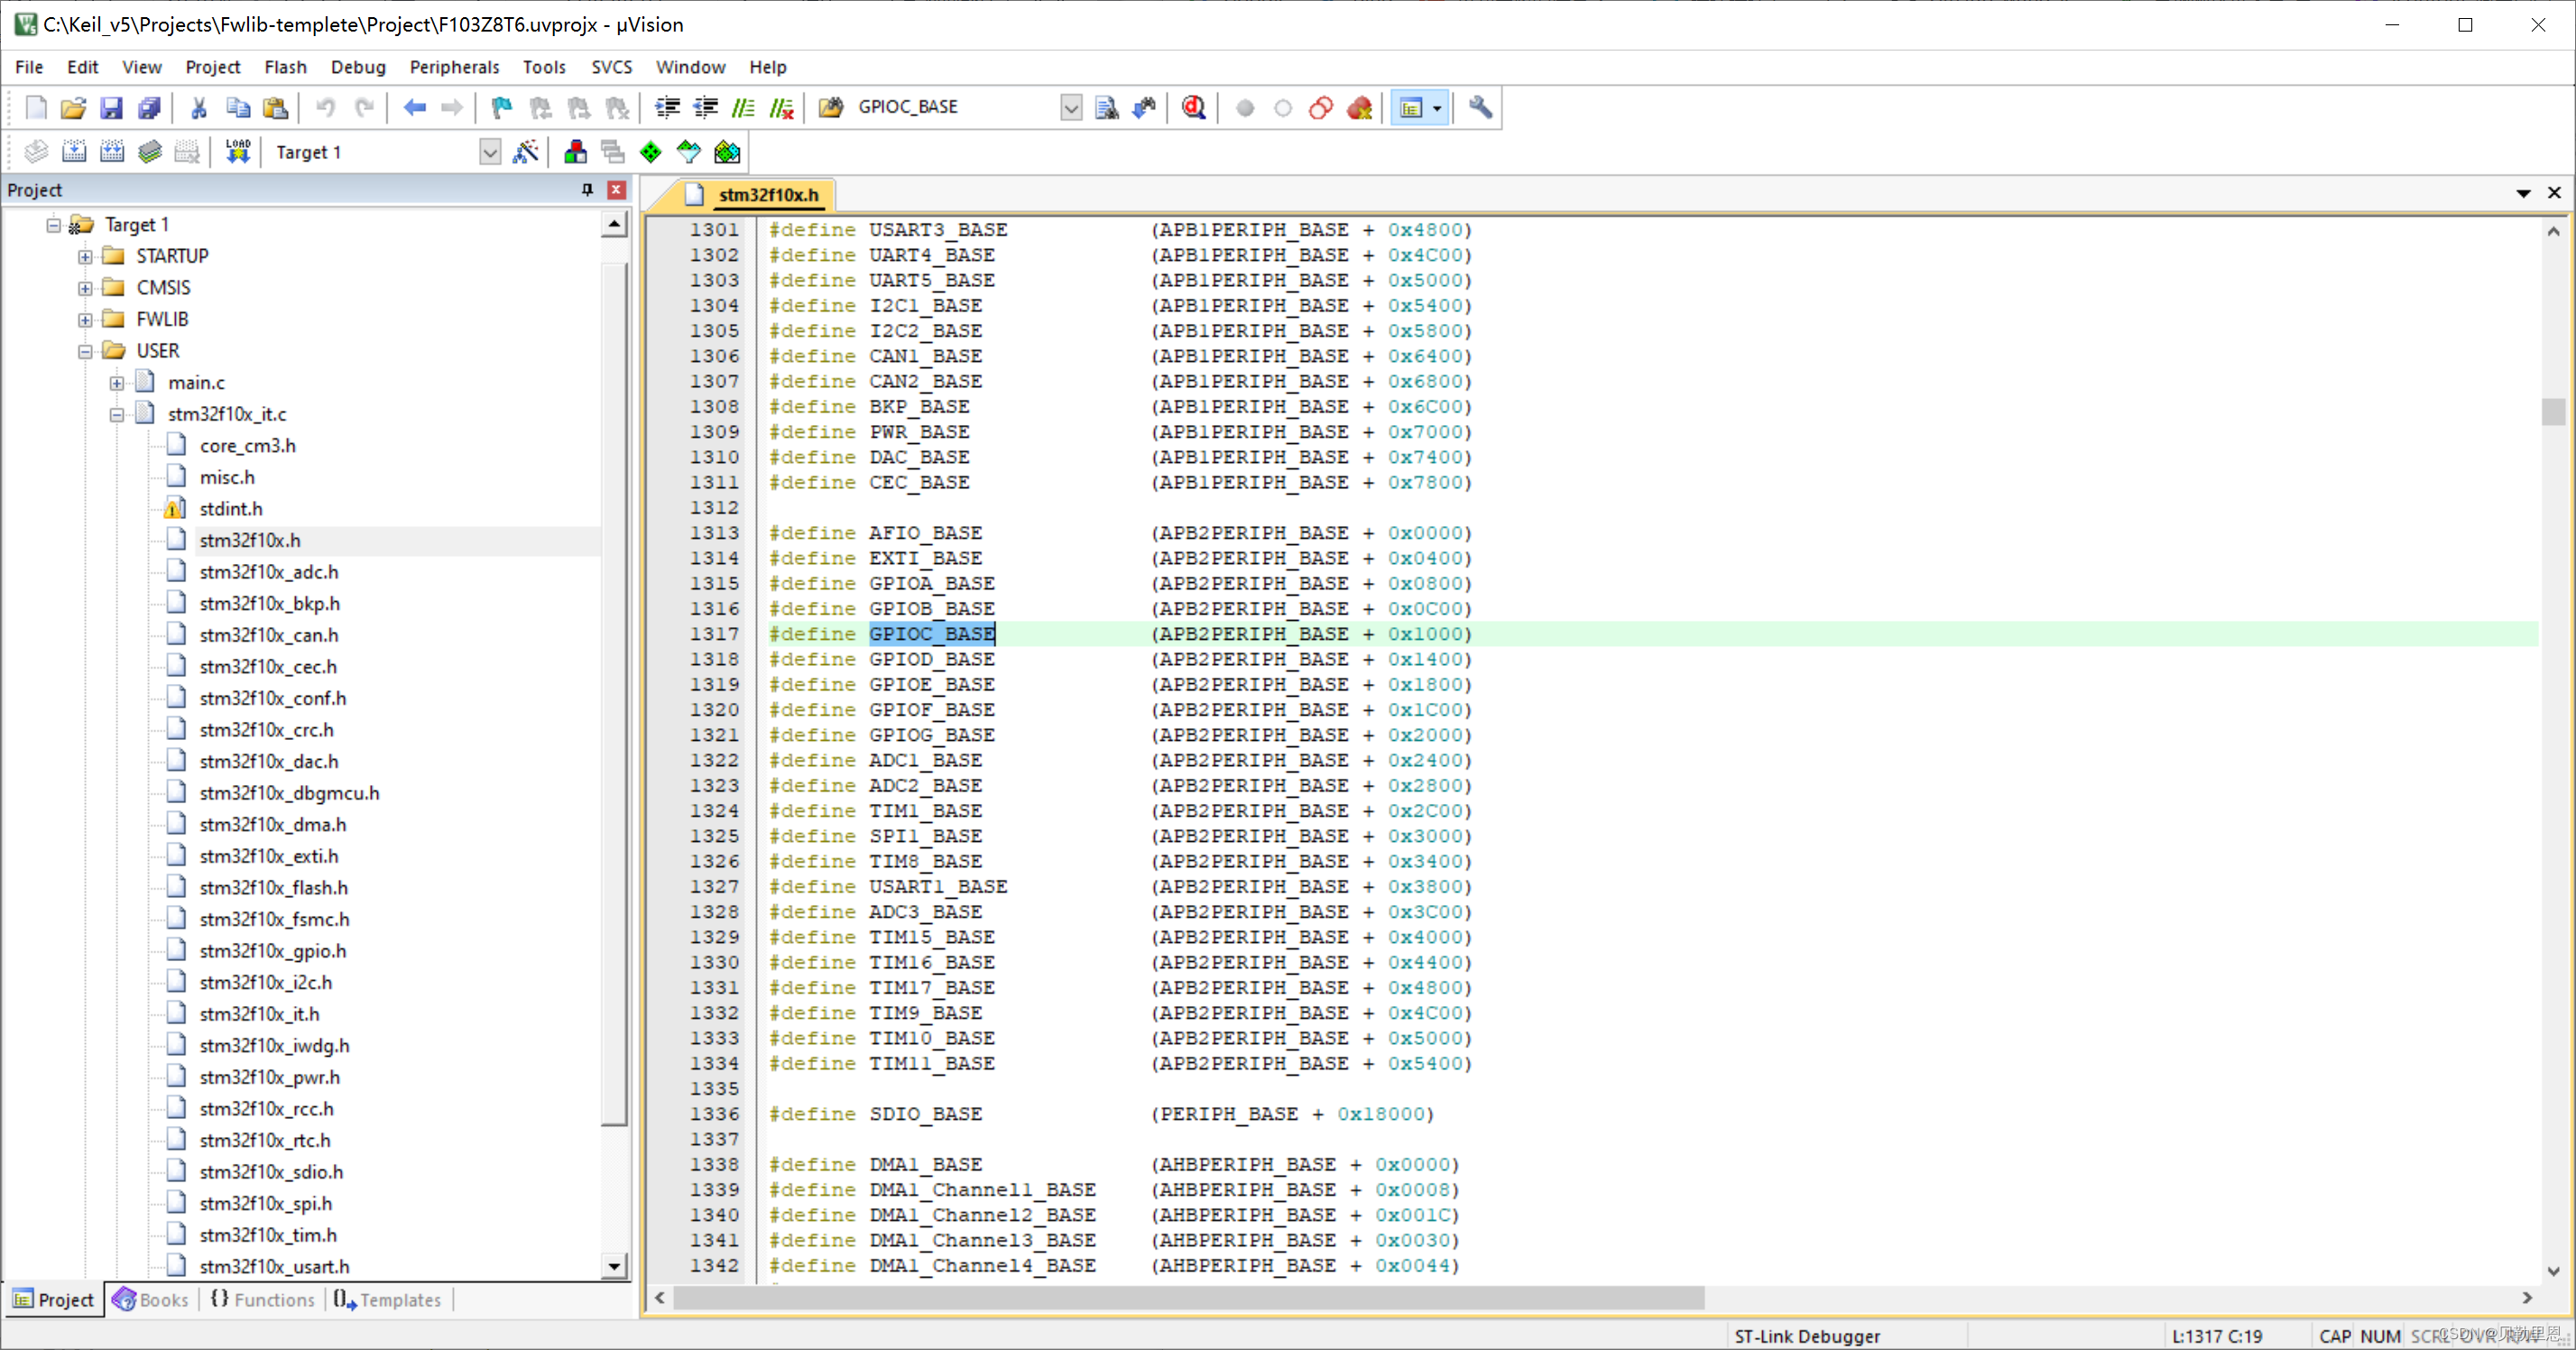
GPIOC_BASE representative GPIOC Base address of group register
3、 ... and 、 Write code
Use peripherals , Be sure to turn on the peripheral clock ;
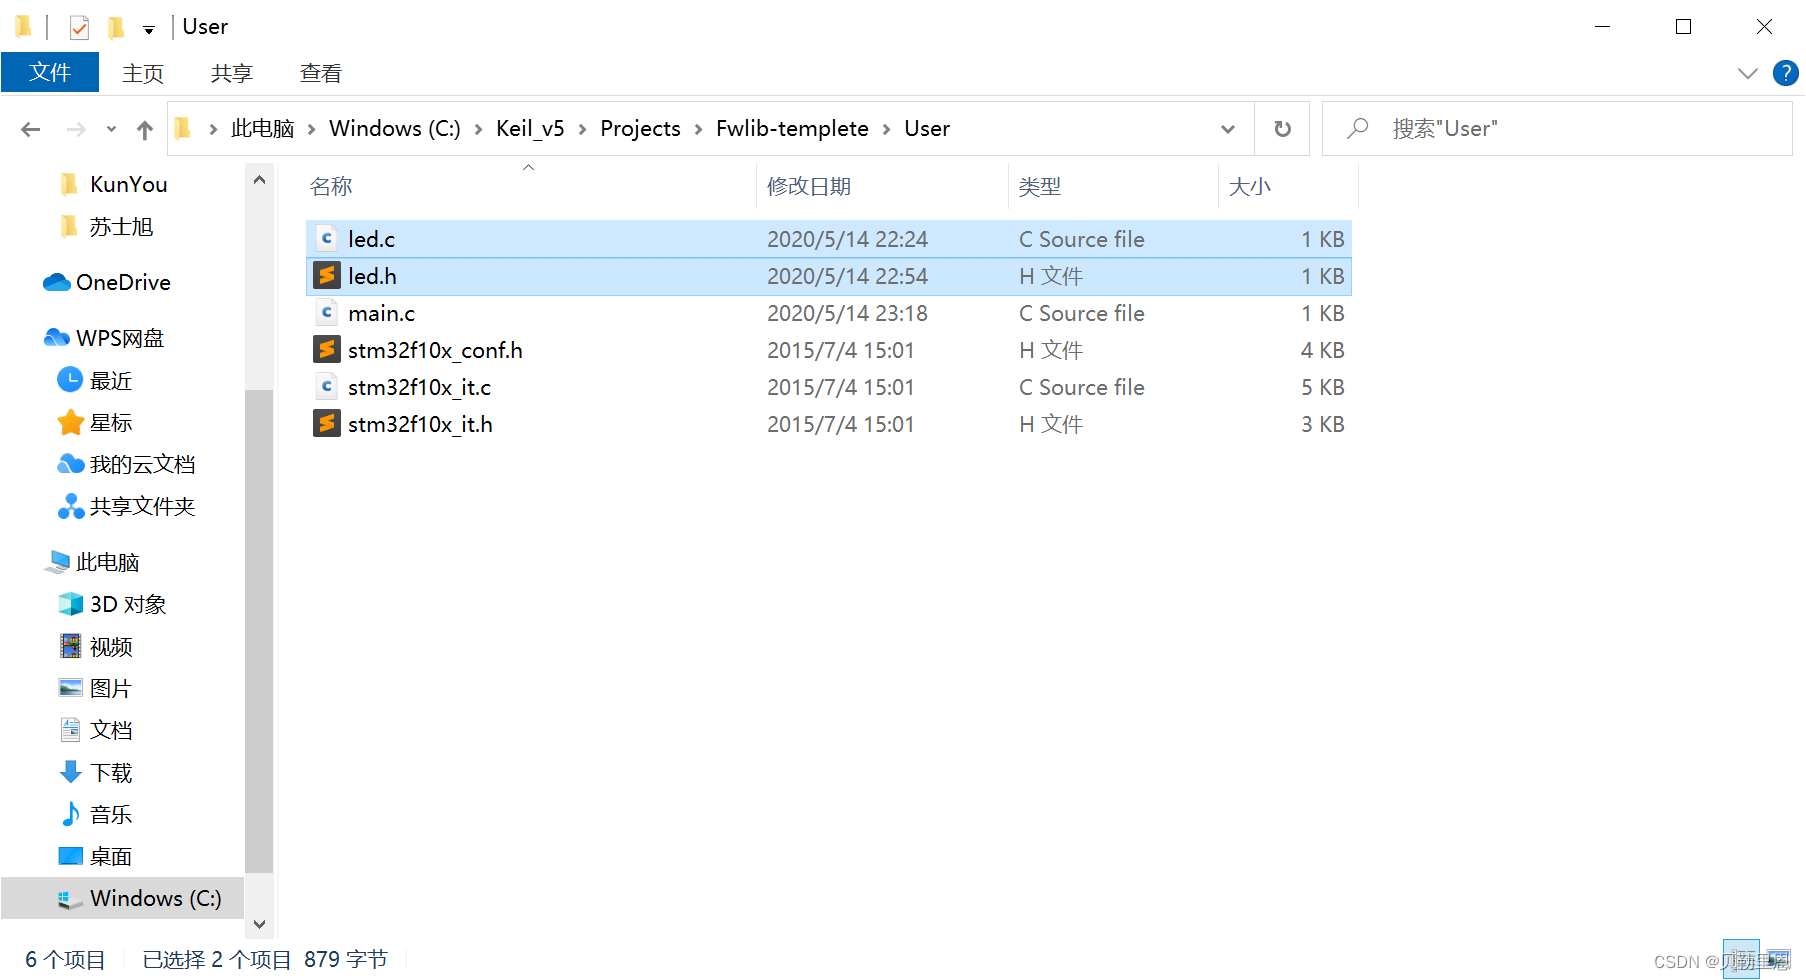
1、 establish led file , establish led.c and led.h stay USER Under the folder 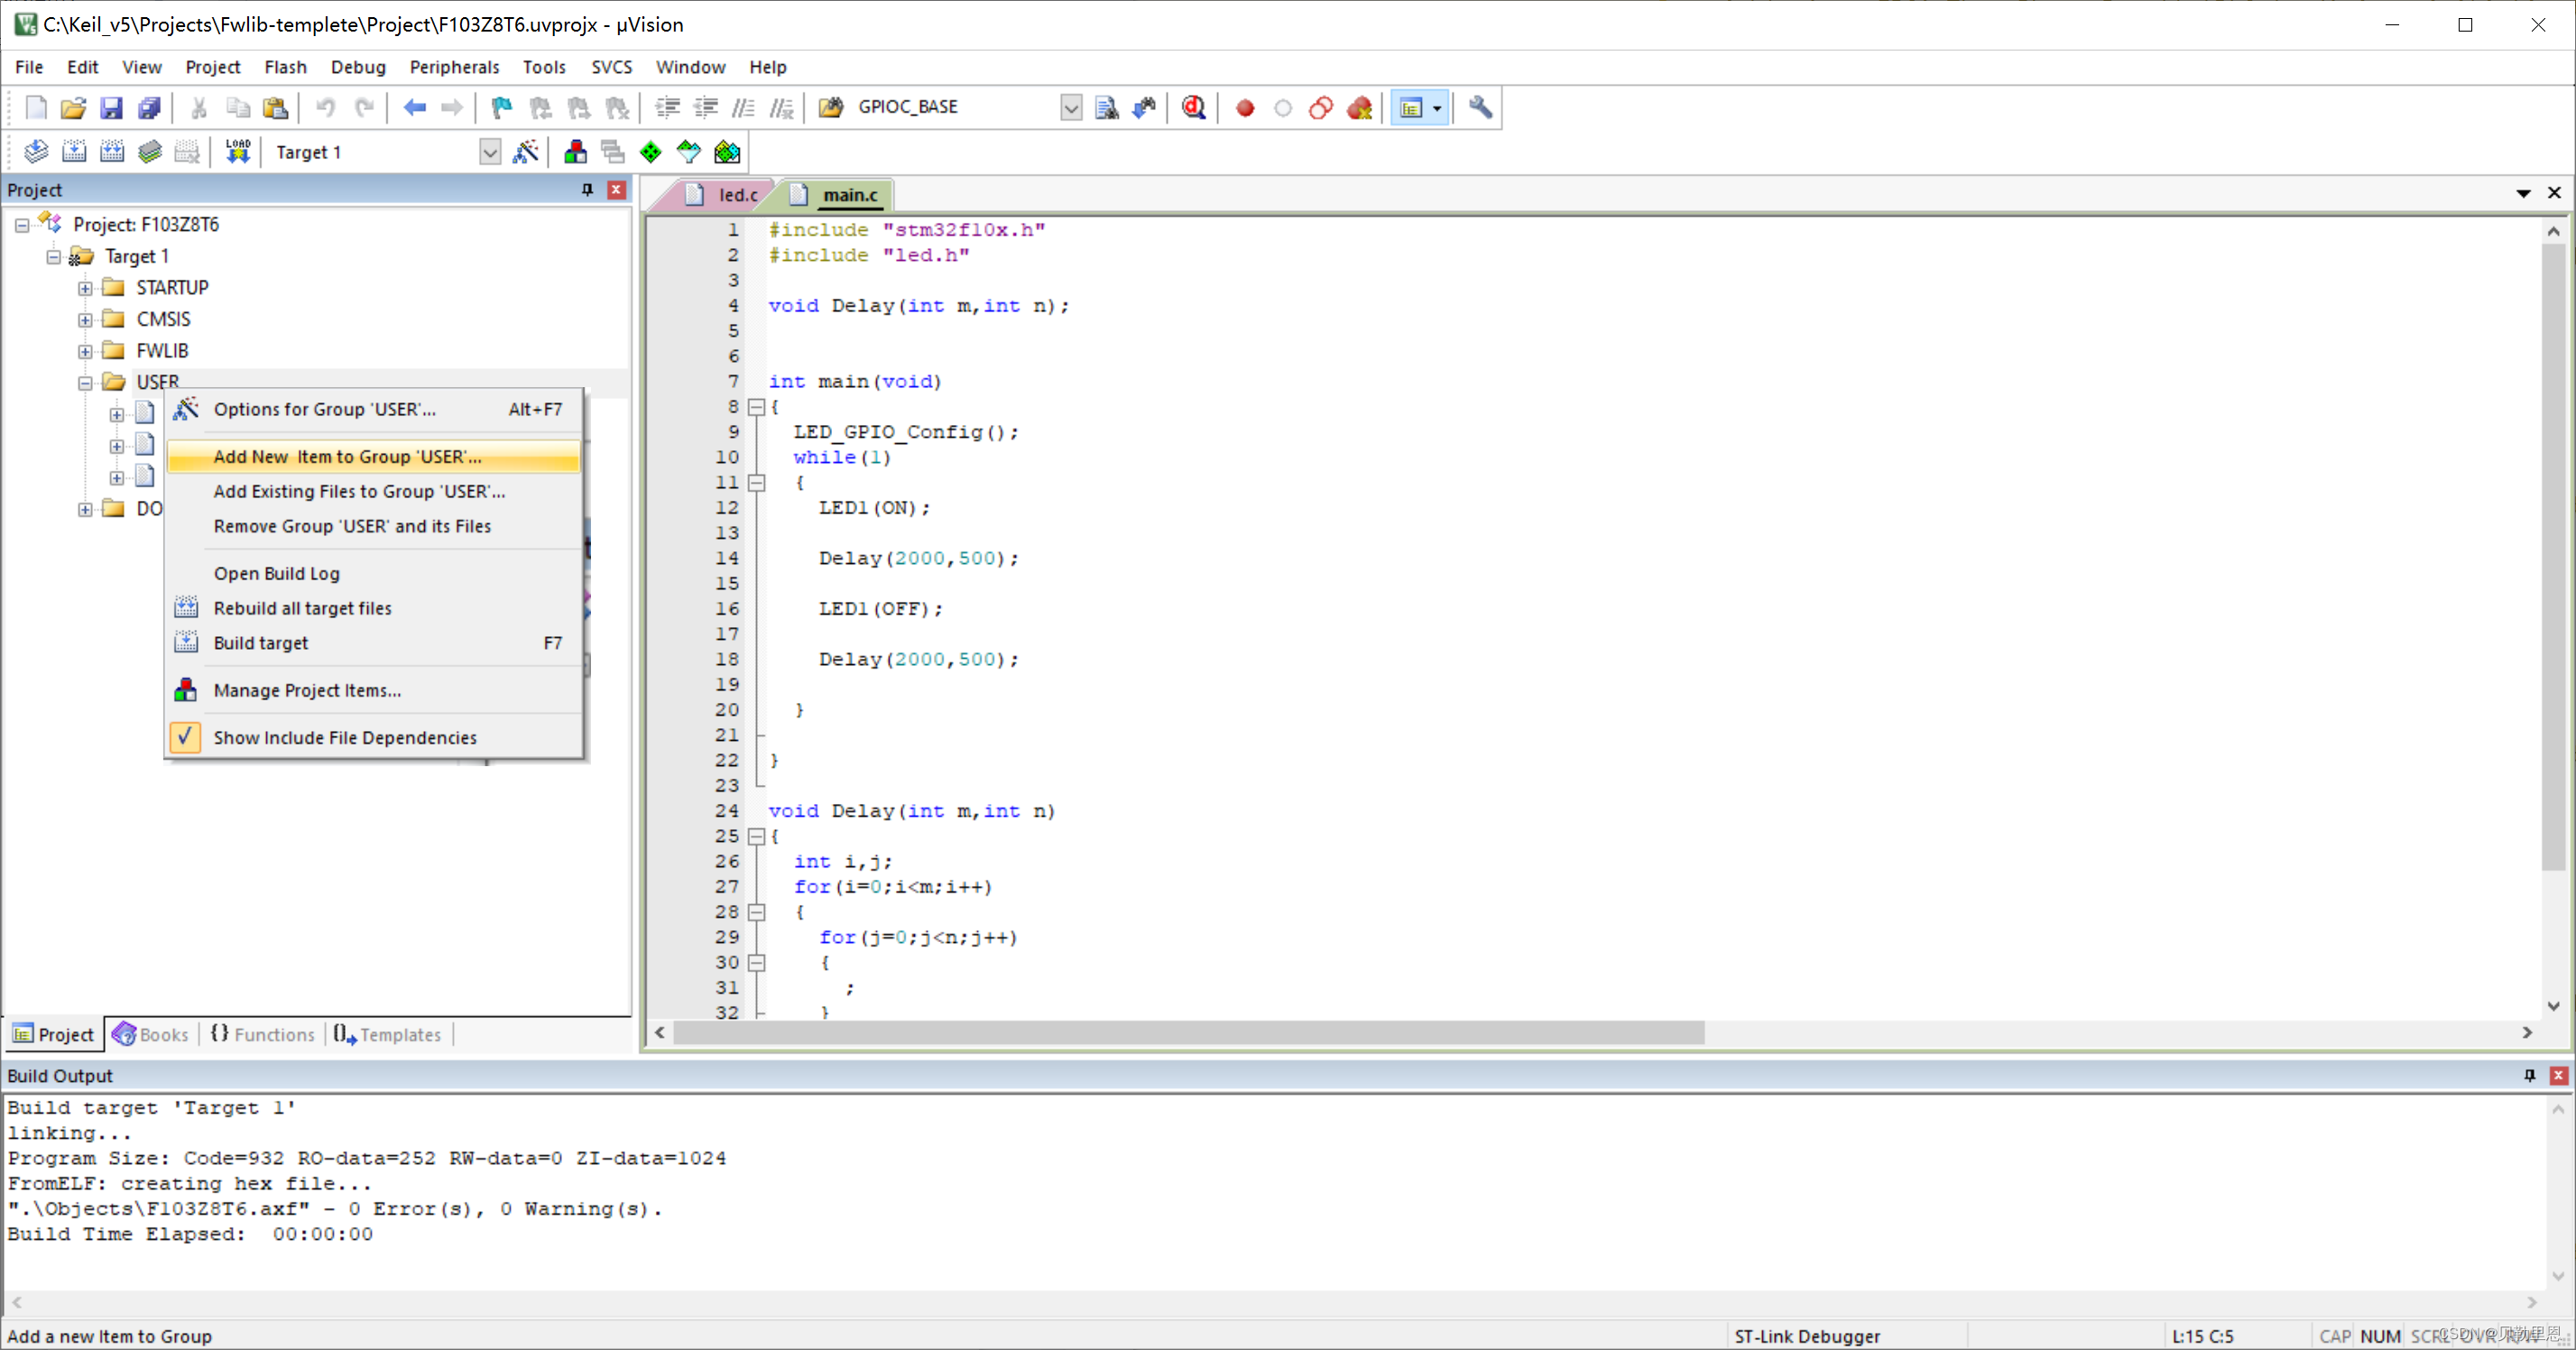
2、 Add code
attachment : One pin of the small lamp is connected STM32 Upper GPIOC13, One pin is connected STM32 Upper GND
effect : The small lamp lights up circularly - destroy - bright - destroy
led.h
#ifndef __LED_H
#define __LED_H

#include "stm32f10x.h"

void LED_GPIO_Config(void);

#endif
led.c
#include "led.h"

void LED_GPIO_Config(void)
{

	// Define a GPIO_InitTypeDef Type of structure
	GPIO_InitTypeDef GPIO_InitStructure;

	// Turn on GPIOC The peripheral clock of
	RCC_APB2PeriphClockCmd(RCC_APB2Periph_GPIOC,ENABLE);

	// Choose what you want to control GPIOC Pin
	GPIO_InitStructure.GPIO_Pin = GPIO_Pin_13;

	// Set pin mode : General push-pull output
	GPIO_InitStructure.GPIO_Mode = GPIO_Mode_Out_PP;

	// Set pin rate :50MHz
	GPIO_InitStructure.GPIO_Speed = GPIO_Speed_50MHz;

	// Call library function , initialization GPIOC13
	GPIO_Init(GPIOC,&GPIO_InitStructure);
}
main.c
#include "stm32f10x.h"
#include "led.h"

void Delay(int m,int n);	// The time delay function

int main(void)
{

	LED_GPIO_Config();
	while(1)
	{

		// Set up GPIOC13 High level ( Little lights )
		GPIO_SetBits(GPIOC,GPIO_Pin_13);

		// Time delay
		Delay(2000,500);

		// Set up GPIOC13 Low level ( Small lights went out )
		GPIO_ResetBits(GPIOC,GPIO_Pin_13)

		// Time delay
		Delay(2000,500);
	}
}

void Delay(int m,int n)	// Rough delay function
{

	int i,j;
	for(i=0;i<m;i++) {

		for(j=0;j<n;j++);
	}
}
Four 、 Library interface analysis
1、 Initialize structure -----GPIO_InitTypeDef type
typedef struct
{

	uint16_t GPIO_Pin;				// Specify the GPIO Pin
	GPIOSpeed_TypeDef GPIO_Speed;	// Appoint GPIO The highest frequency that the pin can output
	GPIOMode_TypeDef GPIO_Mode;		// Appoint GPIO The working state of the pin to be configured
}GPIO_InitTypeDef;
effect : The whole structure includes GPIO_Pin、GPIO_Speed、GPIO_Mode Three members , We only need to assign different values to these three members to GPIO Ports are configured differently , And these configurable values , Already by ST The library file of is encapsulated into a well-known enumeration constant , This makes it very easy for us to write code .
GPIO_Pin The value is :
#define GPIO_Pin_0
#define GPIO_Pin_1
......
GPIO_Speed The value is :
typedef enum
{

	GPIO_Speed_10MHz = 1,		// Enumeration constants , The value is 1, Represents that the maximum output rate is 10MHz
	GPIO_Speed_20MHz,			// Enumerating variables that are not assigned values , Automatic addition 1, This constant value is 2
	GPIO_Speed_50MHz			// Constant value is 3
}GPIOSpeed_TypeDef;
GPIO_Mode The value is :
typedef enum
{

	GPIO_Mode_AIN = 0x0,				// Analog input mode
	GPIO_Mode_IN_FLOATING = 0x04,		// Floating input mode
	GPIO_Mode_IPD = 0x28,				// Drop down input mode
	GPIO_Mode_IPU = 0x48,				// Pull up input mode
	GPIO_Mode_Out_OD = 0x14,			// Open drain output mode
	GPIO_Mode_Out_PP = 0x10,			// Universal push-pull output mode
	GPIO_Mode_AF_OD = 0x1C,				// Multiplexing function open drain output
	GPIO_Mode_AF_PP = 0x18				// Reuse function push-pull output
}GPIOMode_TypeDef;
2、 Initialize library functions -----GPIO_Init()
void GPIO_Init(GPIO_TypeDef* GPIOx, GPIO_InitTypeDef* GPIO_InitStruct)
GPIO_InitTypeDef It can be understood as a packaged configuration package ,GPIO_Init() Is the tool that makes this configuration package effective ;
3、 Turn on the peripheral clock
stay startup_stm32f10x_hd.s In startup file , There is a startup code :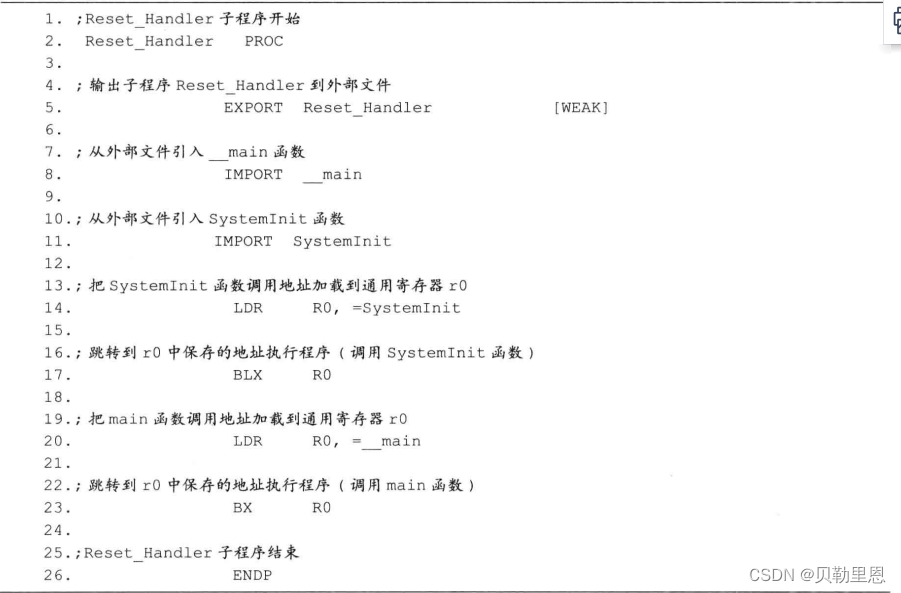
explain : When the chip is reset ( Including power on reset ), Will start running this code , The running process calls SystemInit() function , Enter again C In language “_main” Function execution ( And main Functions are different , This is a C Initialization function of standard library ), After executing this function , Finally jump to “main” Function entrance , Start running the main program .
in other words , When entering main A function named SystemInit() Function of , This function is defined in system_stm32f10x.c In the document , Its function is to set the system clock SYSCLK.
3.5 Version of the library calls... In the startup file SystemInit(), So you don't have to main() Function again . But if you use 3.0 The version of the library must be in main Call in function SystemInit(), To set the system clock , Because in 3.0 Version of the startup code does not call SystemInit() function .
SYSCLK from SystemInit() The configuration. , and GPIO The clock used PCLK2, We use the default value , Also for the 72MHz. We can use the default value without modifying the frequency divider , But the peripheral clock is off by default . Therefore, the peripheral clock is usually set to on when initializing the peripheral . To turn on and off the peripheral clock, you can use the function :
RCC_APB2PeriphClockCmd(uint32_t RCC_APB2Periph, FunctionalState NewState)
The first parameter is the mount to be controlled in APB2 Peripheral clock on the bus ; The second parameter is to choose whether to turn the clock on or off (ENABLE or FALSE);

Mounted on APB2 Peripherals on the :
- RCC_APB2Periph_AFIO
- RCC_APB2Periph_GPIOA
- RCC_APB2Periph_GPIOB
- RCC_APB2Periph_GPIOC
- RCC_APB2Periph_GPIOD
- RCC_APB2Periph_GPIOE
- RCC_APB2Periph_GPIOF
- RCC_APB2Periph_GPIOG
- RCC_APB2Periph_ADC1
- RCC_APB2Periph_ADC2
- RCC_APB2Periph_TIM1
- RCC_APB2Periph_SPI1
- RCC_APB2Periph_TIM8
- RCC_APB2Periph_USART1
- RCC_APB2Periph_ADC3
- RCC_APB2Periph_TIM15
- RCC_APB2Periph_TIM16
- RCC_APB2Periph_TIM17
- RCC_APB2Periph_TIM9
- RCC_APB2Periph_TIM10
- RCC_APB2Periph_TIM11
4、 control I/O High output 、 Low level
Control GPIO The level of the pin is high or low , As long as GPIOx_BSRR Write the corresponding bit of the register to the control parameter , Of course ST The library also provides us with such function :
GPIO_SetBits(GPIO_TypeDef* GPIOx, uint16_t GPIO_Pin);		// Output high level
GPIO_ResetBits(GPIO_TypeDef* GPIOx, uint16_t GPIO_Pin);		// Output low level

5、 Bit operation 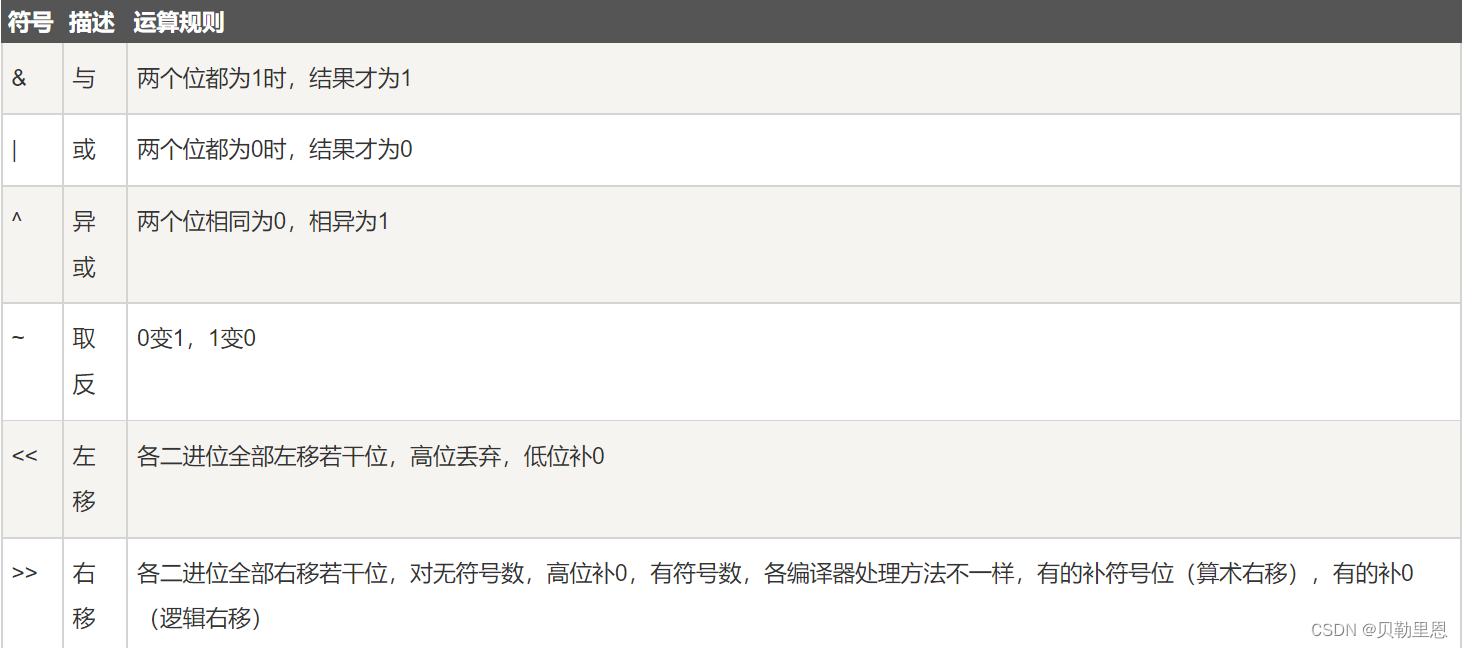
- take char Type variable a Seventh place in (bit6) Zero clearing , Other bits remain the same
a &= ~(1<<6);

 First step  1<<6:1 Move left 6 position ,0000 0001 --> 0100 0000
 The second step  ~(1<<6): The result of moving left is reversed ,0100 0000 --> 1011 1111
 The third step  a &= ~(1<<6): Take the inverse result and a Conduct and operate , The seventh place is 0, And operation, this bit must be 0, The rest are 1, Keep the original ;
- take char Type variable a Seventh place in (bit6) Set up 1, Other bits remain the same
a |= (1<<6);

 First step  1<<6:1 Move left 6 position ,0000 0001 --> 0100 0000
 The second step  a |= (1<<6): The result of moving left and a To carry out or operate , The seventh place is 1, Or the operation bit must be 1, The rest are 0, Keep the original ;
- take char Type variable a Seventh place in (bit6) Take the opposite , Other bits remain the same
a ^= (1<<6);

 First step  1<<6:1 Move left 6 position ,0000 0001 --> 0100 0000
 The second step  a ^= (1<<6): The result of moving left and a To perform exclusive or operations ;
 The seventh place is 1, If a yes 1, If it is the same, the seventh place becomes 0; If a yes 0, If it is different, the seventh place will become 1;
 The rest are 0, If a yes 1, The difference is still 1; If a yes 0, The same is still 0;
边栏推荐
- The number of enclaves
- 读者写者模型
- Solon Auth 认证框架使用演示(更简单的认证框架)
- Yolov5 adds attention mechanism
- 【ES实战】ES上的native realm安全方式使用
- 卷积神经网络简介
- [binary search] 69 Square root of X
- Codeforces round 712 (Div. 2) d. 3-coloring (construction)
- 发现一个很好的 Solon 框架试手的教学视频(Solon,轻量级应用开发框架)
- How can the Solon framework easily obtain the response time of each request?
猜你喜欢

Corridor and bridge distribution (csp-s-2021-t1) popular problem solution
National teacher qualification examination in the first half of 2022
![[merge array] 88 merge two ordered arrays](/img/e9/a73d9f22eead8e68c1e45c27ff6e6c.jpg)
[merge array] 88 merge two ordered arrays

Reader writer model
一个新的微型ORM开源框架
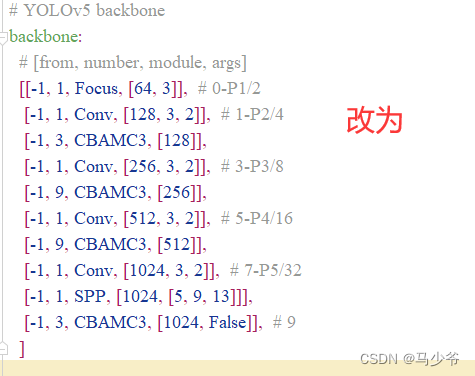
YOLOv5添加注意力机制
A new micro ORM open source framework

GBase数据库助力湾区数字金融发展
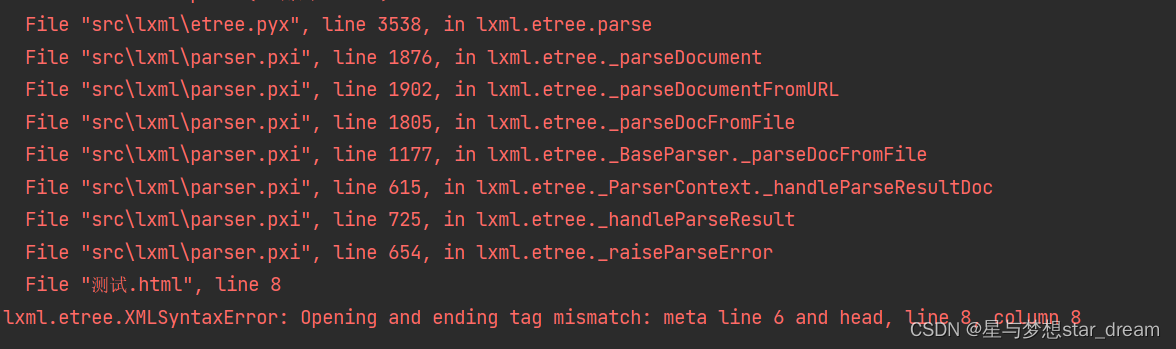
lxml.etree.XMLSyntaxError: Opening and ending tag mismatch: meta line 6 and head, line 8, column 8
![[to be continued] [UE4 notes] L1 create and configure items](/img/20/54ba719be2e51b7db5b7645b361e26.jpg)
[to be continued] [UE4 notes] L1 create and configure items
随机推荐
Zzulioj 1673: b: clever characters???
YOLOv5-Shufflenetv2
lxml.etree.XMLSyntaxError: Opening and ending tag mismatch: meta line 6 and head, line 8, column 8
xftp7与xshell7下载(官网)
Haut OJ 1241: League activities of class XXX
Insert sort
SAP method of modifying system table data
lxml. etree. XMLSyntaxError: Opening and ending tag mismatch: meta line 6 and head, line 8, column 8
Gbase database helps the development of digital finance in the Bay Area
Time complexity and space complexity
记录QT内存泄漏的一种问题和解决方案
Support multi-mode polymorphic gbase 8C database continuous innovation and heavy upgrade
Web APIs DOM node
使用Room数据库报警告: Schema export directory is not provided to the annotation processor so we cannot expor
Developing desktop applications with electron
On-off and on-off of quality system construction
Reflection summary of Haut OJ freshmen on Wednesday
Demonstration of using Solon auth authentication framework (simpler authentication framework)
Fragment addition failed error lookup
Remote upgrade afraid of cutting beard? Explain FOTA safety upgrade in detail