当前位置:网站首页>YOLOv5添加注意力机制
YOLOv5添加注意力机制
2022-07-05 05:16:00 【马少爷】
YOLOv5加入注意力机制可分为以下三个步骤:
1.common.py中加入注意力模块
2.yolo.py中增加判断条件
3.yaml文件中添加相应模块
一、CBAM注意力机制添加
(1)在common.py中添加可调用的CBAM模块
1.打开models文件夹中的common.py文件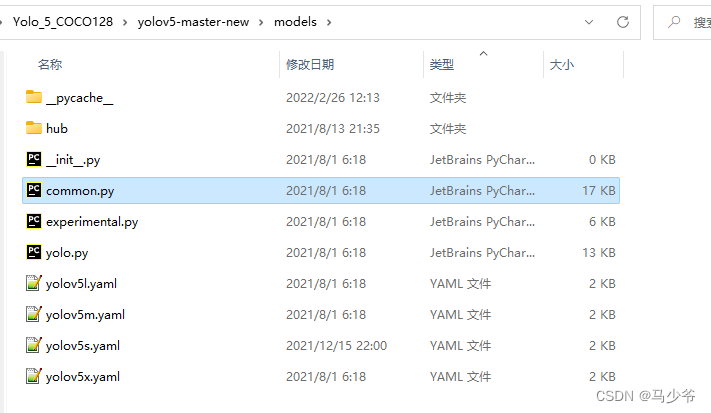
2.将下面的CBAMC3代码复制粘贴到common.py文件中
class ChannelAttention(nn.Module):
    def __init__(self, in_planes, ratio=16):
        super(ChannelAttention, self).__init__()
        self.avg_pool = nn.AdaptiveAvgPool2d(1)
        self.max_pool = nn.AdaptiveMaxPool2d(1)

        self.f1 = nn.Conv2d(in_planes, in_planes // ratio, 1, bias=False)
        self.relu = nn.ReLU()
        self.f2 = nn.Conv2d(in_planes // ratio, in_planes, 1, bias=False)
        # 写法二,亦可使用顺序容器
        # self.sharedMLP = nn.Sequential(
        # nn.Conv2d(in_planes, in_planes // ratio, 1, bias=False), nn.ReLU(),
        # nn.Conv2d(in_planes // rotio, in_planes, 1, bias=False))

        self.sigmoid = nn.Sigmoid()

    def forward(self, x):
        avg_out = self.f2(self.relu(self.f1(self.avg_pool(x))))
        max_out = self.f2(self.relu(self.f1(self.max_pool(x))))
        out = self.sigmoid(avg_out + max_out)
        return torch.mul(x, out)


class SpatialAttention(nn.Module):
    def __init__(self, kernel_size=7):
        super(SpatialAttention, self).__init__()

        assert kernel_size in (3, 7), 'kernel size must be 3 or 7'
        padding = 3 if kernel_size == 7 else 1

        self.conv = nn.Conv2d(2, 1, kernel_size, padding=padding, bias=False)
        self.sigmoid = nn.Sigmoid()

    def forward(self, x):
        avg_out = torch.mean(x, dim=1, keepdim=True)
        max_out, _ = torch.max(x, dim=1, keepdim=True)
        out = torch.cat([avg_out, max_out], dim=1)
        out = self.sigmoid(self.conv(out))
        return torch.mul(x, out)


class CBAMC3(nn.Module):
    # CSP Bottleneck with 3 convolutions
    def __init__(self, c1, c2, n=1, shortcut=True, g=1, e=0.5):  # ch_in, ch_out, number, shortcut, groups, expansion
        super(CBAMC3, self).__init__()
        c_ = int(c2 * e)  # hidden channels
        self.cv1 = Conv(c1, c_, 1, 1)
        self.cv2 = Conv(c1, c_, 1, 1)
        self.cv3 = Conv(2 * c_, c2, 1)
        self.m = nn.Sequential(*[Bottleneck(c_, c_, shortcut, g, e=1.0) for _ in range(n)])
        self.channel_attention = ChannelAttention(c2, 16)
        self.spatial_attention = SpatialAttention(7)

        # self.m = nn.Sequential(*[CrossConv(c_, c_, 3, 1, g, 1.0, shortcut) for _ in range(n)])

    def forward(self, x):
   		# 将最后的标准卷积模块改为了注意力机制提取特征
        return self.spatial_attention(
            self.channel_attention(self.cv3(torch.cat((self.m(self.cv1(x)), self.cv2(x)), dim=1))))
如下图所示,本文这里是将其粘贴到了common.py的末尾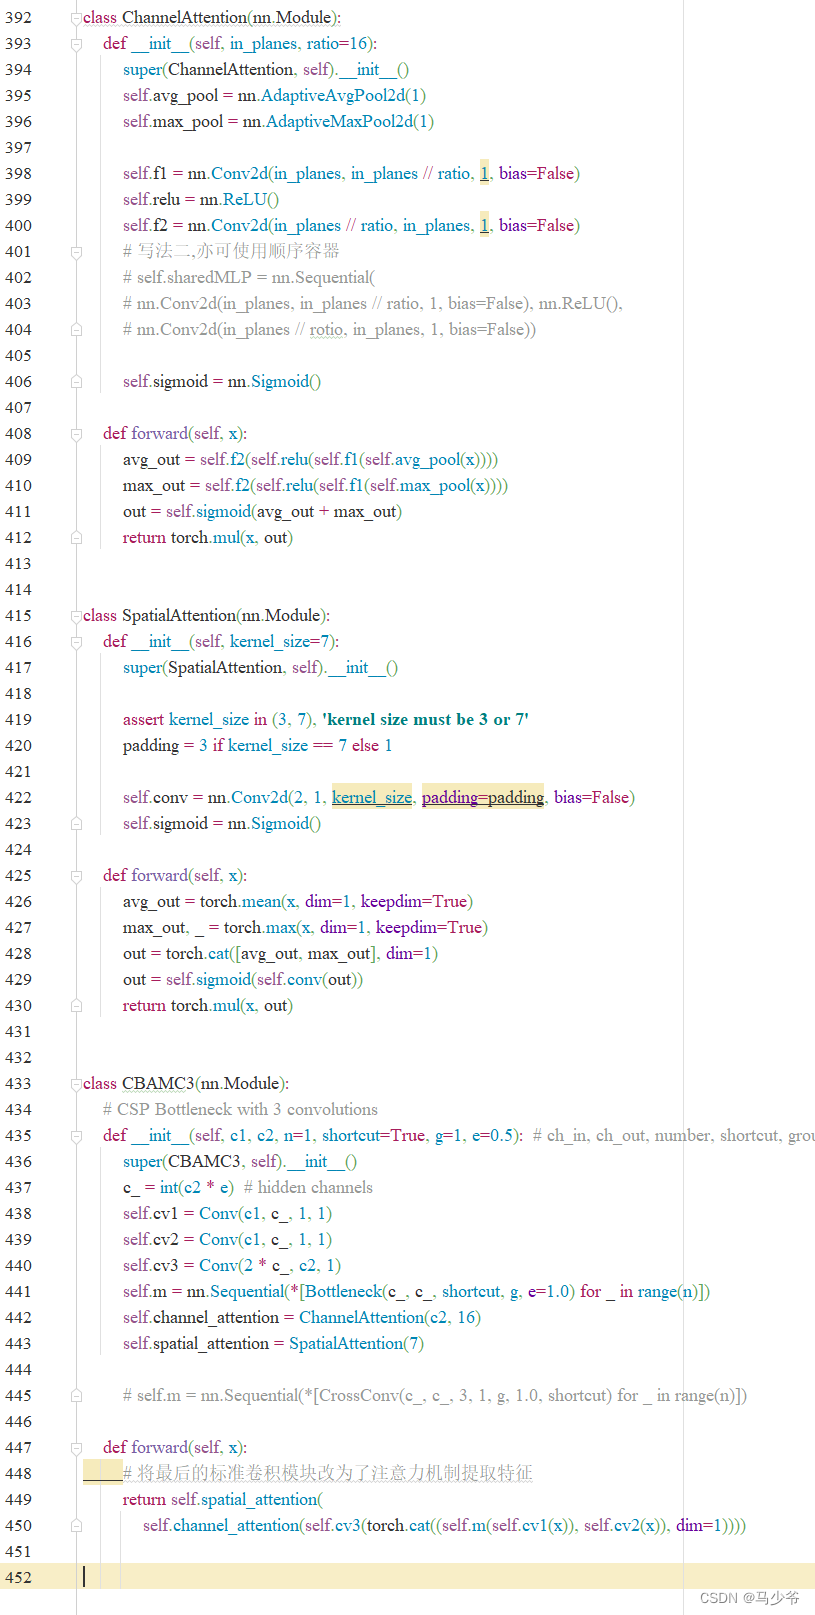
(2)向yolo.py文件添加CBAMC3判断语句
1.打开models文件夹中的yolo.py文件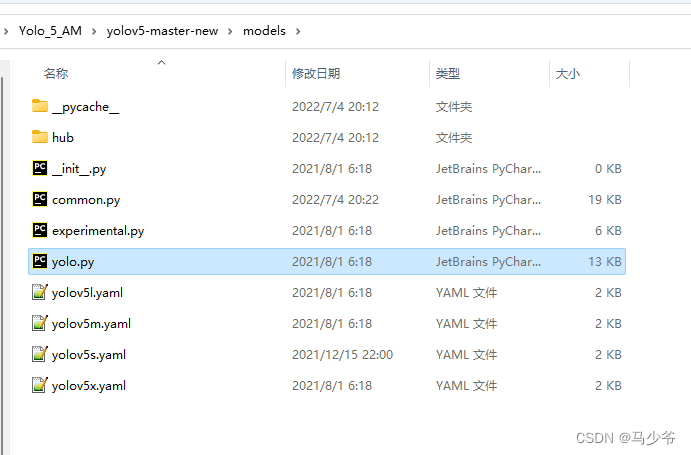
2.分别在239行和245行添加CBAMC3,如下图所示
同样改完之后记得点保存
3)修改yaml文件
注意力机制可以添加在backbone,Neck,Head等部分,大家可以在yaml文件中修改网络的结构、添加其他模块等等,接下来本文将以向主干网络(backbone)添加CBAM模块为例,本文介绍的只是其中一种添加方式
1.在yolov5-5.0工程文件夹下,找到models文件夹下的yolov5s.yaml文件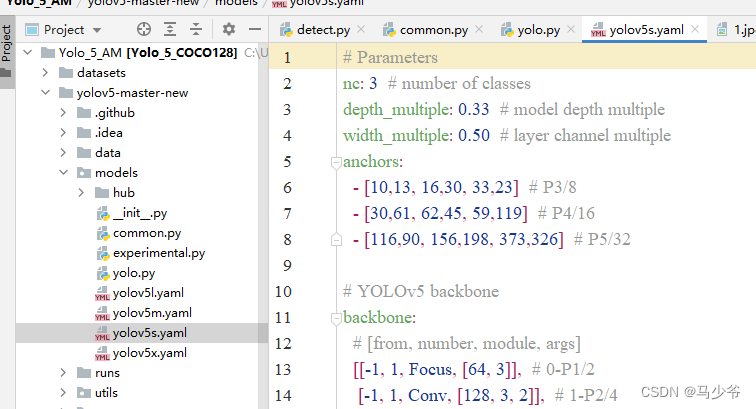
2.backbone主干网络中的4个C3模块改为CBAMC3,如下图所示:
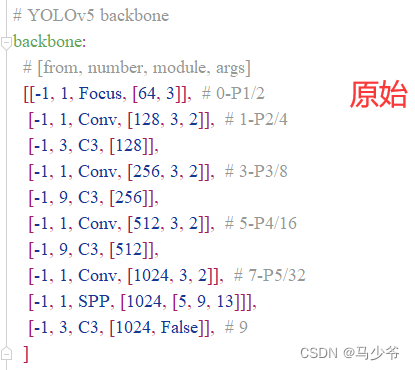
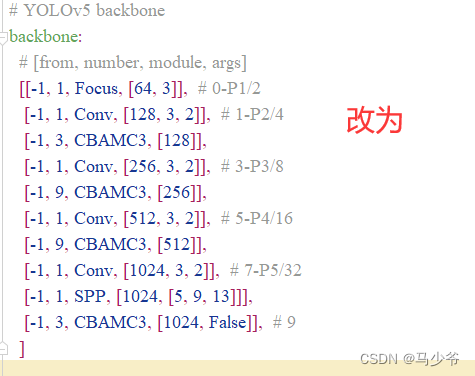
这样我们就在yolov5s主干网络中添加了CBAM注意力机制
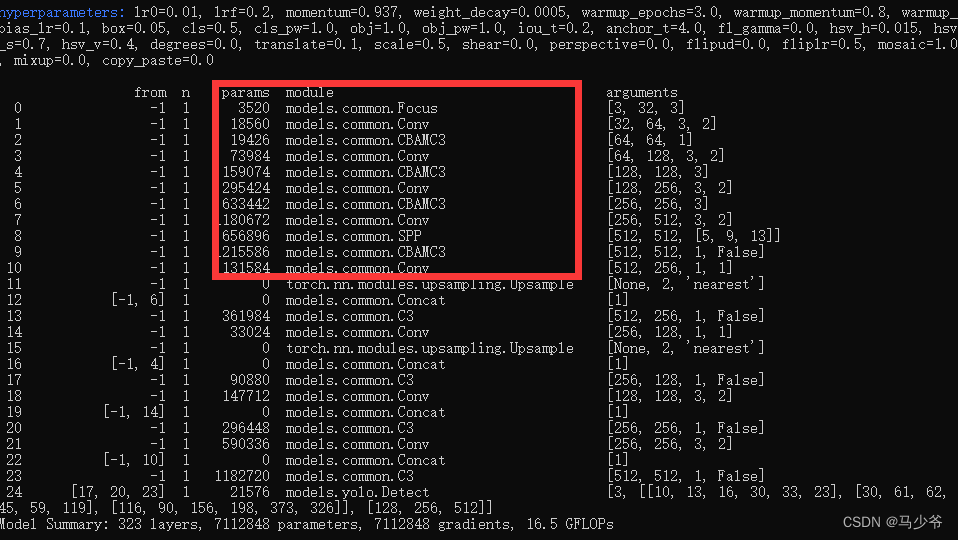
接下来开始训练模型,我们就可以看到CBAMC3模块已经成功添加到主干网络中了
二、SE注意力机制添加
(步骤和CBAM相似)
(1)在common.py中添加可调用的SE模块
1.打开models文件夹中的common.py文件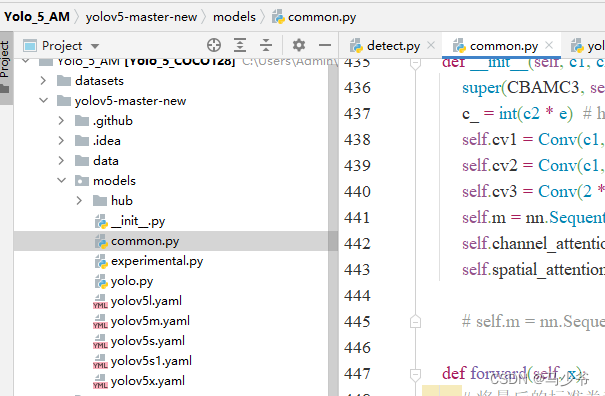
2.将下面的SE代码复制粘贴到common.py文件中
class SE(nn.Module):
    def __init__(self, c1, c2, r=16):
        super(SE, self).__init__()
        self.avgpool = nn.AdaptiveAvgPool2d(1)
        self.l1 = nn.Linear(c1, c1 // r, bias=False)
        self.relu = nn.ReLU(inplace=True)
        self.l2 = nn.Linear(c1 // r, c1, bias=False)
        self.sig = nn.Sigmoid()
    def forward(self, x):
        print(x.size())
        b, c, _, _ = x.size()
        y = self.avgpool(x).view(b, c)
        y = self.l1(y)
        y = self.relu(y)
        y = self.l2(y)
        y = self.sig(y)
        y = y.view(b, c, 1, 1)
        return x * y.expand_as(x)
如下图所示,本文这里是将其粘贴到了common.py的末尾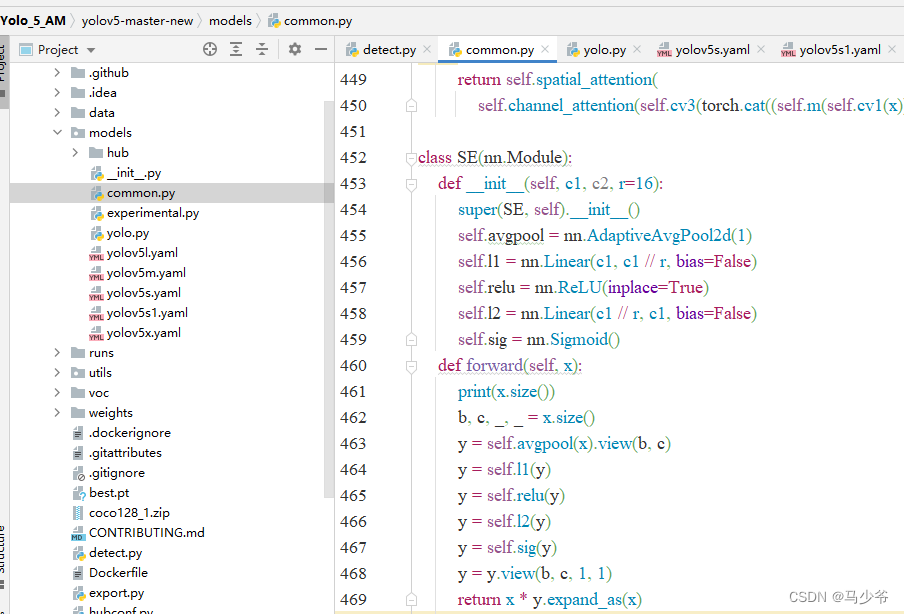
(2)向yolo.py文件添加SE判断语句
1.打开models文件夹中的yolo.py文件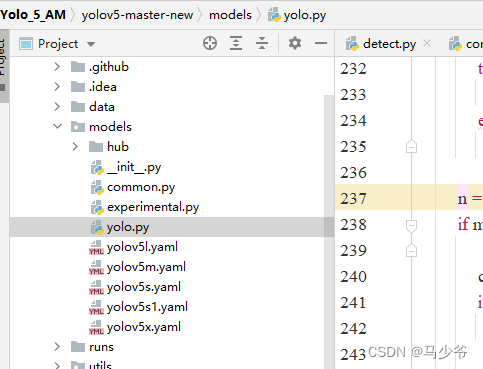
2.分别在238行和245行添加SE,如下图所示
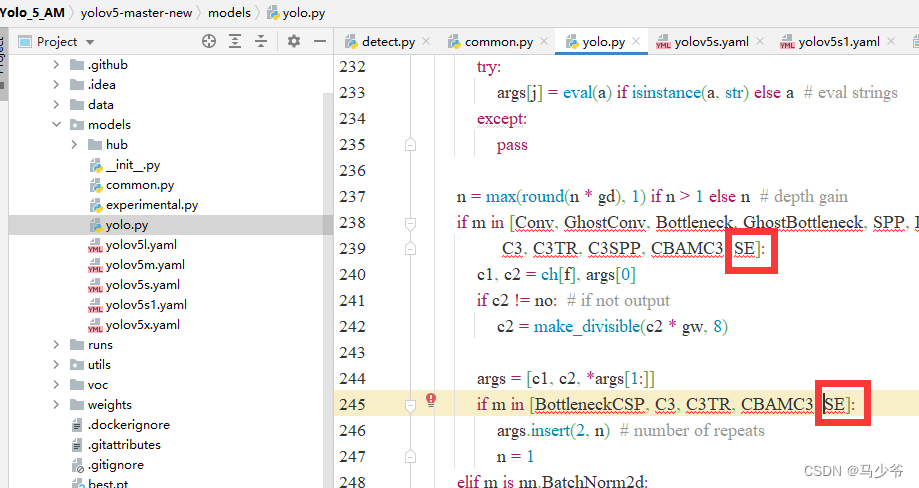
同样改完之后记得点保存
(3)修改yaml文件
注意力机制可以添加在backbone,Neck,Head等部分,大家可以在yaml文件中修改网络的结构、添加其他模块等等。与CBAM的添加过程一样,接下来本文将以向主干网络(backbone)添加SE模块为例,本文介绍的只是其中一种添加方式
1.在yolov5-5.0工程文件夹下,找到models文件夹下的yolov5s.yaml文件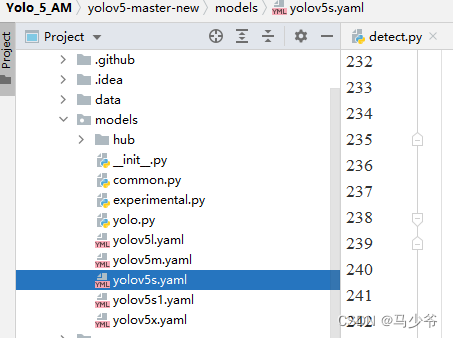
2.backbone主干网络末尾添加下面的代码,如下图所示:
(注意逗号是英文,以及注意对齐)
[-1, 1, SE, [1024, 4]],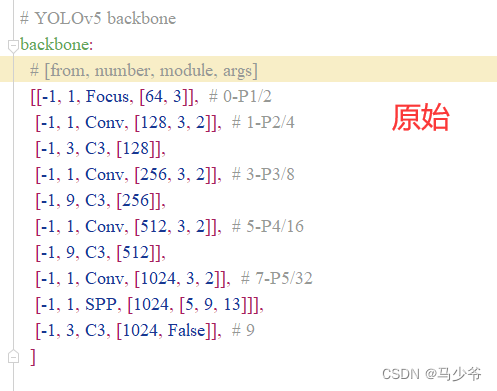
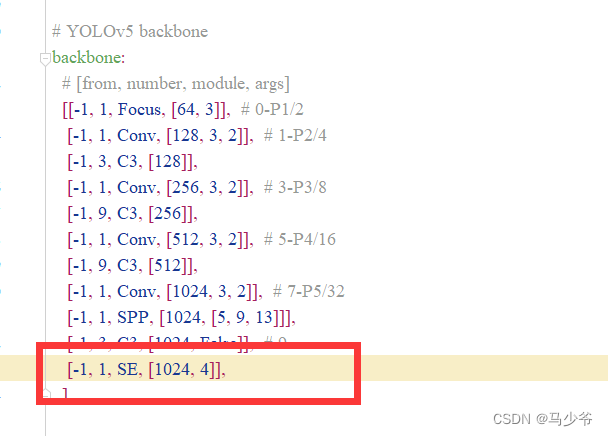
这样我们就在yolov5s主干网络中添加了SE注意力机制
(在服务器上跑代码修改后,记得点击文本编辑器右上角的保存)
接下来开始训练模型,我们就可以看到SE模块已经成功添加到主干网络中了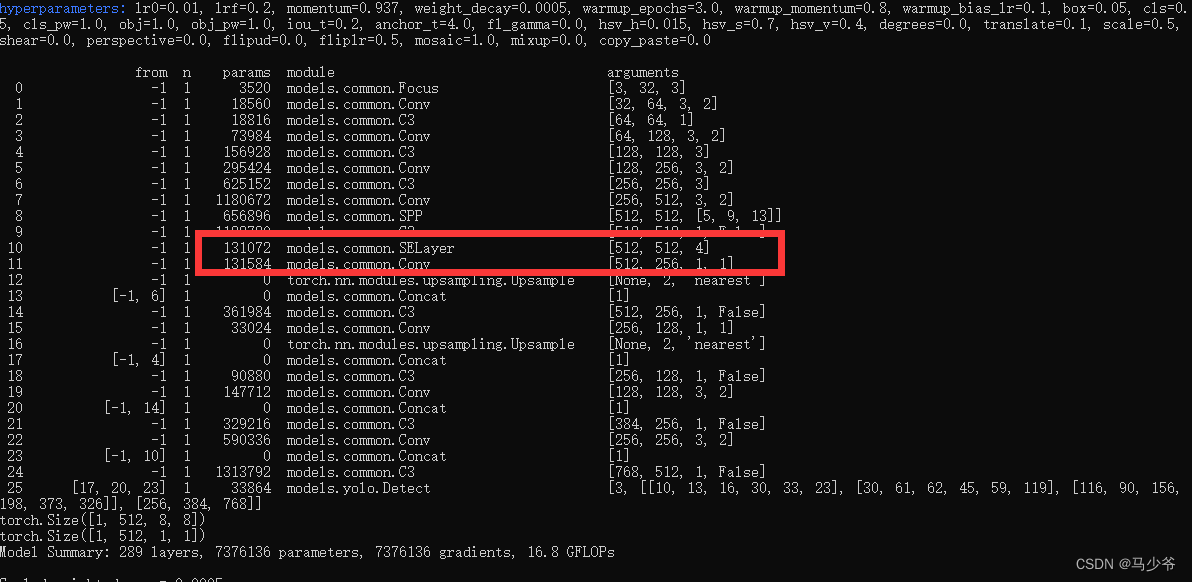
三、其他几种注意力机制代码
添加过程不再赘述,模仿上方CBAM和SE的添加过程即可
(1)ECA注意力机制代码
 class eca_layer(nn.Module):
     """Constructs a ECA module.
     Args:
         channel: Number of channels of the input feature map
         k_size: Adaptive selection of kernel size
     """
     def __init__(self, channel, k_size=3):
         super(eca_layer, self).__init__()
         self.avg_pool = nn.AdaptiveAvgPool2d(1)
         self.conv = nn.Conv1d(1, 1, kernel_size=k_size, padding=(k_size - 1) // 2, bias=False)
         self.sigmoid = nn.Sigmoid()

     def forward(self, x):
         # feature descriptor on the global spatial information
         y = self.avg_pool(x)

         # Two different branches of ECA module
         y = self.conv(y.squeeze(-1).transpose(-1, -2)).transpose(-1, -2).unsqueeze(-1)

         # Multi-scale information fusion
         y = self.sigmoid(y)
         x=x*y.expand_as(x)

         return x * y.expand_as(x)
(2)CA注意力机制代码:
 class h_sigmoid(nn.Module):
     def __init__(self, inplace=True):
         super(h_sigmoid, self).__init__()
         self.relu = nn.ReLU6(inplace=inplace)

     def forward(self, x):
         return self.relu(x + 3) / 6


 class h_swish(nn.Module):
     def __init__(self, inplace=True):
         super(h_swish, self).__init__()
         self.sigmoid = h_sigmoid(inplace=inplace)

     def forward(self, x):
         return x * self.sigmoid(x)


 class CoordAtt(nn.Module):
     def __init__(self, inp, oup, reduction=32):
         super(CoordAtt, self).__init__()
         self.pool_h = nn.AdaptiveAvgPool2d((None, 1))
         self.pool_w = nn.AdaptiveAvgPool2d((1, None))

         mip = max(8, inp // reduction)

         self.conv1 = nn.Conv2d(inp, mip, kernel_size=1, stride=1, padding=0)
         self.bn1 = nn.BatchNorm2d(mip)
         self.act = h_swish()

         self.conv_h = nn.Conv2d(mip, oup, kernel_size=1, stride=1, padding=0)
         self.conv_w = nn.Conv2d(mip, oup, kernel_size=1, stride=1, padding=0)

     def forward(self, x):
         identity = x

         n, c, h, w = x.size()
         x_h = self.pool_h(x)
         x_w = self.pool_w(x).permute(0, 1, 3, 2)

         y = torch.cat([x_h, x_w], dim=2)
         y = self.conv1(y)
         y = self.bn1(y)
         y = self.act(y)

         x_h, x_w = torch.split(y, [h, w], dim=2)
         x_w = x_w.permute(0, 1, 3, 2)

         a_h = self.conv_h(x_h).sigmoid()
         a_w = self.conv_w(x_w).sigmoid()

         out = identity * a_w * a_h

         return out
参考文献:https://blog.csdn.net/thy0000/article/details/125016410
边栏推荐
- Simple HelloWorld color change
- Common database statements in unity
- Sixth note
- BUUCTF MISC
- Basic knowledge points of dictionary
- cocos_ Lua loads the file generated by bmfont fnt
- FVP和Juno平台的Memory Layout介绍
- Download xftp7 and xshell7 (official website)
- 2022/7/2 question summary
- Embedded database development programming (zero)
猜你喜欢
Magnifying glass effect
![[turn to] MySQL operation practice (I): Keywords & functions](/img/b1/8b843014f365b786e310718f669043.png)
[turn to] MySQL operation practice (I): Keywords & functions

Applet Live + e - commerce, si vous voulez être un nouveau e - commerce de détail, utilisez - le!

2022/7/2做题总结

Recherche de mots pour leetcode (solution rétrospective)
远程升级怕截胡?详解FOTA安全升级

小程序直播+电商,想做新零售电商就用它吧!

【论文笔记】Multi-Goal Reinforcement Learning: Challenging Robotics Environments and Request for Research

Download and use of font icons

Embedded database development programming (zero)
随机推荐
Unity parallax infinite scrolling background
Bubble sort summary
UE 虚幻引擎,项目结构
[转]MySQL操作实战(一):关键字 & 函数
TF-A中的工具介绍
Unity connects to the database
Cocos create Jiugongge pictures
Transport connection management of TCP
Basic knowledge points of dictionary
PMP考试敏捷占比有多少?解疑
使用命令符关闭笔记本自带键盘命令
Out and ref functions of unity
FVP和Juno平台的Memory Layout介绍
C # perspective following
Vs2015 secret key
Research on the value of background repeat of background tiling
3dsmax snaps to frozen objects
Solon 框架如何方便获取每个请求的响应时间?
Judge the position of the monster in the role under unity3d
Bucket sort