当前位置:网站首页>Deep learning framework installation (tensorflow & pytorch & paddlepaddle)
Deep learning framework installation (tensorflow & pytorch & paddlepaddle)
2022-07-06 04:10:00 【Basic Qi learning】
One 、 Preface
The steps of installing the deep learning framework explained in this article are based on Anaconda Of , So you want to follow the steps in this article to install the deep learning framework , You need to install Anaconda( Be careful when changing sources ).
Experimental environment :Windows10,NVIDIA GeForce GTX 1050 Ti.
Two 、PaddlePaddle Deep learning framework installation
2.1 brief introduction
PaddlePaddle( Flying oar ) It is a domestic deep learning framework developed by Baidu , use PaddlePaddle The advantage of this method is that it can be used AI Studio Platform GPU Model training with calculating power , Not only save time, but also free ,PaddlePaddle There are also offers like PaddleSeg Wait for some kits , It is very friendly for beginners to start the project of deep learning model . Of course , Other frameworks can also use some online computing platforms for model training .
2.2 PaddlePaddle CPU Version installed
Step one : stay Anaconda Create a virtual environment in .
stay cmd in (cmd The opening method of can baidu ) Input “conda create -n paddle_cpu python=3.8”, Creating a virtual environment , Creating a virtual environment can be analogous to creating a virtual environment named “paddle_cpu” Folder .

Input “y”, And then go back .


Step two : Input “activate paddle_cpu”. Enter the created environment .

Step three : Input :
“conda install paddlepaddle==2.2.2 --channel https://mirrors.tuna.tsinghua.edu.cn/anaconda/cloud/Paddle/”
Conduct paddlepaddle(CPU edition ) Installation of deep learning framework .


Step four : Test for successful installation . Input in sequence “python”, enter ,"import paddle", enter ,"paddle.utils.run_check()", enter .

If the above figure appears , The installation is successful .
2.3 PaddlePaddle GPU Version installed
Step one : stay Anaconda Create a virtual environment in . stay cmd Input in “conda create -n paddle_gpu python=3.8”, Creating a virtual environment .


Step two : Input “activate paddle_gpu”. Enter the created environment .

Step three : Input :
conda install paddlepaddle-gpu==2.2.2 cudatoolkit=10.1 --channel https://mirrors.tuna.tsinghua.edu.cn/anaconda/cloud/Paddle/, install paddlepaddle(GPU edition ),CUDA10.1 And the matching cuDNN.

Input “y”.


As can be seen from the above figure ,CUDA and cuDNN Will be installed together , So there is no need to configure it manually .

appear “done”, Description installation complete .
Step four : Test for successful installation . Input in sequence “python”, enter ,import paddle, enter ,paddle.utils.run_check(), enter .

If the above figure appears , The installation is successful ( As can be seen from the above figure device 0 as well as cuDNN Version of ).
3、 ... and 、PyTorch Deep learning framework installation
3.1 brief introduction
PyTorch It's an open source Python Machine learning library , be based on Torch, For natural language processing applications .
3.2 PyTorch CPU Version installed
Step one : stay Anaconda Create a virtual environment in . stay cmd Input in “conda create -n pytorch_cpu python=3.8”, Creating a virtual environment .

Input “y”.

Step two : Input “activate pytorch_cpu”. Enter the created environment .

Step three : Input :
conda install pytorch torchvision torchaudio cpuonly -c pytorch, install PyTorch CPU Version deep learning framework .

Input “y”.

Waiting for the installation .


appear “done”, Description installation complete .
Step four : Test for successful installation . Input in sequence python, enter ,import torch, enter ,x = torch.rand(5, 3), enter ,print(x), enter .

If the above figure appears , The installation is successful .
3.3 PyTorch GPU Version installed
Step one : stay Anaconda Create a virtual environment in . stay cmd Input in “conda create -n pytorch_gpu python=3.8”, Creating a virtual environment .


Step two : Input “activate pytorch_gpu”. Enter the created environment .

Step three : Input “conda install pytorch torchvision torchaudio cudatoolkit=10.2 -c pytorch”.

Input “y”.


appear “done”, Description installation complete .
Step four : Test for successful installation . Input in sequence python, enter ,import torch, enter ,x = torch.rand(5, 3), enter ,print(x), enter , Input torch.cuda.is_available(), enter . among torch.cuda.is_available() It's used to test CUDA Of ( Used to distinguish from CPU Version testing ).

If the above figure appears , The installation is successful .
Four 、Tensorflow Deep learning framework installation
4.1 brief introduction
TensorFlow yes Google The second generation of open source is used for digital computing (numerical computation) Software library .
4.2 Tensorflow CPU Version installed
Step one : stay cmd Input in “conda create -n tf2xx_cpu” Creating a virtual environment .


Step two : Input “activate tf2xx_cpu” Enter the virtual environment , Type the following command to install python and tensorflow(CPU edition ):
conda install --channel https://mirrors.ustc.edu.cn/anaconda/pkgs/main/ python=3.7 tensorflow==2.1.0 .

Input “y”.

Step three : Test for successful installation , Input in sequence “python”, enter ,“import tensorflow as tf”, enter ,“import os”, enter ,“os.environ['TF_CPP_MIN_LOG_LEVEL']='2'”, enter ,“print(tf.reduce_sum(tf.random.normal([1000, 1000])))”.

If the same content as above appears , This indicates that the installation was successful .
4.3 Tensorflow GPU Version installed ( Pay attention to your graphics card model , My is 1050TI( If the graphics card is better than mine , You can also install 2.1.0 edition ), The graphics card driver is relatively old , So the installation 2.1.0 edition .)
Step one : stay cmd Input in “conda create -n tf2xx_gpu”, Creating a virtual environment .

Step two : Input “activate tf2xx_gpu” Enter the virtual environment , And enter the following instructions to install python and Tensorflow-gpu edition :
conda install --channel https://mirrors.ustc.edu.cn/anaconda/pkgs/main/ python=3.7 tensorflow-gpu==2.1.0.


You can see from the above picture that , The installation includes CUDA and cuDNNN.
Input “y”.

Step three : Test for successful installation . Input in sequence “python”, enter ,“import tensorflow as tf”, enter ,“print("Num GPUs Available: ", len(tf.config.experimental.list_physical_devices('GPU')))”.

If the same content as above appears , This indicates that the installation was successful .
5、 ... and 、 Conclusion
This paper introduces the installation of three deep learning frameworks , actually , You can choose a deep learning framework to install . In deep learning projects , The framework can only be said to be a tool , Personal programming ability is the core .
6、 ... and 、 The content of the next article
In the next article, I plan to use the deep learning framework to achieve target detection ( Including face recognition ), The main content is “ Brief introduction ”+“ Detailed code ”, I will try to annotate the code in detail , Try to make beginners understand , If you don't understand, please feel free to contact me . Recently, a confrontation network has been generated (GAN,Generative Adversarial Networks) Comparing the fire , Especially will GAN As the topic of graduation design , So I will try my best to write a few later GAN The content of .
in addition , If you have problems with your undergraduate thesis, you can also contact me ( Free of charge , Because I want to do more good , Gradually become a kind person ), I reply in the evening , Practice in the company during the day , If the problem is urgent , It can also be direct +q 1031794256 perhaps vx:17860157407.

边栏推荐
- math_ Derivative function derivation of limit & differential & derivative & derivative / logarithmic function (derivative definition limit method) / derivative formula derivation of exponential functi
- 【按键消抖】基于FPGA的按键消抖模块开发
- Custom event of C (31)
- 判断当天是当月的第几周
- Global and Chinese market of rubber wheel wedges 2022-2028: Research Report on technology, participants, trends, market size and share
- Thread sleep, thread sleep application scenarios
- math_极限&微分&导数&微商/对数函数的导函数推导(导数定义极限法)/指数函数求导公式推导(反函数求导法则/对数求导法)
- Several important classes in unity
- 10 exemples les plus courants de gestion du trafic istio, que savez - vous?
- Overturn your cognition? The nature of get and post requests
猜你喜欢
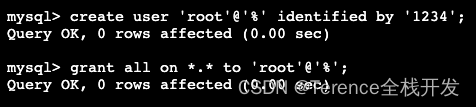
MySql數據庫root賬戶無法遠程登陸解决辦法

WPF effect Article 191 box selection listbox

颠覆你的认知?get和post请求的本质
Le compte racine de la base de données MySQL ne peut pas se connecter à distance à la solution

Comprehensive ability evaluation system

C (thirty) C combobox listview TreeView
Solution to the problem that the root account of MySQL database cannot be logged in remotely
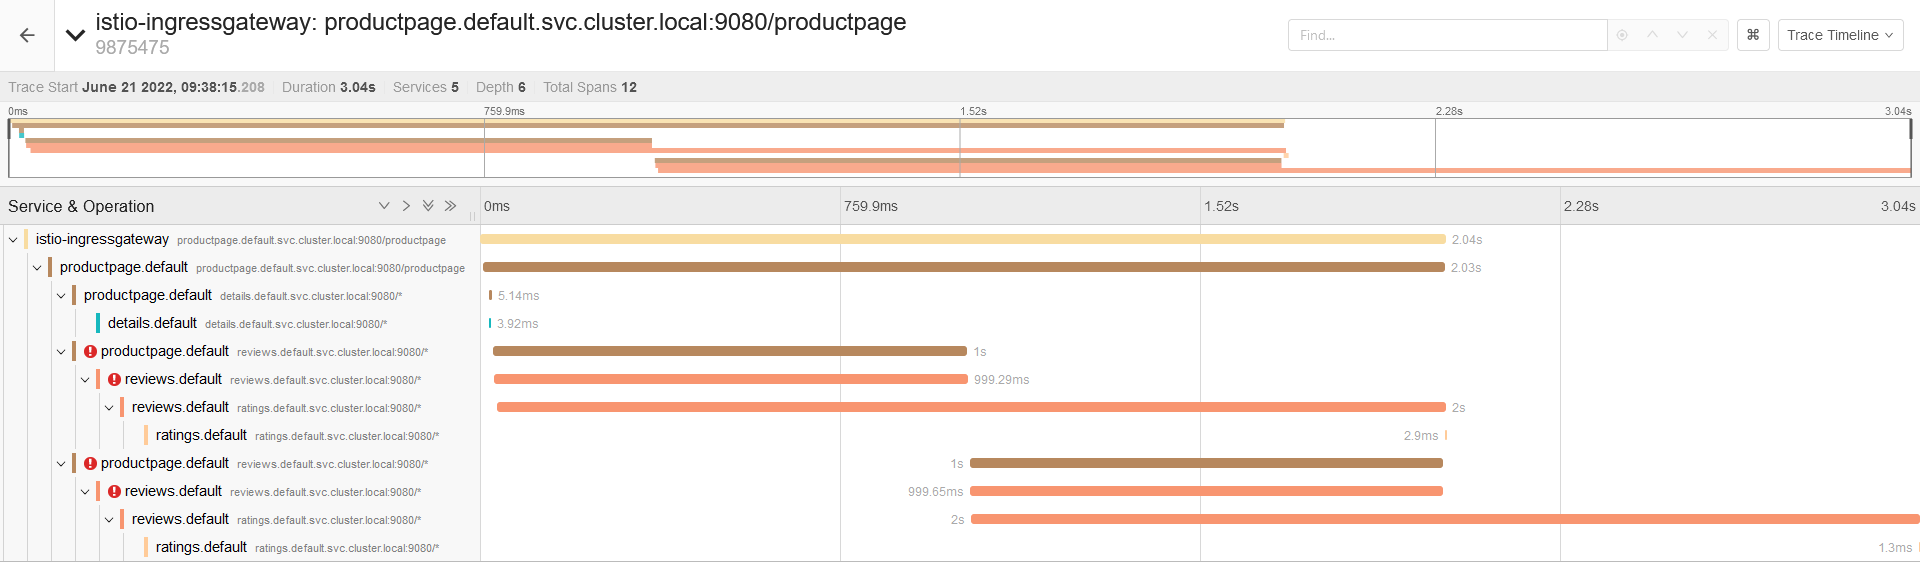
How many of the 10 most common examples of istio traffic management do you know?
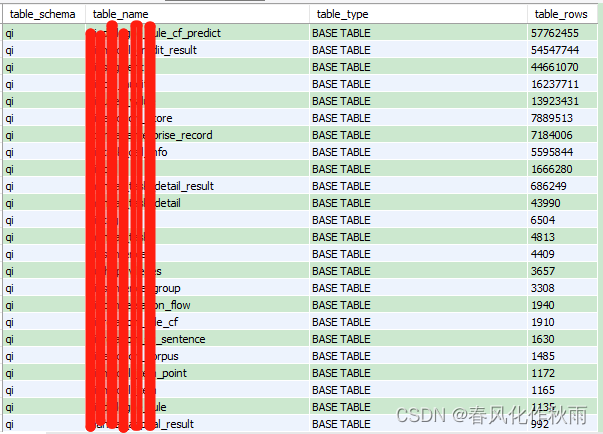
查询mysql数据库中各表记录数大小

C language -- structs, unions, enumerations, and custom types
随机推荐
[introduction to Django] 11 web page associated MySQL single field table (add, modify, delete)
The Research Report "2022 RPA supplier strength matrix analysis of China's banking industry" was officially launched
PTA tiantisai l1-078 teacher Ji's return (15 points) detailed explanation
Thread sleep, thread sleep application scenarios
math_极限&微分&导数&微商/对数函数的导函数推导(导数定义极限法)/指数函数求导公式推导(反函数求导法则/对数求导法)
Global and Chinese markets for patent hole oval devices 2022-2028: Research Report on technology, participants, trends, market size and share
1291_Xshell日志中增加时间戳的功能
Mlapi series - 04 - network variables and network serialization [network synchronization]
【FPGA教程案例11】基于vivado核的除法器设计与实现
ESP32_ FreeRTOS_ Arduino_ 1_ Create task
深入浅出node模板解析错误escape is not a function
Determine which week of the month the day is
STC8H开发(十二): I2C驱动AT24C08,AT24C32系列EEPROM存储
2/13 qaq~~ greed + binary prefix sum + number theory (find the greatest common factor of multiple numbers)
记一次excel XXE漏洞
Scalpel like analysis of JVM -- this article takes you to peek into the secrets of JVM
Solution of storage bar code management system in food industry
80% of the diseases are caused by bad living habits. There are eight common bad habits, which are both physical and mental
[001] [stm32] how to download STM32 original factory data
Unity中几个重要类