当前位置:网站首页>Move base parameter analysis and experience summary
Move base parameter analysis and experience summary
2022-07-07 13:32:00 【Plum fruit tea】
List of articles
Preface
gmapping Drawing , Then you can use the built map to locate and avoid obstacles . If you do this task , It's natural to think of , Static obstacles and dynamic obstacles are handled hierarchically , This is why , Static layer 、 Barrier layer and expansion layer . And let the robot reach the target position , How to reach between the current point and the target point , Need a global “ eye ”——global_planner, In the process of overall planning , Encountered obstacles , Local adjustment is needed , So it introduces local planer.
According to official website nav_core The description here ,ROS1 Built in three global planning algorithms : global_planner、navfn and carrot planner.
among navfn Is the most common and default global planner , It uses Dijkstra’s Algorithm to calculate the shortest path between the initial position and the target position .carrot_planner The applicability of is not strong , Generally, it is more effective in some specific scenarios ( For example, let the robot move to the scene as close to the obstacle as possible ).global_planner Can be said to be navfn Updated version of , although navfn Built in Dijkstra’s and A Implementation of two algorithms , But in earlier versions A The implementation of the algorithm is somewhat bug Not fixed , So I think navfn It uses Dijkstra’s Algorithm , In the upgrade of later versions, in order to be compatible with the old version , So keep navfn But also introduced global_planner,global_planner Both provide Dijkstra’s and A* Implementation of algorithm , It also supports customized global planner plug-ins , To say than navfn More flexible .
Actually, it's just a kind of , The second is because there is something left bug Replaced by the first , The third kind is mainly used when the target is very close to the obstacle or in the obstacle , Actually, few people configure it . According to the following search, there are two kinds global planner, What you are interested in can be studied :
http://wiki.ros.org/dlux_global_planner
https://github.com/ros-planning/navigation_experimental/tree/melodic-devel/sbpl_lattice_planner
in general move_base The configuration of is inseparable from this 6 File , At most, these are just a few .
- global_costmap & local_costmap Shared files , utilize namespace Load separately costmap_common_params.yaml
- global_costmap_params.yaml Setting of global cost map
- local_costmap_params.yaml Setting of local cost map
- move_base_params.yaml controller move_base Its own settings
- global_planner_params.yaml Global planner settings
- local_planner_params.yaml Setting of local planner
move_base.launch
<?xml version="1.0"?>

<launch>
  <!-- Arguments -->
  <arg name="cmd_vel_topic" default="/cmd_vel" />
  <arg name="odom_topic" default="odom" />
  <arg name="move_forward_only" default="false"/>

  <!-- move_base -->
  <node pkg="move_base" type="move_base" respawn="false" name="move_base" output="screen">
    <param name="base_local_planner" value="dwa_local_planner/DWAPlannerROS" />
    <rosparam file="$(find robot_nav)/param/costmap_common_params.yaml" command="load" ns="global_costmap" />
    <rosparam file="$(find robot_nav)/param/costmap_common_params.yaml" command="load" ns="local_costmap" />
    <rosparam file="$(find robot_nav)/param/local_costmap_params.yaml" command="load" />
    <rosparam file="$(find robot_nav)/param/global_costmap_params.yaml" command="load" />
    <rosparam file="$(find robot_nav)/param/move_base_params.yaml" command="load" />
    <rosparam file="$(find robot_nav)/param/local_planner_params.yaml" command="load" />
    <rosparam file="$(find robot_nav)/param/global_planner_params.yaml" command="load" />

    <remap from="cmd_vel" to="$(arg cmd_vel_topic)"/>
    <remap from="odom" to="$(arg odom_topic)"/>
    <param name="DWAPlannerROS/min_vel_x" value="0.0" if="$(arg move_forward_only)" />
  </node>
</launch>
Start up move_base Node time , The first four parameters are related to the configuration cost map , First of all, I loaded costmap_common_params.yaml To global_costmap and local_costmap In two namespaces , Because the configuration file is a general cost map configuration parameter , namely local_costmap and global_costmap You need to configure parameters . And then the next local_costmap_params.yaml It is a parameter specially configured for local cost map ,global_costmap_params.yaml It is a parameter specially configured for the global cost map . The latter three are the parameters related to the configuration path planning .
One 、costmap_common_params.yaml
#robot_radius: 0.20
footprint: [[0.22, 0.22], [-0.22, 0.22], [-0.22, -0.22], [0.22, -0.22]] # Real is 0.2

# map_type: voxel # From turtlebot2, 3D map
# map_type: costmap # From turtlebot3, 2D map

obstacle_layer:
  enabled:              true
  obstacle_range: 3.0 #  The planning considers the obstacles within a few meters
  raytrace_range: 3.5 #  Remove obstacles within a few meters in real time
  max_obstacle_height:  0.5
  unknown_threshold:    15
  mark_threshold:       0
  combination_method:   1
  track_unknown_space:  true    #true needed for disabling global path planning through unknown space
  origin_z: 0.0
  z_resolution: 0.2
  z_voxels: 2
  publish_voxel_map: false
  observation_sources:  scan
  scan:
    data_type: LaserScan
    topic: scan
    marking: true
    clearing: true
    min_obstacle_height: 0.05
    max_obstacle_height: 0.5


#  Expansive layer , It is used to mark a layer of dangerous areas outside the obstacles , It is necessary to avoid this dangerous area during path planning
inflation_layer:
  enabled:              true
  cost_scaling_factor:  4.0  #  Because in the formula cost_scaling_factor Multiplied by a negative number , Therefore, increasing the scale factor will reduce the cost  (default: 10)
  inflation_radius:     0.5  # max. distance from an obstacle at which costs are incurred for planning paths.

static_layer:
  enabled:              true
Let's explain the meaning of each parameter in turn :
- footprint: Each coordinate represents a point on the robot , Set the center of the robot to [0,0], According to different shapes of robots , Find the protruding coordinate points of the robot , For details, please refer to the following figure ( If it is a circular chassis robot , Set the radius directly : for example robot_radius: 0.5):
![[Pasted image 20220704173900.png]]
- map_type: Map type , Here for costmap( Cost map ). Another map type is voxel( Voxel map ). The difference between the two is that the former is world 2D Express , The latter is the world's 3D Express .
- obstacle_layer: Configure obstacle layer
- enabled: Whether to enable this layer
- combination_method(default: 1): Can only be set to 0 or 1, Used to update the generation value on the map , Generally set as 1;
- track_unknown_space (default: false): If set to false, Then the generation value on the map is only divided into fatal collision and free area , If set to true, Then it is divided into fatal collisions , Free region and unknown region . This means that if the parameter is set to false Words , It means that unknown areas on the map will also be considered as areas that can move freely , In this way, when planning the global path , Some unexplored unknown areas can also be involved in path planning , If you need this, set this parameter to false. However, generally speaking, unexplored areas should not be regarded as areas that can move freely , Therefore, this parameter is generally set to true;
- obstacle_range(default: 2.5): Set the maximum range of obstacles detected by the robot , It means obstacles beyond this range , No testing , Only when it is close to this range, the obstacle is regarded as an obstacle that affects path planning and movement ;
- raytrace_range(default: 3.0): In the process of robot movement , The maximum range of obstacles on the cost map can be cleared in real time , Update freely movable spatial data . If the value is set to 3 rice , Then it means in 3 Obstacles within meters , Originally, there were , But this test did not , Then you need to update it on the cost map , Mark the space of the old obstacle as a space that can move freely
- observation_sources: Set the sensors used in navigation , Many sensors can be distinguished here in the form of commas , For example, lidar , Collision sensor , Ultrasonic sensors, etc , I only set up lidar here ;
- data_type: Lidar data type ;
- topic: The topic name released by the lidar ;
- marking: Whether the sensor can be used to mark obstacles ;
- clearing: Whether the sensor can be used to remove obstacles and mark them as free space ;
- max_obstacle_height(default: 2.0): Insert in meters costmap The maximum height of any obstacle . This parameter should be set slightly higher than the height of the robot .
- min_obstacle_height: Minimum height of sensor reading ( In meters ) Deemed valid . Usually set to ground level .
- inflation_layer: Expansive layer , It is used to mark a layer of dangerous areas outside the obstacles , It is necessary to avoid this dangerous area during path planning
- enabled: Whether to enable this layer ;
- cost_scaling_factor(default: 10.0): The scale factor applied to the generation value in the expansion process , Cost all the distance from the actual obstacle in the map from the inscribed circle radius to the expansion radius cell The following formula can be used to calculate the inflation cost :exp(-1.0 * cost_scaling_factor * (distance_from_obstacle – inscribed_radius)) * (costmap_2d::INSCRIBED_INFLATED_OBSTACLE – 1) In the formula costmap_2d::INSCRIBED_INFLATED_OBSTACLE Currently designated as 254, Be careful : Because in the formula cost_scaling_factor Multiplied by a negative number , Therefore, increasing the scale factor will reduce the cost .
- inflation_radius(default: 0.55): Expansion radius , The expansion layer will expand the obstacle until the radius , Generally, this value is set to the diameter of the robot chassis .
- Static_layer: Static map layer , namely SLAM Map layer built in
- enabled: Whether to enable this map layer ;
Two 、global_costmap_params.yaml Base system map
global_costmap:
  global_frame: map
  robot_base_frame: base_link
  update_frequency: 1.0  #  Global map , Usually set a relatively small 、 stay 1.0 To 5.0 Between the value of the .  In Hertz
  publish_frequency: 0.5 #  For static global maps , No need to publish constantly
  static_map: true

  transform_tolerance: 0.5

  plugins:
    - {
    name: static_layer,            type: "costmap_2d::StaticLayer"}
    - {
    name: obstacle_layer,          type: "costmap_2d::VoxelLayer"}
    - {
    name: inflation_layer,         type: "costmap_2d::InflationLayer"}
The following is the meaning of the parameters in the global cost map configuration file :
- global_frame: Under which coordinate system does the global cost map need to run ;
- robot_base_frame: In the global cost map, the base coordinate system of the robot ontology , It's the root coordinate system on the robot . adopt global_frame and robot_base_frame You can calculate the transformation between two coordinate systems , We know the coordinates of the robot in the global coordinate system ;
- update_frequency: Global cost map update frequency ( Company :Hz), Generally, the global cost map update frequency setting is relatively small ;
- publish_frequency: Frequency of global cost map release ( Company :Hz).
- static_map: Configure whether to use map_server Provide a map to initialize ; If you don't need to use the existing map or map_server, Best set to false;
- rolling_window: Whether it is necessary to scroll the window during the robot movement , Always keep the robot in the center of the current window ;
- transform_tolerance: The maximum time delay that the transformation between coordinate systems can endure .
- plugins: stay global_costmap We use the following three plug-ins to fuse three different layers , Namely static_layer、obstacle_layer and inflation_layer, Synthesis of a master_layer For global path planning .
3、 ... and 、local_costmap_params.yaml Base system odom
local_costmap:
  global_frame: odom
  robot_base_frame: base_link
  update_frequency: 10.0
  publish_frequency: 10.0
  static_map: false
  rolling_window: true
  width: 4.0
  height: 4.0
  resolution: 0.05
  transform_tolerance: 0.5

  plugins:
   - {
    name: obstacle_layer,      type: "costmap_2d::ObstacleLayer"}
   - {
    name: inflation_layer,     type: "costmap_2d::InflationLayer"}
The following is a detailed explanation of the meaning of each parameter :
- global_frame: The global coordinate system in the local cost map , Generally, it needs to be set to odom_frame;
- robot_base_frame: The base coordinate system of the robot body ;
- update_frequency: Update frequency of local cost map ;
- publish_frequency: Release frequency of local cost map ;
- static_map: The local cost map is generally not set as a static map , Because it is necessary to detect whether there are new dynamic obstacles near the robot ;
- rolling_window: Use scrolling windows , Always keep the robot in the center of the current local map ;
- width: The width of the scrolling window , The unit is meters ;
- height: Height of scrolling window , The unit is meters ;
- resolution: The resolution of the map , The resolution can be obtained from the configuration file corresponding to the loaded map ;
- transform_tolerance: The maximum tolerable delay of the transformation between coordinate systems in the local cost map ;
- plugins: In the local cost map , No static map layer is required , Because we use scrolling windows to constantly scan obstacles , So we need to integrate the two-tier map (inflation_layer and obstacle_layer) that will do , The fused map is used for local path planning .
Four 、move_base_params.yaml
The parameters here can be set here , It can also be on the top launch Set in file . For example, sometimes you will see in launch It is specified in global perhaps local planner .
base_global_planner—— default: navfn/NavfnROS
base_local_planner—— default: base_local_planner/TrajectoryPlannerROS
<node pkg="move_base" type="move_base" respawn="false" name="move_base" output="screen">

    <param name="base_global_planner" value="global_planner/GlobalPlanner" />
    <param name="base_local_planner" value="dwa_local_planner/DWAPlannerROS" />
Another thing to note service: make_plan; When you only need the result of the planned path without the robot actually executing , Sure call This service To get . For example, you need a path , You can do this with other trackers .
#base_global_planner: navfn/NavfnROS
#base_global_planner: global_planner/GlobalPlanner
#base_local_planner: base_local_planner/TrajectoryPlannerROS
#base_local_planner: dwa_local_planner/DWAPlannerROS
controller_frequency: 10.0  # default 20.0
planner_patience: 5.0
controller_patience: 15.0
conservative_reset_dist: 3.0
recovery_behavior_enabled: true
clearing_rotation_allowed: true
shutdown_costmaps: false
oscillation_timeout: 10.0
oscillation_distance: 0.2
planner_frequency: 5.0
The following is a detailed explanation of the meaning of each parameter :
- controller_frequency: default: 20.0
- planner_patience (double, default: 5.0) Before performing a space cleanup operation , How long will the planner wait ( In seconds ) To try to find effective planning results .
- controller_patience (double, default: 15.0)
- conservative_reset_dist (double, default: 3.0)
- recovery_behavior_enabled (bool, default: true) Is it enabled? move_base To try to reset the space .
- clearing_rotation_allowed (bool, default: true) Determine whether the robot will try to rotate in place when trying to reset space . Be careful : Only when using the default recovery behavior , Only use this parameter , This means that the user has not yet recovery_behaviors The parameter is set to any custom .
- shutdown_costmaps:default: false, When move_base Whether to close the node when it is inactive costmaps
- oscillation_timeout (double, default: 0.0) The time allowed to oscillate before performing the recovery behavior ( In seconds ). value 0.0 Corresponds to an infinite timeout
- oscillation_distance (double, default: 0.5) How far must a robot move to be considered non oscillatory . Moving the distance to this distance will reset the timer count to ~oscillation_timeout
- planner_frequency (double, default: 0.0) The rate at which the global planning cycle runs ( With Hz In units of ). If the frequency is set to 0.0, Then the global planner will only run when a new target is received or the local planner reports that its path is blocked
5、 ... and 、global_planner_params.yaml
global_planner - ROS Wiki Official explanation
GlobalPlanner:
  allow_unknown: false  # Default true, Whether to allow the path to pass through the unknown area
  default_tolerance: 0.2  # Default 0.0, Target tolerance
  visualize_potential: false # Default false, Whether to display from PointCloud2 The calculated potential region
  use_dijkstra: true # Default true,true Said the use of dijkstra's Otherwise use A*
  use_quadratic: true # Default true,true It means using quadratic function to approximate function
  use_grid_path: false # Default false,true Indicates that the path is generated along the grid boundary , Otherwise, use the gradient descent algorithm
  old_navfn_behavior: false # Default false, Copy or not navfn Planner results
  lethal_cost: 253 # Default 253, Deadly value
  neutral_cost: 50 # Default 50, Medium generation value
  cost_factor: 3.0 # Default 3.0, Cost factor
  publish_potential: true # Default true, Publish or not costmap The potential function of
  orientation_mode: 0 # Default 0, Set the direction of the point
  orientation_window_size: 1 # Default 1, according to orientation_mode The specified position integral determines the window direction
Let's explain the meaning of each parameter in turn :
- allow_unknown(default: true): Whether the planner is allowed to plan the path through the unknown area , Only design this parameter as true Not yet , Still in costmap_commons_params.yaml Set in track_unknown_space The parameter is false Talent .
- default_tolerance(default: 0.0): When the set destination is occupied by obstacles , Take this parameter as the radius to find the nearest point as the new destination .
- visualize_potential(default: false): Whether to display from PointCloud2 The calculated potential region .
- use_dijkstra(default: true): If set to true, Will use dijkstra Algorithm , Otherwise use A* Algorithm .
- use_quadratic(default: true): If set to true, A quadratic function will be used to approximate the function , Otherwise, use a simpler calculation , This saves hardware computing resources .
- use_grid_path(default: false): If set to true, Then a path along the grid boundary will be planned , Tends to cross the grid in a straight line , Otherwise, the gradient descent algorithm will be used , The path is smoother .
- old_navfn_behavior(default: false): If in some cases , Want to make global_planner Copy completely navfn The function of , Then set it to true, But we need to pay attention navfn It's very old ROS Used in the system , Now it has been used global_planner Instead of navfn 了 , Therefore, it is not recommended to set it to true.
- lethal_cost(default: 253): Deadly value
- neutral_cost(default: 50): Medium generation value
- cost_factor(default: 3.0): The factor by which the cost map multiplies the value of each generation
- publish_potential(default: true): Publish or not costmap The potential function of
- orientation_mode(default: 0): How to set the direction of each point (None = 0,Forward = 1,Interpolate = 2,ForwardThenInterpolate = 3,Backward = 4,Leftward = 5,Rightward = 6)
- orientation_window_size(default: 1): according to orientation_mode Specify the position integral to get the direction of the use window .
6、 ... and 、local_planner_params.yaml
Here we use the commonly used DWA For example ,DWA Compare with TEB Relatively few parameters , The meaning is also very clear , There will be more resources on the Internet .
DWAPlannerROS:

# Robot Configuration Parameters
  max_vel_x: 0.26
  min_vel_x: 0.0

  max_vel_y: 0.0
  min_vel_y: 0.0

# The velocity when robot is moving in a straight line
  max_vel_trans:  0.26
  min_vel_trans:  0.13

  max_vel_theta: 1.82
  min_vel_theta: 0.9

  acc_lim_x: 2.5
  acc_lim_y: 0.0
  acc_lim_theta: 3.2

# Goal Tolerance Parametes
  xy_goal_tolerance: 0.05
  yaw_goal_tolerance: 0.17
  latch_xy_goal_tolerance: false

# Forward Simulation Parameters
  sim_time: 2.0
  vx_samples: 20
  vy_samples: 0
  vth_samples: 40
  controller_frequency: 10.0

# Trajectory Scoring Parameters
  path_distance_bias: 32.0
  goal_distance_bias: 20.0
  occdist_scale: 0.02
  forward_point_distance: 0.325
  stop_time_buffer: 0.2
  scaling_speed: 0.25
  max_scaling_factor: 0.2

# Oscillation Prevention Parameters
  oscillation_reset_dist: 0.05

# Debugging
  publish_traj_pc : true
  publish_cost_grid_pc: true
Thank you for sharing , Reprint links :https://blog.csdn.net/yaked/article/details/125503202
边栏推荐
- Esp32 construction engineering add components
- clion mingw64中文乱码
- Cmake learning and use notes (1)
- JNA学习笔记一:概念
- Error lnk2019: unresolved external symbol
- Cloud detection 2020: self attention generation countermeasure network for cloud detection in high-resolution remote sensing images
- 迅为iTOP-IMX6ULL开发板Pinctrl和GPIO子系统实验-修改设备树文件
- [dark horse morning post] Huawei refutes rumors about "military master" Chen Chunhua; Hengchi 5 has a pre-sale price of 179000 yuan; Jay Chou's new album MV has played more than 100 million in 3 hours
- cmake 学习使用笔记(一)
- JNA learning notes 1: Concepts
猜你喜欢

高端了8年,雅迪如今怎么样?
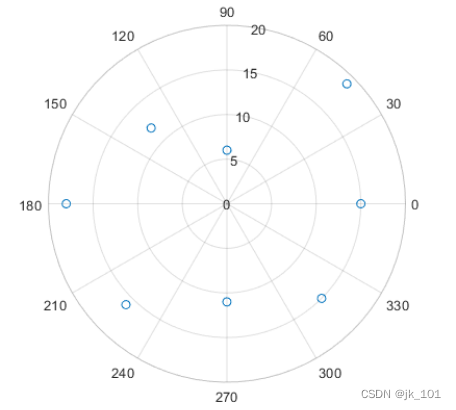
MATLAB中polarscatter函数使用
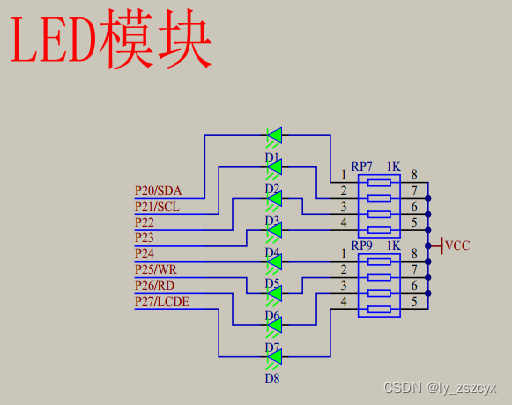
单片机学习笔记之点亮led 灯
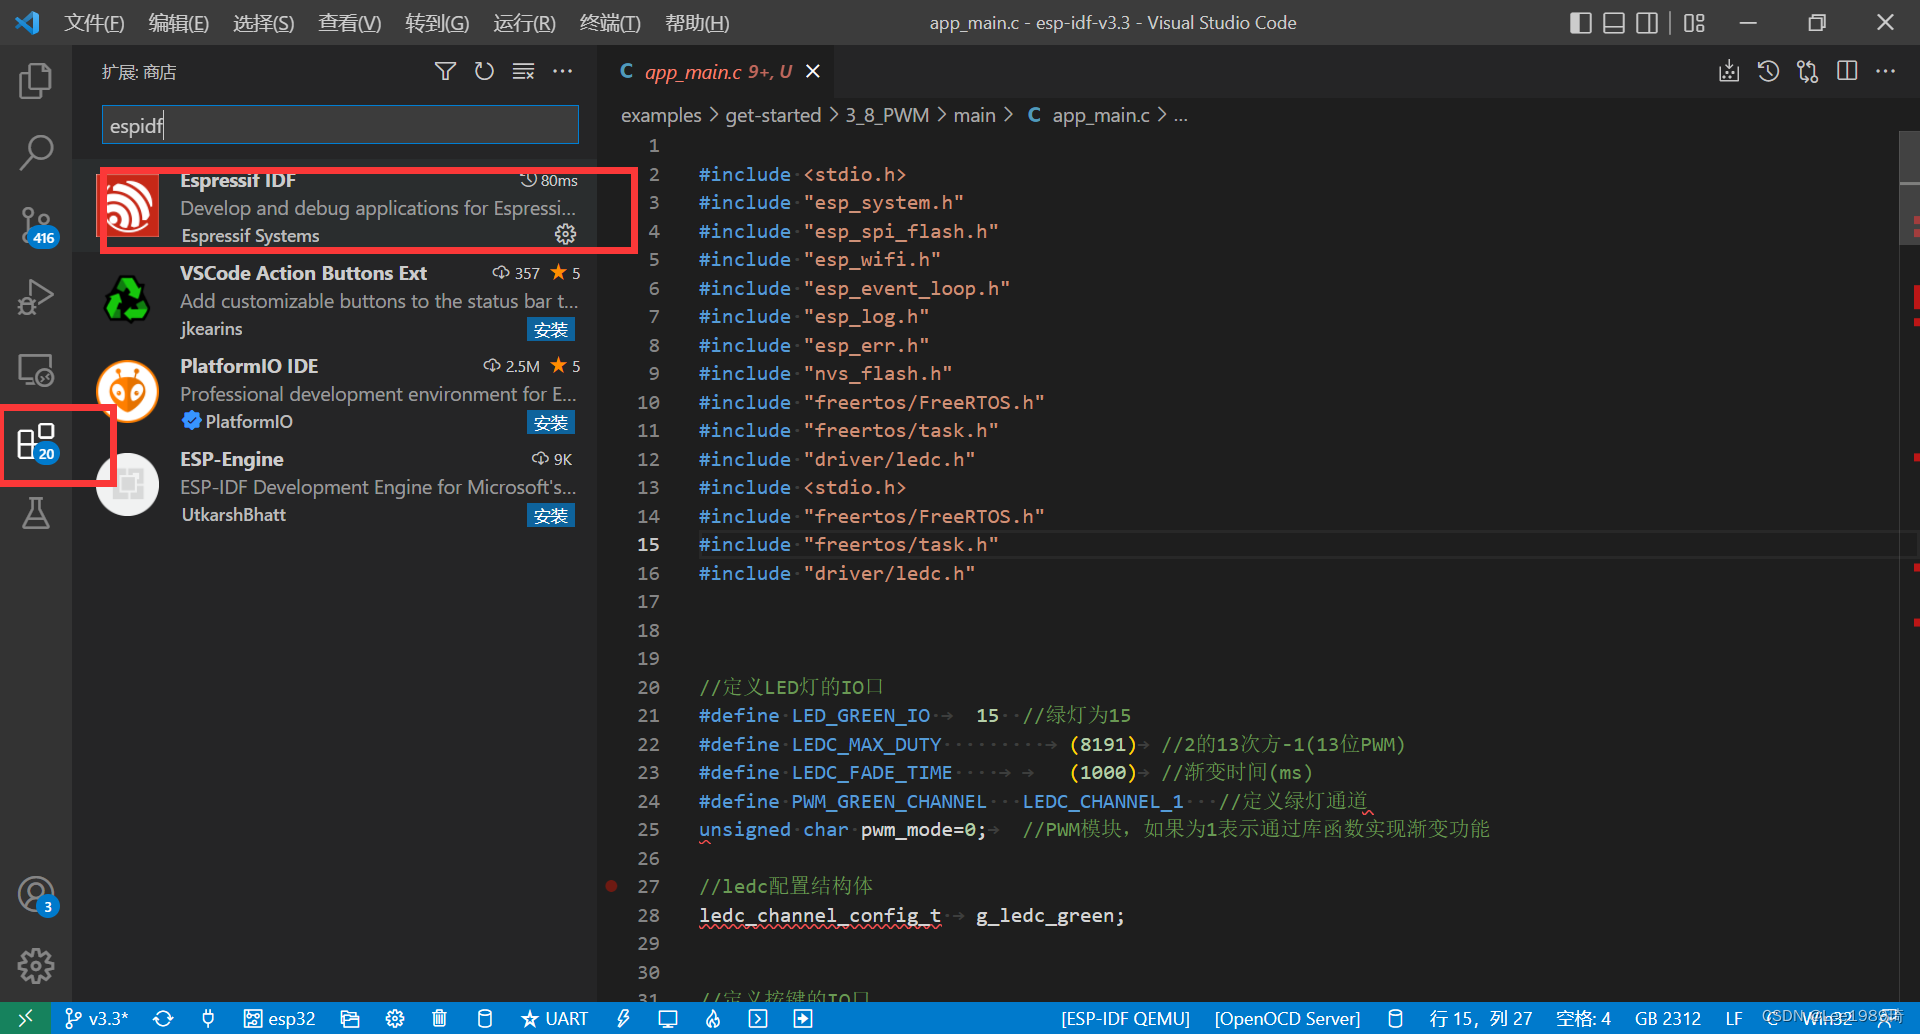
Vscade editor esp32 header file wavy line does not jump completely solved

Ogre入门尝鲜

10 pictures open the door of CPU cache consistency
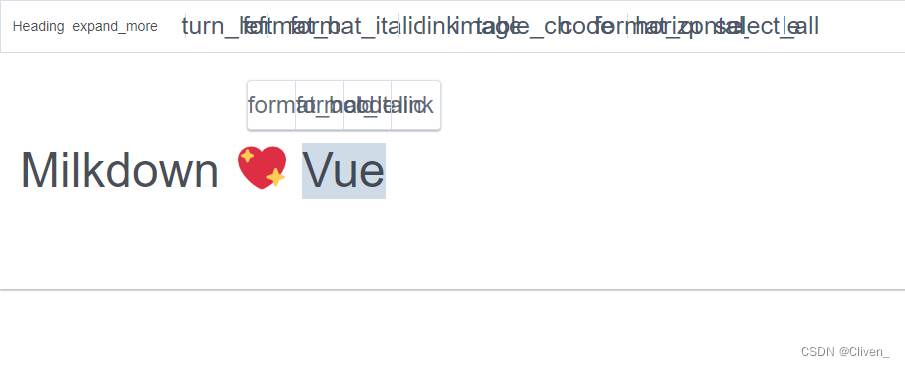
Milkdown 控件图标
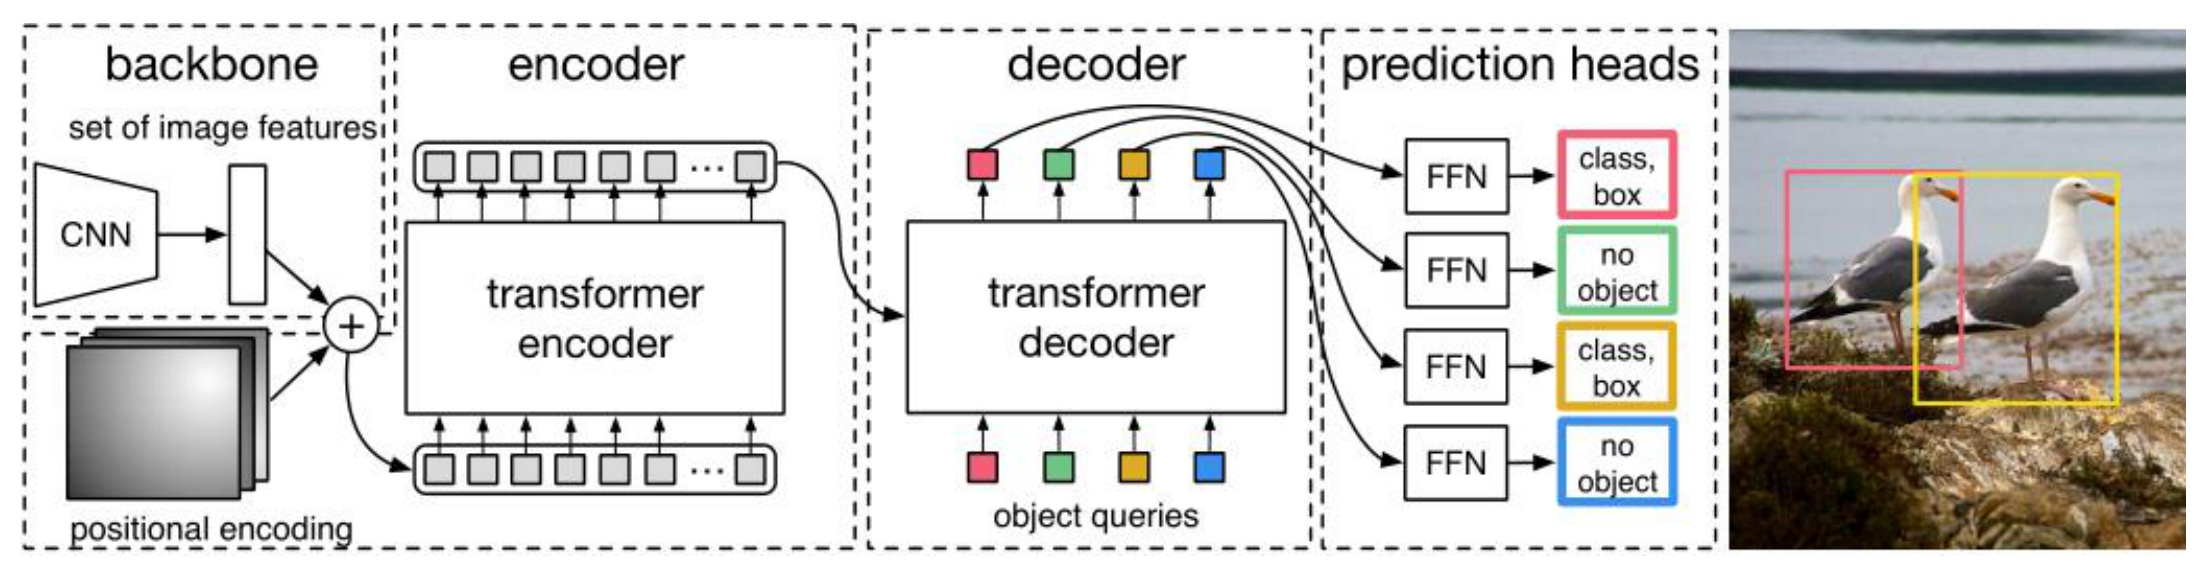
DETR介绍
聊聊伪共享

Fast development board pinctrl and GPIO subsystem experiment for itop-imx6ull - modify the device tree file
随机推荐
mysql 局域网内访问不到的问题
Milkdown 控件图标
Distributed transaction solution
Summary of import, export, backup and recovery of mongodb
MongoDB复制(副本集)总结
LIS longest ascending subsequence problem (dynamic programming, greed + dichotomy)
Show the mathematical formula in El table
最佳实践 | 用腾讯云AI意愿核身为电话合规保驾护航
Server to server (S2S) event (adjust)
《厌女:日本的女性嫌恶》摘录
PCAP学习笔记二:pcap4j源码笔记
[untitled]
Signal strength (RSSI) knowledge sorting
DETR介绍
MATLAB中polarscatter函数使用
Digital IC Design SPI
ROS机器人更换新雷达需要重新配置哪些参数
Getting started with MySQL
MongoDB的用户管理总结
Cloud detection 2020: self attention generation countermeasure network for cloud detection in high-resolution remote sensing images