当前位置:网站首页>[Zhao Yuqiang] deploy kubernetes cluster with binary package
[Zhao Yuqiang] deploy kubernetes cluster with binary package
2022-07-06 03:58:00 【Teacher zhaoyuqiang】

In the private environment of some enterprises, it may not be possible to connect to the external network . If you want to deploy in such an environment Kubernetes colony , Can collect Kubernetes Deploy by offline installation . namely : Deploy using binary installation packages Kubernetes colony , The version used is Kubernetes v1.18.20.
The following steps demonstrate how to deploy three nodes using binary packages Kubernetes colony . 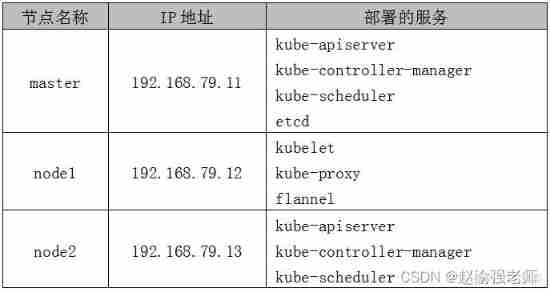
1. Deploy ETCD
(1) from GitHub Upload and download ETCD Binary installation package for “etcd-v3.3.27-linux-amd64.tar.gz”.
(2) from cfssl Download the required media on the official website , And install cfssl.
Tips : cfssl Is a command line toolkit , This toolkit contains all the functions needed to run a certification authority .
(3) Create for generating CA Configuration files for certificates and private keys , Execute the following command :
(4) Generate CA Certificate and private key .
(5) In the catalog “/opt/ssl/etcd” Add file below “etcd-csr.json”, This file is used to generate ETCD Certificate and private key of , The contents are as follows :
Tips : There is only one deployed ETCD The node of . If it's deployment ETCD colony , You can modify the fields “hosts” Add multiple ETCD The node can be .
(6) install ETCD.
(7) Edit the file “/opt/platform/etcd/etcd.conf” add to ETCD Configuration information , The contents are as follows :
(8) take ETCD Services are added to system services , Edit the file “/usr/lib/systemd/system/etcd.service” The contents are as follows :
(9) establish ETCD Data storage directory , Then start ETCD service .
(10) verification ETCD The state of .
The output information is as follows :
(11) see ETCD Member list for .
The output information is as follows :
Tips : Because it is single node ETCD, So there is only one member information .
(12) take ETCD Copy of certificate file node1 and node2 Node .

2. Deploy Flannel The Internet
(1) stay master Write the allocated subnet segment on the node to ETCD Medium supply Flannel Use , Carry out orders :
(2) stay master View the written on the node Flannel Subnet information , Carry out orders :
The output information is as follows :
(3) stay node1 Decompress flannel-v0.10.0-linux-amd64.tar.gz Installation package , Carry out orders :
(4) stay node1 To create a Kubernetes working directory .
(5) stay node1 Defined on the Flannel Script files “ flannel.sh”, Enter the following :
(6) stay node1 Turn on the node Flannel Network function , Carry out orders :
Tips : It is specified here that master Deployed on the node ETCD Address .
(7) stay node1 View on the node Flannel The state of the network , Carry out orders :
The output information is as follows :
(8) stay node1 Modify the file on the node “/usr/lib/systemd/system/docker.service” To configure node1 nodes Docker Connect Flannel The Internet , Add the following line to the file :
(9) stay node1 Restart on node Docker service .
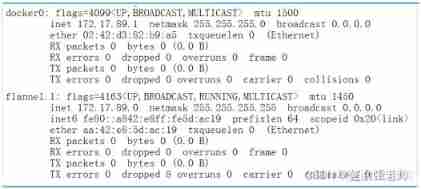
(10) see node1 nodes Flannel Internet Information , Pictured 13-3 Shown :
(11) stay node2 Configuration on node Flannel The Internet , Repeat the first 3 Step to step 10 Step .
3. Deploy Master node
(1) establish Kubernetes Cluster certificate Directory .
(2) Create script file “ k8s-cert.sh” Used to generate Kubernetes Certificate of cluster , Enter the following in the script :
(3) Execute script file “ k8s-cert.sh”.
(4) Copy certificate .
(5)) decompression kubernetes Compressed package
(6) Copy key command file
(7) Randomly generated serial number .
The output is as follows :
(8) establish “/opt/kubernetes/cfg/token.csv” file , Enter the following :
(9) establish API Server Configuration file for “/opt/kubernetes/cfg/kube-apiserver.conf”, Enter the following :
(10) Using the system's systemd To manage API Server, Carry out orders :
(11) start-up API Server.
(12) see API Server The state of .
The output information is as follows :
(13) View listening ports 6433 And port 8080 Information , Pictured 13-4 Shown .

(14) to grant authorization kubelet-bootstrap Users are allowed to request certificates .
(15) establish kube-controller-manager Configuration file for , Carry out orders :
(16) Use systemd Service to manage kube-controller-manager, Carry out orders
(17) start-up kube-controller-manager.
(18) see kube-controller-manager The state of .
The output information is as follows :
(19) establish kube-scheduler Configuration file for , Carry out orders :
(20) Use systemd Service to manage kube-scheduler, Carry out orders :
(21) start-up kube-scheduler.
(22) see kube-scheduler The state of .
The output information is as follows :
(23) see master Status information of the node .
The output information is as follows :
4. Deploy Node node
(1) stay master Create a script file on the node “kubeconfig”, Enter the following :
(2) Execute script file “kubeconfig”.
The output information is as follows :
(3) take master Copy the configuration file generated on the node to node1 Nodes and node2 node .
(4) stay node1 Unzip the file on the node “kubernetes-node-linux-amd64.tar.gz”.
(5) stay node1 The node will kubelet and kube-proxy Copy to directory “/opt/kubernetes/bin/” Next .
(6) stay node1 Create a script file on the node “ kubelet.sh”, Enter the following :
(7) stay node1 Execute the script file on the node “ kubelet.sh”.
Tips : Specified here node1 Node IP Address .
(8) stay node1 View on the node Kubelet The state of .
The output information is as follows :
kubelet.service - Kubernetes Kubelet Loaded: loaded (/usr/lib/systemd/system/kubelet.service; enabled; vendor preset: disabled) Active: active (running) since Tue 2022-02-08 23:23:52 CST; 3min 18s ago
(9) stay node1 Create a script file on the node “ proxy.sh”, Enter the following
(10) stay node1 Execute the script file on the node “ proxy.sh”.
(11) stay node1 View on the node kube-proxy The state of .
The output information is as follows :
(12) stay master Check on the node node1 The request information of the node to join the cluster , Carry out orders :
The output information is as follows :
(13) stay master Approved on node node1 Node's request , Carry out orders :
(14) stay master View on the node Kubernetes Node information in the cluster , Carry out orders :
The output information is as follows :
Tips : Now node1 The node has successfully joined Kubernetes In the cluster .
(15) stay node2 Repeat step 4 Step to step 14 Step , In the same way node2 Nodes join the cluster . (16) stay master View on the node Kubernetes Node information in the cluster , Carry out orders :
The output information is as follows :
So far, we have successfully deployed three nodes using binary packages Kubernetes colony .
边栏推荐
- Thread sleep, thread sleep application scenarios
- JS Vanke banner rotation chart JS special effect
- Cf603e pastoral oddities [CDQ divide and conquer, revocable and search set]
- asp. Core is compatible with both JWT authentication and cookies authentication
- 80% of the diseases are caused by bad living habits. There are eight common bad habits, which are both physical and mental
- 3.1 detailed explanation of rtthread serial port device (V1)
- 如何修改表中的字段约束条件(类型,default, null等)
- Network security - Security Service Engineer - detailed summary of skill manual (it is recommended to learn and collect)
- [practical exercise] face location model based on skin color
- 在 .NET 6 中使用 Startup.cs 更简洁的方法
猜你喜欢

Stc8h development (XII): I2C drive AT24C08, at24c32 series EEPROM storage
Esp32 (based on Arduino) connects the mqtt server of emqx to upload information and command control
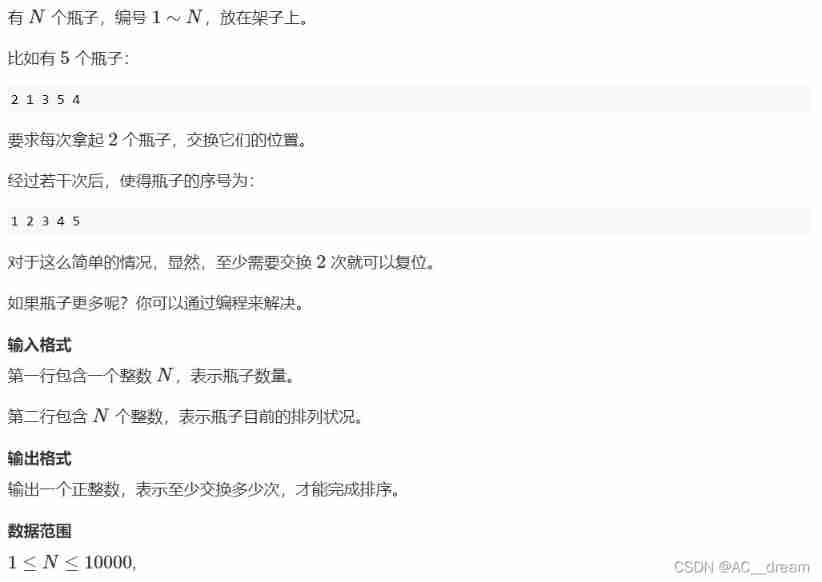
Exchange bottles (graph theory + thinking)
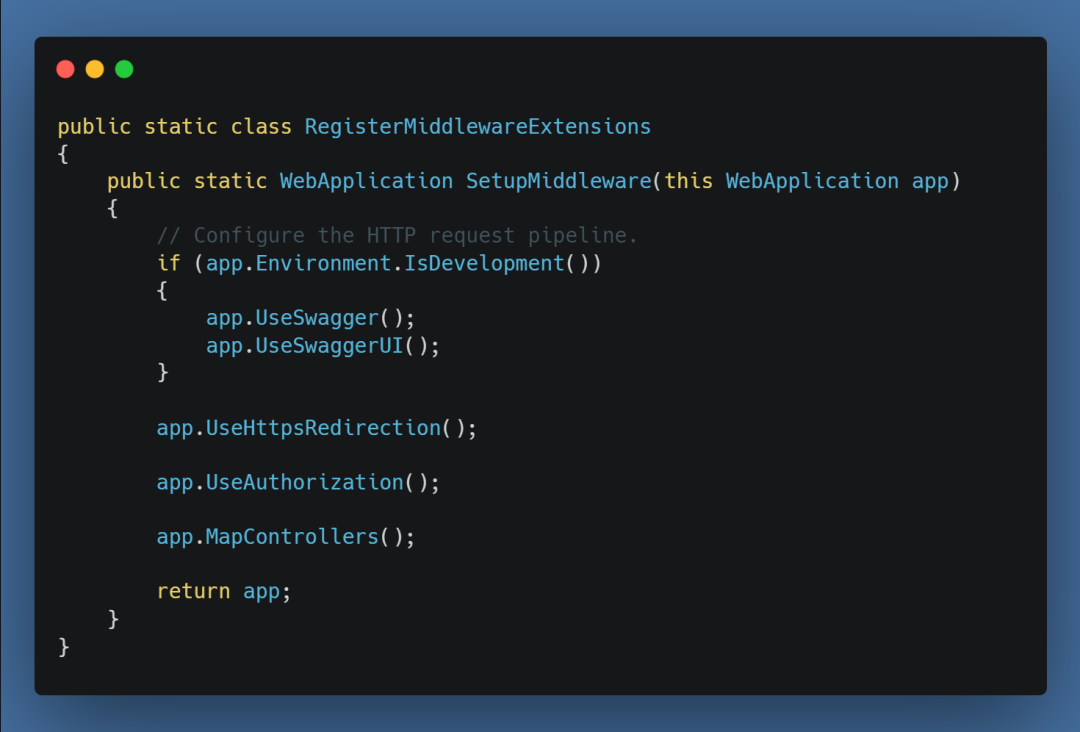
In Net 6 CS more concise method

WPF effect Article 191 box selection listbox
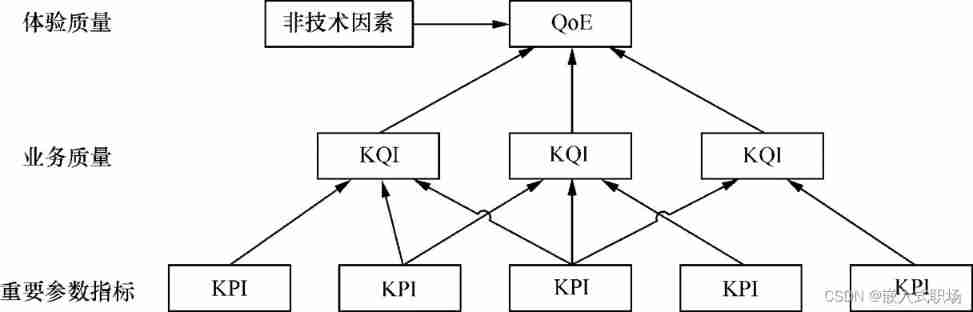
User experience index system
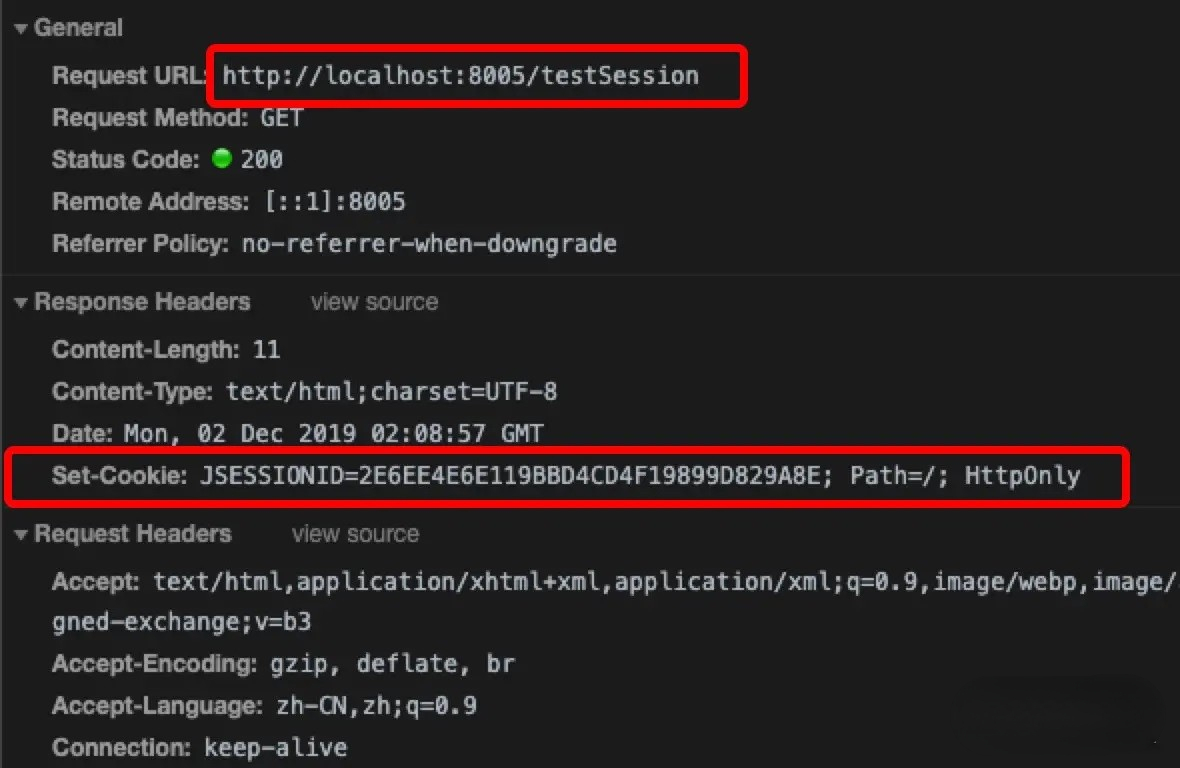
cookie,session,Token 这些你都知道吗?
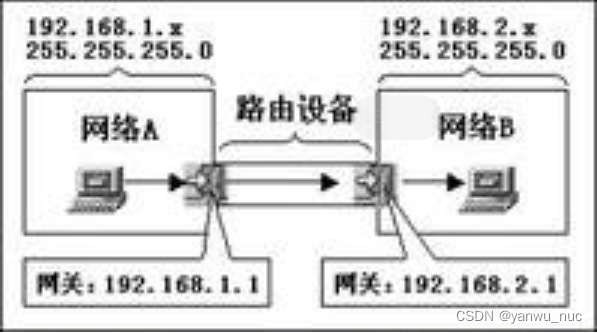
TCP/IP协议里面的网关地址和ip地址有什么区别?
Redis (replicate dictionary server) cache
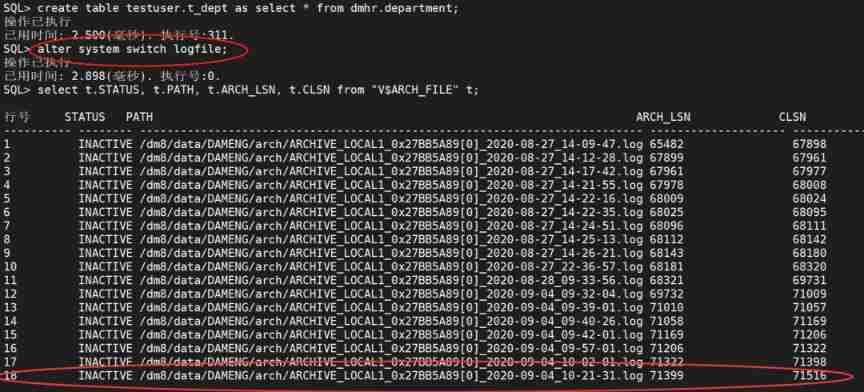
DM8 archive log file manual switching
随机推荐
DM8 archive log file manual switching
C#(三十一)之自定义事件
Blue Bridge Cup - Castle formula
20、 EEPROM memory (AT24C02) (similar to AD)
How to standardize the deployment of automated testing?
Overview of super-resolution reconstruction of remote sensing images
asp. Core is compatible with both JWT authentication and cookies authentication
MySQL reads missing data from a table in a continuous period of time
[prediction model] difference method model
Record the pit of NETCORE's memory surge
51nod 1130 n factorial length V2 (Stirling approximation)
Indicator system of KQI and KPI
Proof of Stirling formula
KS008基于SSM的新闻发布系统
阿里测试师用UI自动化测试实现元素定位
ESP32(基于Arduino)连接EMQX的Mqtt服务器上传信息与命令控制
Schnuka: what is visual positioning system and how to position it
简述C语言中的符号和链接库
【leetcode】1189. Maximum number of "balloons"
cookie,session,Token 这些你都知道吗?