当前位置:网站首页>【ROS】usb_ Cam camera calibration
【ROS】usb_ Cam camera calibration
2022-07-06 08:34:00 【Will_ Ye】
1. Nagging two sentences
When we want to use the camera for measurement , You need to calibrate the camera , Otherwise, the calculated result will have a big error , The calibration includes three parts : Internal reference , External parameters and distortion parameters . So the calibration process requires the above parameters .
It was probably troublesome to do this before , Experiments and calculations are needed to get , Now through ros The open source package of can complete camera calibration in a few minutes , Appreciate !
Specific description of the internal and external parameters distortion coefficient , You can see Reference The first link inside , It's very detailed .
2. preparation
There are three things to prepare :
- usb_cam Of ROS Start the package
- Camera calibration ROS package
- There is also a checkerboard for calibration
1)usb_cam Start the package
Use what I uploaded usb_cam edition , I don't know why GitHub The downloaded version is not good , This usb_cam The version is also sent by others , It's strange , I can study it later , See what's different , Both of them can turn on the camera , Just use GitHub After opening the version of ,apriltag_ros Do not output the correct value . Download here
Download after decompression , Put it in the corresponding work space in src In the document , for example catkin_ws
And then use catkin_make compile
And then use ls /dev/video* have a look usb Camera number , If
[email protected]:~/omni_ws$ ls /dev/video*
/dev/video0  /dev/video1  /dev/video2  /dev/video3
My notebook has webcam Another external camera is connected , Actually, two cameras have four numbers , In fact, only 0 and 2 Just go , They correspond to each other webcam and usb cam, The other two won't work , And then modify usb_cam/launch/usb_cam-test.launch
<launch>
  <node name="usb_cam" pkg="usb_cam" type="usb_cam_node" output="screen" >
    <param name="video_device" value="/dev/video0" />
    <param name="image_width" value="640" />
    <param name="image_height" value="480" />
    <param name="pixel_format" value="yuyv" />
    <param name="camera_frame_id" value="usb_cam" />
    <param name="io_method" value="mmap"/>
  </node>
  <node name="image_view" pkg="image_view" type="image_view" respawn="false" output="screen">
    <remap from="image" to="/usb_cam/image_raw"/>
    <param name="autosize" value="true" />
  </node>
</launch>
The main thing is to modify the <param name="video_device" value="/dev/video0" /> This one is ok , The default is 0, Change to /dev/video2 Just go
Then start roslaunch usb_cam usb_cam-test.launch
If there is an image, it will succeed .
2)ROS Camera calibration package
Very convenient , direct apt-get You can download and use :sudo apt-get install ros-melodic-camera-cibration
3) Print checkerboard
You can go to Google or Baidu Search for one , Something like this 
Then figure out two things :
first , This is the chessboard size, For example, this one above is a 4x6 Of , Just count the intersections of the four grids. How many are there in a row , And a few in a column
the second , Determine the size of the grid , Measure according to the printed results , The picture above , I use A4 Paper printing , The side length of the printed grid is 0.026m, That is to say 2.6cm, Also measure the length and width of the lattice , See if it's really a square .
It is important to determine the above two points , The following input will use
3. Start calibration
Start the camera first , Then start the calibration procedure roslaunch usb_cam usb_cam-test.launchrosrun camera_calibration cameracalibrator.py --size 4x6 --square 0.026 image:=/usb_cam/image_raw camera:=/usb_cam
The second instruction above is to start the calibration procedure , You need to input the chessboard size and square Corresponding to the two values mentioned above
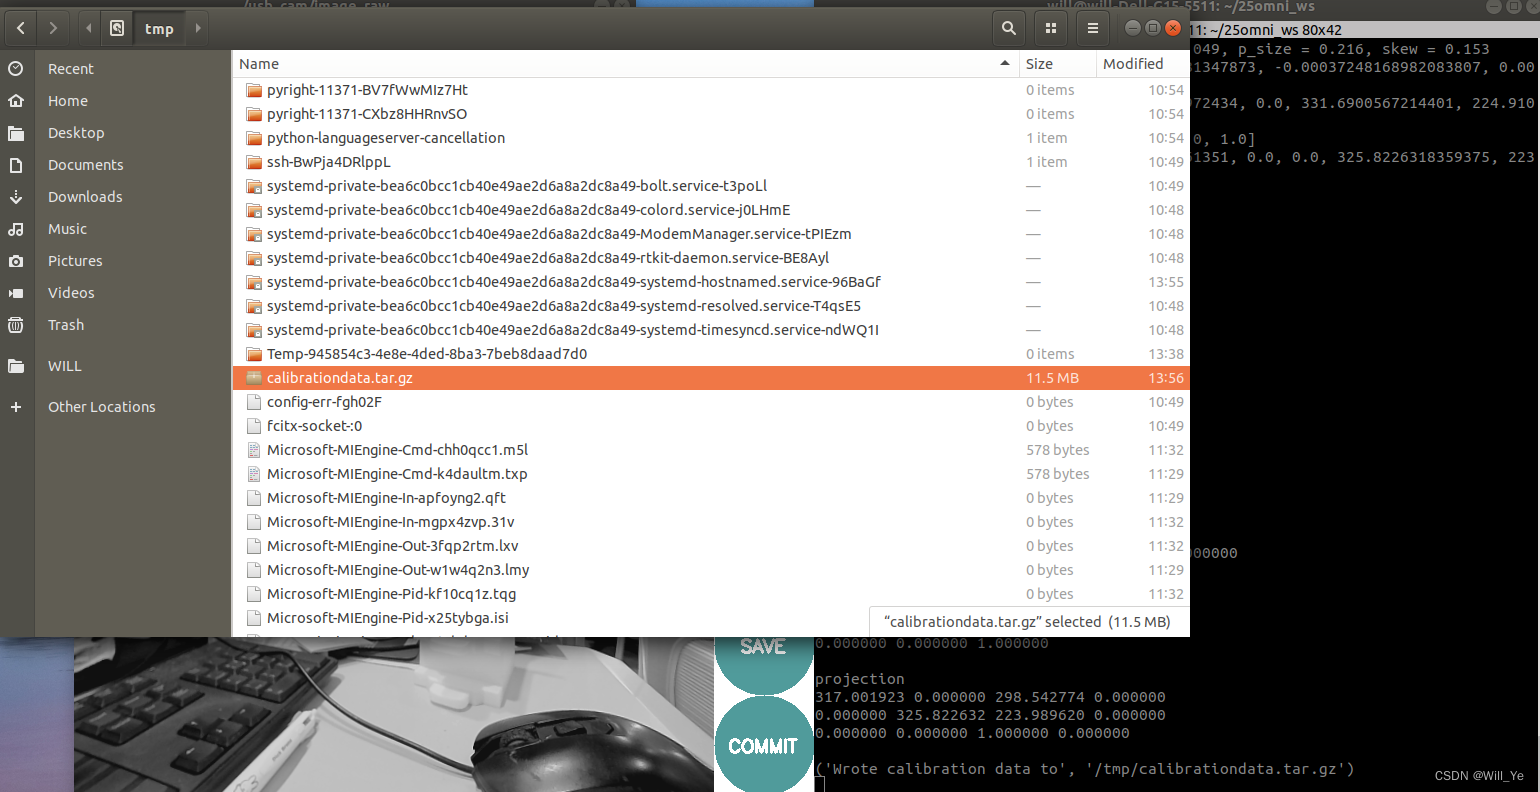
Then you will see the following interface :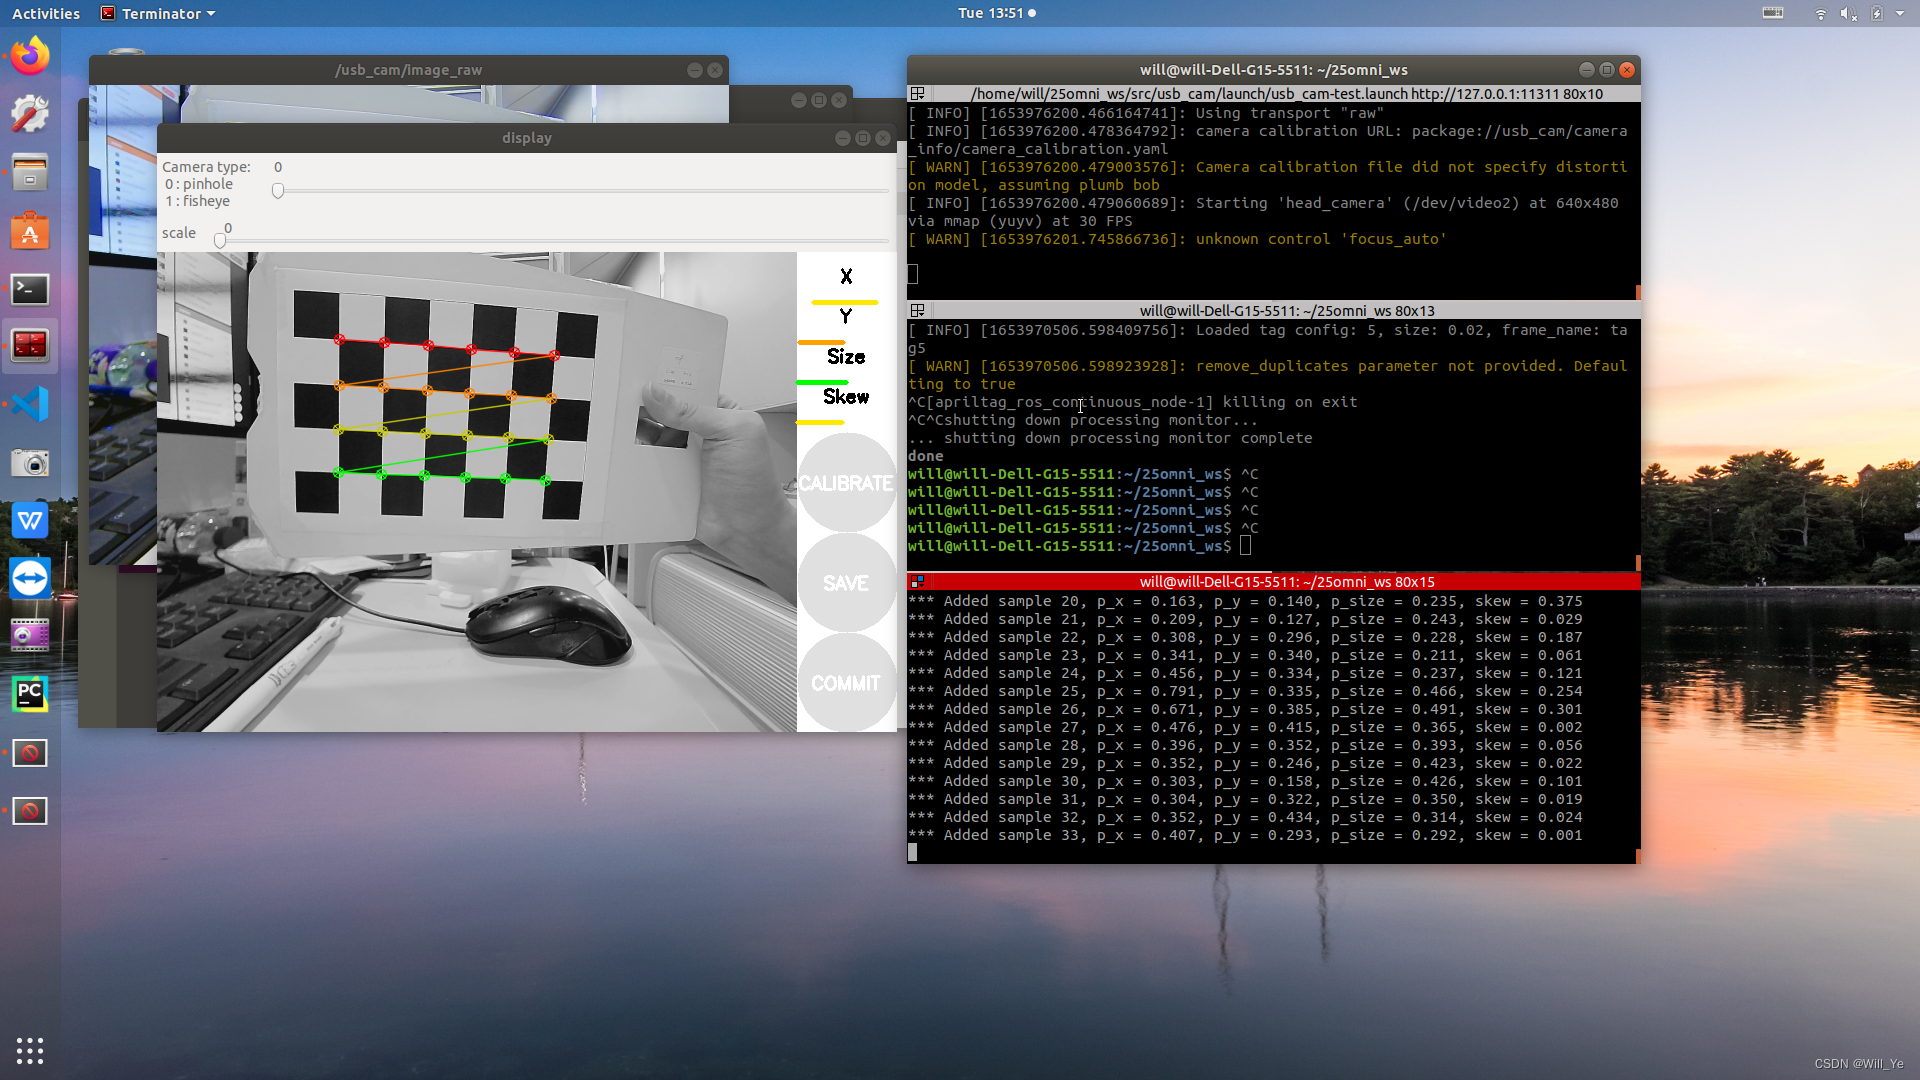 On the interface of the calibration program, you can see X Y Size Skew also CALIBRATE, SAVE and COMMIT The logo of
X: Indicates the left and right position of the calibration plate in the field of view
Y: The position on the calibration plate in the lower field of view
Size: Indicates the size of the calibration plate in the field of view , In fact, it's the distance from the camera
Skew: Indicates the inclination angle of the calibration plate in the field of view
After opening the program , You can start to adjust the position of the calibration plate , Let it move and rotate in various positions in the camera's field of view , Give Way X Y Size and Skew The bar below these four values turns green , And then you can see CALIBRATE This button turns blue , Click to start calculating camera parameters , This process needs to wait for a while , Wait patiently 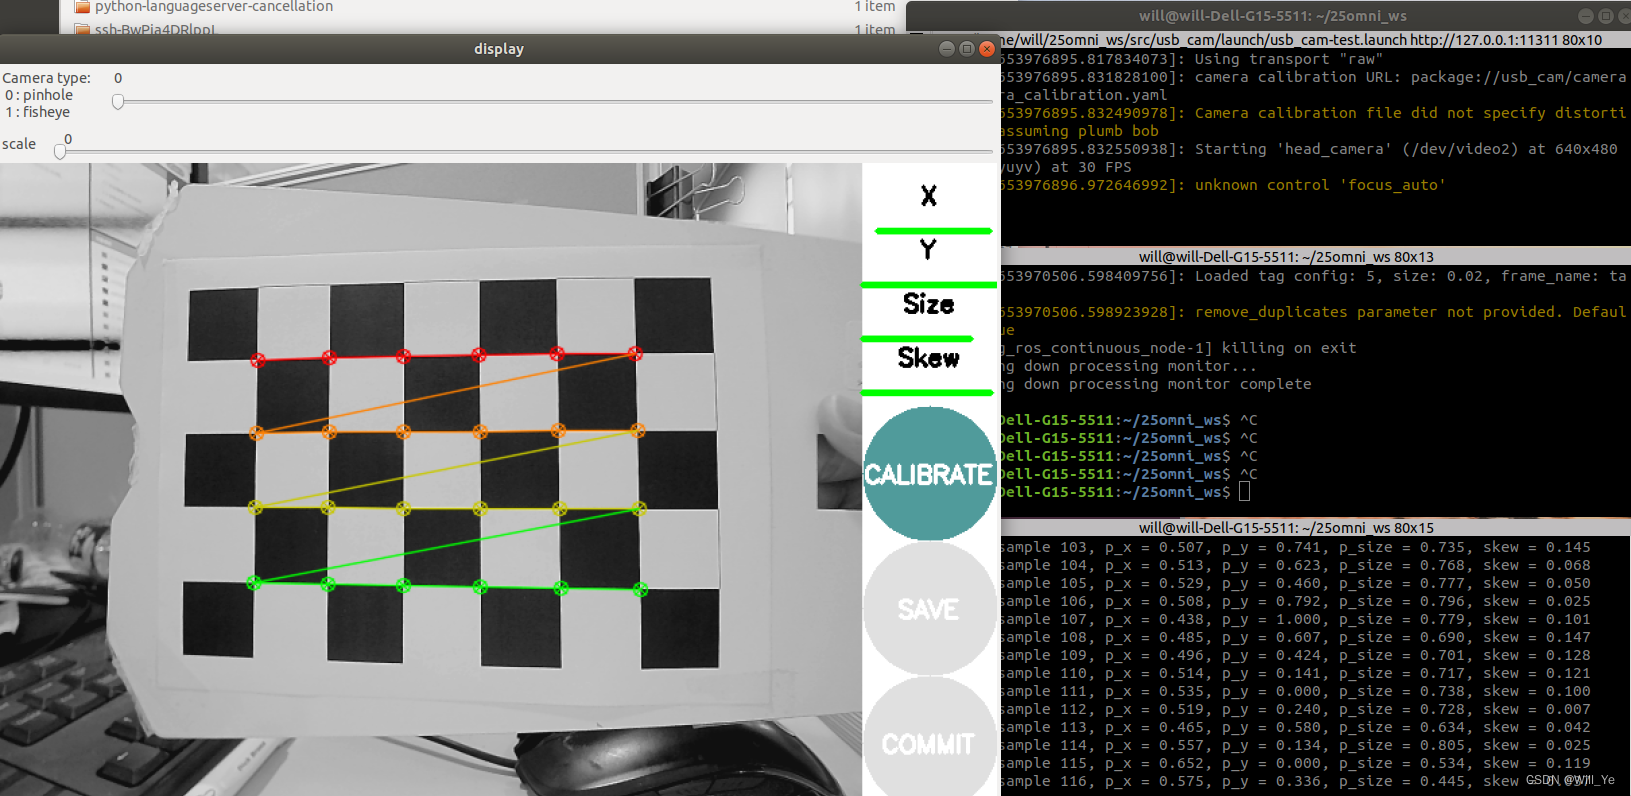
When the calculation is finished , You can go to terminal See the following data 
then SAVE The button will also turn blue , Click on SAVE Button will save the data to the default directory .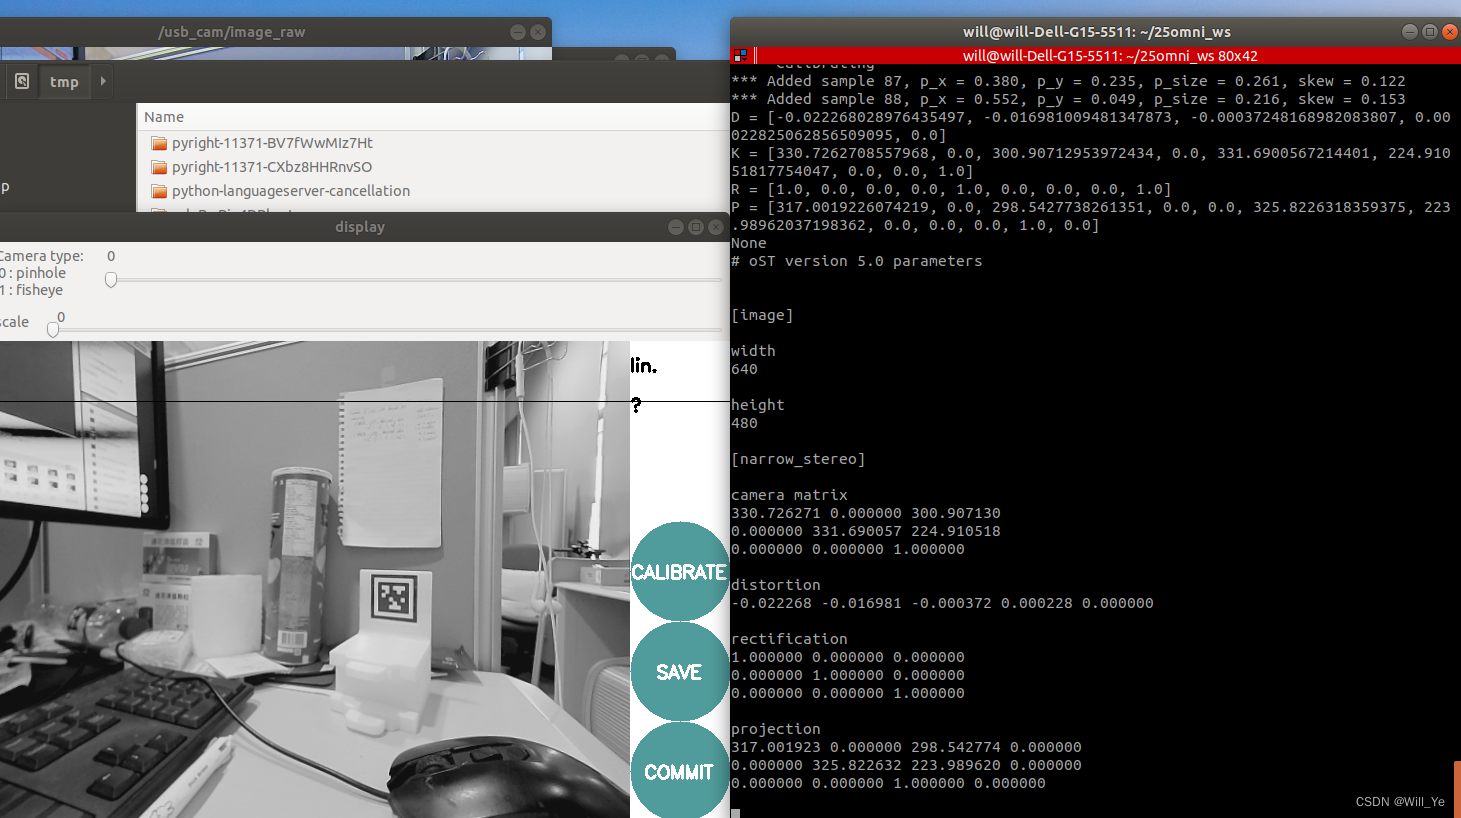
This catalog is in /tmp/calibrationdata.tar.gz
Open the package , There are pictures just collected , And save the parameters of the camera , as follows :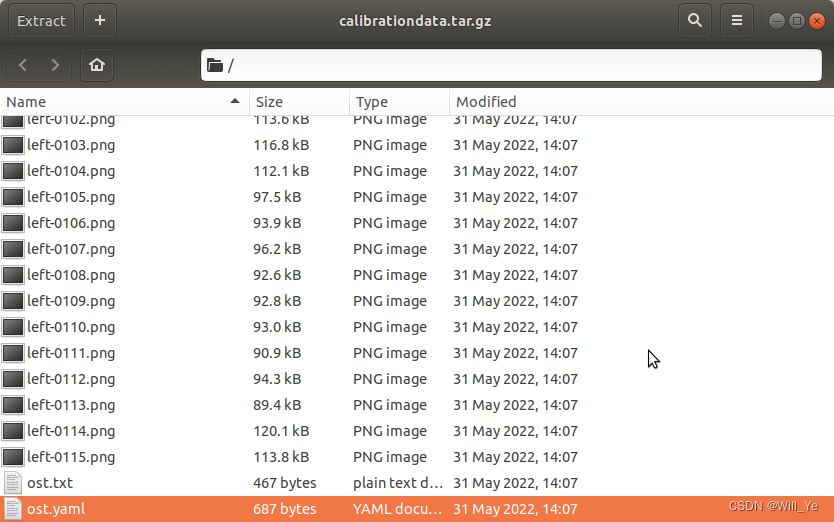
Put this inside ost.yaml Unzip and put it in usb_cam Of src Under the table of contents , Then change your name , such as camera_calibration20220531.yaml, I like to put these configuration files in a folder , Then write down the path
And then it's the last step , open launch file , Add one more line to import camera parameters :
<launch>
  <node name="usb_cam" pkg="usb_cam" type="usb_cam_node" output="screen" >
    <param name="video_device" value="/dev/video2" />
    <param name="image_width" value="640" />
    <param name="image_height" value="480" />
    <param name="pixel_format" value="yuyv" />
    <param name="camera_info_url" value="package://usb_cam/camera_info/camera_calibration20220531.yaml"/>
    <param name="camera_frame_id" value="usb_cam" />
    <param name="io_method" value="mmap"/>
  </node>
  <node name="image_view" pkg="image_view" type="image_view" respawn="false" output="screen">
    <remap from="image" to="/usb_cam/image_raw"/>
    <param name="autosize" value="true" />
  </node>
</launch>
Then follow the usual roslaunch start-up usb cam That's all right. , Then you can compare the measurement results before and after calibration , You will find that the accuracy has been greatly improved .
Reference
- Step1: Model 16 Camera parameters ( Internal reference 、 External reference 、 Distortion parameters ):
https://blog.csdn.net/weixin_43206570/article/details/84797361
边栏推荐
- 个人电脑好用必备软件(使用过)
- tree树的精准查询
- synchronized 解决共享带来的问题
- China polyether amine Market Forecast and investment strategy report (2022 Edition)
- Cisp-pte practice explanation
- LDAP Application Section (4) Jenkins Access
- Wincc7.5 download and installation tutorial (win10 system)
- Indentation of tabs and spaces when writing programs for sublime text
- Image fusion -- challenges, opportunities and Countermeasures
- Summary of phased use of sonic one-stop open source distributed cluster cloud real machine test platform
猜你喜欢
Trying to use is on a network resource that is unavailable
2022.02.13 - NC004. Print number of loops
JS native implementation shuttle box
优秀的软件测试人员,都具备这些能力
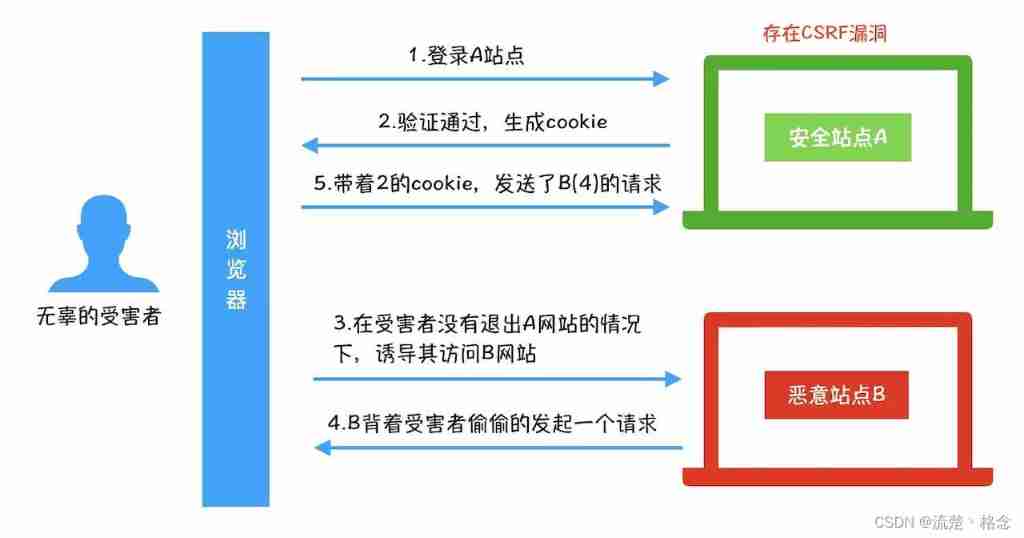
What is CSRF (Cross Site Request Forgery)?
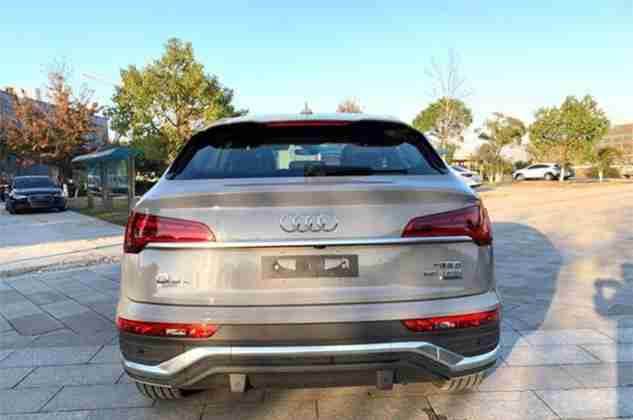
The ECU of 21 Audi q5l 45tfsi brushes is upgraded to master special adjustment, and the horsepower is safely and stably increased to 305 horsepower
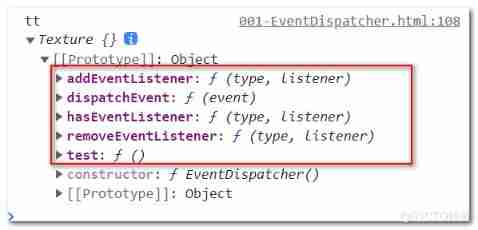
Yyds dry goods inventory three JS source code interpretation eventdispatcher
PC easy to use essential software (used)
C語言雙指針——經典題型
FairGuard游戏加固:游戏出海热潮下,游戏安全面临新挑战
随机推荐
Yyds dry goods inventory three JS source code interpretation eventdispatcher
Online yaml to CSV tool
Process of obtaining the electronic version of academic qualifications of xuexin.com
tree树的精准查询
目标检测——Pytorch 利用mobilenet系列(v1,v2,v3)搭建yolov4目标检测平台
JVM 快速入门
The mysqlbinlog command uses
MySQL learning record 11jdbcstatement object, SQL injection problem and Preparedstatement object
移位运算符
visdom可视化实现与检查介绍
win10系统中的截图,win+prtSc保存位置
【Nvidia开发板】常见问题集 (不定时更新)
企微服务商平台收费接口对接教程
2022.02.13 - 238. Maximum number of "balloons"
Pointer advanced --- pointer array, array pointer
China high purity silver nitrate Market Research and investment strategy report (2022 Edition)
IOT -- interpreting the four tier architecture of the Internet of things
Research Report on supply and demand and development prospects of China's high purity aluminum market (2022 Edition)
TCP/IP协议
swagger设置字段required必填