当前位置:网站首页>Vs code configuration latex environment nanny level configuration tutorial (dual system)
Vs code configuration latex environment nanny level configuration tutorial (dual system)
2022-07-08 01:04:00 【Sleepy without water】
as everyone knows , Microsoft recently launched its own programming software visual studio code , This lightweight open source programming software , It's really adorable , It can not only be used on it python, It can also carry various operating environments , For example, it is often used Latex、Matlab、Freefem、C++ Such as software , Can be in vs code Upper use , It's just too powerful , The configuration tutorial function of relevant software will be updated later .

Every time before using these third-party software , You need to configure its running environment , also vs code The frequency of updates is also very fast , So some languages of the code also need to be updated in real time , The author is a little white , So put these easy-to-use tutorials (windows Version and mac edition ) And programming records , Easy to modify later hahahaha .
One 、vs code Download, install and configure the locale
1.1 vs code Download and install
vs code Installation is very simple, no more , Search official website [1], Choose a suitable version to install .
1.2 vs code Language environment
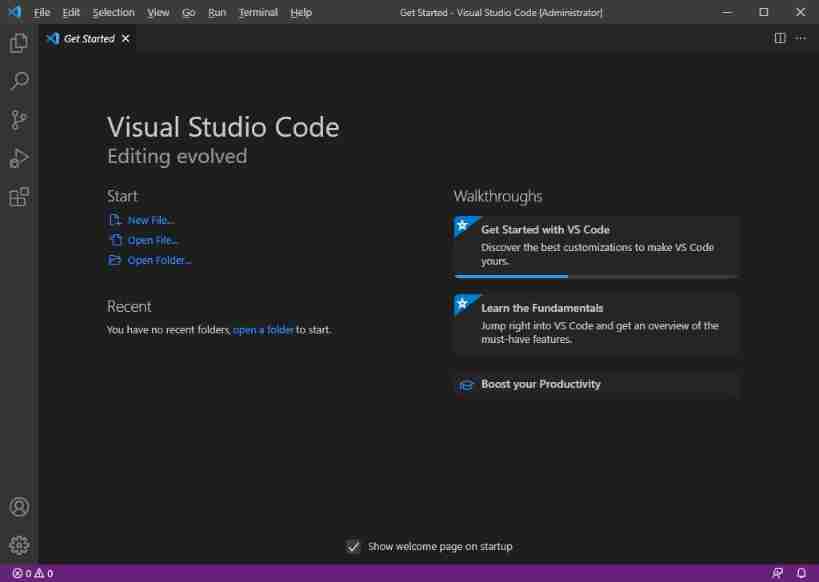
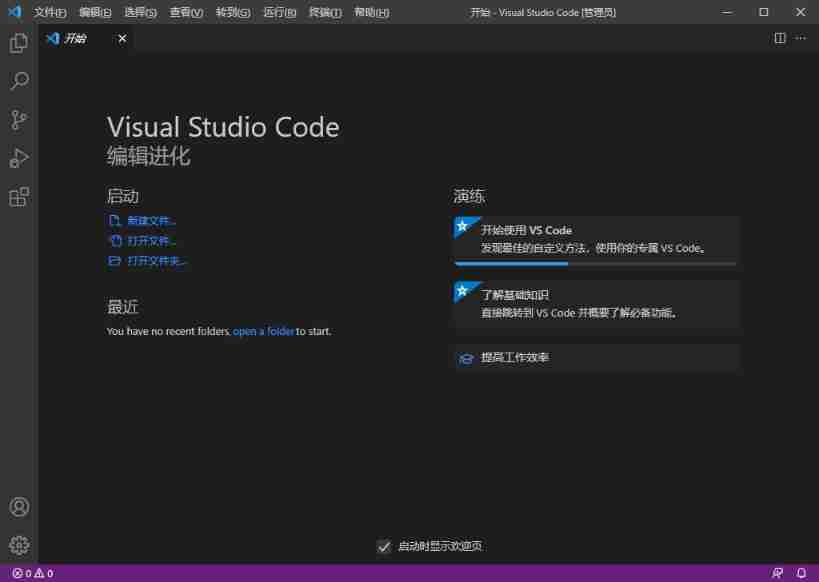
After installing this lightweight software, the interface is as follows :

For general software, we set the language , Directly find the language options in the settings , Find Chinese and switch back , but vs code The language setting of requires this operation :
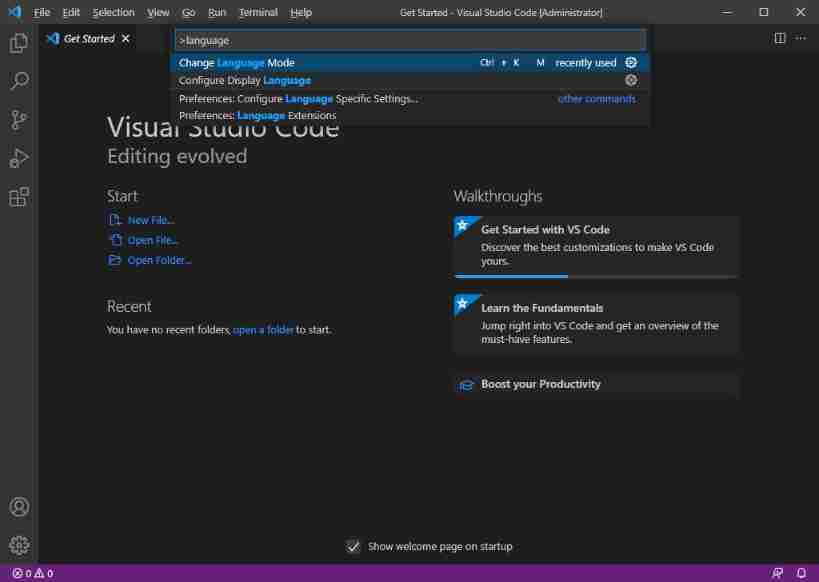
Shortcut key 【control + shift + p】 The following search box will pop up
Enter... In the search box 【language】 This option appears 【Configure Display Language】, Click ok .
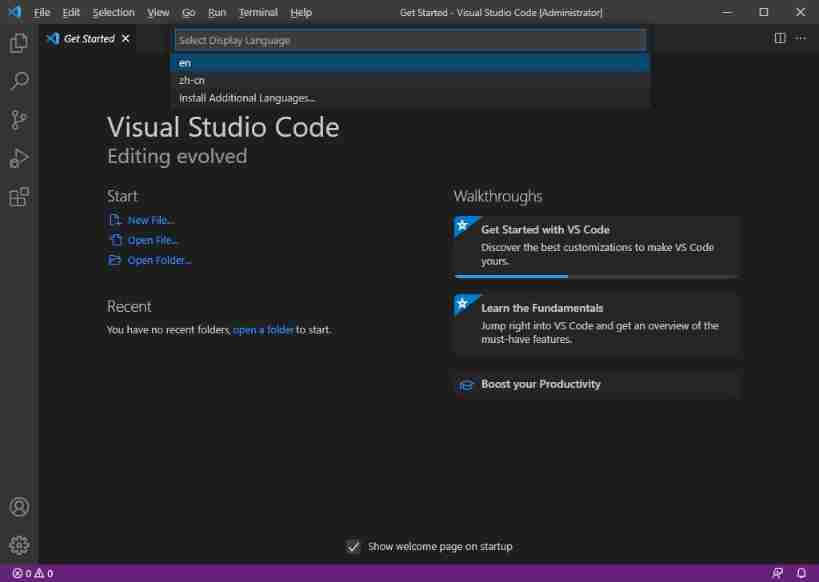
Then choose 【zh-cn】, Follow the prompts to restart , It switches to the Chinese interface .
The Chinese interface is as follows :
Come here , We will take vs code Installation and configuration complete .
1.3 install Sumatra PDF
find Sumatra PDF Official website [4], This software installation is the simplest , Most software installation processes are similar , But be sure to remember the installation path , Because the installation path is required below , We need to configure to vs code On .
1.4 Download and install textlive compiler
If you want to install textive compiler (windows), There are two image websites Alibaba cloud open source image websites [2]、 Huawei open source [3] Can download . The interfaces are as follows :

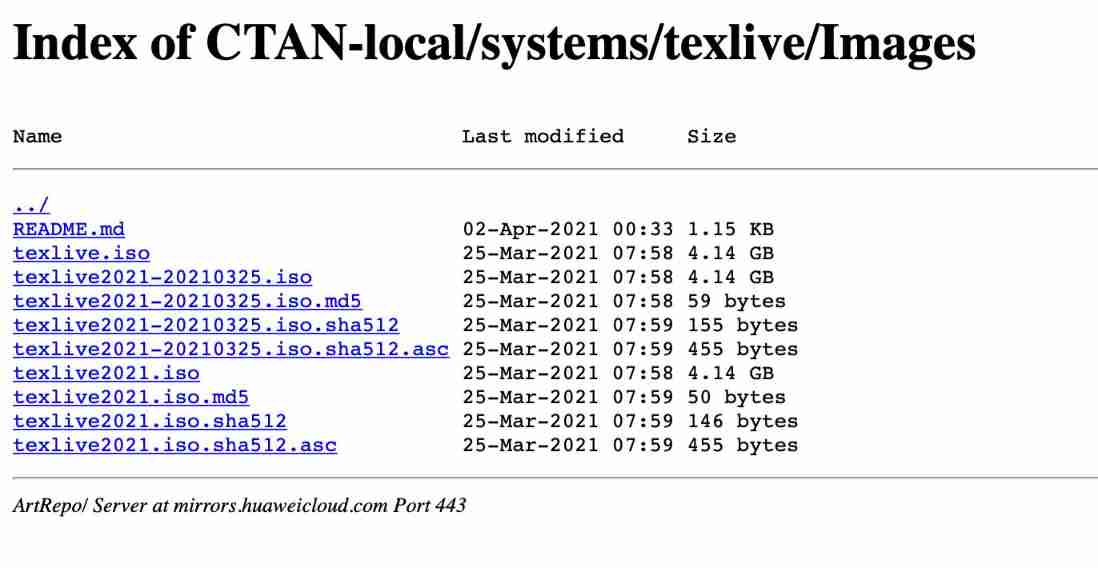
find 【textlive2021】 download , The download time is about ten minutes .
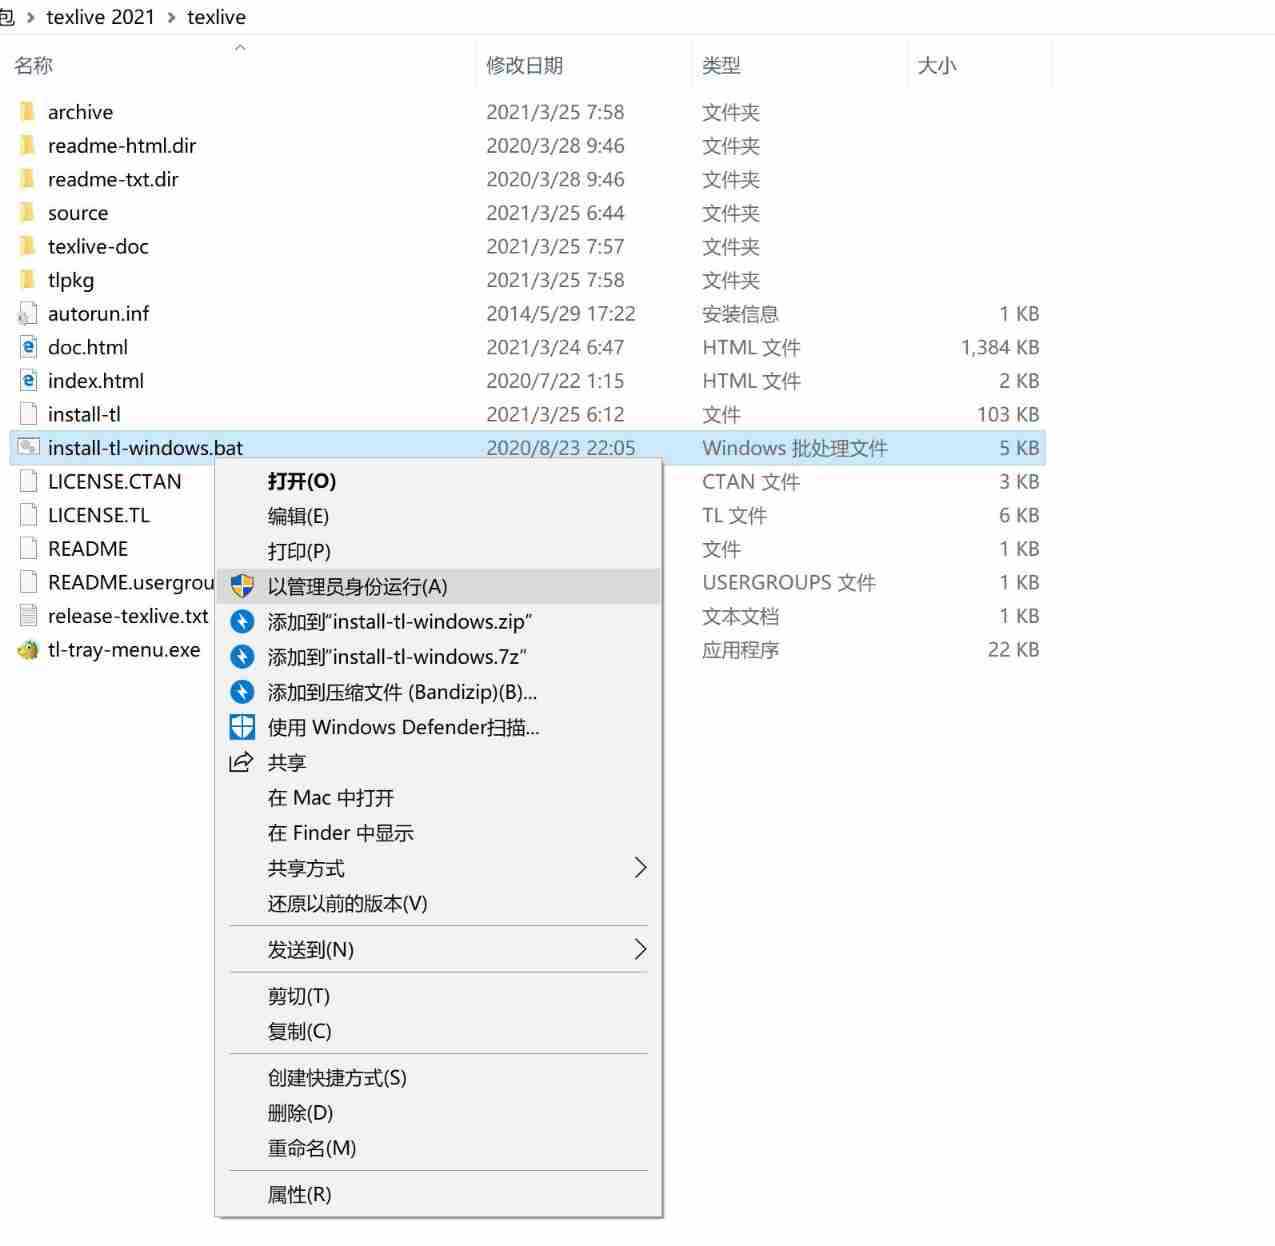
After the download is completed, the installation process .
- open 【textlive2021】 Image file , find 【install-tl-windows】, Right click 【 Open as administrator 】.
- Wait a few seconds and the interface will appear : Click on the bottom left corner 【advanced】;
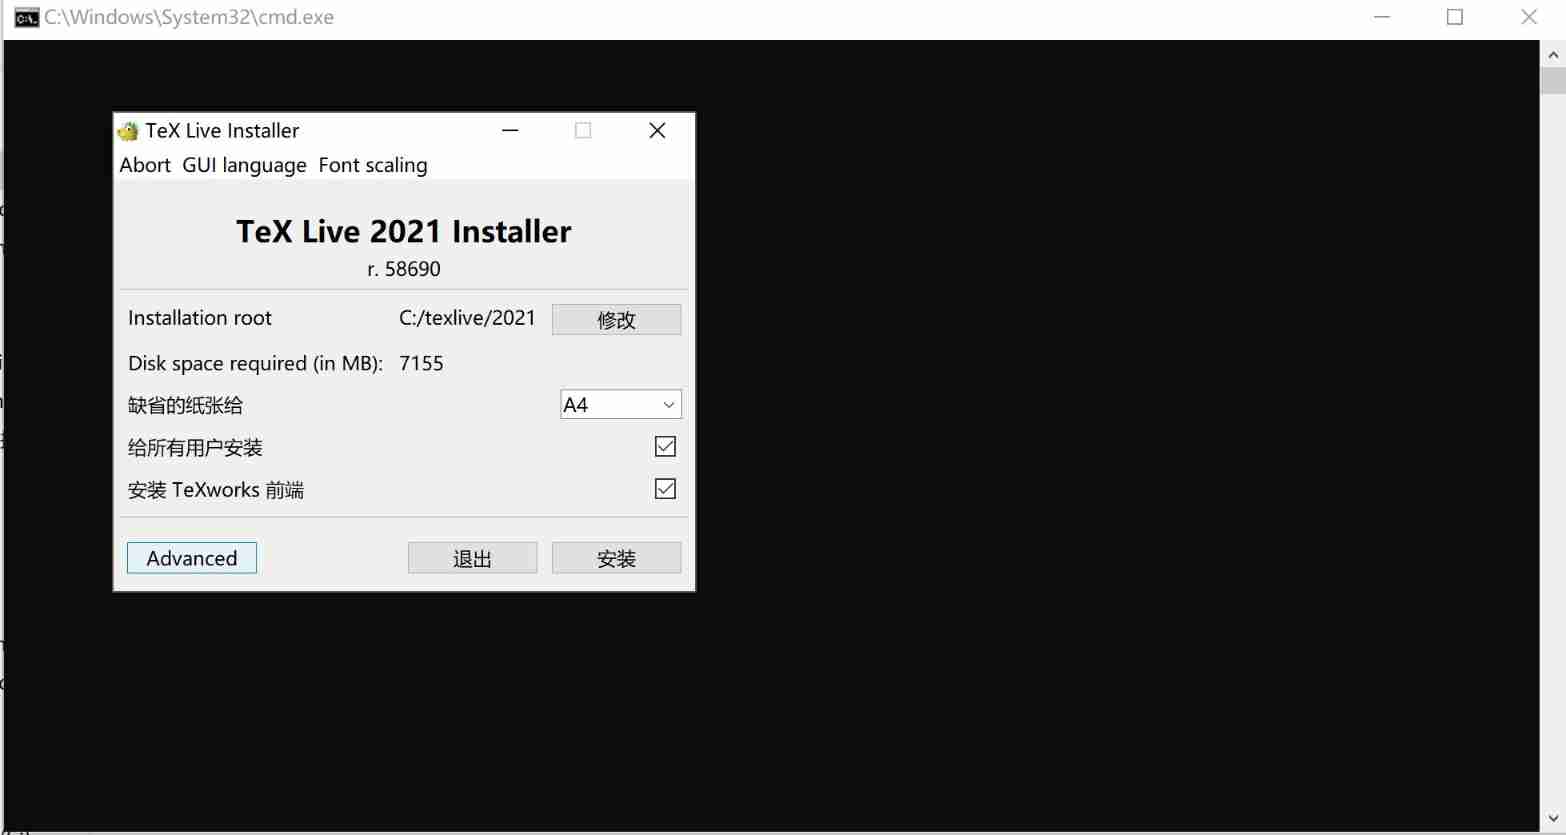
- Click on the bottom left corner 【customize】;
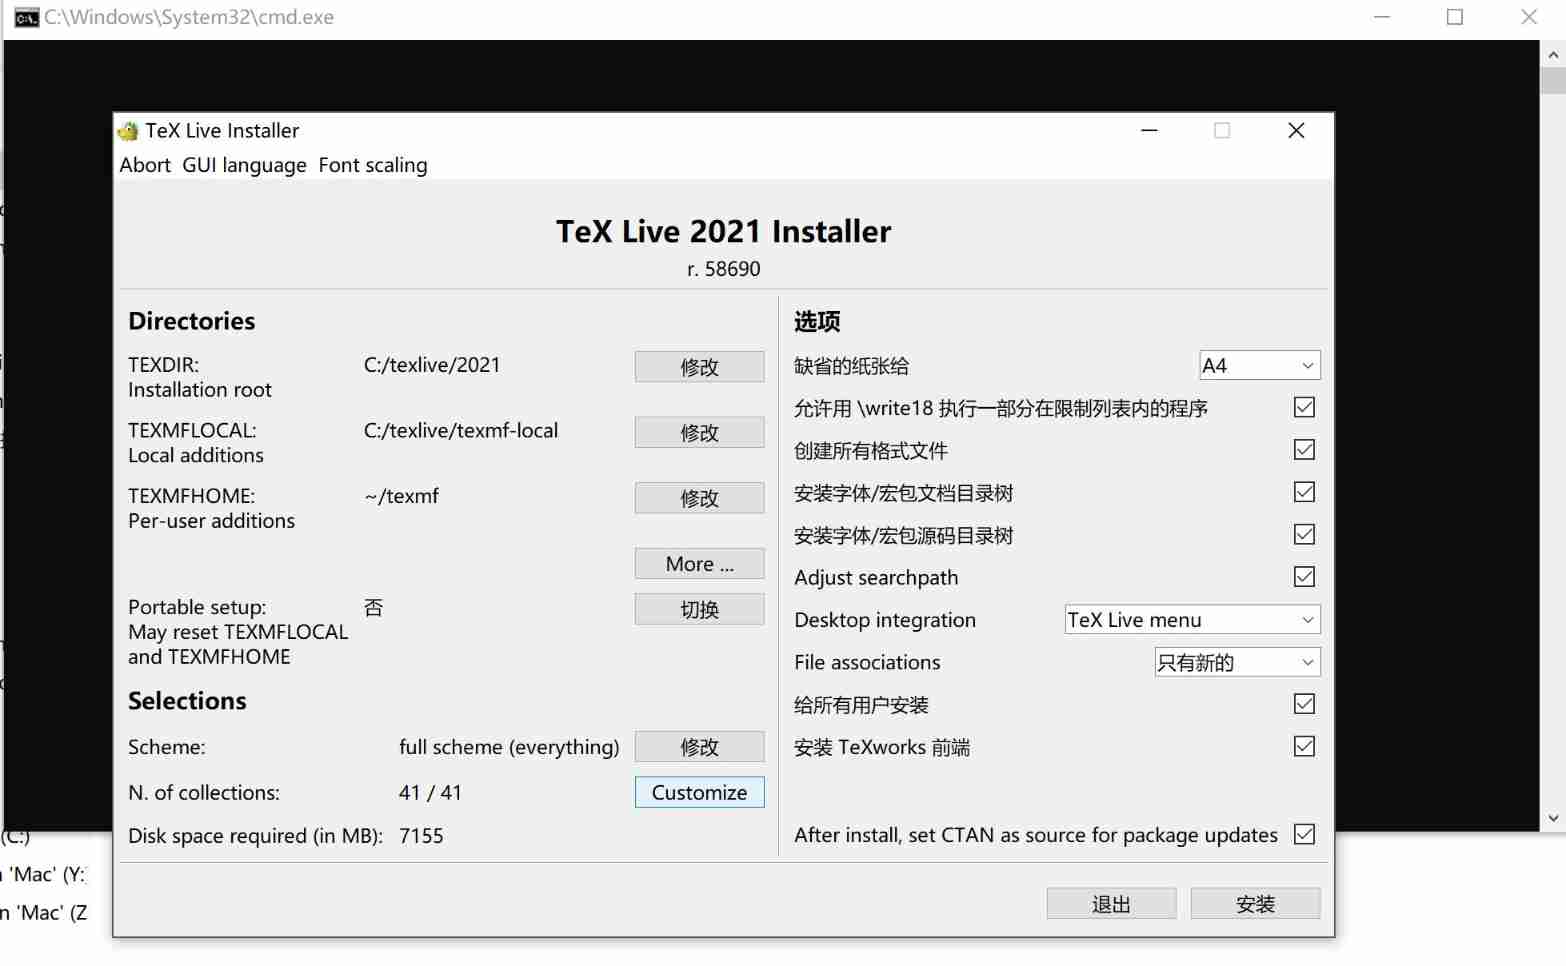
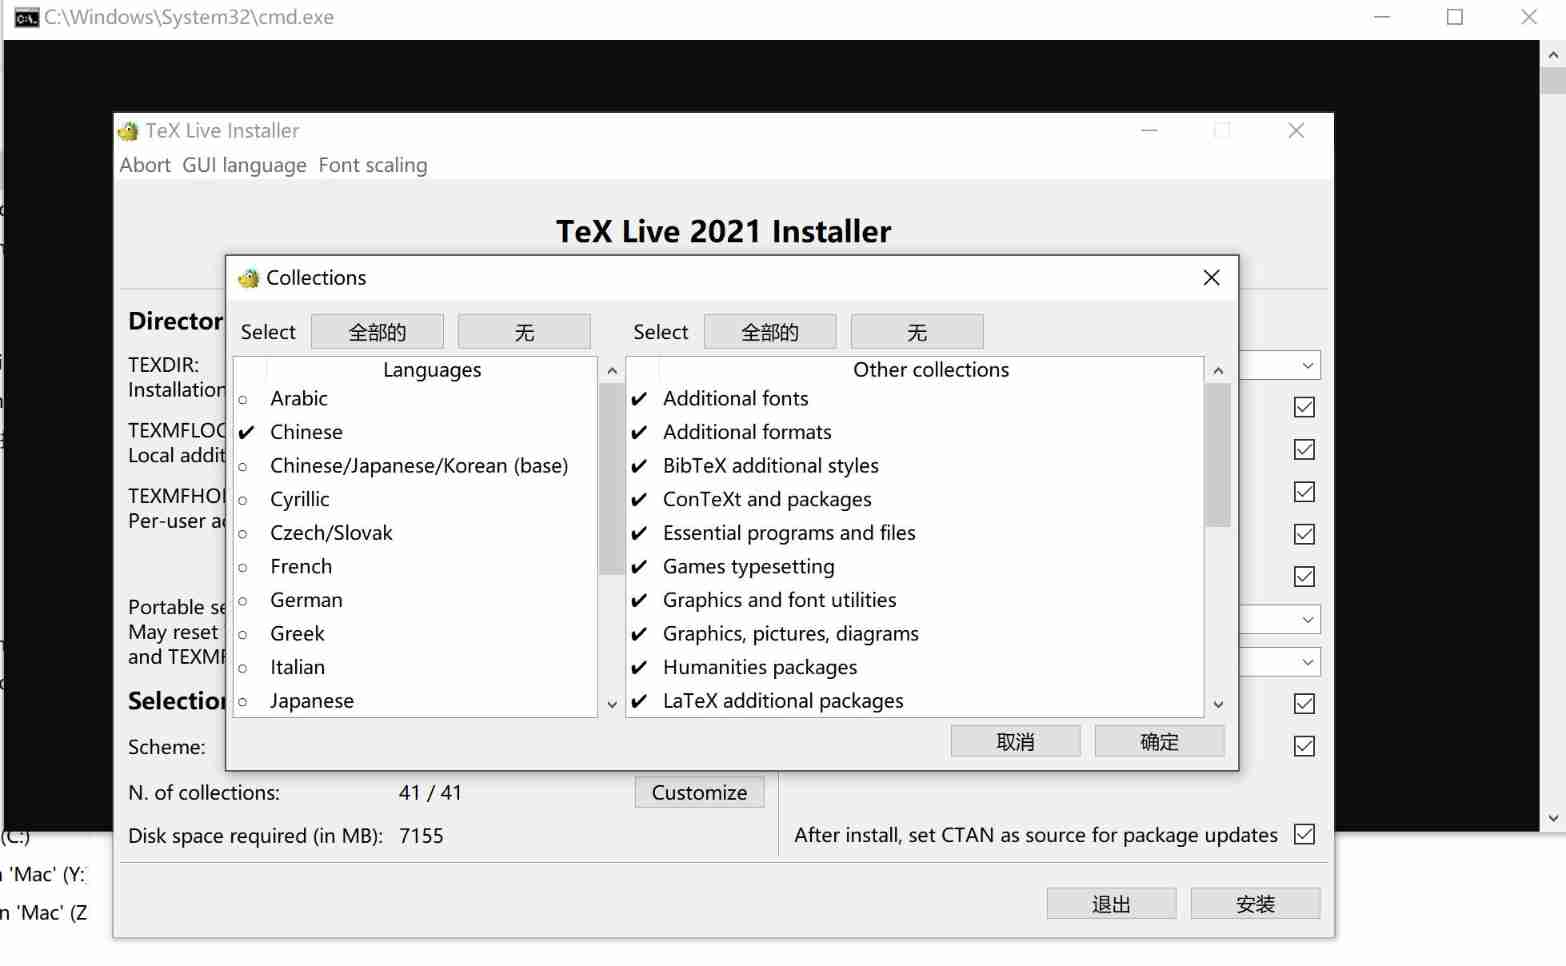
- The left column is the language column , Only choose what we need 【 chinese 】 and 【 english 】 that will do , Other language packs can be removed , This can save 1G File memory . After clicking on 【 determine 】.
- Find the one in the lower right corner 【 install texworks front end 】, This option can be cancelled , You can also keep , But now that they have chosen to use vs code edit latex 了 , I don't think I can use it 【texworks】 edit .
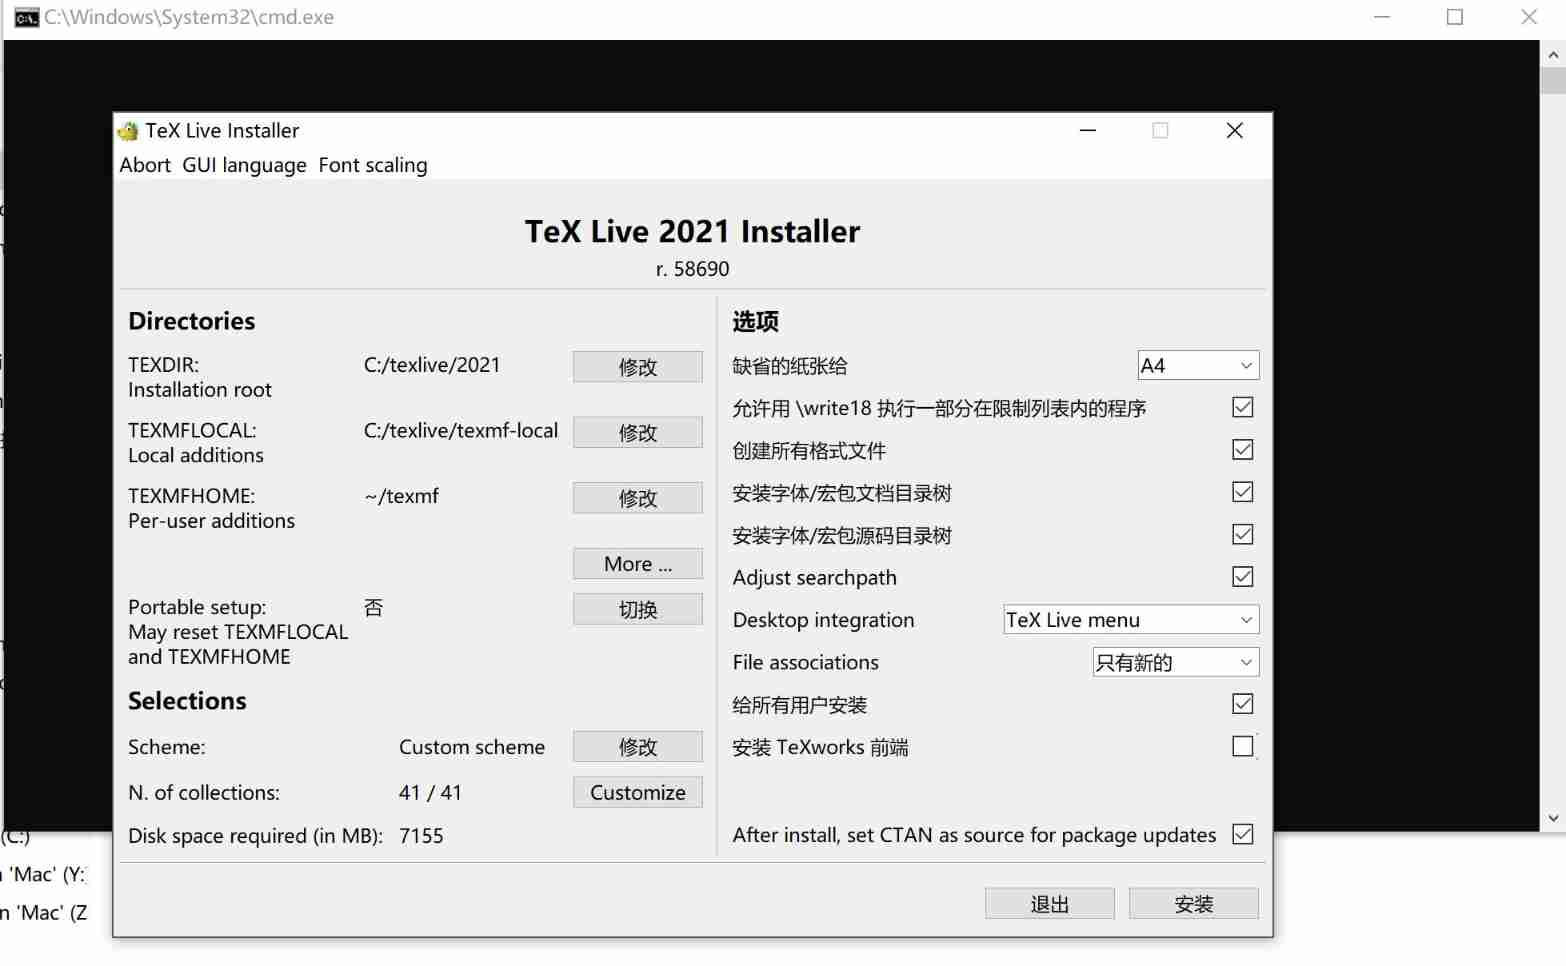
- Then comes the long installation time , The installation time is about half an hour , After installation, turn off the software .
1.5 stay vs code On the configuration latex Environmental Science
Next comes the key step , stay vs code On the configuration latex Environmental Science , The first step has been latex Adjust to Chinese interface , Next, open your vscode.
First, we need to install the plug-in 【latex workshop】, Find the column on the left of the interface 【 expand 】;
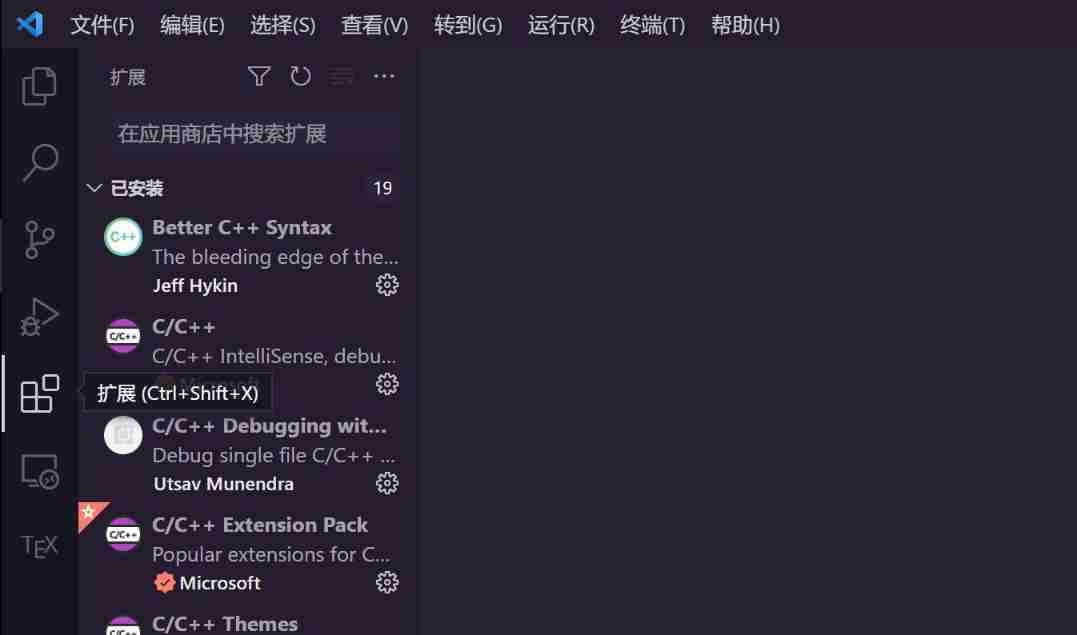
Search for 【latex workshop】 And install ;

- next step , Click on the gear in the lower left corner ️ open 【 Set up 】

- stay 【 Set up 】 Medium 【 expand 】 find 【JSON】, Click on 【 stay setting.json Editor in chief 】.
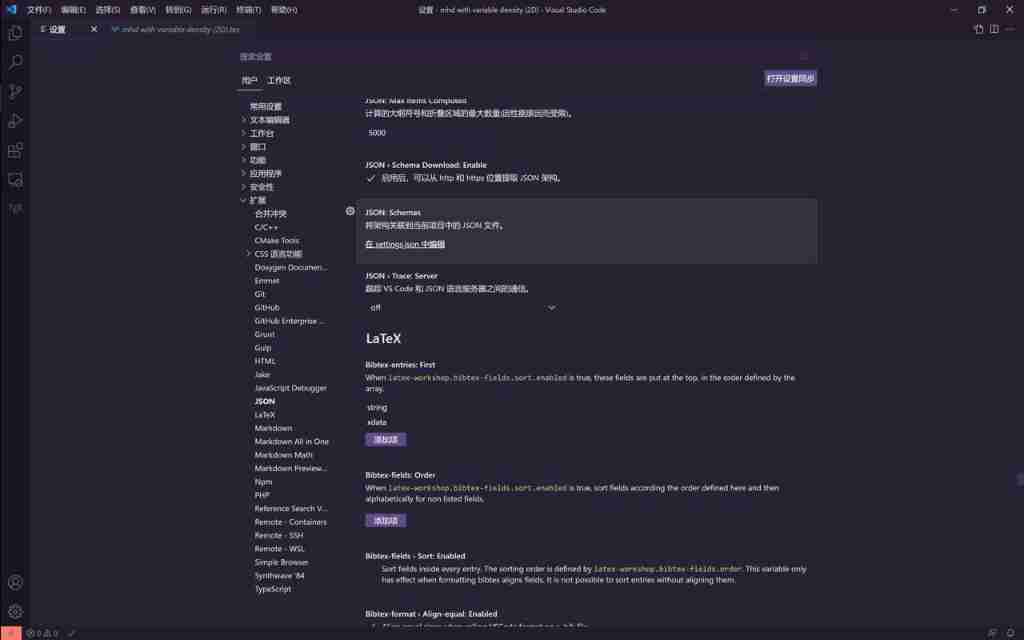
- Copy the following code to the input box ; Save and close . Then the configuration process is completed !
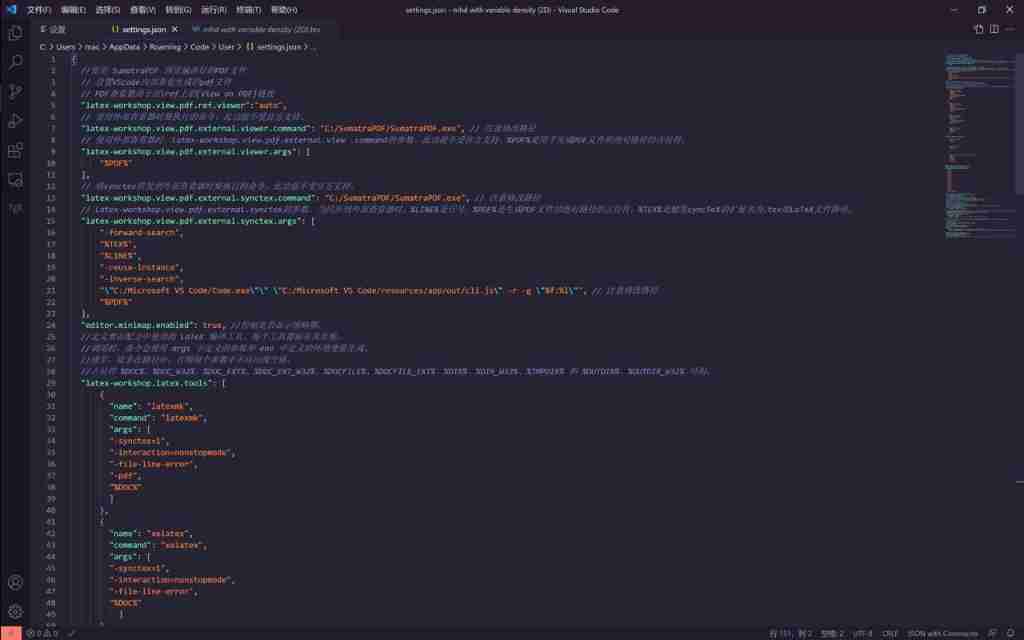
The configuration code is as follows :
The commands on each line of code have comments , Unclear can also be in vs code Put the cursor on the program ,vs code It will also explain the meaning of the code , Be careful , Where the code needs to be changed is the location of your software , This is very important , Be sure to change it to the path of the software on your computer .
{
    // Use  SumatraPDF  Preview compiled PDF file
    //  Set up VScode Internal view generated pdf file
    // PDF The viewer is used in \ref Upper [View on PDF] link
    "latex-workshop.view.pdf.ref.viewer":"auto",
    //  Commands to execute when using an external viewer . This feature is not officially supported .
    "latex-workshop.view.pdf.external.viewer.command": "C:/SumatraPDF/SumatraPDF.exe", //  Pay attention to modifying the path
    //  When using an external viewer ,latex-workshop.view.pdf.external.view .command Parameters of . This feature is not officially supported .%PDF% Is used to generate PDF Placeholder for the absolute path of the file .
    "latex-workshop.view.pdf.external.viewer.args": [
        "%PDF%"
    ],
    //  take synctex The command to execute when forwarding to an external viewer . This feature is not officially supported .
    "latex-workshop.view.pdf.external.synctex.command": "C:/SumatraPDF/SumatraPDF.exe", //  Pay attention to modifying the path
    // latex-workshop.view.pdf.external.synctex Parameters of . When syncing to an external viewer .%LINE% Is the line number ,%PDF% Is to generate PDF Placeholder for the absolute path of the file ,%TEX% Is triggered syncTeX The extension of is .tex Of LaTeX File path .
    "latex-workshop.view.pdf.external.synctex.args": [
        "-forward-search",
        "%TEX%",
        "%LINE%",
        "-reuse-instance",
        "-inverse-search",
        "\"C:/Microsoft VS Code/Code.exe\"\" \"C:/Microsoft VS Code/resources/app/out/cli.js\" -r -g \"%f:%l\"", //  Pay attention to modifying the path
        "%PDF%"
    ],
    "editor.minimap.enabled": true, // Controls whether thumbnails are displayed .
    // Define the... To be used in the recipe  LaTeX  Compiler tools . Each tool is marked with its name .
    // Invocation time , The command will use  args  Parameters and defined in  env  The environment variables defined in generate .
    // Usually , Unless in the path , Otherwise, no spaces should appear in each parameter .
    // Place holder  %DOC%、%DOC_W32%、%DOC_EXT%、%DOC_EXT_W32%、%DOCFILE%、%DOCFILE_EXT%、%DIR%、%DIR_W32%、%TMPDIR%  and  %OUTDIR%、%OUTDIR_W32%  You can use .
    "latex-workshop.latex.tools": [
        {
          "name": "latexmk",
          "command": "latexmk",
          "args": [
          "-synctex=1",
          "-interaction=nonstopmode",
          "-file-line-error",
          "-pdf",
          "%DOC%"
          ]
        },
        {
          "name": "xelatex",
          "command": "xelatex",
          "args": [
          "-synctex=1",
          "-interaction=nonstopmode",
          "-file-line-error",
          "%DOC%"
            ]
        },
        {
          "name": "pdflatex",
          "command": "pdflatex",
          "args": [
          "-synctex=1",
          "-interaction=nonstopmode",
          "-file-line-error",
          "%DOC%"
          ]
        },
        {
          "name": "bibtex",
          "command": "bibtex",
          "args": [
          "%DOCFILE%"
          ]
        }
      ],
  "latex-workshop.latex.recipes": [
        {
          "name": "xelatex",
          "tools": [
          "xelatex"
                      ]
                },
        {
          "name": "latexmk",
          "tools": [
          "latexmk"
                      ]
        },

        {
          "name": "pdflatex -> bibtex -> pdflatex*2",
          "tools": [
          "pdflatex",
          "bibtex",
          "pdflatex",
          "pdflatex"
                      ]
        }
      ],
  "latex-workshop.view.pdf.viewer": "tab",
  "latex-workshop.latex.clean.enabled": true,
  "latex-workshop.latex.clean.fileTypes": [
      "*.aux",
      "*.bbl",
      "*.blg",
      "*.idx",
      "*.ind",
      "*.lof",
      "*.lot",
      "*.out",
      "*.toc",
      "*.acn",
      "*.acr",
      "*.alg",
      "*.glg",
      "*.glo",
      "*.gls",
      "*.ist",
      "*.fls",
      "*.log",
      "*.fdb_latexmk"
    ],
    // Set to onFaild  Clear auxiliary files after build failure
    "latex-workshop.latex.autoClean.run": "onFailed",
    //  Use the last recipe Compilation combination
    "latex-workshop.latex.recipe.default": "lastUsed",
    //  Key binding of internal viewer for reverse synchronization .ctrl/cmd + Click on ( Default ) Or double click
    "latex-workshop.view.pdf.internal.synctex.keybinding": "double-click",
    // Right-click menu
    "latex-workshop.showContextMenu":true,
    // Automatically complete commands and environments from the packages you use
    "latex-workshop.intellisense.package.enabled": true,
    // take  glob  Mode configuration to editor ( for example  "* Hexadecimal ": "hexEditor.hexEdit"). These priorities are higher than the default behavior .
    "workbench.editorAssociations": {
        "*.ipynb": "jupyter-notebook"
    },
    "kite.showWelcomeNotificationOnStartup": false,    // Need to install kite,show the Kite welcome notification on startup.
    "python.defaultInterpreterPath": "E:\\Python\\python.exe", //python route
    // Where should the cell toolbar be displayed , Or whether to hide it .
    "notebook.cellToolbarLocation": {
        "default": "right",
        "jupyter-notebook": "left"// Configure the cell toolbar location for a specific file type
    },
    // If set to  true, Automatically from the current  Git  The default remote library extraction commit for the repository . If set to “ All ”, Extract from all remote libraries .
    "git.autofetch": true,
    // Always trust the workspace
    "security.workspace.trust.untrustedFiles": "open",
    // Do not display the new version message
    "vsicons.dontShowNewVersionMessage": true,
    // For a language , Configure alternate editor settings
    "[latex]": {
        "editor.formatOnPaste": false,// For a language , Configure alternate editor settings
        "editor.suggestSelection": "recentlyUsedByPrefix" // Controls how suggestions are preselected in the suggestion list .recentlyUsedByPrefix:  Choose according to the prefixes suggested previously . for example ,co -> console、con -> const.
    },
    "code-runner.clearPreviousOutput": true,
    "code-runner.saveAllFilesBeforeRun": true,
    "code-runner.runInTerminal": true,
    "workbench.colorTheme": "Solarized Dark",
}
1.6 The test link
Next, let's test it , Whether the debugging is successful .
- Create a new folder on the desktop , And in vs code Open folder on 【test1】;
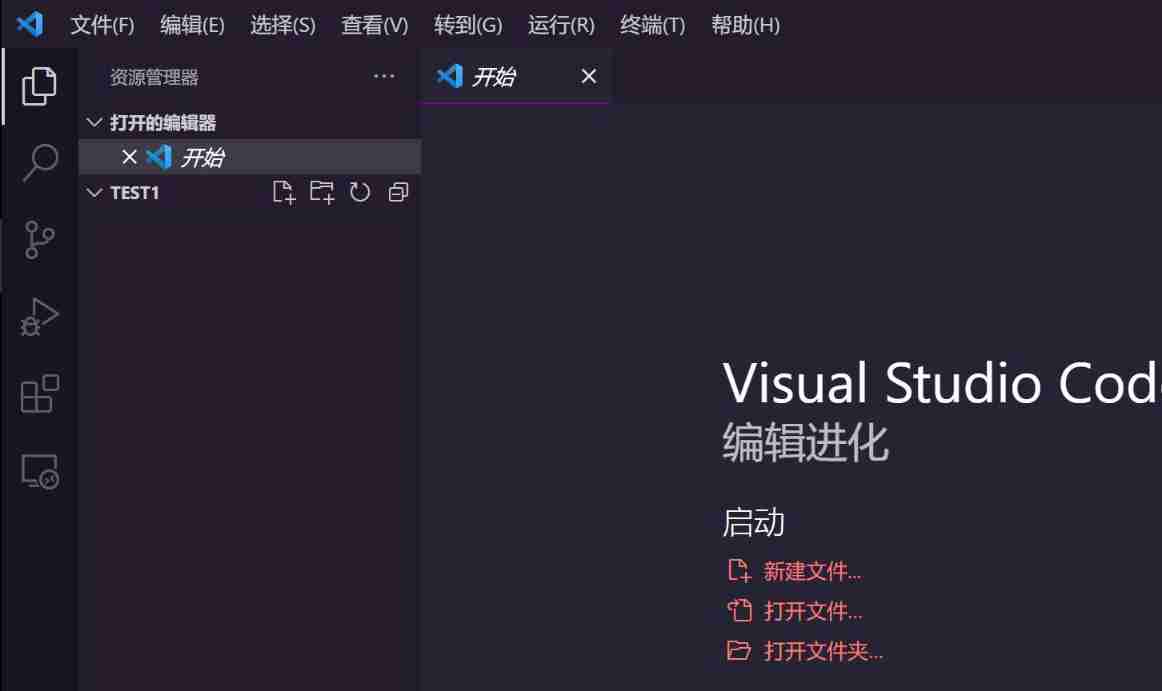
stay vs code On , find 【test1】 Folder , And click the first option 【 New file 】;
New file 【test.tex】, Be sure to add a suffix 【.tex】, If there is no suffix 【.tex】,vs code Can't identify latex file ;
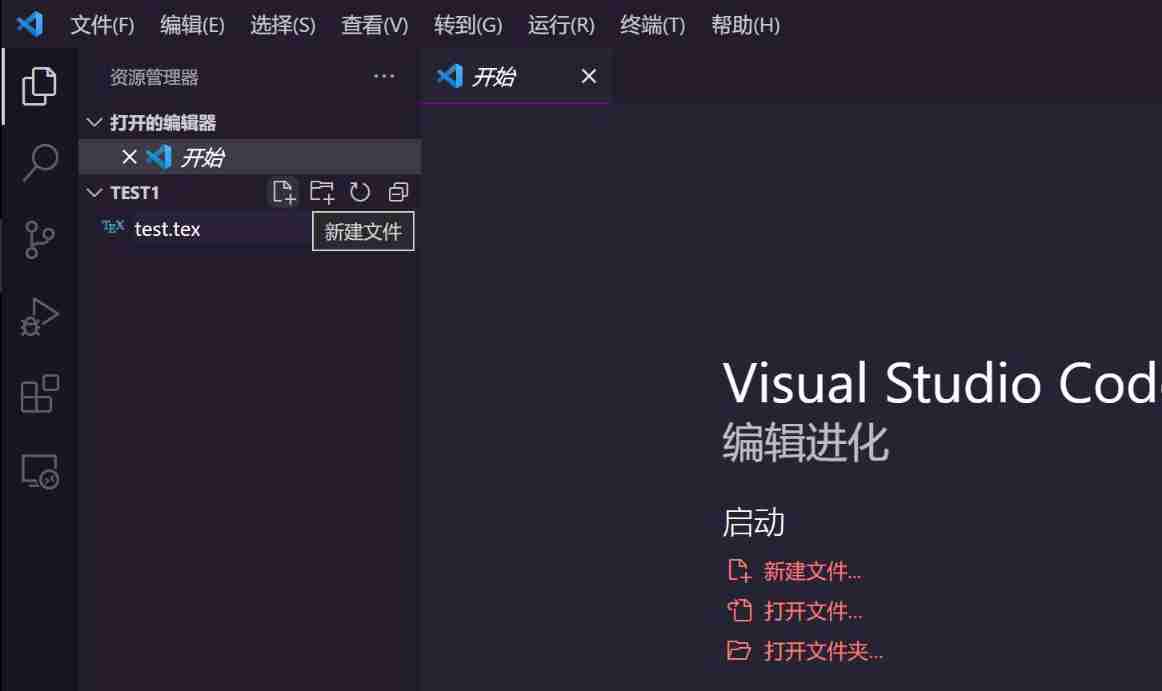
- Copy the following code into the input box , And save ;
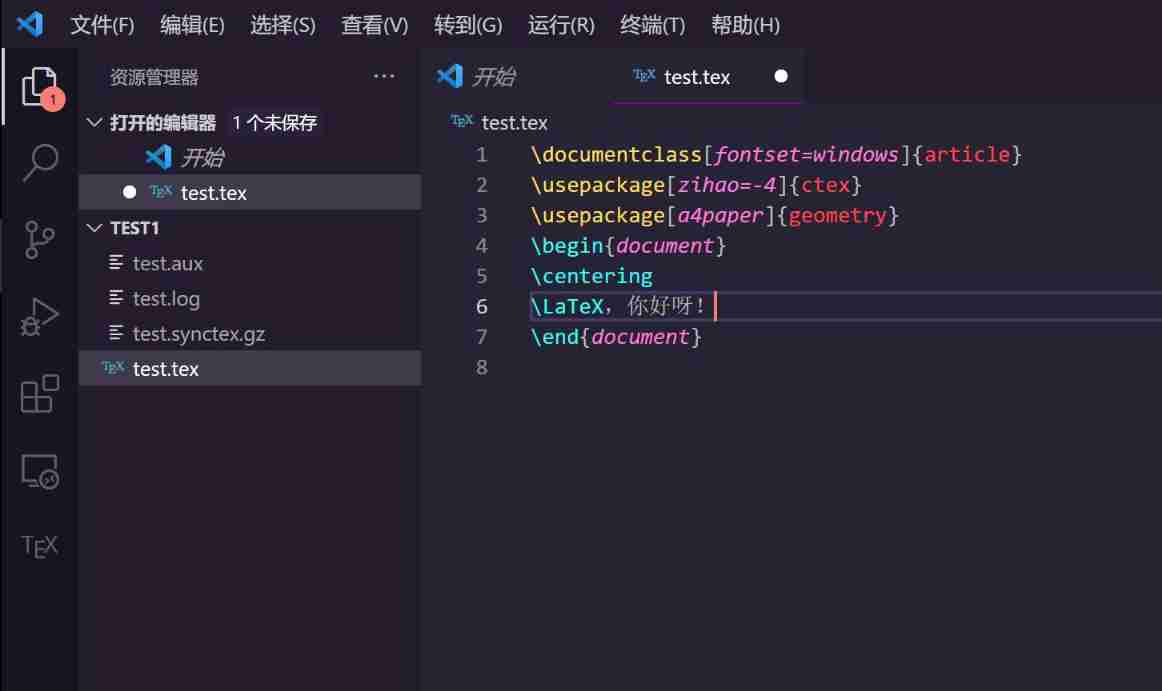
\documentclass[fontset=windows]{article}
\usepackage[zihao=-4]{ctex}
\usepackage[a4paper]{geometry}
\begin{document}
\centering
\LaTeX, How are you? !
\end{document}
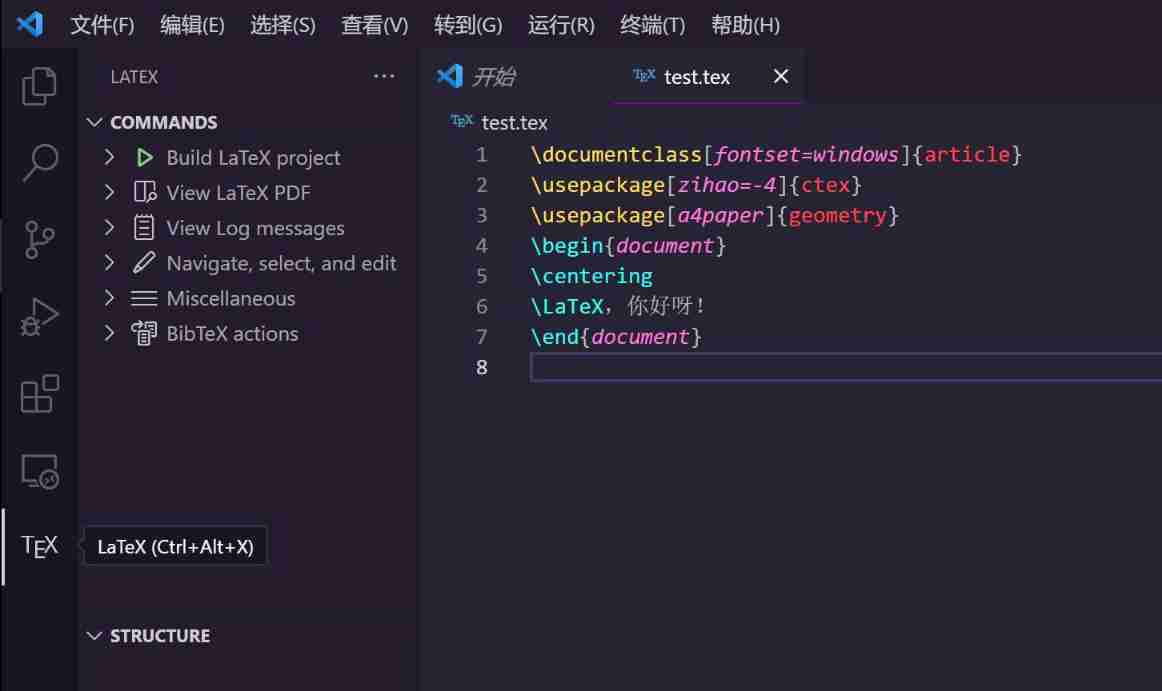
- Then I saw a flower in the left column 【tex】 Button , Click on .
- Find the first button 【Build latex project】, Click to expand , find 【Recipe:pdflatex…】, Click on ;
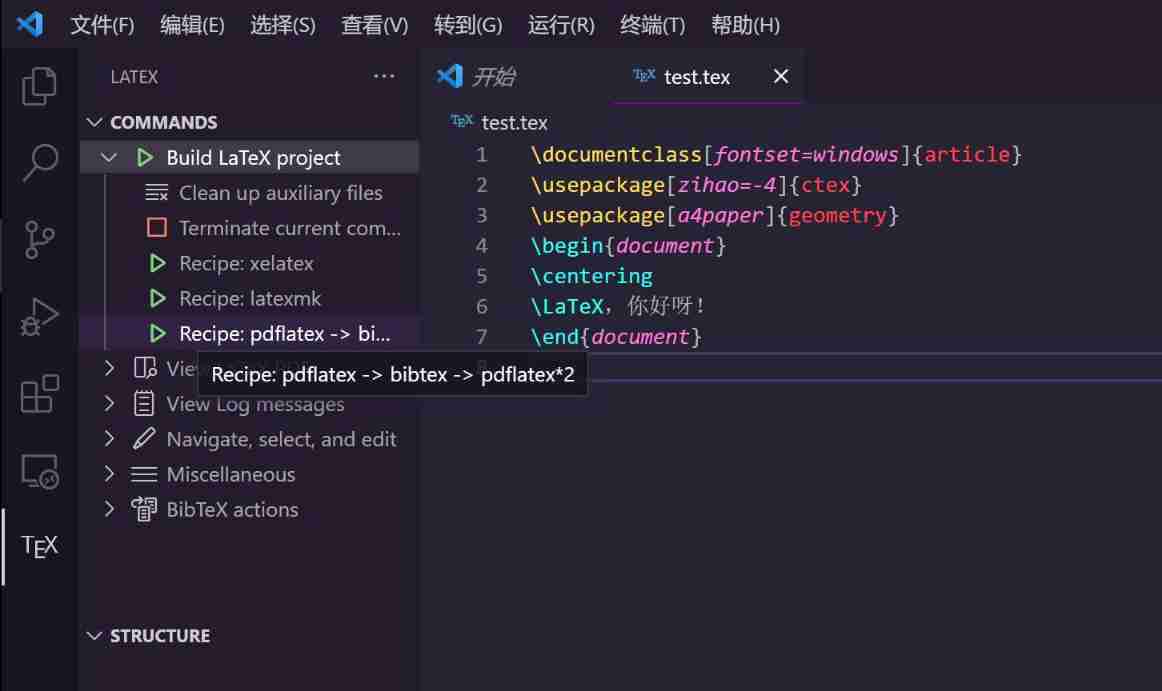
- You will see the compilation progress at the bottom ;

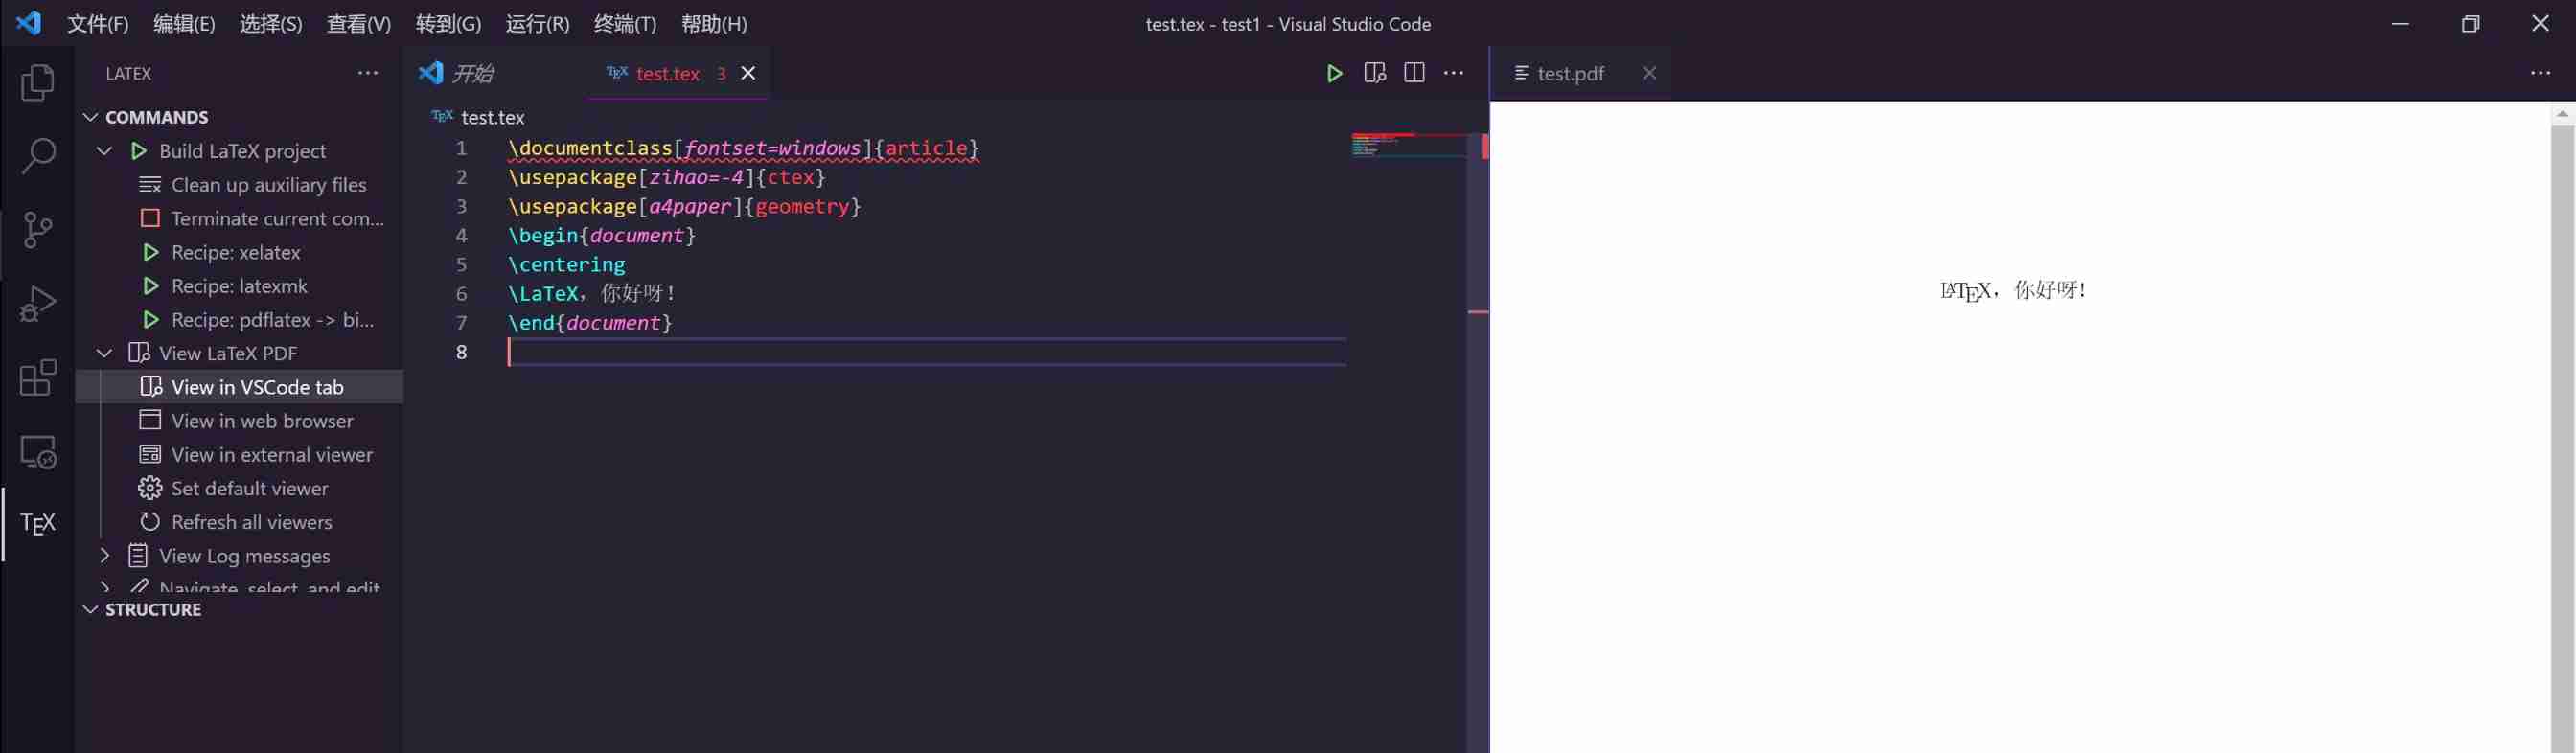
- After success , Then find the upper left corner 【View LaTex Pdf】, Click to expand , find 【View in VSCode tab】 And click OK .

- You can see the following interface ; It means that the test is successful ; Then you can be happy in vs code Knock up latex La ~
Two 、vs code To configure latex course mac edition
mac On the configuration latex Relatively simple , Here is a brief explanation , Also use vs code Download a software
vs code install ; ( see 1.1)
vs code Chinese environment configuration ; ( see 1.2)
vs code Installing a plug-in 【latexworkshop】; (1.5)
download 【MacTex】
mac Upper tex Compile software and windows Not quite the same. , front windows It uses 【textive2021】, here mac It uses 【MacTex】, The configuration process is simple , find 【MacTex】 Official website [5], Download and install . When the download is complete, close .
The test link ;( see 1.6)
Reference websites and materials
[1] visual studio code Official website :https://code.visualstudio.com
[2] Alibaba cloud open source image website : https://mirrors.aliyun.com/CTAN/systems/texlive/Images/
[3] Huawei open source : https://mirrors.huaweicloud.com/CTAN/systems/texlive/Images/
[4] Sumatra PDF Official website : https://www.sumatrapdfreader.org/free-pdf-reader
[5] MacTex Download website :https://tug.org/mactex/
边栏推荐
- Su embedded training - C language programming practice (implementation of address book)
- New library online | information data of Chinese journalists
- 6.Dropout应用
- 图像数据预处理
- Fundamentals - integrating third-party technology
- 51 communicates with the Bluetooth module, and 51 drives the Bluetooth app to light up
- String usage in C #
- Cross modal semantic association alignment retrieval - image text matching
- 4.交叉熵
- What does interface testing test?
猜你喜欢
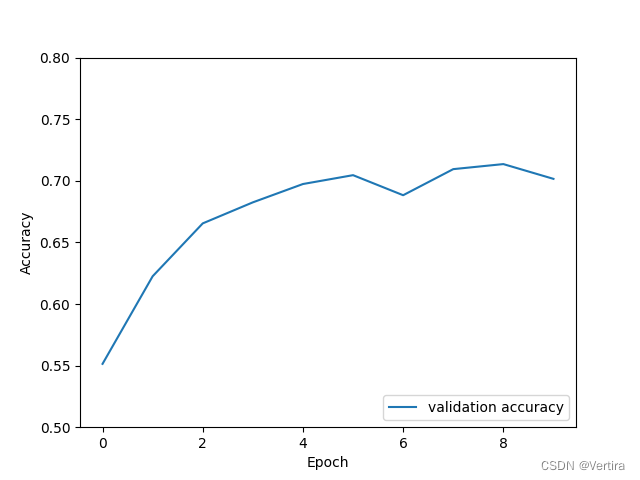
A network composed of three convolution layers completes the image classification task of cifar10 data set
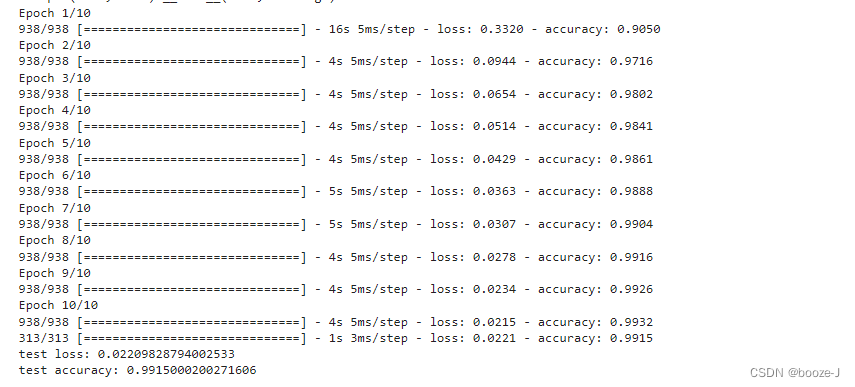
10.CNN应用于手写数字识别

13. Enregistrement et chargement des modèles
![[necessary for R & D personnel] how to make your own dataset and display it.](/img/50/3d826186b563069fd8d433e8feefc4.png)
[necessary for R & D personnel] how to make your own dataset and display it.
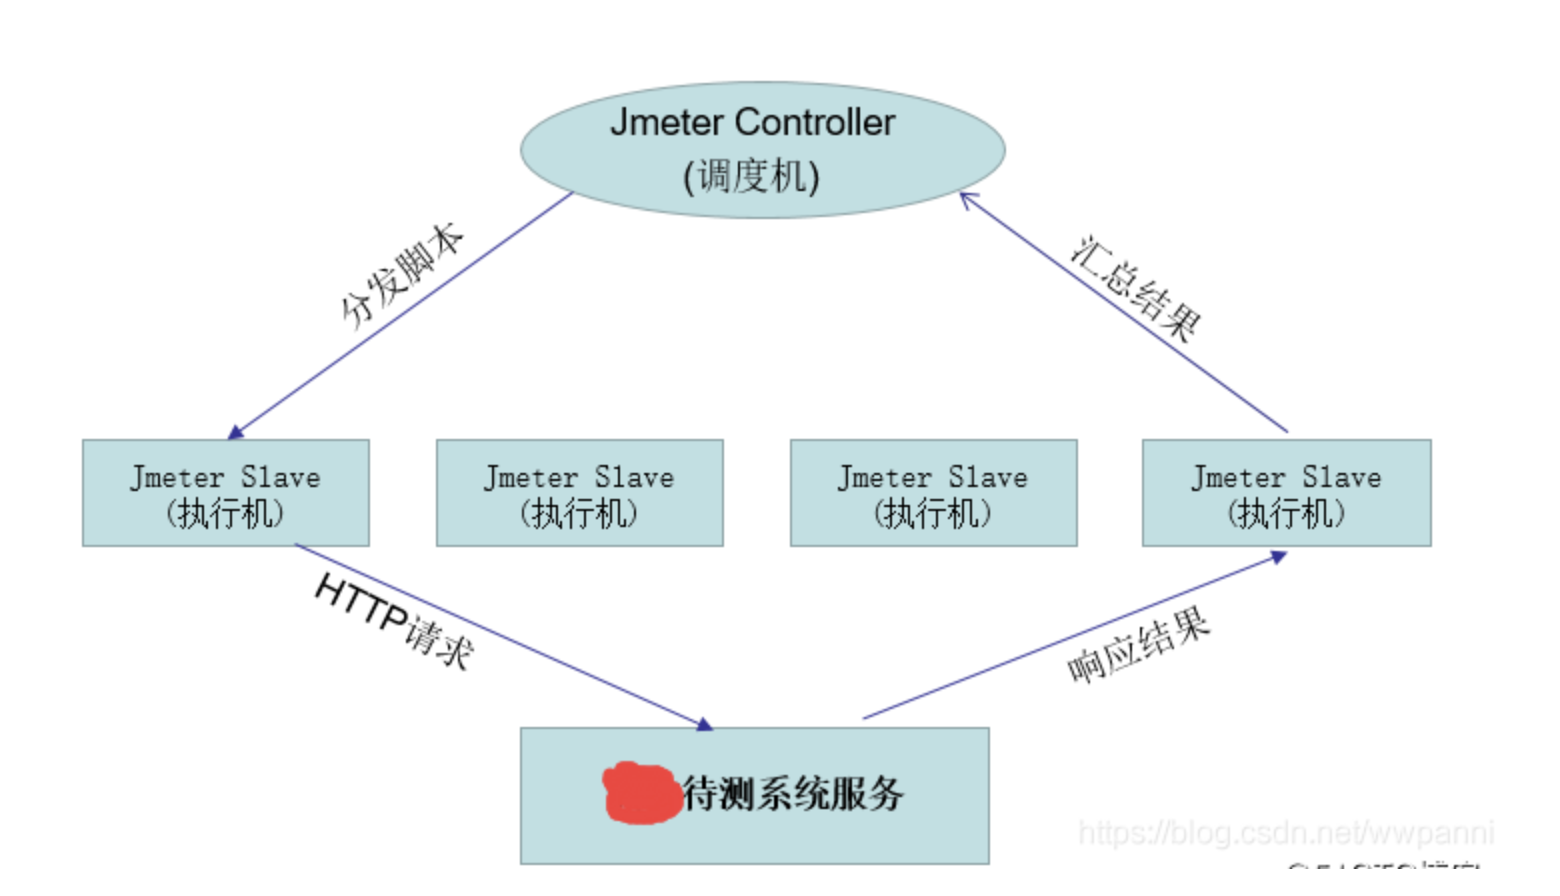
jemter分布式
6. Dropout application
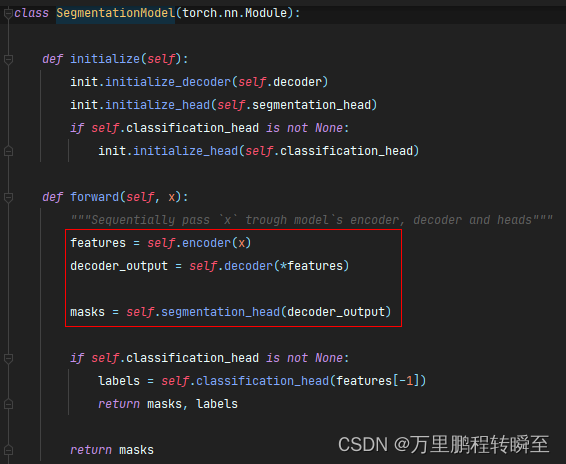
语义分割模型库segmentation_models_pytorch的详细使用介绍
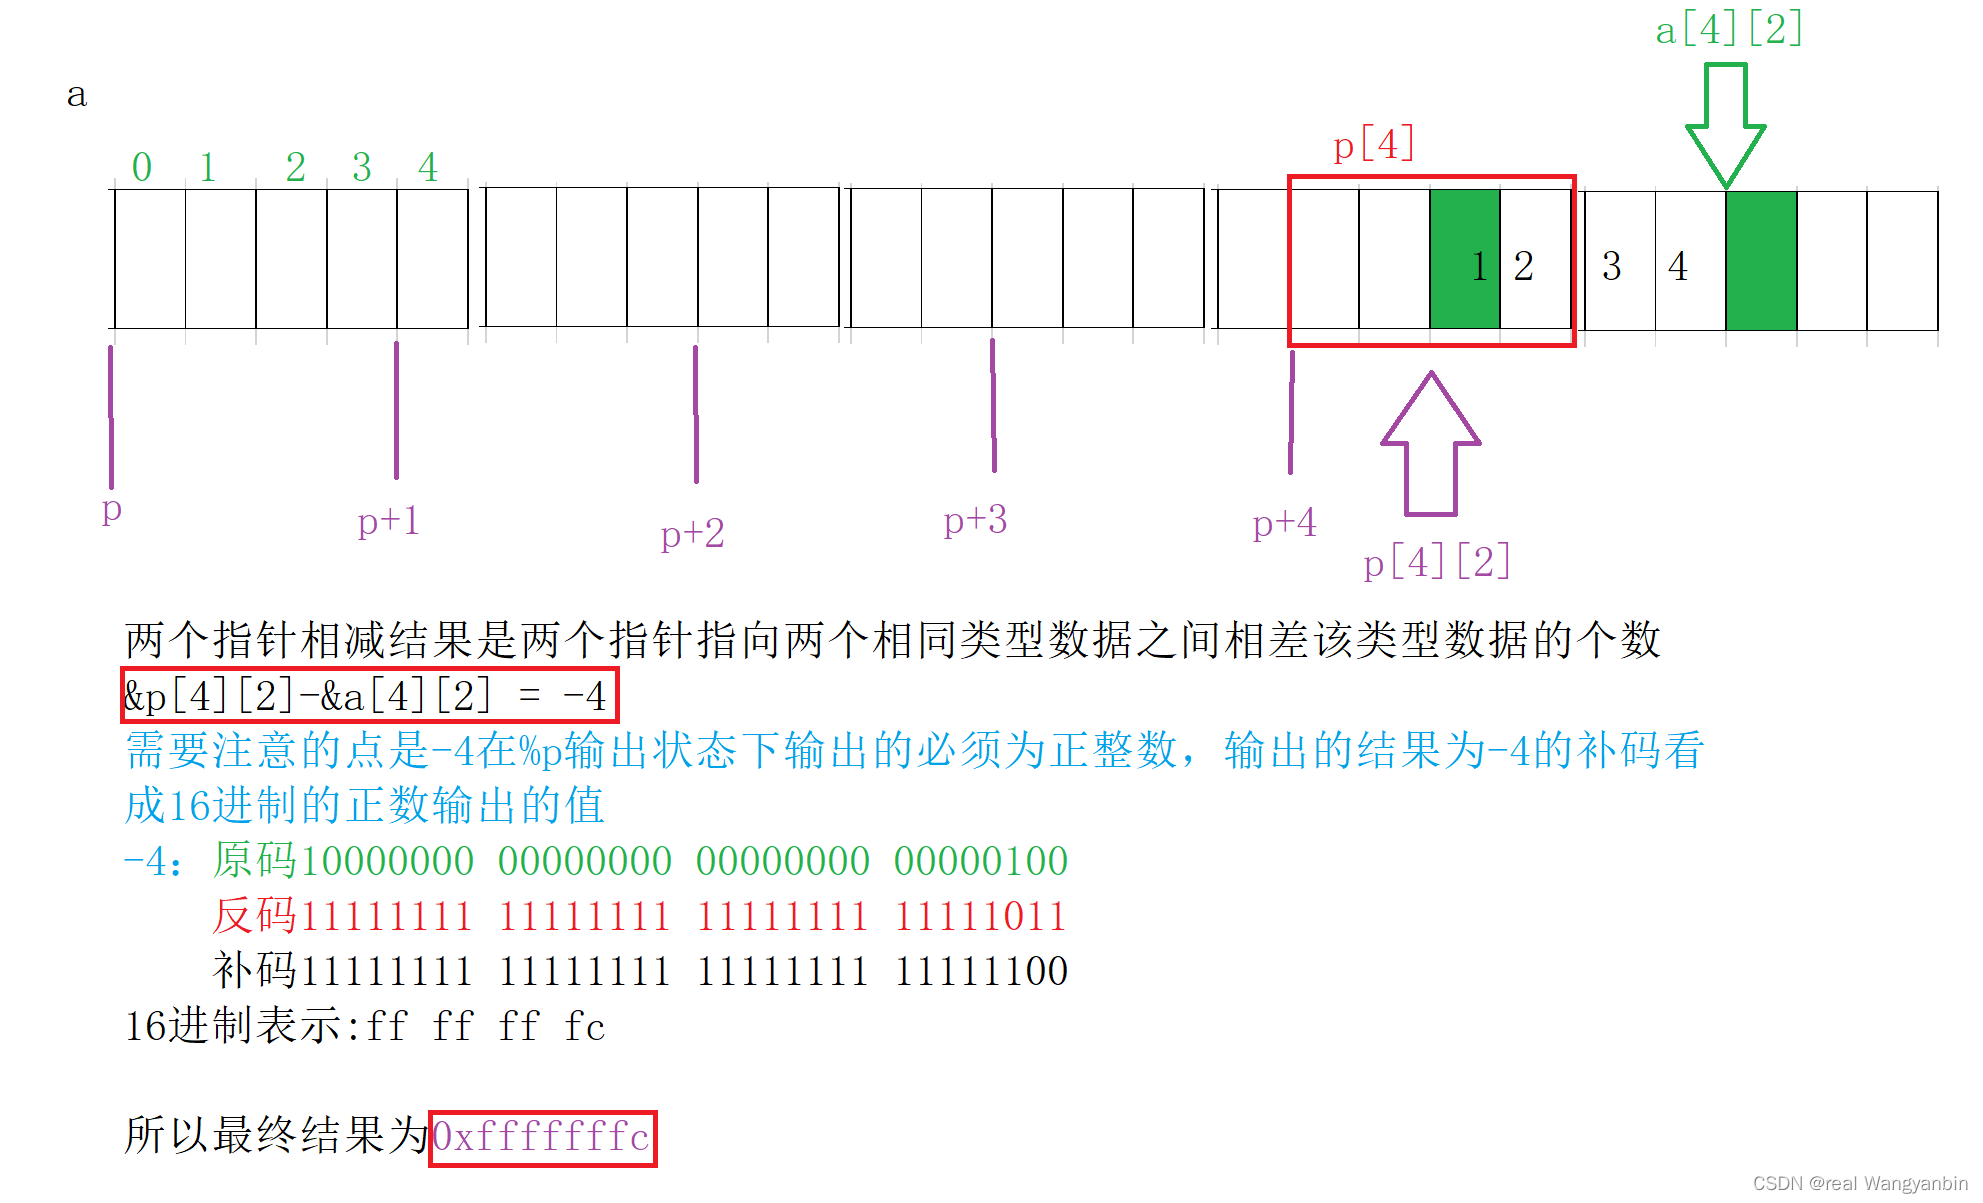
8道经典C语言指针笔试题解析
Su embedded training - Day9
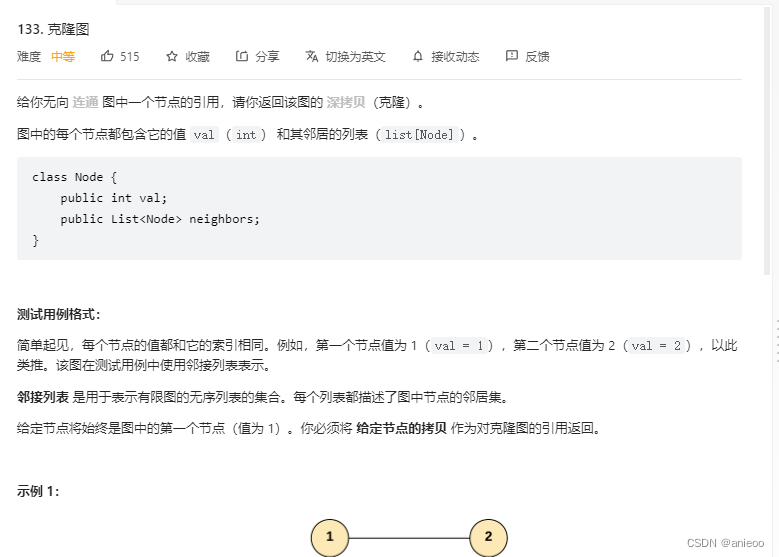
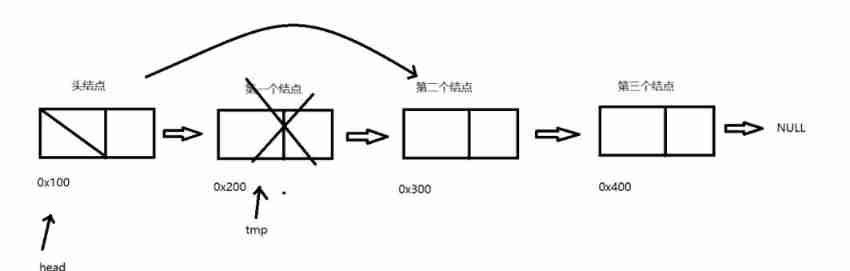
133. Clone map
随机推荐
130. 被围绕的区域
9.卷积神经网络介绍
C#中string用法
Where is the big data open source project, one-stop fully automated full life cycle operation and maintenance steward Chengying (background)?
New library launched | cnopendata China Time-honored enterprise directory
133. 克隆图
Four stages of sand table deduction in attack and defense drill
[necessary for R & D personnel] how to make your own dataset and display it.
【愚公系列】2022年7月 Go教学课程 006-自动推导类型和输入输出
Prediction of the victory or defeat of the League of heroes -- simple KFC Colonel
[note] common combined filter circuit
New library online | cnopendata China Star Hotel data
Password recovery vulnerability of foreign public testing
新库上线 | CnOpenData中国星级酒店数据
Marubeni official website applet configuration tutorial is coming (with detailed steps)
Complete model verification (test, demo) routine
letcode43:字符串相乘
String usage in C #
DNS series (I): why does the updated DNS record not take effect?
FOFA-攻防挑战记录