当前位置:网站首页>Swagger, Yapi interface management service_ SE
Swagger, Yapi interface management service_ SE
2022-07-06 10:56:00 【Bolus acidophilus】
List of articles
Swagger
Introduce
Official website :https://swagger.io/
Swagger Is a specification and complete framework , Used to generate 、 describe 、 Invocation and visualization RESTful Style Web service . The functions mainly include the following points :
A. It makes it more convenient to separate the front end from the back end , It's good for teamwork
B. Interface documents are automatically generated online , Reduce the burden of writing interface documents for back-end developers
C. Interface function test
Use Swagger Just define the interface and interface related information according to its specification , Re pass Swagger A series of derived projects and tools , You can generate various formats of interface documents , And online interface debugging page and so on .
Use it directly Swagger, Need to follow Swagger The specification defines the interface , It's actually writing Json file , It's cumbersome to write 、 It's not convenient , . And use... In projects , We usually choose some ready-made frameworks to simplify the preparation of documents , These frameworks are based on Swagger Of , Such as knife4j.knife4j Is for Java MVC Framework for the integration Swagger Generate Api Document enhancement solution . And we're going to use kinfe4j, Need to be in pom.xml The following dependencies can be introduced :
<dependency>
    <groupId>com.github.xiaoymin</groupId>
    <artifactId>knife4j-spring-boot-starter</artifactId>
    <version>3.0.2</version>
</dependency>
Usage mode
Next , We will integrate our project Knife4j, To automatically generate interface documents . Here we still need to create a new branch v1.2, In this branch knife4j Integration of , After the integration test , No problem , We will again v1.2 Branch into master.
Use knife4j, The following steps are required :
1). Import knife4j Of maven coordinate
<dependency>
    <groupId>com.github.xiaoymin</groupId>
    <artifactId>knife4j-spring-boot-starter</artifactId>
    <version>3.0.2</version>
</dependency>
2). Import knife4j Related configuration classes
Here we don't need to create a new configuration class , We are directly in the WebMvcConfig Just declare it in the configuration class .
A. Add two annotations to the configuration class @EnableSwagger2 @EnableKnife4j , Turn on Swagger and Knife4j The function of .
B. Declare a Docket Type of bean, Through the bean To specify the information of the generated document .
@Slf4j
@Configuration
@EnableSwagger2
@EnableKnife4j
public class WebMvcConfig extends WebMvcConfigurationSupport {


    /** *  Set static resource mapping  * @param registry */
    @Override
    protected void addResourceHandlers(ResourceHandlerRegistry registry) {

        log.info(" Start static resource mapping ...");
        registry.addResourceHandler("/backend/**").addResourceLocations("classpath:/backend/");
        registry.addResourceHandler("/front/**").addResourceLocations("classpath:/front/");
    }

    /** *  Expand mvc Message converter of framework  * @param converters */
    @Override
    protected void extendMessageConverters(List<HttpMessageConverter<?>> converters) {

        log.info(" Extended message converter ...");
        // Create a message converter object
        MappingJackson2HttpMessageConverter messageConverter = new MappingJackson2HttpMessageConverter();
        // Set the object converter , Bottom use Jackson take Java Object to json
        messageConverter.setObjectMapper(new JacksonObjectMapper());
        // Append the above message converter object to mvc In the converter collection of the framework
        converters.add(0,messageConverter);
    }

    @Bean
    public Docket createRestApi() {

        //  The document type
        return new Docket(DocumentationType.SWAGGER_2)
                .apiInfo(apiInfo())
                .select()
                .apis(RequestHandlerSelectors.basePackage("com.itheima.reggie.controller"))
                .paths(PathSelectors.any())
                .build();
    }

    private ApiInfo apiInfo() {

        return new ApiInfoBuilder()
                .title(" Reggie takeout ")
                .version("1.0")
                .description(" Reggie takeout interface document ")
                .build();
    }
}
Be careful : Docket When making a statement , There is a package scanning path specified , This path specifies Controller The path of the package . because Swagger When generating interface documents , According to the package path specified here , Automatically scan the package @Controller, @RestController, @RequestMapping etc. SpringMVC Annotations , Generate the corresponding interface document according to these annotations .
3). Set static resource mapping
because Swagger In the generated online document , It involves many static resources , These static resources need to add static resource mapping , Otherwise, the interface document page cannot be accessed . So you need to WebMvcConfig Class addResourceHandlers The following configuration is added to the method .
registry.addResourceHandler("doc.html").addResourceLocations("classpath:/META-INF/resources/");
registry.addResourceHandler("/webjars/**").addResourceLocations("classpath:/META-INF/resources/webjars/");
4). stay LoginCheckFilter Set the request path that does not need to be processed in
Need to put Swagger And Knife4j Relevant static resources are released directly , No need to log in to access , Otherwise, we need to log in , Can access the page of the interface document .
In the original request path that does not need to be processed , Add the following links :
"/doc.html",
"/webjars/**",
"/swagger-resources",
"/v2/api-docs"
![[ Failed to transfer the external chain picture , The origin station may have anti-theft chain mechanism , It is suggested to save the pictures and upload them directly (img-yQpIu5Ko-1653844979052)(assets/image-20210901171132242.png)]](/img/a7/9417c685595f16843e5ddf913fc6f5.png)
View interface documentation
After the above integrated configuration , Our project integration Swagger And Knife4j We're done , Next we can restart the project , Provider documentation , The access link is : http://localhost:8080/doc.html
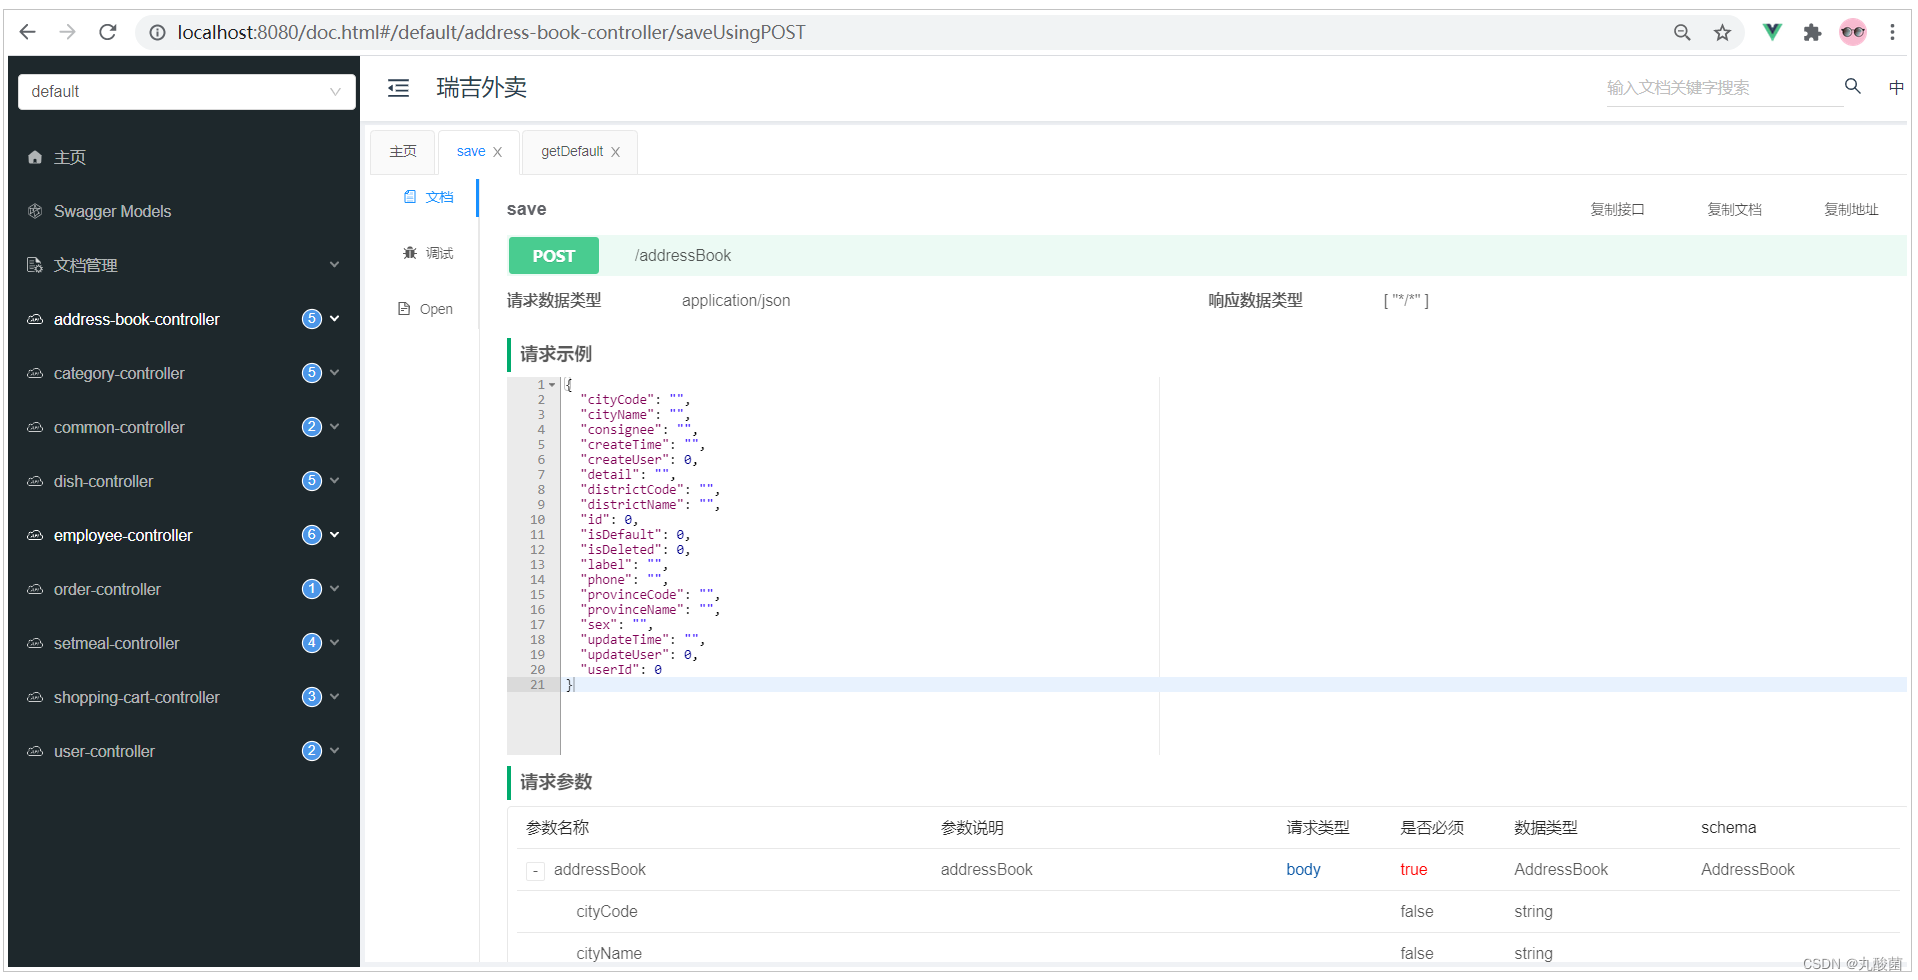
We can see , Of all the Controller Interfaces for adding, deleting, modifying and querying all businesses provided in , All have been automatically generated , We can see the requested through the interface document url、 Request mode 、 Request parameters 、 Request instance 、 Response parameters , Examples of responses . And , We can also use this online interface document , Test the interface .
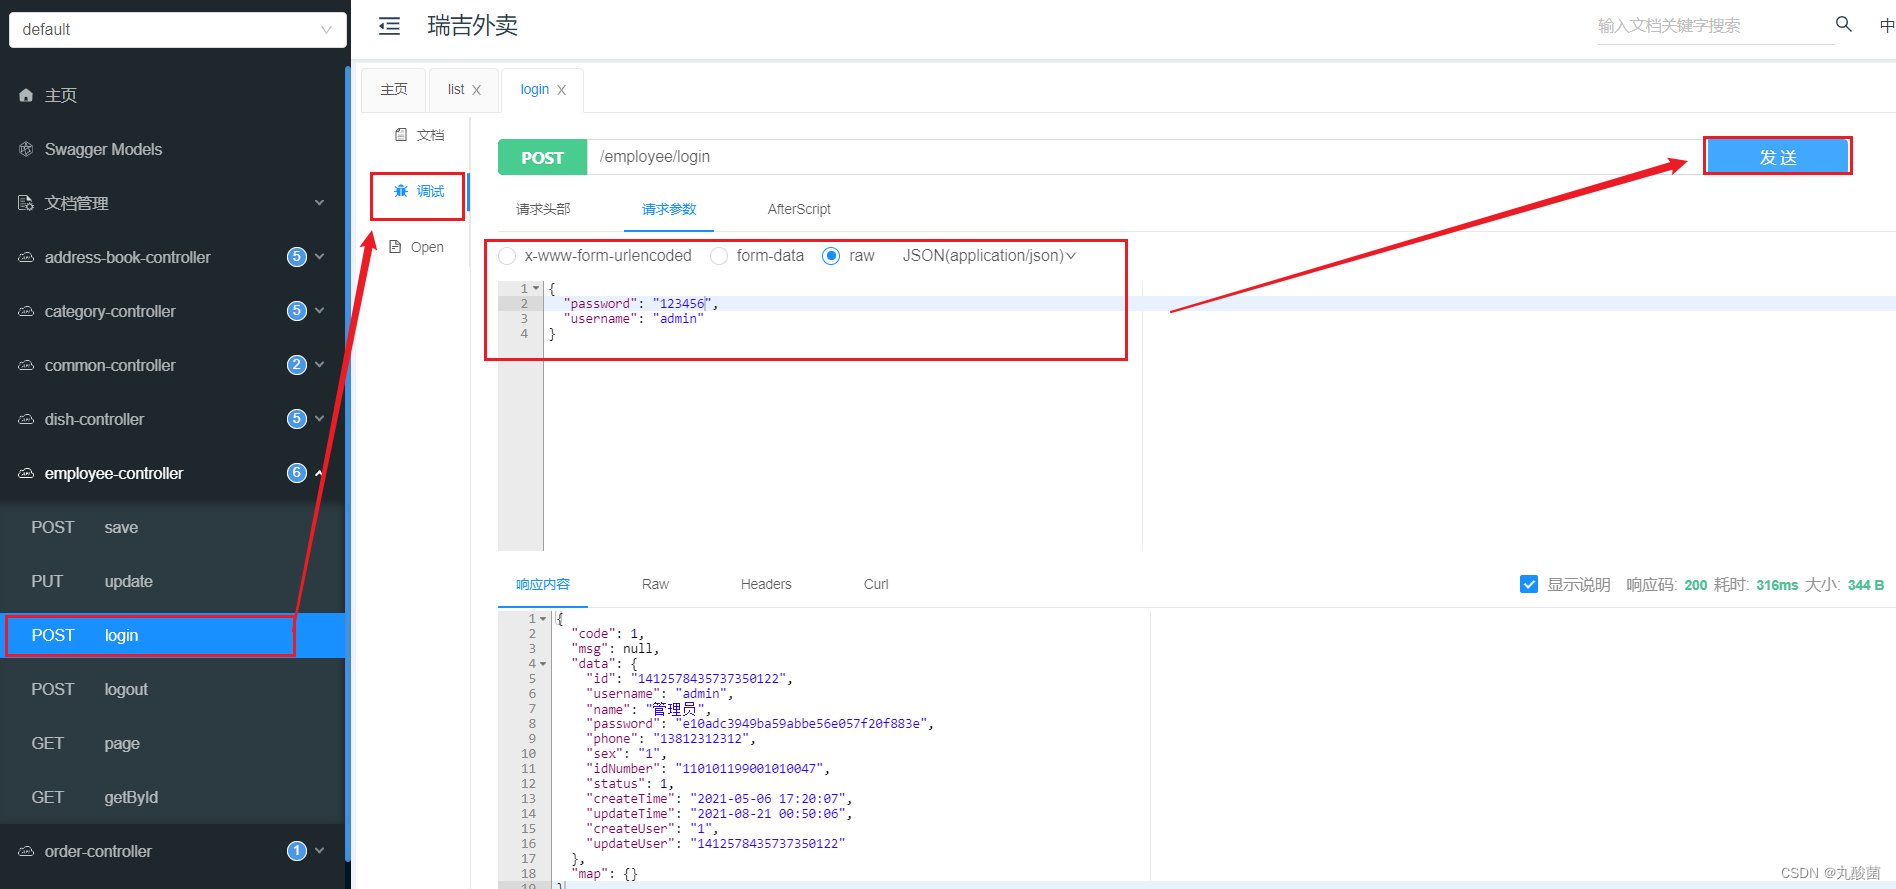
Be careful : Because of our server Controller Methods of business addition, deletion, modification and query in , You must log in before you can access , therefore , When we are testing , You also need to access the login interface first . After login , We can access other interfaces for testing .
We can not only browse the generated interface documents in the browser ,Knife4j It also supports offline documents , Download interface documents , The supported download formats are :markdown、html、word、openApi.

Commonly used annotations
Problem specification
Above we visit directly Knife4j Interface document page for , You can view all interface document information , But we found that , These interface document classifications and interface descriptions are Controller The name of the class ( The name of hump changes ) And the method name , And in the interface document , All request parameters , The response data , There is no Chinese description , I don't know the meaning of the parameters , The readability of interface documents is poor .
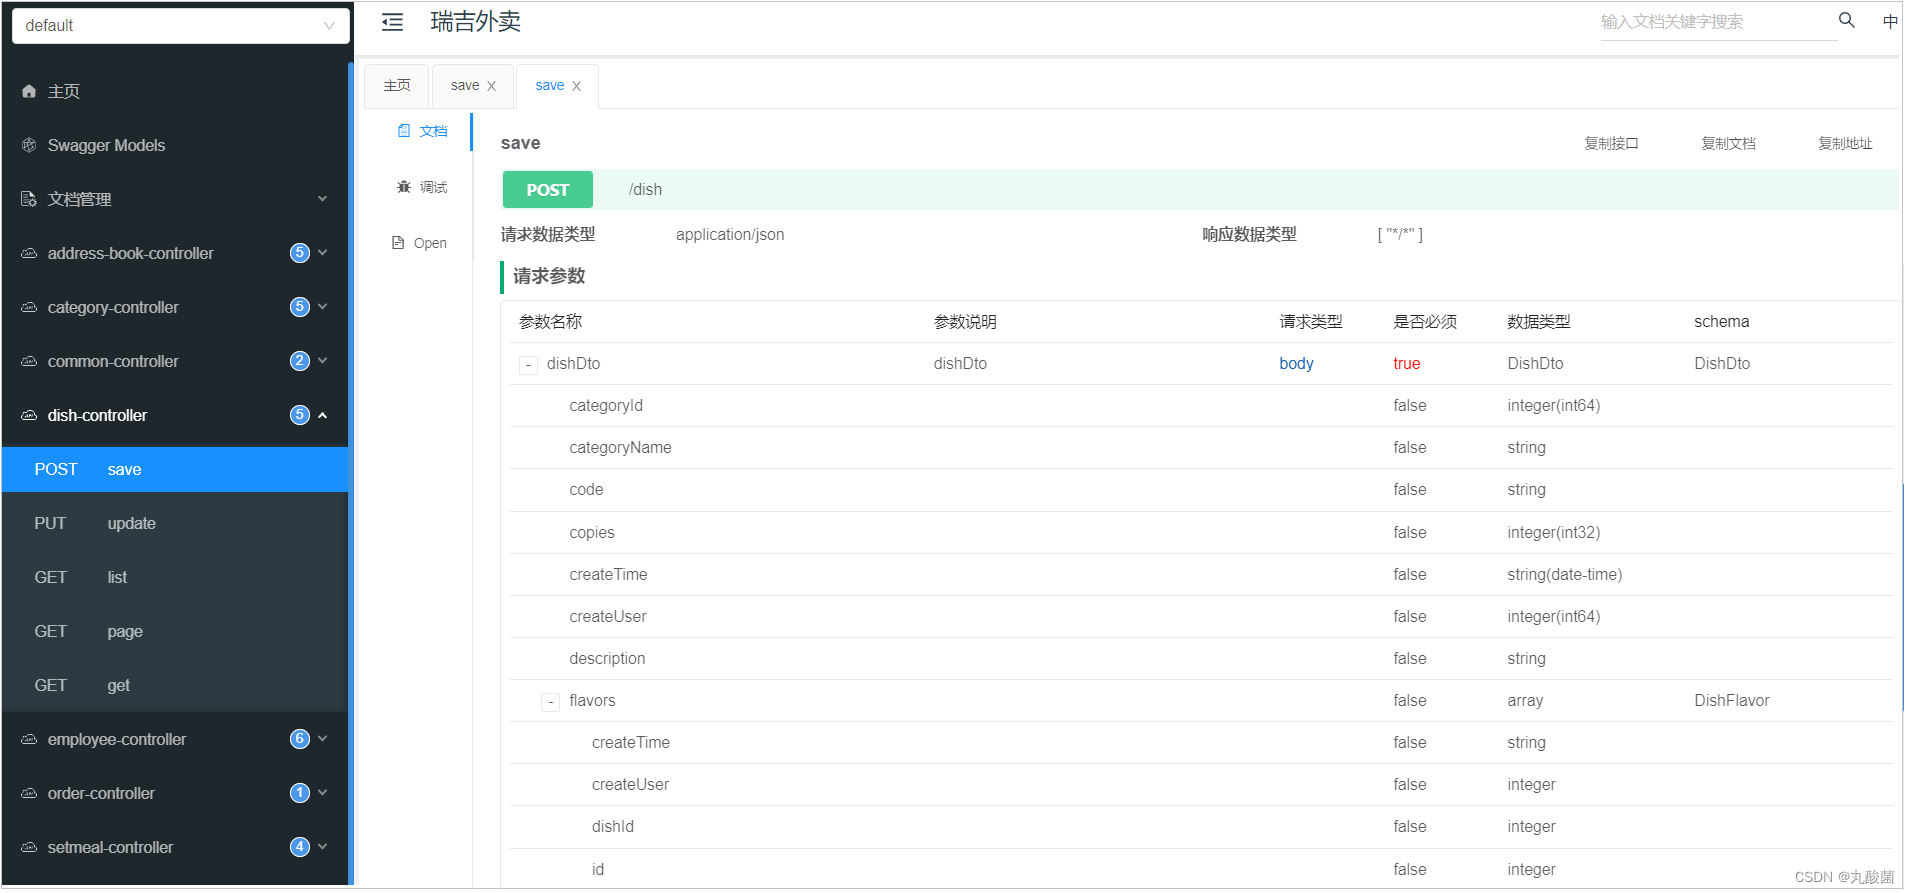
Note introduction
In order to solve the above problems ,Swagger A lot of comments are provided , Through these notes , We can better and more clearly describe our interface , Contains the request parameters of the interface 、 The response data 、 Data models, etc . Core notes , It mainly includes the following :
| annotation | Location | explain |
|---|---|---|
| @Api | class | load Controller Class , Represents a description of a class |
| @ApiModel | class ( Usually entity classes ) | Describe the role of entity classes |
| @ApiModelProperty | attribute | Describes the properties of an entity class |
| @ApiOperation | Method | Explain the purpose of the method 、 effect |
| @ApiImplicitParams | Method | Represents a set of parameter descriptions |
| @ApiImplicitParam | Method | Use in @ApiImplicitParams In the annotations , Specify the attributes of each aspect of a request parameter |
Annotation test
1). Entity class
Can pass @ApiModel , @ApiModelProperty To describe entity classes and attributes
@Data
@ApiModel(" package ")
public class Setmeal implements Serializable {

    private static final long serialVersionUID = 1L;
    @ApiModelProperty(" Primary key ")
    private Long id;

    // classification id
    @ApiModelProperty(" classification id")
    private Long categoryId;

    // Package name
    @ApiModelProperty(" Package name ")
    private String name;

    // Package price
    @ApiModelProperty(" Package price ")
    private BigDecimal price;

    // state  0: Discontinue use  1: Enable
    @ApiModelProperty(" state ")
    private Integer status;

    // code
    @ApiModelProperty(" Package number ")
    private String code;

    // Description information
    @ApiModelProperty(" Description information ")
    private String description;

    // picture
    @ApiModelProperty(" picture ")
    private String image;

    @TableField(fill = FieldFill.INSERT)
    private LocalDateTime createTime;

    @TableField(fill = FieldFill.INSERT_UPDATE)
    private LocalDateTime updateTime;

    @TableField(fill = FieldFill.INSERT)
    private Long createUser;

    @TableField(fill = FieldFill.INSERT_UPDATE)
    private Long updateUser;
}
2). In response to the entity R
@Data
@ApiModel(" Return results ")
public class R<T> implements Serializable{


    @ApiModelProperty(" code ")
    private Integer code; // code :1 success ,0 And other numbers are failures

    @ApiModelProperty(" error message ")
    private String msg; // error message

    @ApiModelProperty(" data ")
    private T data; // data

    @ApiModelProperty(" Dynamic data ")
    private Map map = new HashMap(); // Dynamic data

	// Omit static methods  ....
}
3). Controller Class and its methods
describe Controller、 Method and its method parameters , You can annotate : @Api, @APIOperation, @ApiImplicitParams, @ApiImplicitParam
@RestController
@RequestMapping("/setmeal")
@Slf4j
@Api(tags = " Package related interfaces ")
public class SetmealController {


    @Autowired
    private SetmealService setmealService;
    @Autowired
    private CategoryService categoryService;
    @Autowired
    private SetmealDishService setmealDishService;

    /** *  New package  * @param setmealDto * @return */
    @PostMapping
    @CacheEvict(value = "setmealCache",allEntries = true)
    @ApiOperation(value = " New package interface ")
    public R<String> save(@RequestBody SetmealDto setmealDto){

        log.info(" Package information :{}",setmealDto);

        setmealService.saveWithDish(setmealDto);

        return R.success(" Successfully added package ");
    }

    /** *  Package paging query  * @param page * @param pageSize * @param name * @return */
    @GetMapping("/page")
    @ApiOperation(value = " Package paging query interface ")
    @ApiImplicitParams({

            @ApiImplicitParam(name = "page",value = " Page number ",required = true),
            @ApiImplicitParam(name = "pageSize",value = " Records per page ",required = true),
            @ApiImplicitParam(name = "name",value = " Package name ",required = false)
    })
    public R<Page> page(int page,int pageSize,String name){

        // Page builder object
        Page<Setmeal> pageInfo = new Page<>(page,pageSize);
        Page<SetmealDto> dtoPage = new Page<>();

        LambdaQueryWrapper<Setmeal> queryWrapper = new LambdaQueryWrapper<>();
        // Add query criteria , according to name Conduct like Fuzzy query
        queryWrapper.like(name != null,Setmeal::getName,name);
        // Add sorting criteria , Sort in descending order according to the update time
        queryWrapper.orderByDesc(Setmeal::getUpdateTime);

        setmealService.page(pageInfo,queryWrapper);

        // Object Copy
        BeanUtils.copyProperties(pageInfo,dtoPage,"records");
        List<Setmeal> records = pageInfo.getRecords();

        List<SetmealDto> list = records.stream().map((item) -> {

            SetmealDto setmealDto = new SetmealDto();
            // Object Copy
            BeanUtils.copyProperties(item,setmealDto);
            // classification id
            Long categoryId = item.getCategoryId();
            // According to the classification id Query classification objects
            Category category = categoryService.getById(categoryId);
            if(category != null){

                // Category name
                String categoryName = category.getName();
                setmealDto.setCategoryName(categoryName);
            }
            return setmealDto;
        }).collect(Collectors.toList());

        dtoPage.setRecords(list);
        return R.success(dtoPage);
    }

    /** *  Delete package  * @param ids * @return */
    @DeleteMapping
    @CacheEvict(value = "setmealCache",allEntries = true)
    @ApiOperation(value = " Package deletion interface ")
    public R<String> delete(@RequestParam List<Long> ids){

        log.info("ids:{}",ids);

        setmealService.removeWithDish(ids);

        return R.success(" Package data deleted successfully ");
    }

    /** *  Query package data according to conditions  * @param setmeal * @return */
    @GetMapping("/list")
    @Cacheable(value = "setmealCache",key = "#setmeal.categoryId + '_' + #setmeal.status")
    @ApiOperation(value = " Package condition query interface ")
    public R<List<Setmeal>> list(Setmeal setmeal){

        LambdaQueryWrapper<Setmeal> queryWrapper = new LambdaQueryWrapper<>();
        queryWrapper.eq(setmeal.getCategoryId() != null,Setmeal::getCategoryId,setmeal.getCategoryId());
        queryWrapper.eq(setmeal.getStatus() != null,Setmeal::getStatus,setmeal.getStatus());
        queryWrapper.orderByDesc(Setmeal::getUpdateTime);

        List<Setmeal> list = setmealService.list(queryWrapper);

        return R.success(list);
    }
}
4). Restart service test
We passed the above Swagger Annotations , For entity classes and attributes in entity classes , as well as Controller and Controller Describe the method , Next , We restart the service , Then take a look at the changes in the automatically generated interface document .
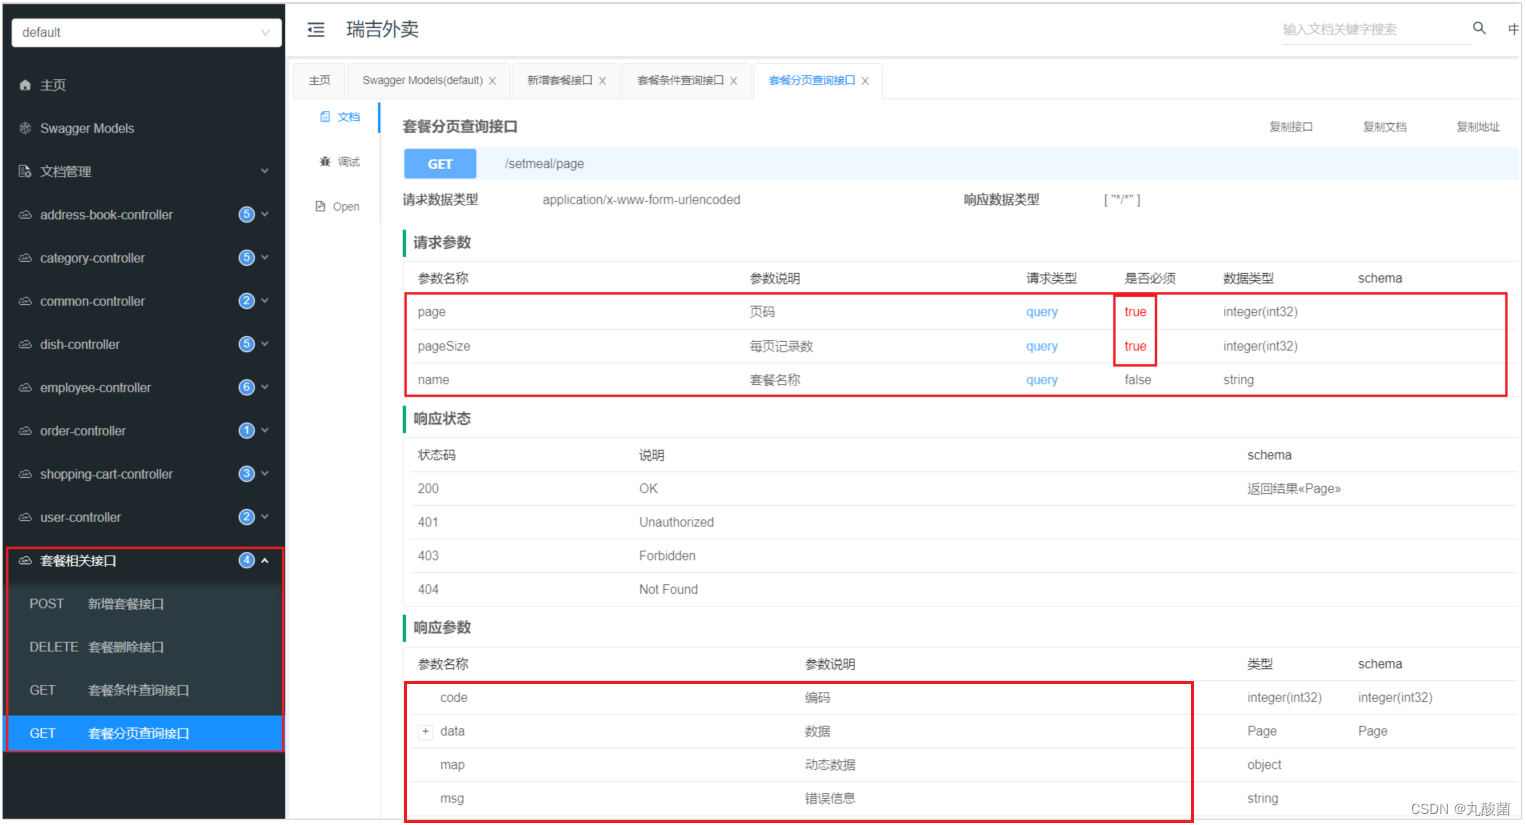
In the page of the interface document , We can see the Chinese description of the interface , Clearly see what each interface does , What is the meaning of interface method parameters , Whether the parameter is required , What is the meaning of the response result parameters , Can be clearly described .
All in all , We need to clearly describe an interface , With the help of Swagger Comments provided to us .
Yapi

Introduce
YApi It's efficient 、 Easy to use 、 Powerful api Management platform , Designed to develop 、 product 、 Testers provide more elegant interface management services . Can help developers easily create 、 Release 、 maintain API,YApi It also provides excellent interaction experience for users , Developers only need to use the interface data writing tool and simple click operation provided by the platform to realize the interface management .
YApi Make interface development simpler and more efficient , Make interface management more readable 、 Maintainability , Make teamwork more reasonable .
Source code address : https://github.com/YMFE/yapi
Official documents : https://hellosean1025.github.io/yapi/
To use YApi, The project team needs to deploy itself , In this project, we can use the platform provided by the course to test , domain name : https://mock-java.itheima.net/
Use
Get ready
Registered account , Login platform ![[ Failed to transfer the external chain picture , The origin station may have anti-theft chain mechanism , It is suggested to save the pictures and upload them directly (img-wesTKlXV-1653841779290)(assets/image-20210901110936381.png)]](/img/5c/3b5ce824588e4b13c0a008e02e6ab6.png)
Defining interfaces
Log in to Yapi After the platform , We can create projects , Create an interface classification under the project , Add interfaces to the corresponding categories .
1). Create project
![[ Failed to transfer the external chain picture , The origin station may have anti-theft chain mechanism , It is suggested to save the pictures and upload them directly (img-rXjVsxFH-1653841779291)(assets/image-20210901115408908.png)]](/img/d4/f5060d6224a058e9f674107948754f.png)
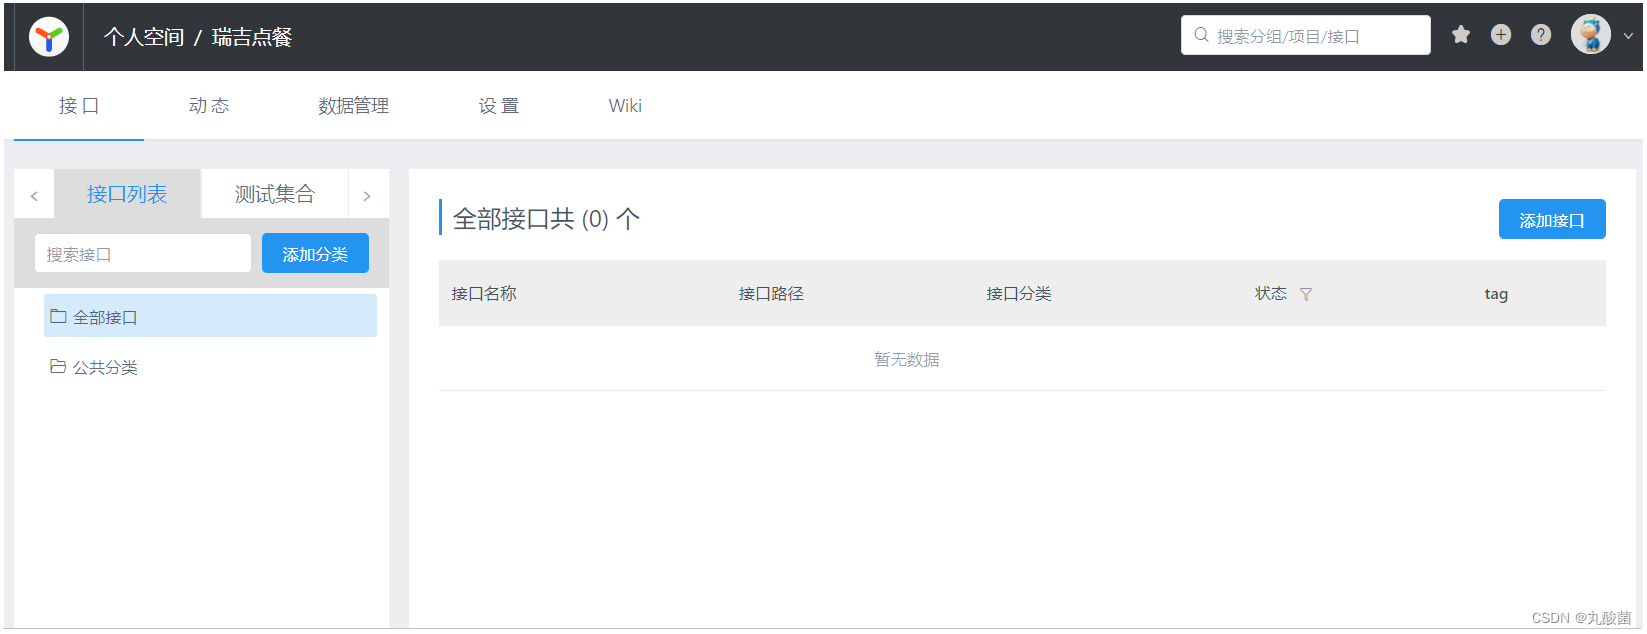
2). Add categories
In the current project , For employees 、 variety of dishes 、 package 、 Order operation , When we maintain the interface , You can classify interfaces , If there is no corresponding classification , We add our own categories .
![[ Failed to transfer the external chain picture , The origin station may have anti-theft chain mechanism , It is suggested to save the pictures and upload them directly (img-vvQzOmX0-1653841779293)(assets/image-20210901125311166.png)]](/img/61/11b5034e8ce727c187d56d9d533665.png)
3). Add interface
![[ Failed to transfer the external chain picture , The origin station may have anti-theft chain mechanism , It is suggested to save the pictures and upload them directly (img-gciVIZPX-1653841779294)(assets/image-20210901125517274.png)]](/img/cf/1bfb8ac78eb88469e81b29dc7d969b.png)
After entering the basic interface information , Add submit , You can see the basic information of the interface :
![[ Failed to transfer the external chain picture , The origin station may have anti-theft chain mechanism , It is suggested to save the pictures and upload them directly (img-xzZXLIz4-1653841779295)(assets/image-20210901125617777.png)]](/img/8d/1742bf696b90ba0f3327402b0b1466.png)
But at the moment , We do not specify the request parameters in the interface , Response data and other information , We can further click Edit , For this interface Edit the details .
![[ Failed to transfer the external chain picture , The origin station may have anti-theft chain mechanism , It is suggested to save the pictures and upload them directly (img-em1CJ0GE-1653841779295)(assets/image-20210901140052897.png)]](/img/94/556d5715e5dd928b6c08cda5a6a4f2.png)
4). Running interface
Yapi Interface test function is also provided , When we finish editing the interface , The code development of the back-end service is completed , Start the service , You can use Yapi Interface test is done .
![[ Failed to transfer the external chain picture , The origin station may have anti-theft chain mechanism , It is suggested to save the pictures and upload them directly (img-fZQt3ndi-1653841779296)(assets/image-20210901140924816.png)]](/img/a4/4dfccad5eaf97fc1ba772ce9650dd4.png)
Be careful : Because the menu paging query interface , It can only be accessed after logging in , So when testing the interface , You need to first request the login interface in the employee management interface , After login , Then access the interface .
stay Yapi In the platform , After defining the interface document , Front and back-end developers need to develop front-end and back-end functions according to the description of the interface in the interface document .
Export interface document
stay Yapi In the platform, we can not only read documents online , Can also be Yapi Directly export the documents maintained in , Can export md,json,html Format , You can choose by yourself when exporting .
![[ Failed to transfer the external chain picture , The origin station may have anti-theft chain mechanism , It is suggested to save the pictures and upload them directly (img-cHerBgnu-1653841779297)(assets/image-20210901150153468.png)]](/img/71/f1b28f41315fec9d1be2ba4d3d565c.png)
In the exported html File or md In file , It mainly describes the basic information of the interface , Include : Request path 、 Request mode 、 Interface description 、 Request parameters 、 Return data and other information . The display form is as follows :
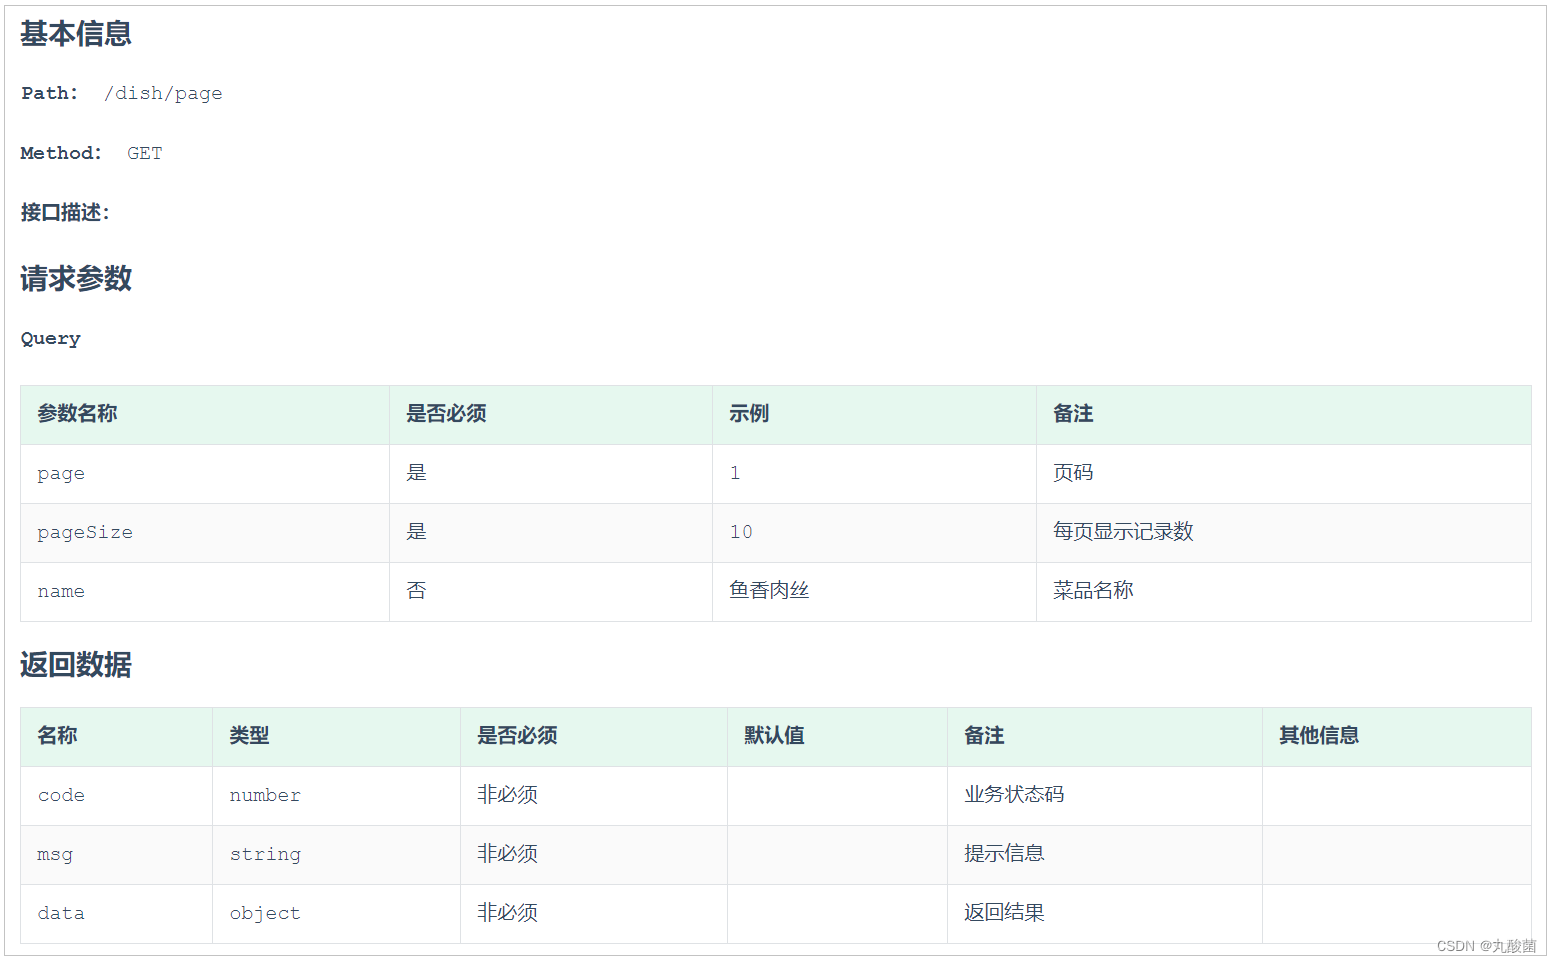
Import interface document
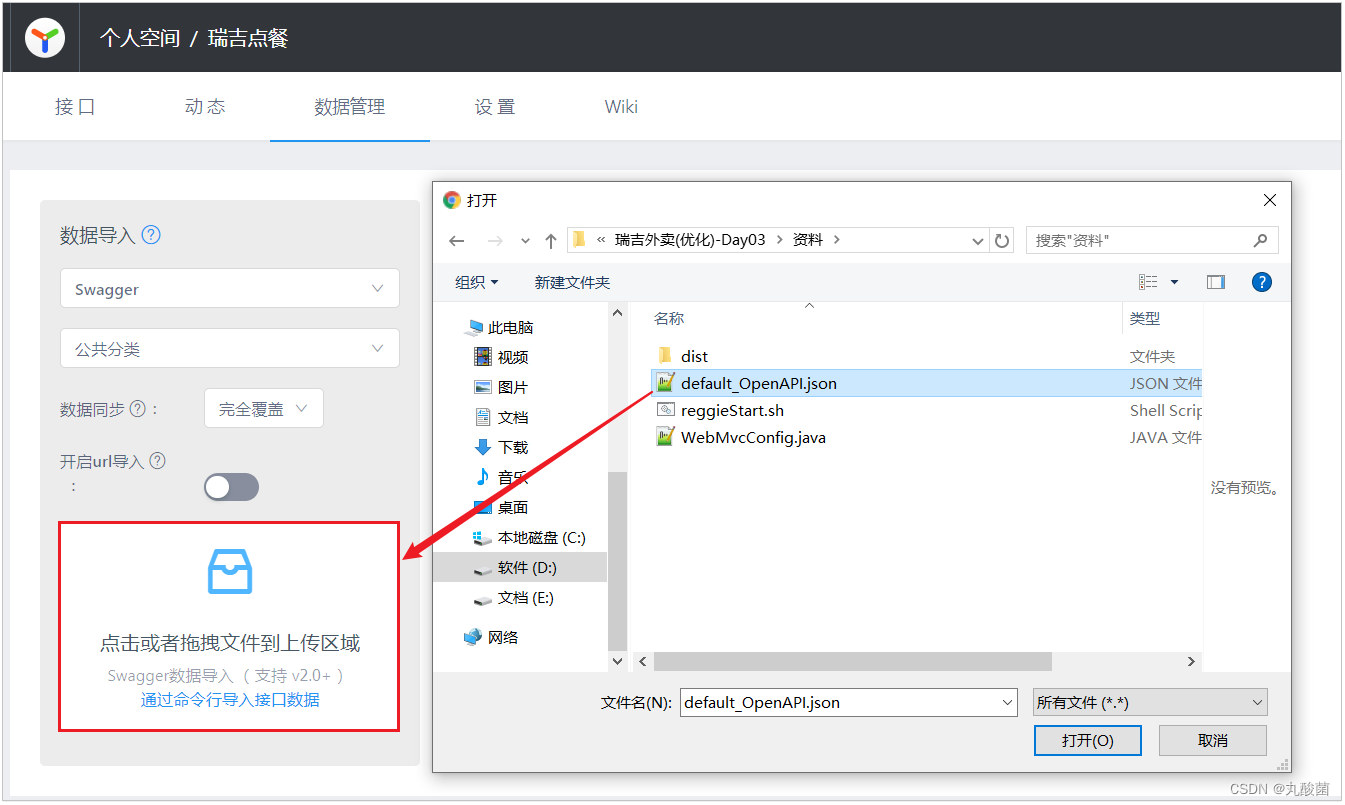
Above, we explained the export of interface documents , We can also import external interface documents into Yapi In the platform , In this way, we don't need to add interfaces one by one . We can use the information provided in the course materials json The interface document in format is imported directly Yapi From the platform .
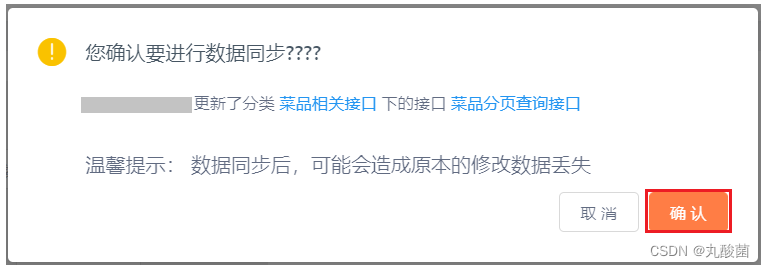
Confirmation pop-up during import , choice " confirm ".
After importing successfully , We can do that Yapi The platform sees the imported interface .
![[ Failed to transfer the external chain picture , The origin station may have anti-theft chain mechanism , It is suggested to save the pictures and upload them directly (img-TBkCIKoQ-1653841779298)(assets/image-20210901151721356.png)]](/img/01/0c0a074ab69a5718dd13f48ce486d4.png)
边栏推荐
- CSDN问答标签技能树(五) —— 云原生技能树
- Postman Interface Association
- Adaptive Bezier curve network for real-time end-to-end text recognition
- Bytetrack: multi object tracking by associating every detection box paper reading notes ()
- [untitled]
- The virtual machine Ping is connected to the host, and the host Ping is not connected to the virtual machine
- Invalid global search in idea/pychar, etc. (win10)
- Mysql34 other database logs
- Global and Chinese market of transfer switches 2022-2028: Research Report on technology, participants, trends, market size and share
- February 13, 2022-3-middle order traversal of binary tree
猜你喜欢
![[recommended by bloggers] C WinForm regularly sends email (with source code)](/img/5d/57f8599a4f02c569c6c3f4bcb8b739.png)
[recommended by bloggers] C WinForm regularly sends email (with source code)
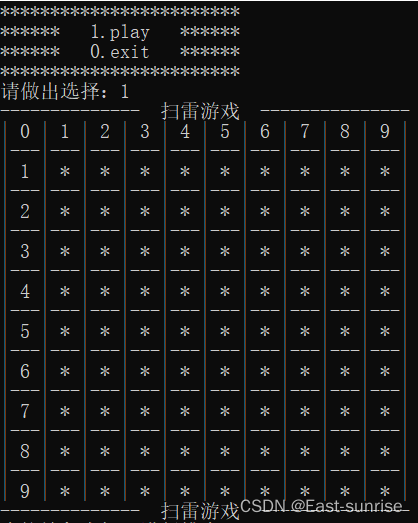
Isn't there anyone who doesn't know how to write mine sweeping games in C language
![[C language] deeply analyze the underlying principle of data storage](/img/d6/1c0cd38c75da0d0cc1df7f36938cfb.png)
[C language] deeply analyze the underlying principle of data storage
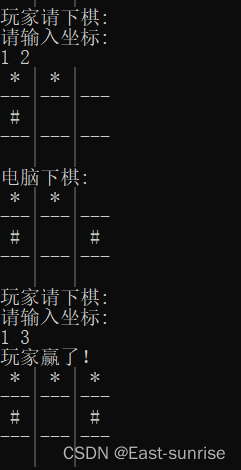
Nanny hand-in-hand teaches you to write Gobang in C language
CSDN blog summary (I) -- a simple first edition implementation
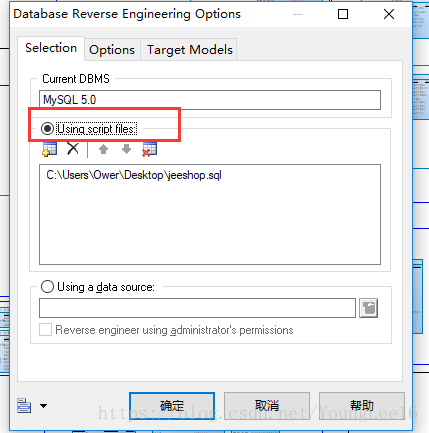
Navicat 導出錶生成PDM文件

【博主推荐】asp.net WebService 后台数据API JSON(附源码)
C language advanced pointer Full Version (array pointer, pointer array discrimination, function pointer)

MySQL27-索引優化與查詢優化
Mysql24 index data structure
随机推荐
CSDN Q & a tag skill tree (V) -- cloud native skill tree
Anaconda3 installation CV2
[reading notes] rewards efficient and privacy preserving federated deep learning
MySQL 29 other database tuning strategies
API learning of OpenGL (2003) gl_ TEXTURE_ WRAP_ S GL_ TEXTURE_ WRAP_ T
frp内网穿透那些事
MySQL24-索引的数据结构
第一篇博客
IDEA 导入导出 settings 设置文件
Adaptive Bezier curve network for real-time end-to-end text recognition
Global and Chinese market of operational amplifier 2022-2028: Research Report on technology, participants, trends, market size and share
Copy constructor template and copy assignment operator template
虚拟机Ping通主机,主机Ping不通虚拟机
CSDN question and answer module Title Recommendation task (I) -- Construction of basic framework
【博主推荐】SSM框架的后台管理系统(附源码)
C language advanced pointer Full Version (array pointer, pointer array discrimination, function pointer)
Mysql27 - Optimisation des index et des requêtes
Windows cannot start the MySQL service (located on the local computer) error 1067 the process terminated unexpectedly
Mysql25 index creation and design principles
[paper reading notes] - cryptographic analysis of short RSA secret exponents