当前位置:网站首页>用STM32点个灯
用STM32点个灯
2022-07-05 05:24:00 【贝勒里恩】
一、前言
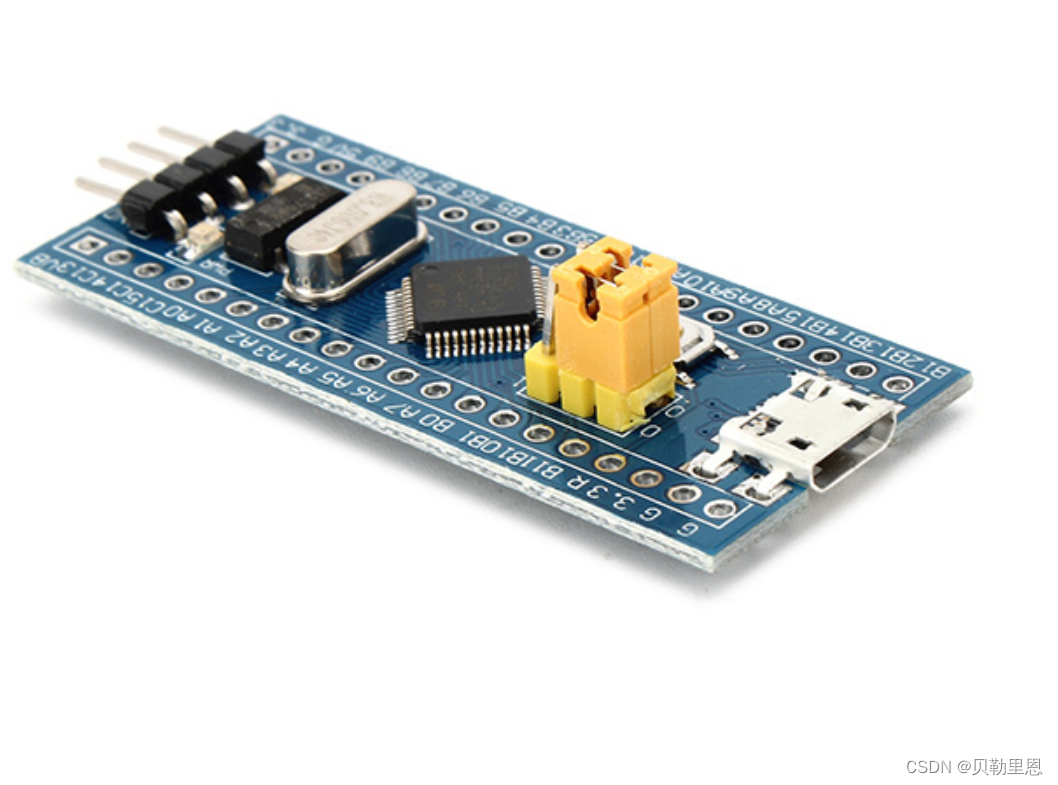
单片机型号:STM32F103C8T6
开发环境:Keil5
二、分析
想要控制LED灯,当然是通过控制STM32芯片的I/O引脚电平的高低来实现。在STM32芯片上,I/O引脚可以被软件设置成各种不同的功能,如输入或输出,所以I/O引脚又被称为GPIO;芯片上的GPIO通常会分组,例如GPIOA、GPIOB、GPIOC等等。
于是,控制LED的步骤大概就可以分为如下几步:
- GPIO端口引脚多-----就要选定需要控制的特定引脚;
- GPIO功能如此丰富-----就要配置需要的特定功能;
- 控制LED的亮和灭-----就要设置GPIO输出电压的高低;
参考《STM32参考手册》,如下: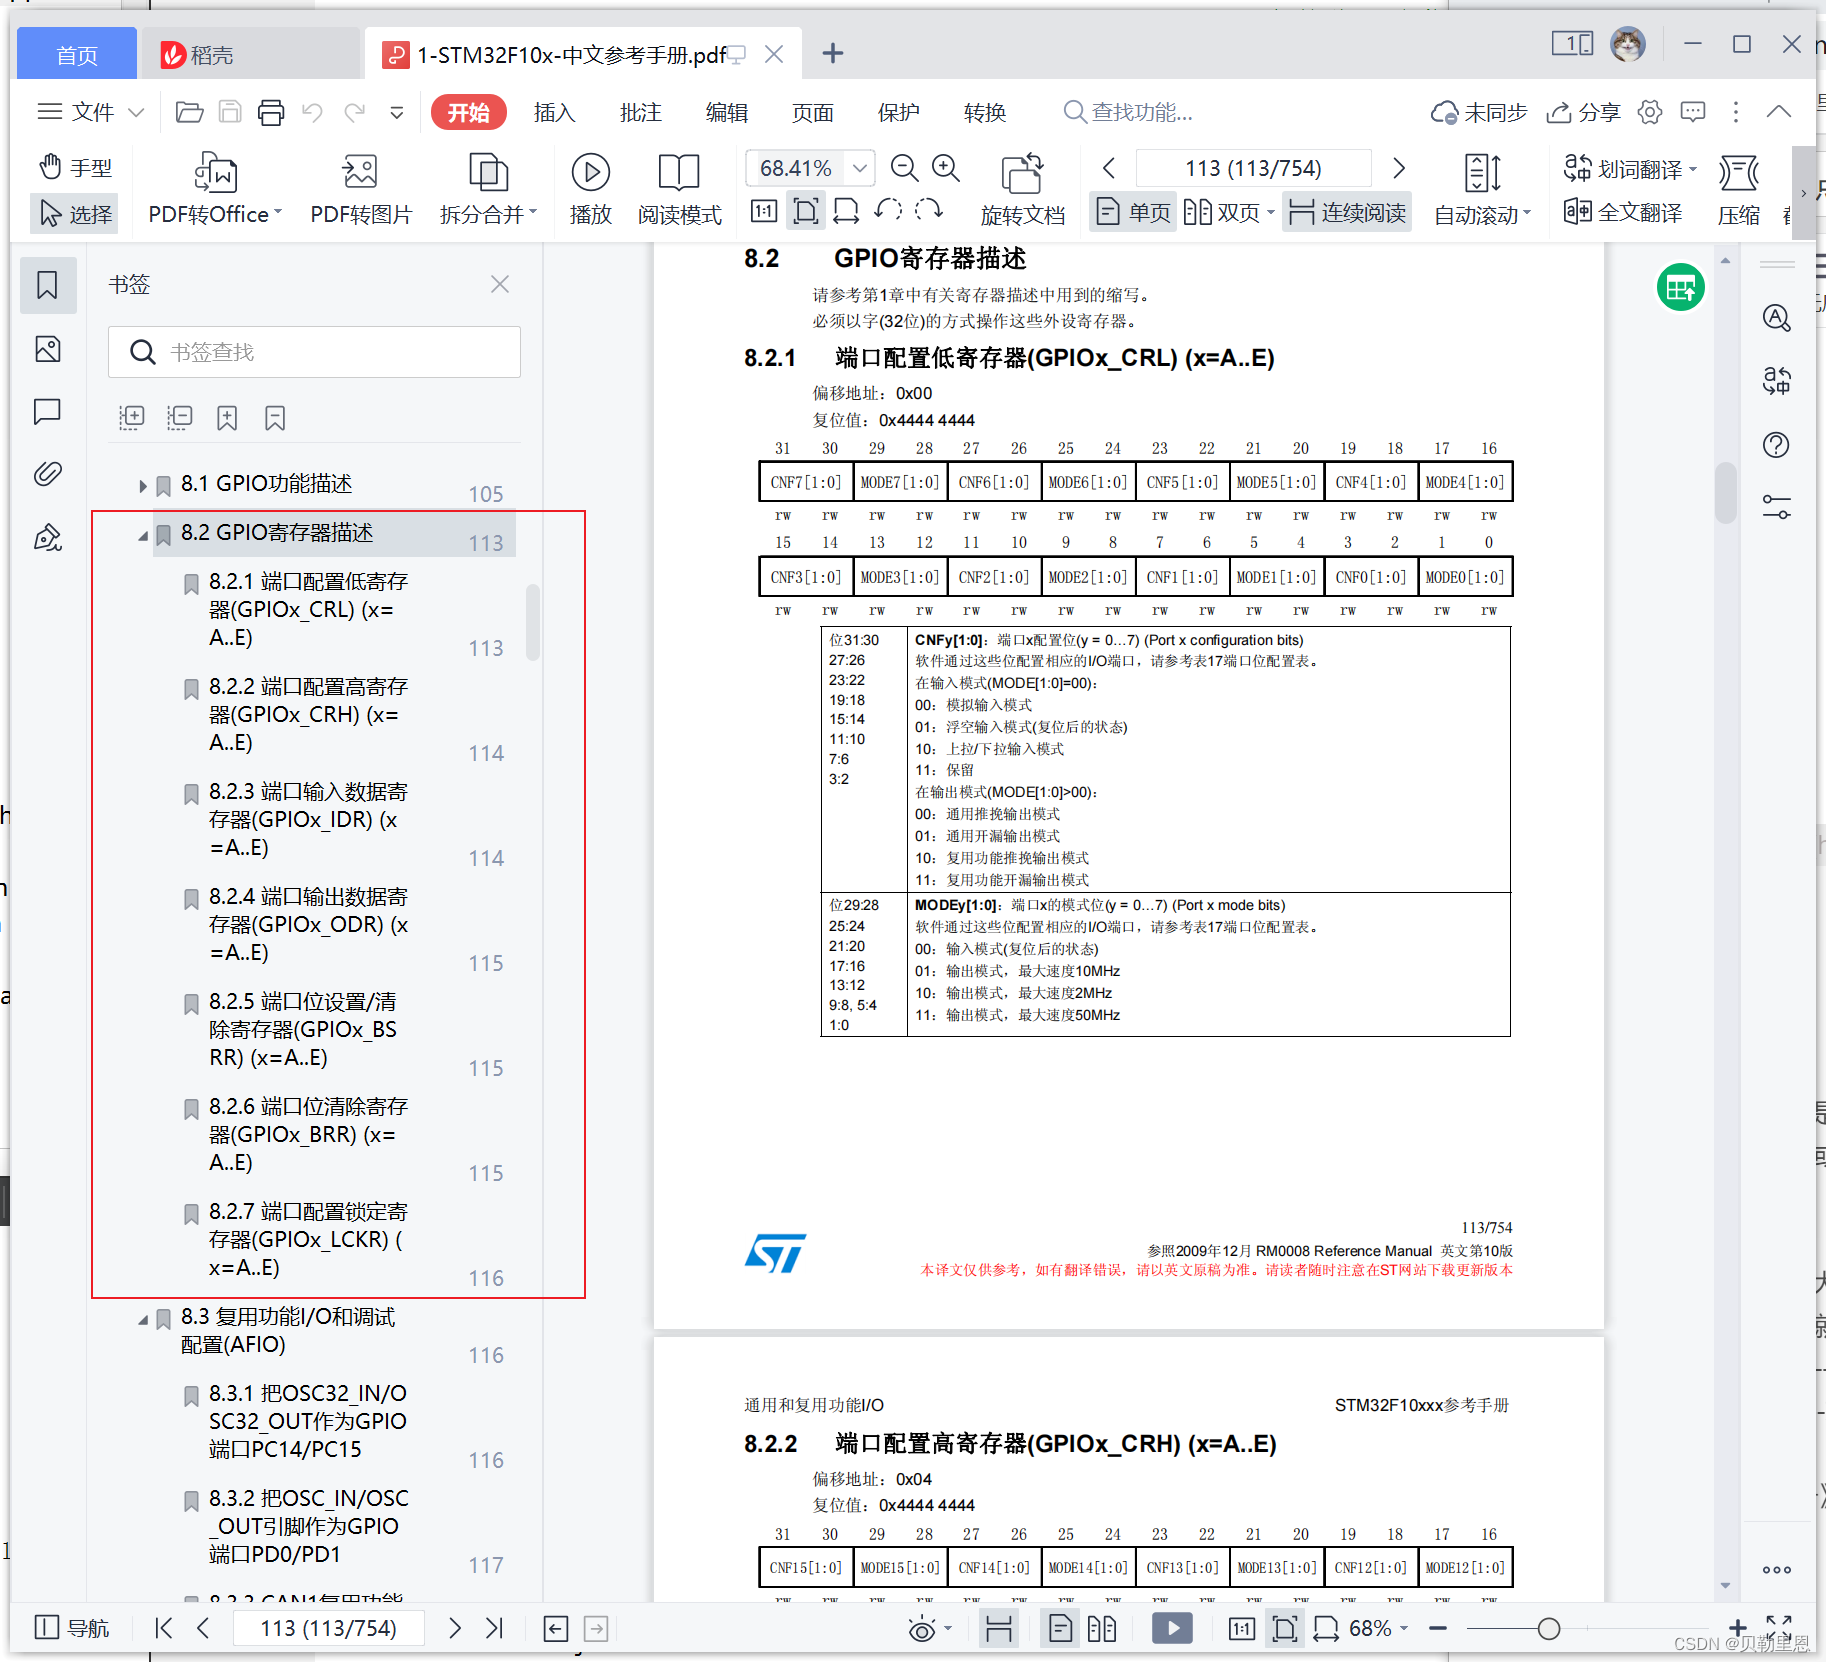
GPIO寄存器功能简要概括如下:
- 配置寄存器:选定GPIO的特定功能,最基本的如选择作为输入还是输出端口;
- 数据寄存器:保存了GPIO的输入电平或将要输出的电平;
- 位控制寄存器:设置某引脚的数据为1或0,控制输出的电平;
- 锁定寄存器:设置某锁定引脚后,就不能修改其配置;
但是我们使用库开发,基本不会通过直接操作寄存器来控制GPIO,《stm32f10x.h》这个文件把STM32的所有寄存器进行了地址映射,例如: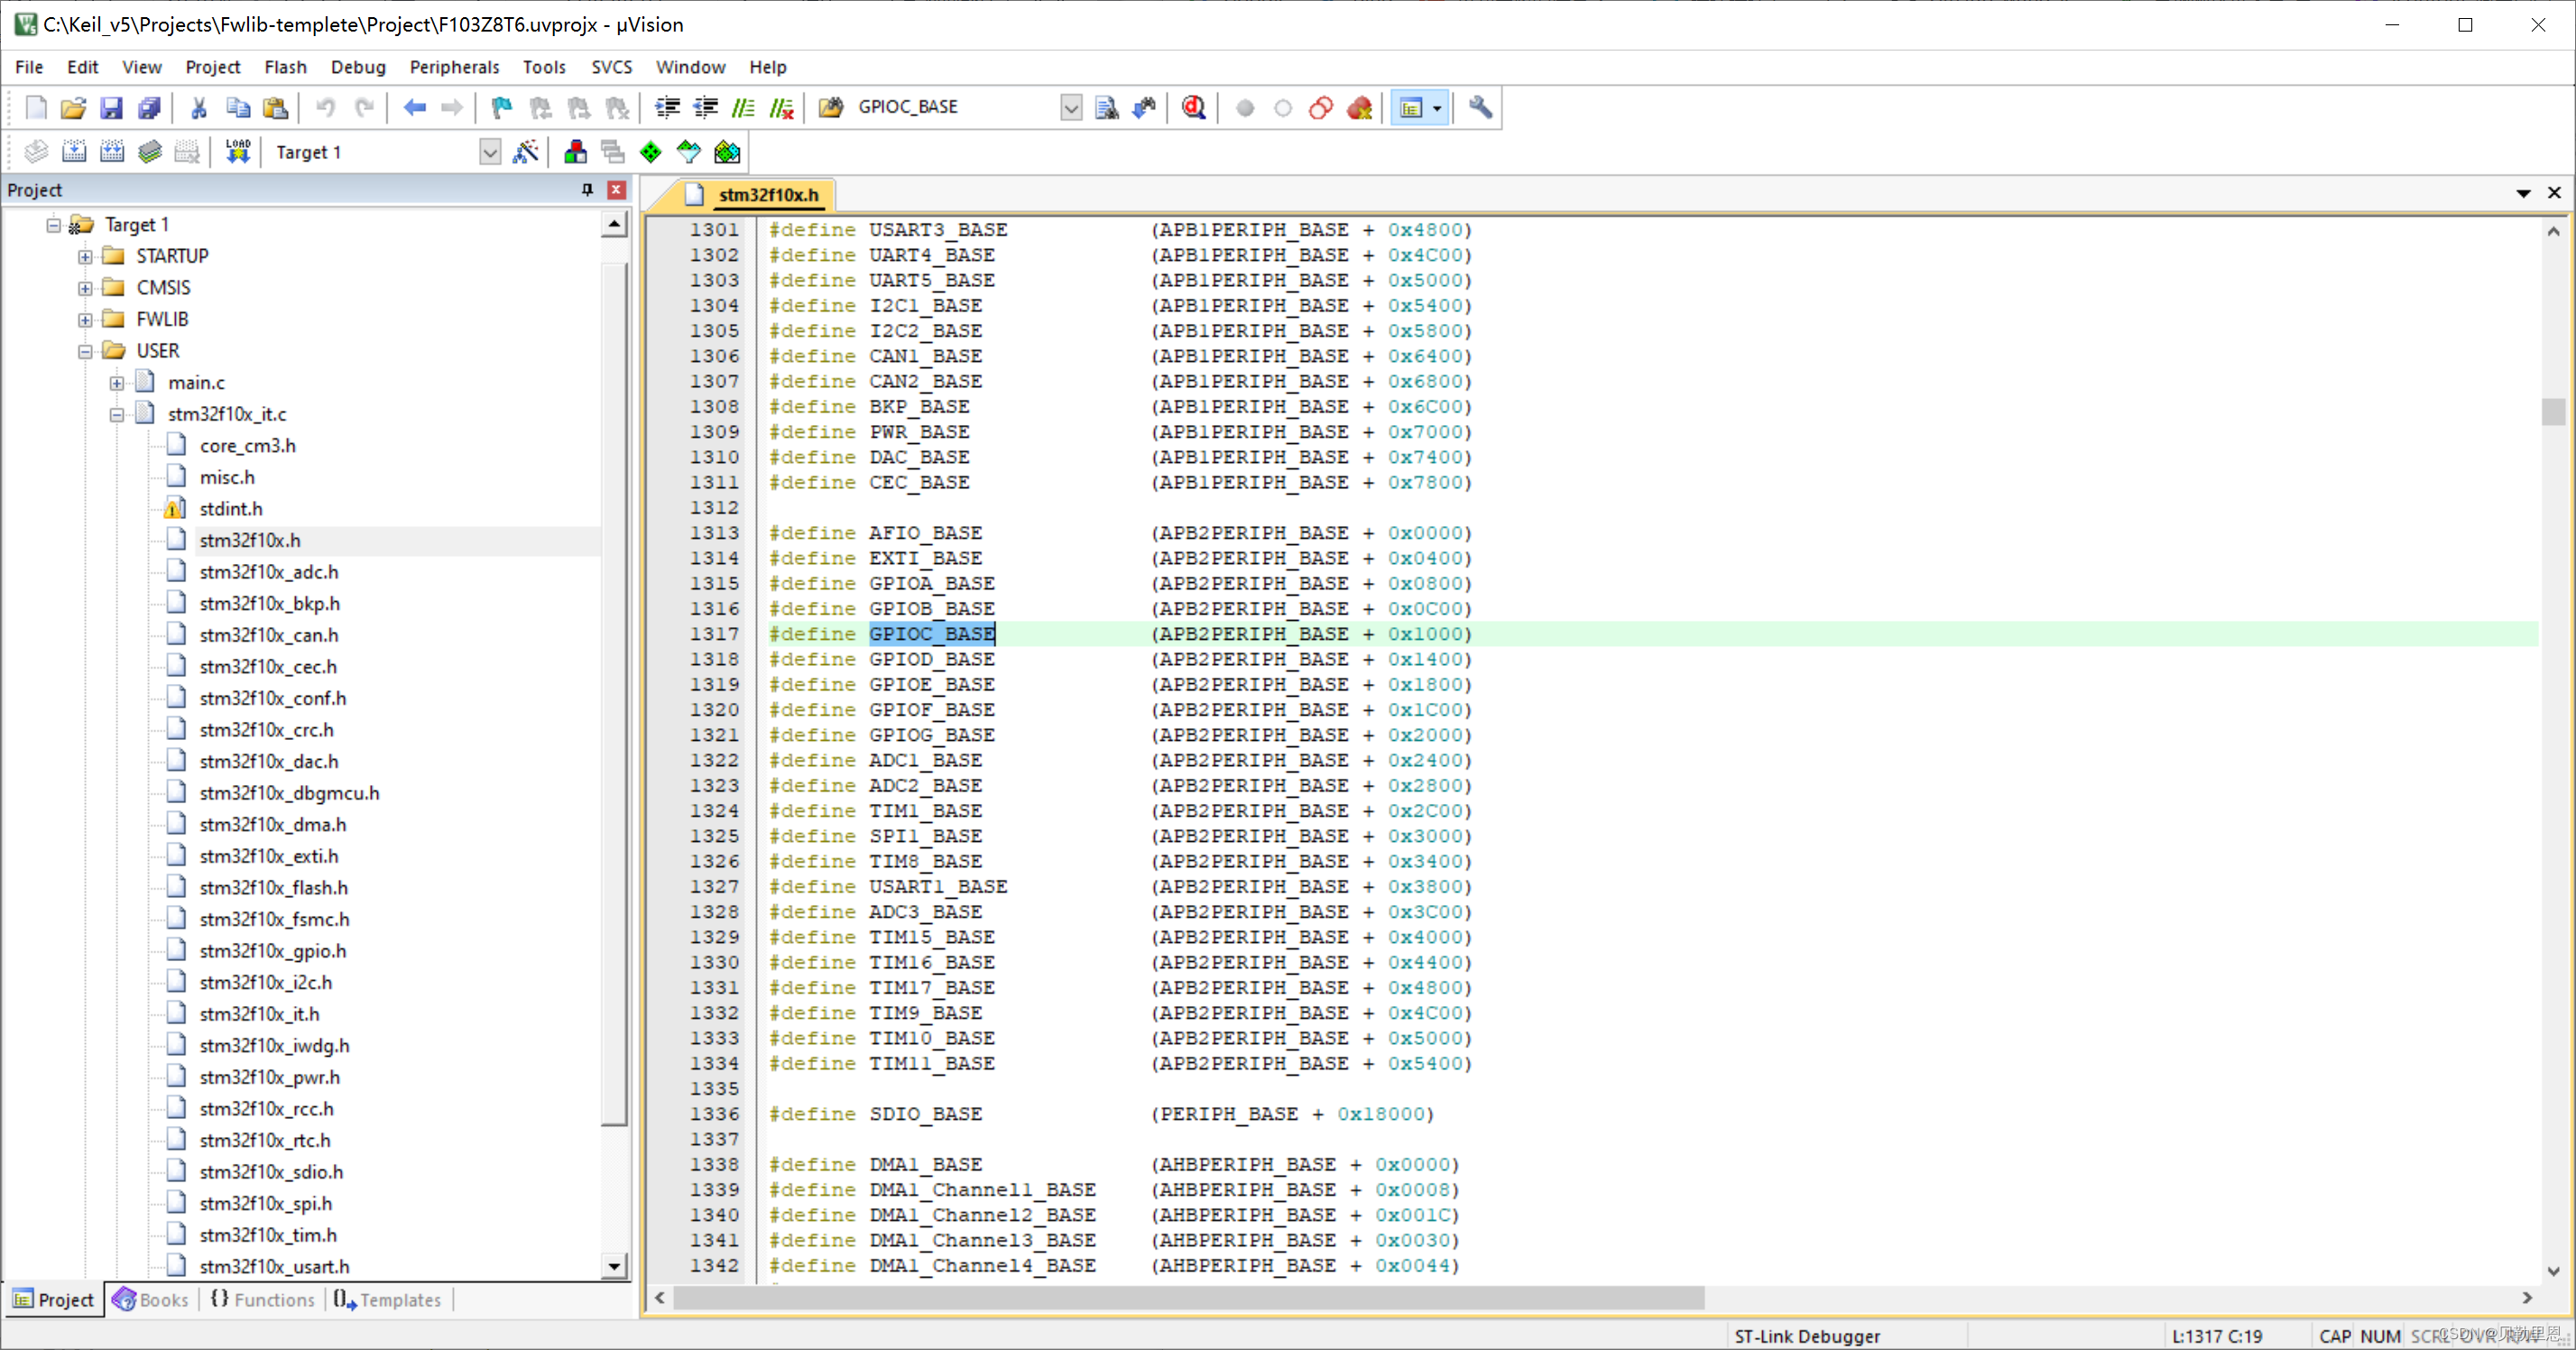
GPIOC_BASE代表GPIOC组寄存器的基地址
三、编写代码
使用外设,一定要记得开启外设的时钟;
1、创建led文件,创建led.c和led.h在USER文件夹下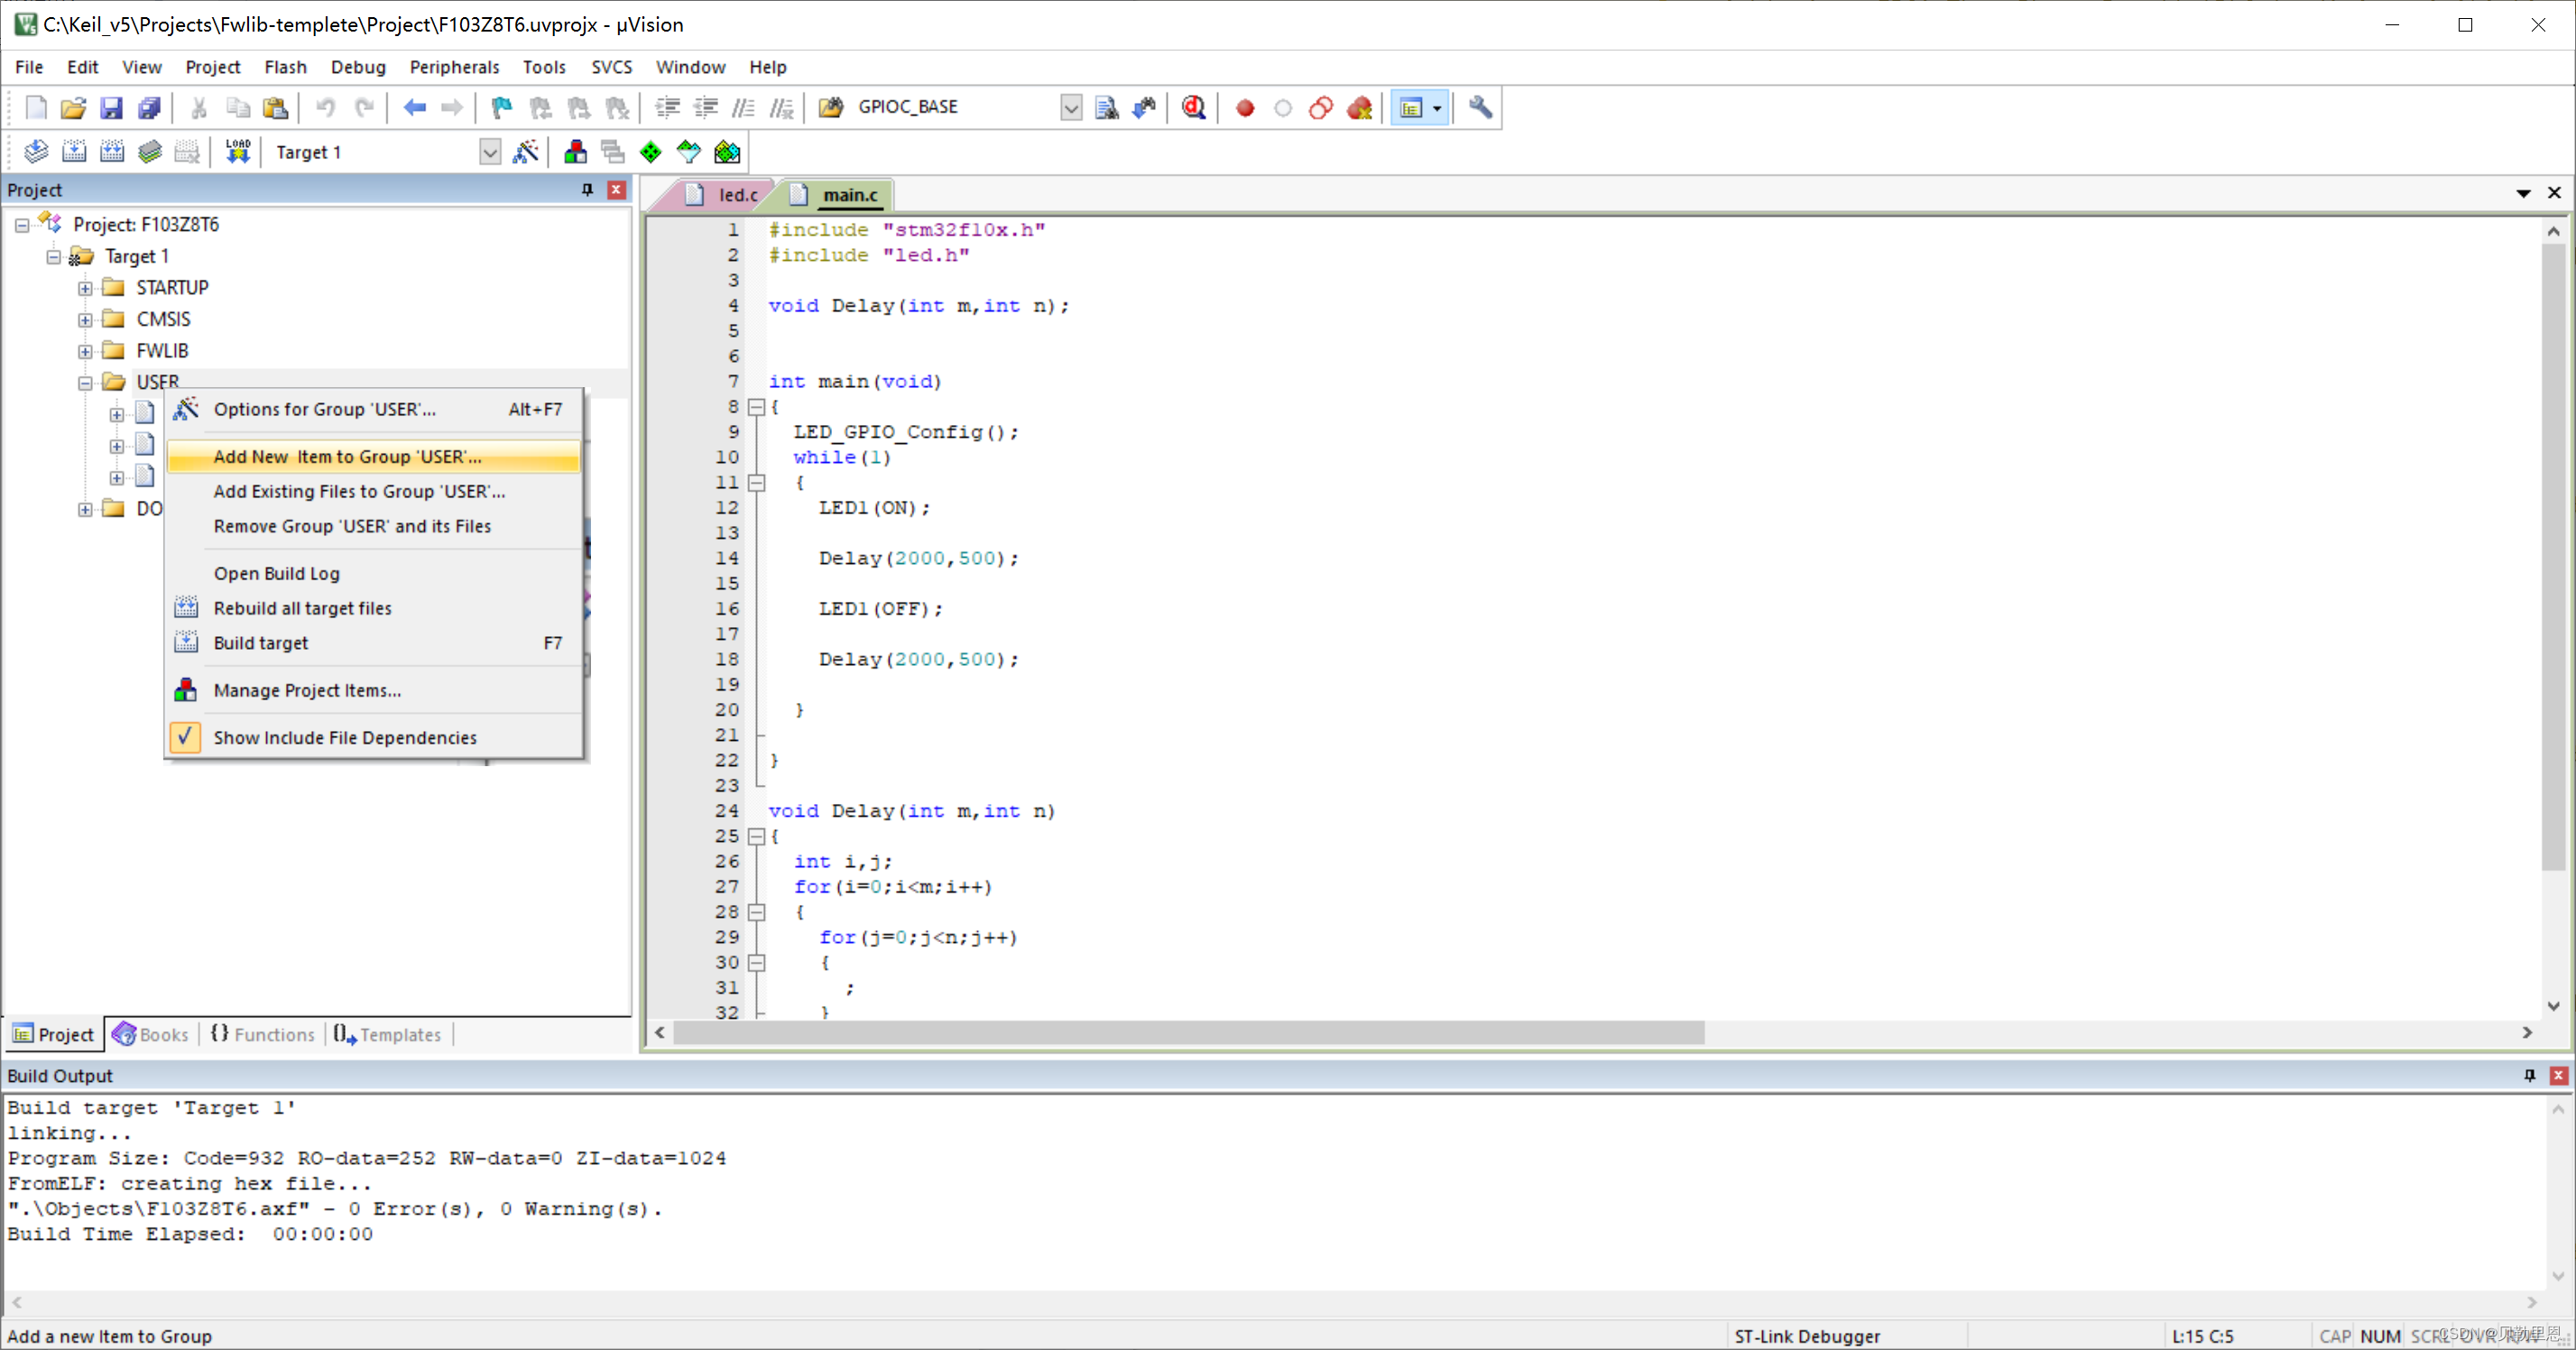
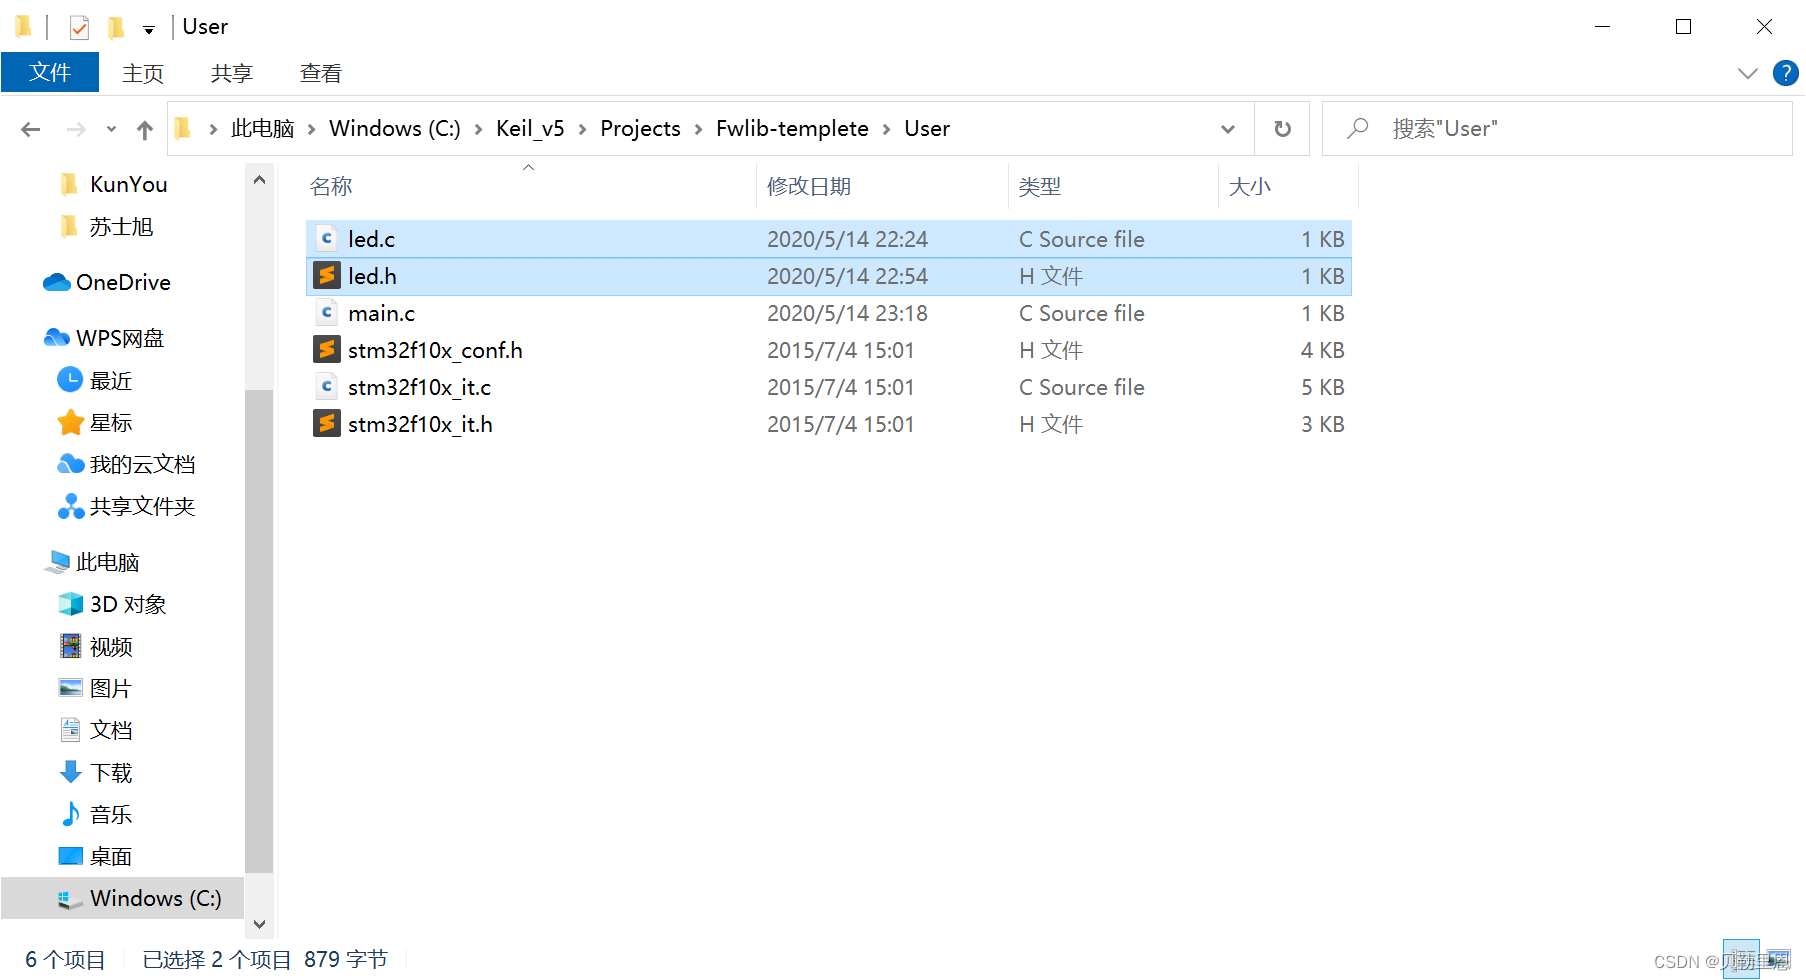
2、添加代码
连线:小灯一个引脚接STM32上的GPIOC13,一个引脚接STM32上的GND
效果:小灯循环亮-灭-亮-灭
led.h
#ifndef __LED_H
#define __LED_H

#include "stm32f10x.h"

void LED_GPIO_Config(void);

#endif
led.c
#include "led.h"

void LED_GPIO_Config(void)
{

	//定义一个GPIO_InitTypeDef类型的结构体
	GPIO_InitTypeDef GPIO_InitStructure;

	//开启GPIOC的外设时钟
	RCC_APB2PeriphClockCmd(RCC_APB2Periph_GPIOC,ENABLE);

	//选择要控制的GPIOC引脚
	GPIO_InitStructure.GPIO_Pin = GPIO_Pin_13;

	//设置引脚模式:通用推挽输出
	GPIO_InitStructure.GPIO_Mode = GPIO_Mode_Out_PP;

	//设置引脚速率:50MHz
	GPIO_InitStructure.GPIO_Speed = GPIO_Speed_50MHz;

	//调用库函数,初始化GPIOC13
	GPIO_Init(GPIOC,&GPIO_InitStructure);
}
main.c
#include "stm32f10x.h"
#include "led.h"

void Delay(int m,int n);	//延时函数

int main(void)
{

	LED_GPIO_Config();
	while(1)
	{

		//设置GPIOC13高电平(小灯亮)
		GPIO_SetBits(GPIOC,GPIO_Pin_13);

		//延时
		Delay(2000,500);

		//设置GPIOC13低电平(小灯灭)
		GPIO_ResetBits(GPIOC,GPIO_Pin_13)

		//延时
		Delay(2000,500);
	}
}

void Delay(int m,int n)	//粗糙延时函数
{

	int i,j;
	for(i=0;i<m;i++) {

		for(j=0;j<n;j++);
	}
}
四、库接口分析
1、初始化结构体-----GPIO_InitTypeDef类型
typedef struct
{

	uint16_t GPIO_Pin;				//指定将要进行配置的GPIO引脚
	GPIOSpeed_TypeDef GPIO_Speed;	//指定GPIO引脚可输出的最高频率
	GPIOMode_TypeDef GPIO_Mode;		//指定GPIO引脚将要配置成的工作状态
}GPIO_InitTypeDef;
作用:整个结构包含了GPIO_Pin、GPIO_Speed、GPIO_Mode三个成员,我们只需要对这三个成员赋予不同的数值就可以对GPIO端口进行不同的配置,而这些可配置的数值,已经由ST的库文件封装成见名知意的枚举常量,这使得我们编写代码变得非常简便。
GPIO_Pin取值为:
#define GPIO_Pin_0
#define GPIO_Pin_1
......
GPIO_Speed取值为:
typedef enum
{

	GPIO_Speed_10MHz = 1,		//枚举常量,值为1,代表输出速率最高为10MHz
	GPIO_Speed_20MHz,			//对不赋值的枚举变量,自动加1,此常量值为2
	GPIO_Speed_50MHz			//常量值为3
}GPIOSpeed_TypeDef;
GPIO_Mode取值为:
typedef enum
{

	GPIO_Mode_AIN = 0x0,				//模拟输入模式
	GPIO_Mode_IN_FLOATING = 0x04,		//浮空输入模式
	GPIO_Mode_IPD = 0x28,				//下拉输入模式
	GPIO_Mode_IPU = 0x48,				//上拉输入模式
	GPIO_Mode_Out_OD = 0x14,			//开漏输出模式
	GPIO_Mode_Out_PP = 0x10,			//通用推挽输出模式
	GPIO_Mode_AF_OD = 0x1C,				//复用功能开漏输出
	GPIO_Mode_AF_PP = 0x18				//复用功能推挽输出
}GPIOMode_TypeDef;
2、初始化库函数-----GPIO_Init()
void GPIO_Init(GPIO_TypeDef* GPIOx, GPIO_InitTypeDef* GPIO_InitStruct)
GPIO_InitTypeDef可以理解为是一个包装好的配置包,GPIO_Init()则是让这个配置包生效的工具;
3、开启外设时钟
在startup_stm32f10x_hd.s启动文件中,有一段启动代码: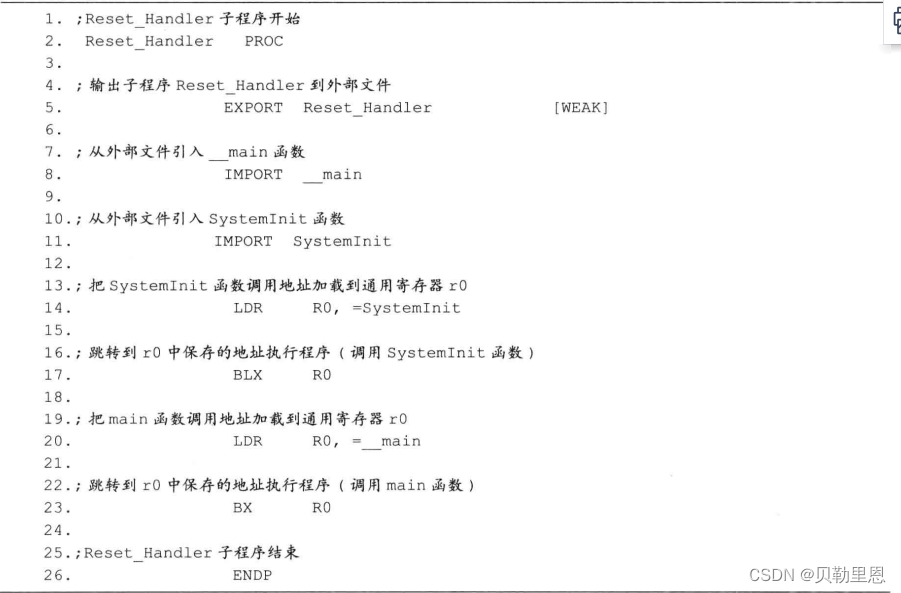
解释:当芯片被复位时(包括上电复位),将开始运行这一段代码,运行过程是先调用SystemInit()函数,再进入C语言中的“_main”函数执行(与main函数不同,这是一个C标准库的初始化函数),执行这个函数后,最终跳转到用户文件中的“main”函数入口,开始运行主程序。
也就是说,在进入main函数之前调用了一个名为SystemInit()的函数,这个函数的定义在system_stm32f10x.c文件之中,它的作用是设置系统时钟SYSCLK。
3.5版本的库在启动文件中调用了SystemInit(),所以不必在main()函数中再次调用。但如果使用的是3.0版本的库则必须在main函数中调用SystemInit(),以设置系统时钟,因为在3.0版本的启动代码中并没有调用SystemInit()函数。
SYSCLK由SystemInit()配置好了,而GPIO所用的时钟PCLK2,我们采用默认值,也为72MHz。我们采用默认值可以不修改分频器,但外设时钟默认是处在关闭状态的。所以外设时钟一般会在初始化外设的时候设置为开启。开启和关闭外设时钟可以通过函数:
RCC_APB2PeriphClockCmd(uint32_t RCC_APB2Periph, FunctionalState NewState)
第一个参数为将要控制的挂载在APB2总线上的外设时钟;第二个参数为选择要开启还是关闭该时钟(ENABLE或FALSE);

挂载在APB2上的外设:
- RCC_APB2Periph_AFIO
- RCC_APB2Periph_GPIOA
- RCC_APB2Periph_GPIOB
- RCC_APB2Periph_GPIOC
- RCC_APB2Periph_GPIOD
- RCC_APB2Periph_GPIOE
- RCC_APB2Periph_GPIOF
- RCC_APB2Periph_GPIOG
- RCC_APB2Periph_ADC1
- RCC_APB2Periph_ADC2
- RCC_APB2Periph_TIM1
- RCC_APB2Periph_SPI1
- RCC_APB2Periph_TIM8
- RCC_APB2Periph_USART1
- RCC_APB2Periph_ADC3
- RCC_APB2Periph_TIM15
- RCC_APB2Periph_TIM16
- RCC_APB2Periph_TIM17
- RCC_APB2Periph_TIM9
- RCC_APB2Periph_TIM10
- RCC_APB2Periph_TIM11
4、控制I/O输出高、低电平
要控制GPIO引脚的电平高低,只要在GPIOx_BSRR寄存器相应的位写入控制参数就可以,当然ST库也为我们提供了这样的功能函数:
GPIO_SetBits(GPIO_TypeDef* GPIOx, uint16_t GPIO_Pin);		//输出高电平
GPIO_ResetBits(GPIO_TypeDef* GPIOx, uint16_t GPIO_Pin);		//输出低电平

5、位操作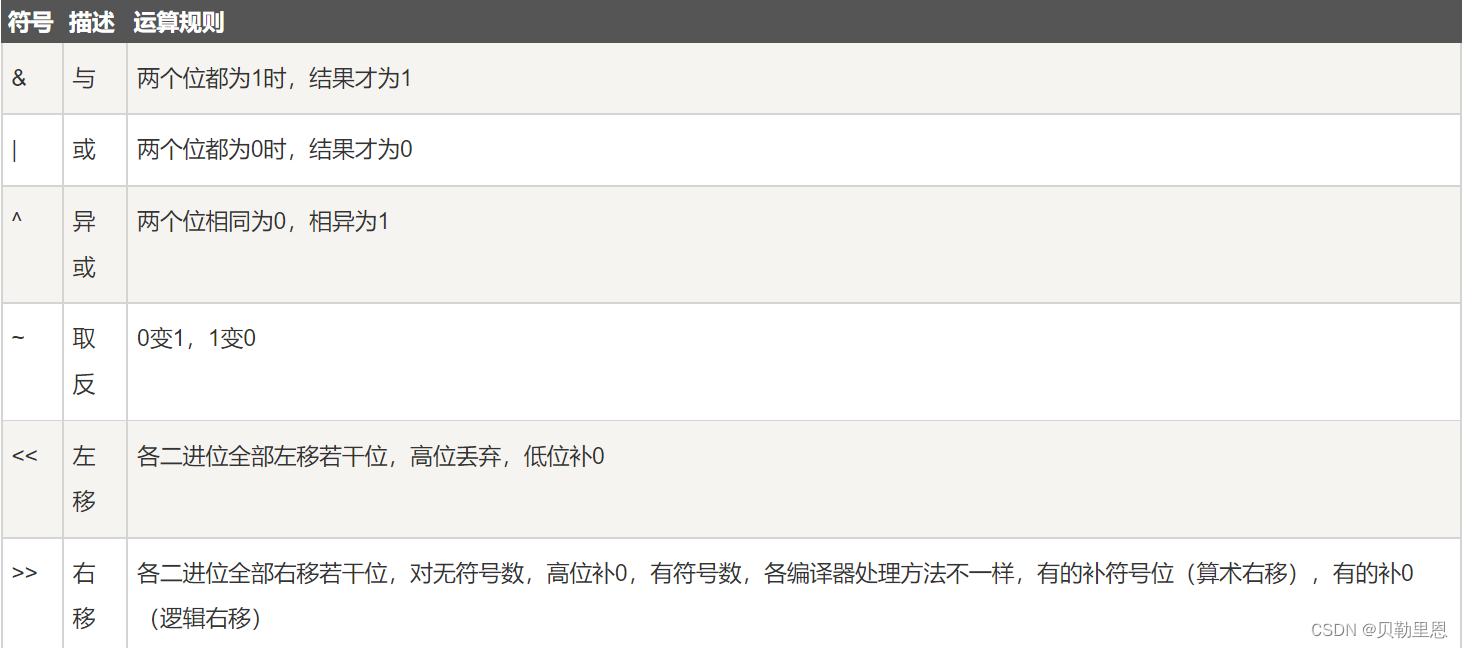
- 将char型变量a的第七位(bit6)清零,其它位不变
a &= ~(1<<6);

第一步 1<<6:1左移6位,0000 0001 --> 0100 0000
第二步 ~(1<<6):左移完的结果取反,0100 0000 --> 1011 1111
第三步 a &= ~(1<<6):取反完的结果和a进行与操作,第七位为0,与操作该位必为0,其余位为1,保持原有不变;
- 将char型变量a的第七位(bit6)置1,其它位不变
a |= (1<<6);

第一步 1<<6:1左移6位,0000 0001 --> 0100 0000
第二步 a |= (1<<6):左移完的结果和a进行或操作,第七位为1,或操作该位必为1,其余位为0,保持原有不变;
- 将char型变量a的第七位(bit6)取反,其它位不变
a ^= (1<<6);

第一步 1<<6:1左移6位,0000 0001 --> 0100 0000
第二步 a ^= (1<<6):左移完的结果和a进行异或操作;
第七位为1,如果a是1,相同则第七位变为0;如果a是0,不同则第七位变为1;
其余位为0,如果a是1,不同则仍然为1;如果a是0,相同则仍然为0;
边栏推荐
- To be continued] [UE4 notes] L4 object editing
- JVM call not used once in ten years
- Do a small pressure test with JMeter tool
- 64 horses, 8 tracks, how many times does it take to find the fastest 4 horses at least
- Solon 框架如何方便获取每个请求的响应时间?
- GBase数据库助力湾区数字金融发展
- Service fusing hystrix
- Haut OJ 1401: praise energy
- 2022年上半年国家教师资格证考试
- Improvement of pointnet++
猜你喜欢
2022年上半年国家教师资格证考试

Gbase database helps the development of digital finance in the Bay Area
嵌入式数据库开发编程(五)——DQL

Embedded database development programming (VI) -- C API

读者写者模型
Embedded database development programming (zero)
C语言杂谈1
《动手学深度学习》学习笔记
Embedded database development programming (V) -- DQL
![[interval problem] 435 Non overlapping interval](/img/a3/2911ee72635b93b6430c2efd05ec9a.jpg)
[interval problem] 435 Non overlapping interval
随机推荐
[depth first search] 695 Maximum area of the island
sync.Mutex源码解读
被舆论盯上的蔚来,何时再次“起高楼”?
Haut OJ 1218: maximum continuous sub segment sum
嵌入式数据库开发编程(零)
Solon Logging 插件的添加器级别控制和日志器的级别控制
搭建完数据库和网站后.打开app测试时候显示服务器正在维护.
Haut OJ 1321: mode problem of choice sister
Bubble sort summary
MySQL数据库(一)
[to be continued] [UE4 notes] L1 create and configure items
软件测试 -- 0 序
小程序直播+電商,想做新零售電商就用它吧!
Service fusing hystrix
Embedded database development programming (VI) -- C API
win10虚拟机集群优化方案
读者写者模型
Learning notes of "hands on learning in depth"
Gbase database helps the development of digital finance in the Bay Area
YOLOv5添加注意力机制