当前位置:网站首页>ROS learning (25) rviz plugin
ROS learning (25) rviz plugin
2022-07-07 01:52:00 【Ice cream with code】
List of articles
Preface
RVIZ yes ROS One provided 3D Visualization tools , As an extensible view tool , You can use the plug-in mechanism to add rich functional modules .RVIZ Laser data commonly used in 、 The visual display of image data is actually an official plug-in .
below , By implementing a speed control plug-in , be familiar with rviz plugin The implementation process of plug-ins .
The source code of this article comes from teacher Hu's book -《ROS Robot development practice 》.
One 、 Function description
The interface is as shown in the figure :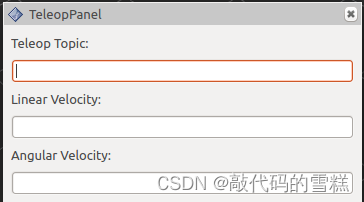
This plug-in uses Qt Development , Contains three input boxes , Topic names 、 Linear velocity and angular velocity .
Two 、 Create Feature Pack
The order is as follows :
catkin_create_pkg rviz_teleop_commander roscpp rviz std_msgs
This feature pack depends on RVIZ, because RVIZ Is based on Qt Developed , So there is no need to list right Qt Dependence .
3、 ... and 、 Code implementation
1、 establish teleop_pad.h file
The contents of the document are as follows :
#ifndef TELEOP_PAD_H
#define TELEOP_PAD_H

// The header file to be included
#ifndef Q_MOC_RUN
#include <ros/ros.h>
#include <ros/console.h>
#include <rviz/panel.h> //plugin Header file of base class
#endif

class QLineEdit;

namespace rviz_teleop_commander
{

//  be-all plugin It has to be rviz::Panel Subclasses of
class TeleopPanel: public rviz::Panel
{

//  You need to use Qt Signals and slots , All are QObject Subclasses of , So you need to declare Q_OBJECT macro
Q_OBJECT
public:
    //  Constructors , In the class will be used QWidget To achieve GUI Interface , Here, it is initialized to 0 that will do
    TeleopPanel( QWidget* parent = 0 );

    //  heavy load rviz::Panel Functions in accumulation , Used to hold 、 Load the data in the configuration file , Here we are plugin
    //  in , The data is topic The name of
    virtual void load( const rviz::Config& config );
    virtual void save( rviz::Config config ) const;

//  Common trough .
public Q_SLOTS:
    //  When user input topic After naming and pressing enter , The callback uses this slot to create a corresponding named topic publisher
    void setTopic( const QString& topic );

//  Internal slot .
protected Q_SLOTS:
    void sendVel();                 //  Release the current speed value
    void update_Linear_Velocity();  //  Update the linear speed value according to the user's input
    void update_Angular_Velocity(); //  Update the angular velocity value according to the user's input
    void updateTopic();             //  Update according to user input topic name

//  Internal variables .
protected:
    // topic name Input box
    QLineEdit* output_topic_editor_;
    QString output_topic_;

    //  Linear velocity value input box
    QLineEdit* output_topic_editor_1;
    QString output_topic_1;

    //  Angular velocity value input box
    QLineEdit* output_topic_editor_2;
    QString output_topic_2;

    // ROS Of publisher, Used to release speed topic
    ros::Publisher velocity_publisher_;

    // ROS inode handle
    ros::NodeHandle nh_;

    //  Current saved linear and angular velocity values
    float linear_velocity_;
    float angular_velocity_;
};

} // end namespace rviz_teleop_commander

#endif // TELEOP_PANEL_H
2、 establish teleop_pad.cpp file
The contents of the document are as follows :
#include <stdio.h>

#include <QPainter>
#include <QLineEdit>
#include <QVBoxLayout>
#include <QHBoxLayout>
#include <QLabel>
#include <QTimer>

#include <geometry_msgs/Twist.h>
#include <QDebug>

#include "teleop_pad.h"

namespace rviz_teleop_commander
{


//  Constructors , Initialize variable
TeleopPanel::TeleopPanel( QWidget* parent )
  : rviz::Panel( parent )
  , linear_velocity_( 0 )
  , angular_velocity_( 0 )
{

    //  Create an input topic Named window
    QVBoxLayout* topic_layout = new QVBoxLayout;
    topic_layout->addWidget( new QLabel( "Teleop Topic:" ));
    output_topic_editor_ = new QLineEdit;
    topic_layout->addWidget( output_topic_editor_ );

    //  Create a window for inputting linear velocity
    topic_layout->addWidget( new QLabel( "Linear Velocity:" ));
    output_topic_editor_1 = new QLineEdit;
    topic_layout->addWidget( output_topic_editor_1 );

    //  Create a window for entering angular velocity
    topic_layout->addWidget( new QLabel( "Angular Velocity:" ));
    output_topic_editor_2 = new QLineEdit;
    topic_layout->addWidget( output_topic_editor_2 );

    QHBoxLayout* layout = new QHBoxLayout;
    layout->addLayout( topic_layout );
    setLayout( layout );

    //  Create a timer , Used to publish messages regularly
    QTimer* output_timer = new QTimer( this );

    //  Set the connection between the signal and the slot
    //  Input topic name , After returning , call updateTopic()
    connect( output_topic_editor_, SIGNAL( editingFinished() ), this, SLOT( updateTopic() ));
    //  Enter the linear speed value , After returning , call update_Linear_Velocity()
    connect( output_topic_editor_1, SIGNAL( editingFinished() ), this, SLOT( update_Linear_Velocity() ));
    //  Enter the angular velocity value , After returning , call update_Angular_Velocity()
    connect( output_topic_editor_2, SIGNAL( editingFinished() ), this, SLOT( update_Angular_Velocity() ));

    //  Set the timer's callback function , Call by cycle sendVel()
    connect( output_timer, SIGNAL( timeout() ), this, SLOT( sendVel() ));

    //  Set the period of the timer ,100ms
    output_timer->start( 100 );
}

//  Update the linear speed value
void TeleopPanel::update_Linear_Velocity()
{

    //  Get the data in the input box
    QString temp_string = output_topic_editor_1->text();

    //  Convert a string to a floating-point number
    float lin = temp_string.toFloat();

    //  Save the current input value
    linear_velocity_ = lin;
}

//  Update the angular velocity value
void TeleopPanel::update_Angular_Velocity()
{

    QString temp_string = output_topic_editor_2->text();
    float ang = temp_string.toFloat() ;
    angular_velocity_ = ang;
}

//  to update topic name
void TeleopPanel::updateTopic()
{

    setTopic( output_topic_editor_->text() );
}

//  Set up topic name
void TeleopPanel::setTopic( const QString& new_topic )
{

    //  Check topic Change or not .
    if( new_topic != output_topic_ )
    {

        output_topic_ = new_topic;

        //  If the name is empty , Do not publish any information
        if( output_topic_ == "" )
        {

            velocity_publisher_.shutdown();
        }
        //  otherwise , initialization publisher
        else
        {

            velocity_publisher_ = nh_.advertise<geometry_msgs::Twist>( output_topic_.toStdString(), 1 );
        }

        Q_EMIT configChanged();
    }
}

//  Release the news
void TeleopPanel::sendVel()
{

    if( ros::ok() && velocity_publisher_ )
    {

        geometry_msgs::Twist msg;
        msg.linear.x = linear_velocity_;
        msg.linear.y = 0;
        msg.linear.z = 0;
        msg.angular.x = 0;
        msg.angular.y = 0;
        msg.angular.z = angular_velocity_;
        velocity_publisher_.publish( msg );
    }
}

//  Overload the function of the parent class
void TeleopPanel::save( rviz::Config config ) const
{

    rviz::Panel::save( config );
    config.mapSetValue( "Topic", output_topic_ );
}

//  Overload the function of the parent class , Load configuration data
void TeleopPanel::load( const rviz::Config& config )
{

    rviz::Panel::load( config );
    QString topic;
    if( config.mapGetString( "Topic", &topic ))
    {

        output_topic_editor_->setText( topic );
        updateTopic();
    }
}

} // end namespace rviz_teleop_commander

//  Declare that this class is a rviz Plug in for
#include <pluginlib/class_list_macros.h>
PLUGINLIB_EXPORT_CLASS(rviz_teleop_commander::TeleopPanel,rviz::Panel )
// END_TUTORIAL
Four 、 Compile the plug-in
1、 establish plugin Description file for
Under the root directory of the function package , establish plugin Description file for , The file named plugin_description.xml, The contents are as follows :
<library path="lib/librviz_teleop_commander">
    <class name="rviz_teleop_commander/TeleopPanel"
           type="rviz_teleop_commander::TeleopPanel"
           base_class_type="rviz::Panel">
        <description>
            A panel widget allowing simple diff-drive style robot base control.
        </description>
    </class>
</library>
2、 modify package.xml file
stay package.xml Add... To the file plugin_description.xml File path , The contents are as follows :
  <export>
      <rviz plugin="${prefix}/plugin_description.xml"/>
  </export>
3、 modify CMakeLists.txt file
Add Compilation Rules , The contents are as follows :
## This plugin includes Qt widgets, so we must include Qt like so:
find_package(Qt5 COMPONENTS Core Widgets REQUIRED)
set(QT_LIBRARIES Qt5::Widgets)

## I prefer the Qt signals and slots to avoid defining "emit", "slots",
## etc because they can conflict with boost signals, so define QT_NO_KEYWORDS here.
add_definitions(-DQT_NO_KEYWORDS)

## Here we specify which header files need to be run through "moc",
## Qt's meta-object compiler.
qt5_wrap_cpp(MOC_FILES
  src/teleop_pad.h
)

## Here we specify the list of source files, including the output of
## the previous command which is stored in ``${MOC_FILES}``.
set(SOURCE_FILES
  src/teleop_pad.cpp
  ${
    MOC_FILES}
)

## An rviz plugin is just a shared library, so here we declare the
## library to be called ``${PROJECT_NAME}`` (which is
## "rviz_plugin_tutorials", or whatever your version of this project
## is called) and specify the list of source files we collected above
## in ``${SOURCE_FILES}``.
add_library(${
    PROJECT_NAME} ${
    SOURCE_FILES})

## Link the library with whatever Qt libraries have been defined by
## the ``find_package(Qt4 ...)`` line above, and with whatever libraries
## catkin has included.
##
## Although this puts "rviz_plugin_tutorials" (or whatever you have
## called the project) as the name of the library, cmake knows it is a
## library and names the actual file something like
## "librviz_plugin_tutorials.so", or whatever is appropriate for your
## particular OS.
target_link_libraries(${
    PROJECT_NAME} ${
    QT_LIBRARIES} ${
    catkin_LIBRARIES})
## END_TUTORIAL


## Install rules

install(TARGETS
  ${
    PROJECT_NAME}
  ARCHIVE DESTINATION ${
    CATKIN_PACKAGE_LIB_DESTINATION}
  LIBRARY DESTINATION ${
    CATKIN_PACKAGE_LIB_DESTINATION}
  RUNTIME DESTINATION ${
    CATKIN_PACKAGE_BIN_DESTINATION}
)

install(FILES
  plugin_description.xml
  DESTINATION ${
    CATKIN_PACKAGE_SHARE_DESTINATION})
After making the above changes , You can compile the function package , The order is as follows :
catkin_make --pkg rviz_teleop_commander
5、 ... and 、 Running plug-ins
The first run roscore, The order is as follows :
roscore
function RVIZ, The order is as follows :
rosrun rviz rviz
Click on the Panels Options , choice Add New Panel, You can see the plug-in just created in the plug-in list , Pictured :
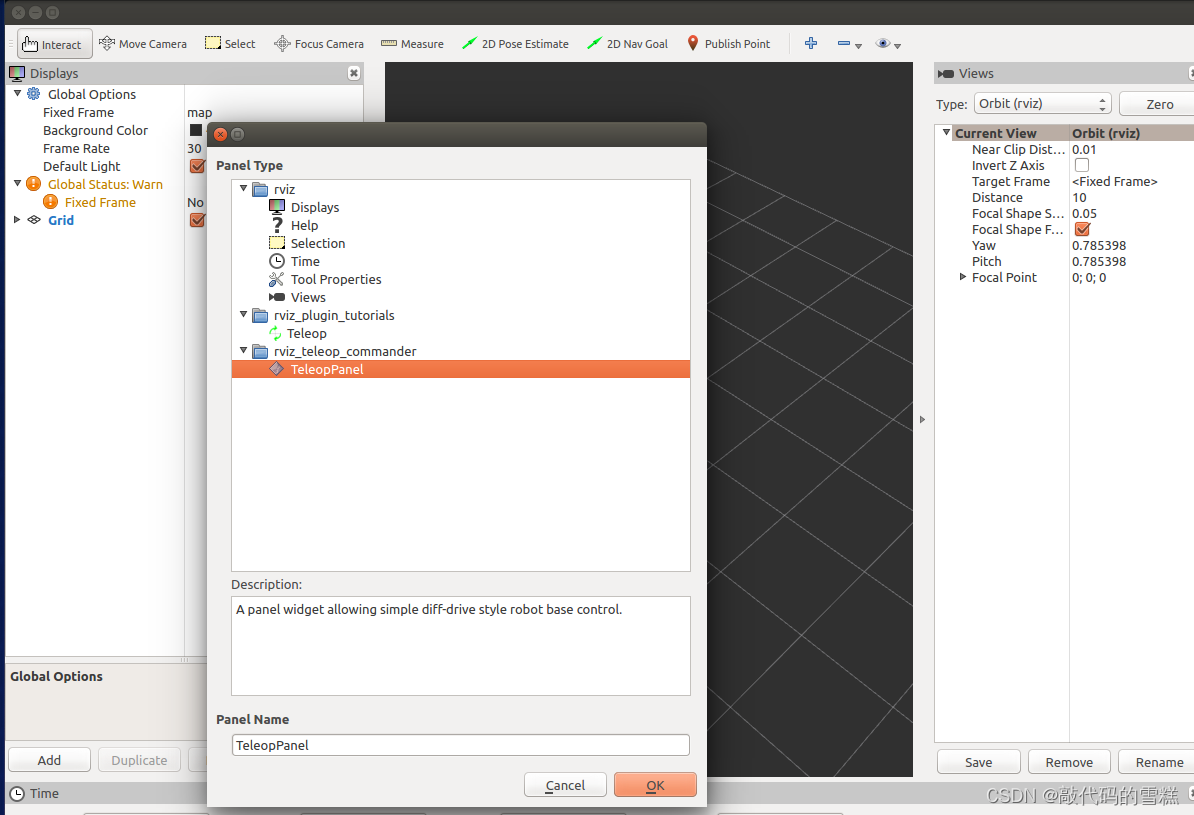
Click on OK after , You can see that , The interface of the plug-in , Enter the parameter value , as follows :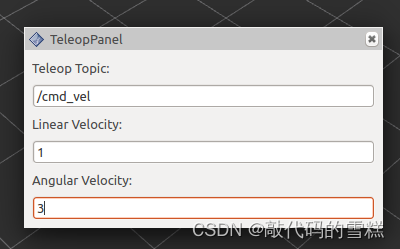
Run the command :
rostopic echo /cmd_vel
The effect is as follows :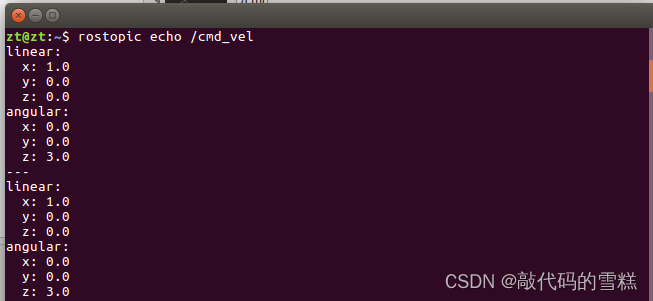
You can see ROS There are already nodes in the release /cmd_vel The news of the topic .
边栏推荐
- Domestic images of various languages, software and systems. It is enough to collect this warehouse: Thanks mirror
- ROS学习(25)rviz plugin插件
- POJ 3177 Redundant Paths POJ 3352 Road Construction(双连接)
- NPM install compilation times "cannot read properties of null (reading 'pickalgorithm')“
- js如何快速创建一个长度为 n 的数组
- Scenario practice: quickly build wordpress blog system based on function calculation
- 736. LISP syntax parsing: DFS simulation questions
- 爬虫实战(六):爬笔趣阁小说
- LeetCode. 剑指offer 62. 圆圈中最后剩下的数
- ZOJ problem set – 2563 long dominoes [e.g. pressure DP]
猜你喜欢

Reptile practice (VI): novel of climbing pen interesting Pavilion
Appium foundation - appium inspector positioning tool (I)
The cradle of eternity

Clickhouse fields are grouped and aggregated, and SQL is queried according to the granularity of any time period

Baidu flying general BMN timing action positioning framework | data preparation and training guide (Part 1)
LeetCode:1175. Prime permutation
Make DIY welding smoke extractor with lighting
今日问题-2022/7/4 lambda体中修改String引用类型变量
New job insights ~ leave the old and welcome the new~
刨析《C语言》【进阶】付费知识【一】
随机推荐
Comparison of picture beds of free white whoring
grep查找进程时,忽略grep进程本身
C language instance_ four
字符串转成日期对象
今日问题-2022/7/4 lambda体中修改String引用类型变量
C language instance_ three
ROS learning (23) action communication mechanism
PartyDAO如何在1年内把一篇推文变成了2亿美金的产品DAO
C language [23] classic interview questions [Part 2]
ZOJ Problem Set – 2563 Long Dominoes 【如压力dp】
Domestic images of various languages, software and systems. It is enough to collect this warehouse: Thanks mirror
使用nodejs完成判断哪些项目打包+发版
盒子拉伸拉扯(左右模式)
According to the analysis of the Internet industry in 2022, how to choose a suitable position?
Modify the system time of Px4 flight control
AcWing 361. Sightseeing cow problem solution (SPFA seeking positive ring)
AcWing 344. 观光之旅题解(floyd求无向图的最小环问题)
The difference between Tansig and logsig. Why does BP like to use Tansig
Start from the bottom structure to learn the customization and testing of fpga---- FIFO IP
uva 1401 dp+Trie