当前位置:网站首页>How to get started with MOOSE platform - an example of how to run the official tutorial
How to get started with MOOSE platform - an example of how to run the official tutorial
2022-08-04 06:19:00 【nuomi666】
This article only introduces how to run the official examples given by the MOOSE platform (Examples and Tutorials | MOOSE), how to install the MOOSE platform can refer to the official tutorial (Install MOOSE | MOOSE), this article is based on the Ubuntu 20.04 virtual machine of the windows10 system.
To run these examples, you can use the app you built yourself, or you can compile the app in the official example folder. In order to run through the examples as soon as possible, you can directly compile the app in the example folder here.
1. Switch the moose environment
First open Ubuntu, type
conda activate mooseIf you haven't built the moose environment, you can refer to (Conda MOOSE Environment |MOOSE),
At this point the beginning of the command line base will be changed to moose

2. Compile the app
Take Ee01 as an example, it is recommended that you put the original file inCopy once in the same directory, switch the working directory to the copied folder ~\projects\moose\examples\ex01_inputfile_copy, and then run make -j 4 to compile the app in this directory, where the number after j is how many threads to compileMeaning, -j4 is 4 threads.
cd ~/projects/moose/examples/ex01_inputfile_copymake -j 4The process of compilation
The compilation process is slow, just wait patiently for completion.
3. Running example
After the app is compiled, we can use the generated appname-opt file to run the corresponding executable file (name.i). Here we use the app:ex01-opt just compiled in the ex01_inputfile_copy directory to run ex01.i, enter the command
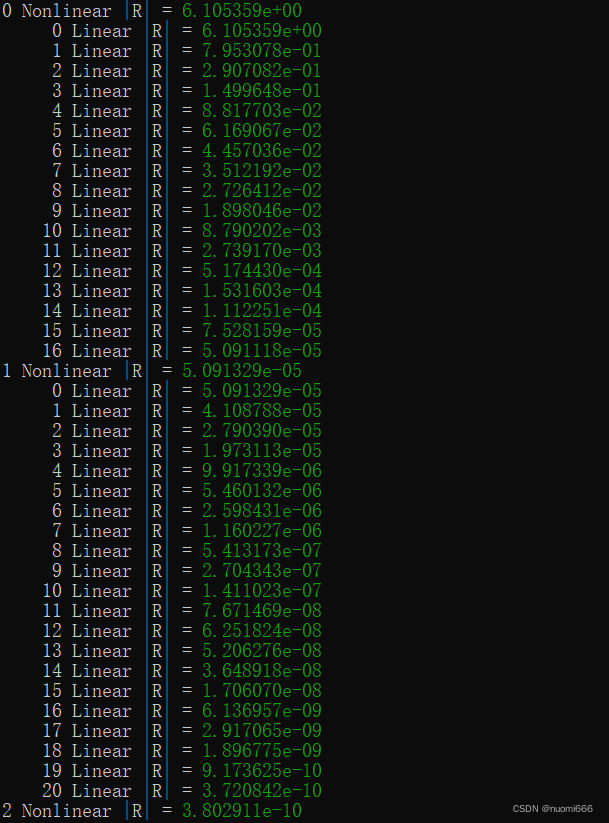
./ex01-opt -i ./ex01.iWait patiently for the results, the model information to be solved
Framework Information:MOOSE Version: git commit cddfe1453b on 2021-12-14LibMesh Version:PETSc Version: 3.15.1SLEPc Version: 3.15.1Current Time: Tue May 10 13:34:47 2022Executable Timestamp: Tue May 10 13:32:14 2022Parallelism:Num Processors: 1Num Threads: 1Mesh:Parallel Type: replicatedMesh Dimension: 3Spatial Dimension: 3Nodes: 3774Elems: 2476Num Subdomains: 1Nonlinear System:Num DOFs: 3774Num Local DOFs: 3774Variables: "diffused"Finite Element Types: "LAGRANGE"Approximation Orders: "FIRST"Execution Information:Executioner: SteadySolver Mode: Preconditioned JFNKThe process of solving, residual output
4. Viewing results
In this example, the final output file is ex01_out.e, in Exodus II format, which can be used with Paraview (Download | ParaView) view, or use the Peacock that comes with the Moose platform (Peacock | MOOSE).
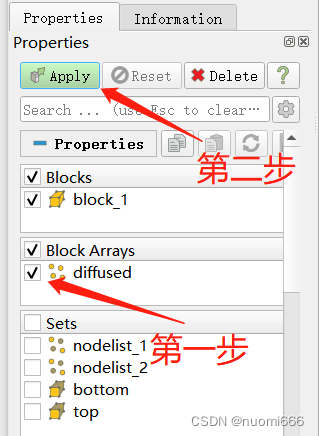
After using Paraview to open, the first step is to check the variable name to be viewed in the Properties tab at the bottom left of the default interface, and the second step is to click the Apply button.
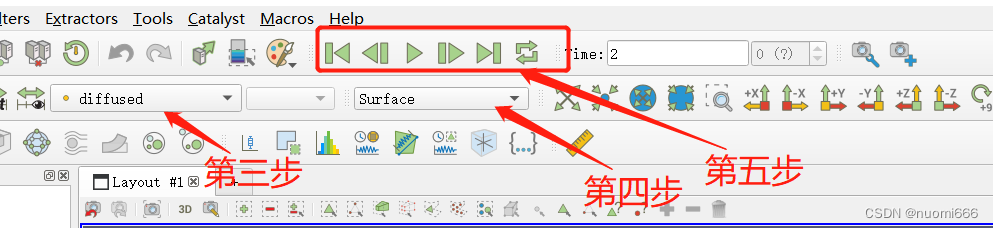
The third step is to select the displayed variables at the top of the interface. The fourth step is to display the type of solution domain (surface, mesh, or node, etc.), and for transient models, you can also adjust the time step.
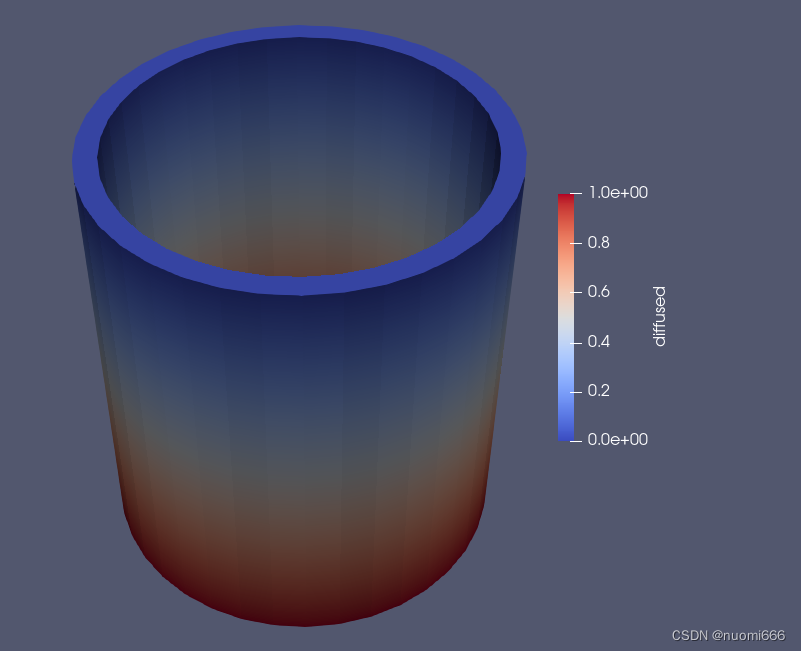
The final result display:
5. Remarks
During the initial compilation, an error code occurred
MAKEFILE:11:***MISSING SEPARATOR.STOP.Open the script file Makefile for viewing later, and find that it is blank. It should be caused by an operation error that deleted the content in the previous use process.
Solution: Open the GitHub repository of MOOSE official website, find the link of the damaged file, and use the GitHub file downloader (GitHub File Acceleration), download the appropriate file, and then replace the corrupted file.
边栏推荐
- 图像线性融合
- yoloV5 使用——训练速度慢,加速训练
- Android connects to mysql database using okhttp
- [Deep Learning 21 Days Learning Challenge] Memo: What does our neural network model look like? - detailed explanation of model.summary()
- PCL窗口操作
- [Deep Learning Diary] Day 1: Hello world, Hello CNN MNIST
- Unity ML-agents 参数设置解明
- TensorFlow2学习笔记:5、常用激活函数
- 周志华机器学习
- 【论文阅读】Further Non-local and Channel Attention Networks for Vehicle Re-identification
猜你喜欢
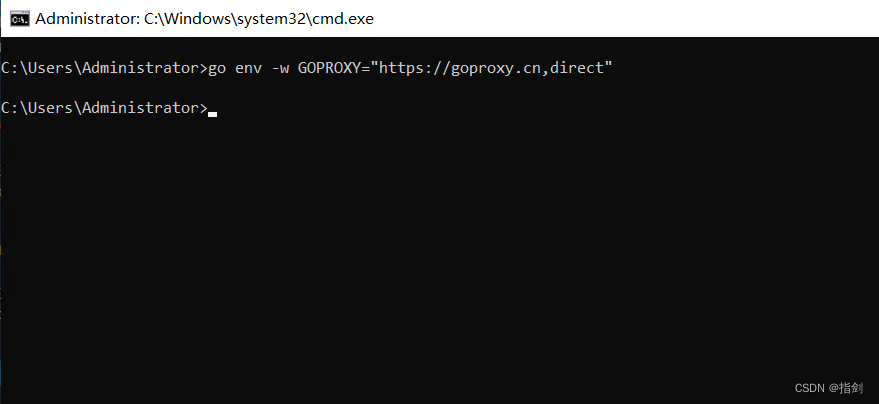
Golang环境变量设置(二)--GOMODULE&GOPROXY
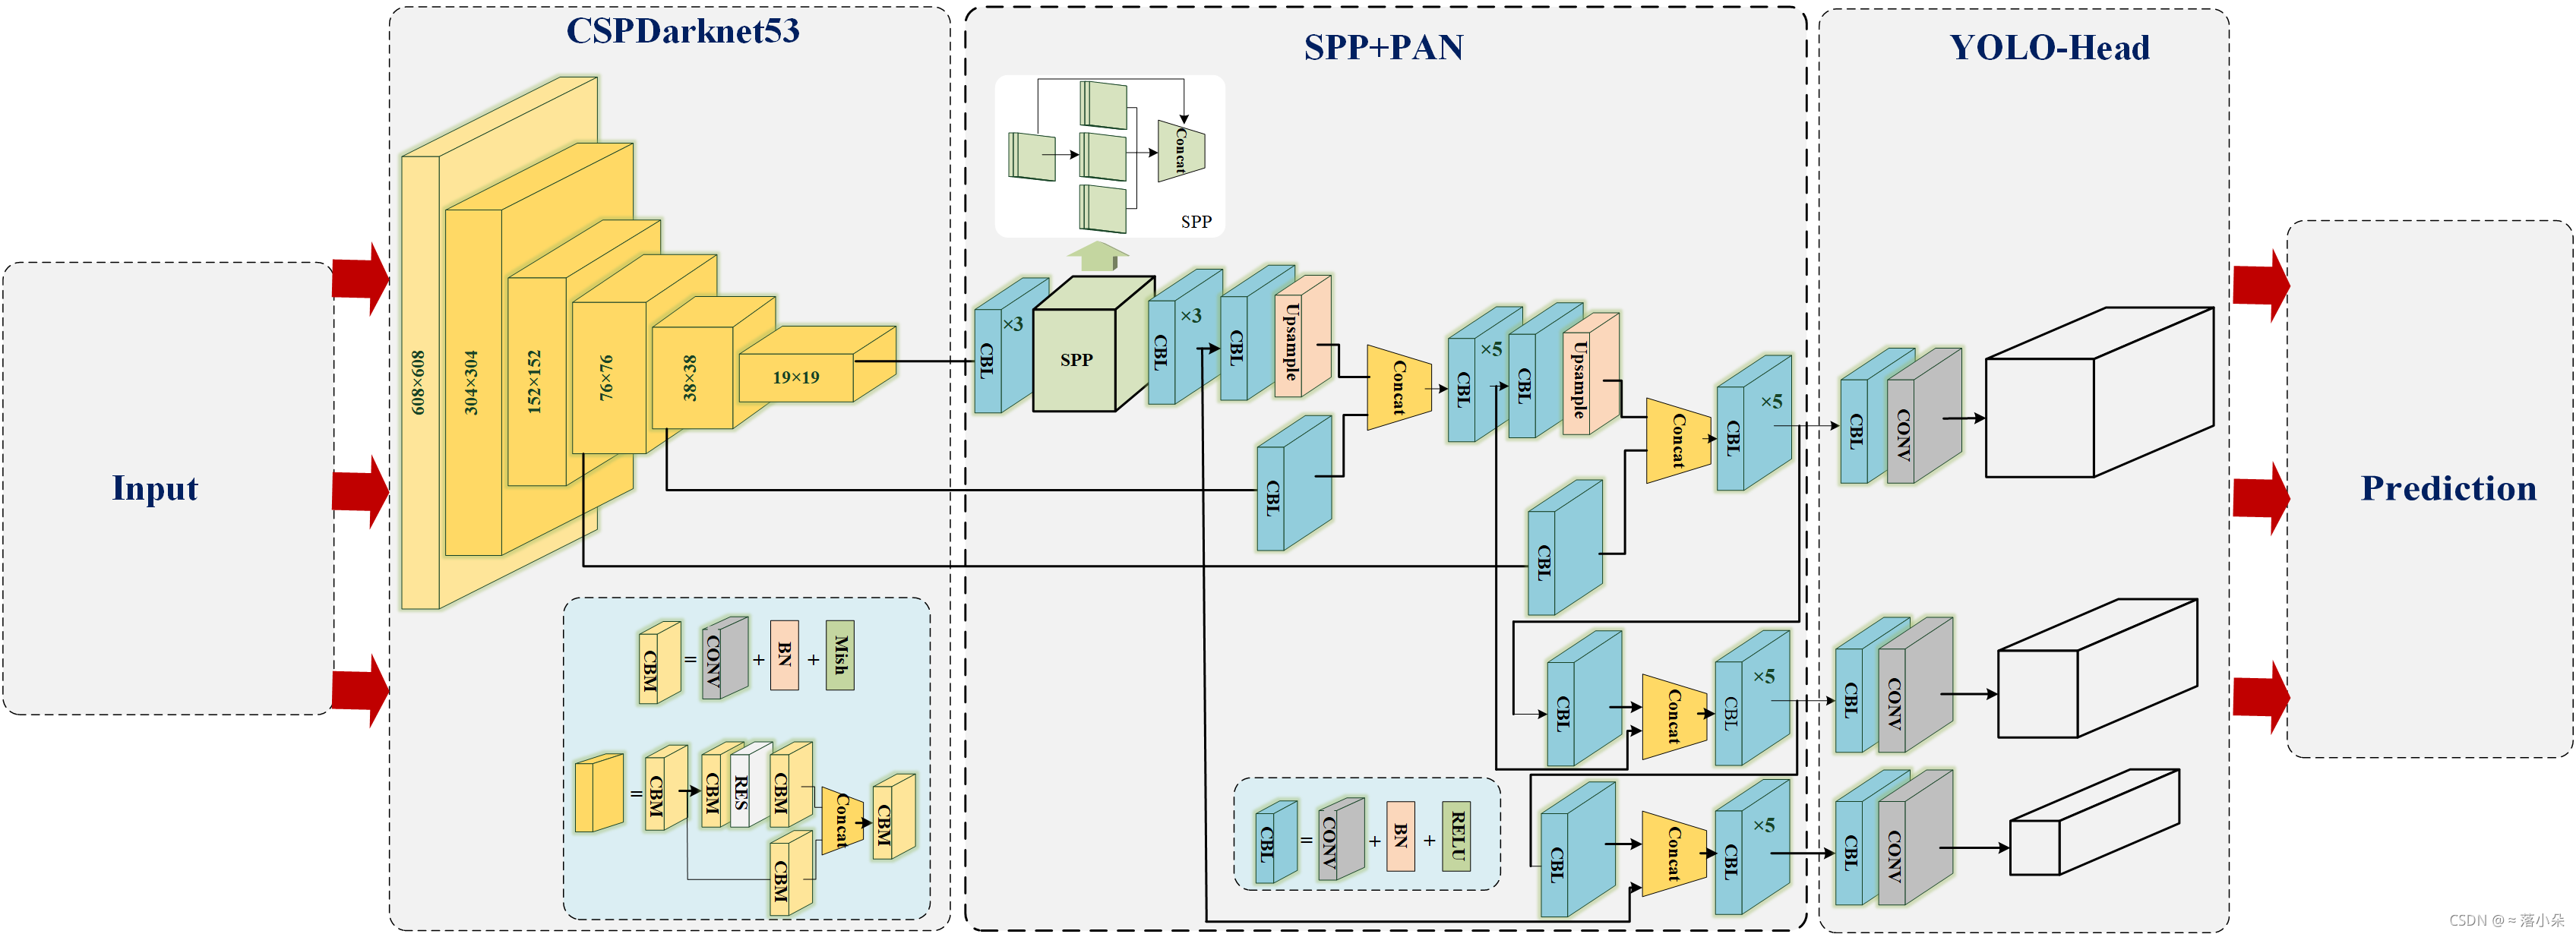
YOLOV4流程图(方便理解)
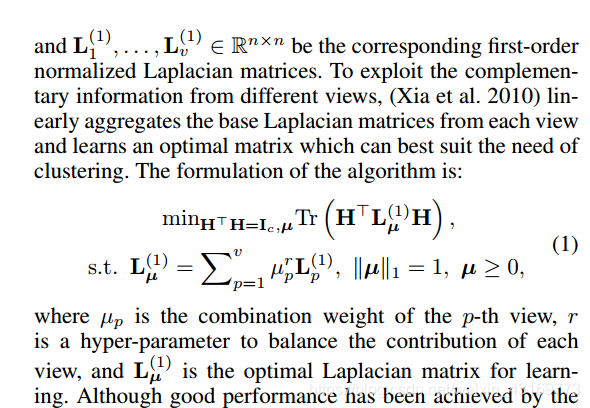
【论文阅读】Multi-View Spectral Clustering with Optimal Neighborhood Laplacian Matrix
![[CV-Learning] Convolutional Neural Network Preliminary Knowledge](/img/7d/58d9649b06e78eeb019d63615a90c4.png)
[CV-Learning] Convolutional Neural Network Preliminary Knowledge
![[Deep Learning 21 Days Learning Challenge] 2. Complex sample classification and recognition - convolutional neural network (CNN) clothing image classification](/img/5f/e5db59bdca19b275b2139020ebc6ea.png)
[Deep Learning 21 Days Learning Challenge] 2. Complex sample classification and recognition - convolutional neural network (CNN) clothing image classification
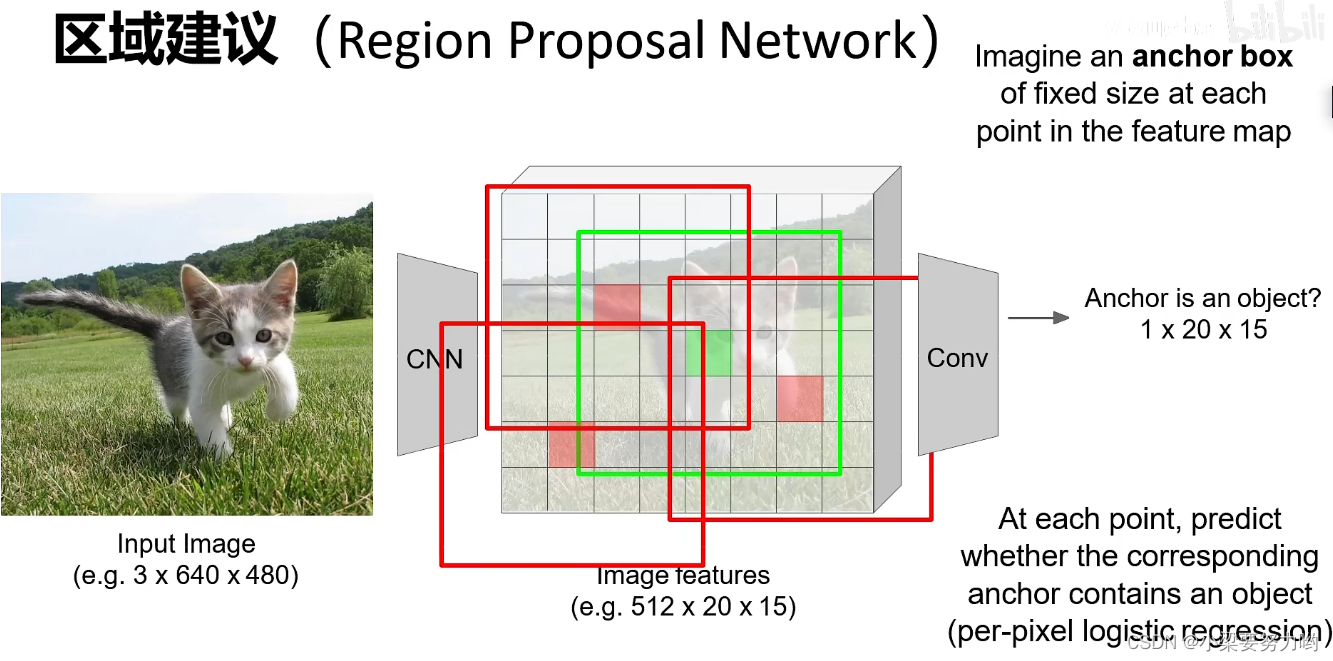
【CV-Learning】目标检测&实例分割
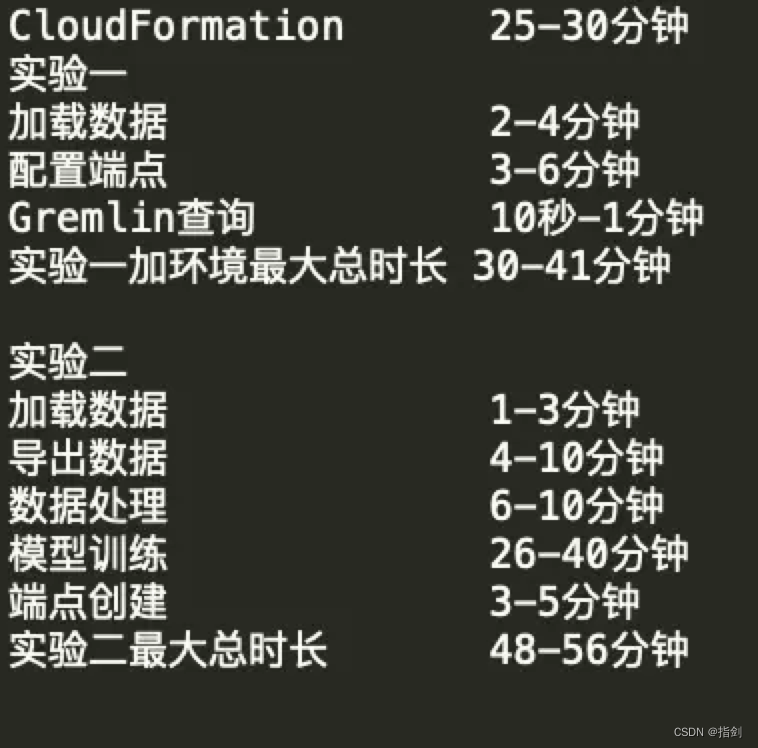
亚马逊云科技Build On-Amazon Neptune基于知识图谱的推荐模型构建心得
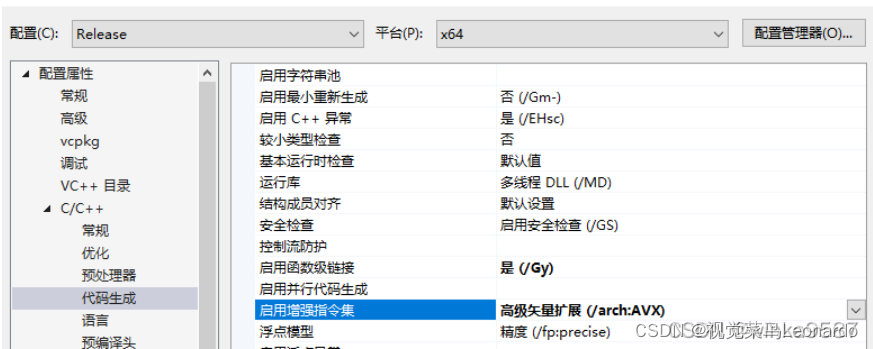
PCL1.12 解决memory.h中EIGEN处中断问题

TensorFlow2学习笔记:4、第一个神经网模型,鸢尾花分类
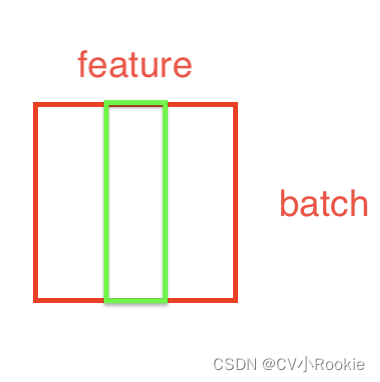
BatchNorm&&LayerNorm
随机推荐
【CV-Learning】语义分割
安装dlib踩坑记录,报错:WARNING: pip is configured with locations that require TLS/SSL
tensorRT教程——使用tensorRT OP 搭建自己的网络
Deep Adversarial Decomposition: A Unified Framework for Separating Superimposed Images
Comparison of oracle's number and postgresql's numeric
【Copy攻城狮日志】飞浆学院强化学习7日打卡营-学习笔记
PyTorch
软著撰写注意事项
【CV-Learning】Image Classification
[Deep Learning Diary] Day 1: Hello world, Hello CNN MNIST
动手学深度学习_线性回归
Android foundation [Super detailed android storage method analysis (SharedPreferences, SQLite database storage)]
【论文阅读】Multi-View Spectral Clustering with Optimal Neighborhood Laplacian Matrix
深度学习,“粮草”先行--浅谈数据集获取之道
卷积神经网络入门详解
基于BiGRU和GAN的数据生成方法
ConnectionRefusedError: [Errno 111] Connection refused问题解决
Learning curve learning_curve function in sklearn
Androd Day02
0, deep learning 21 days learning challenge 】 【 set up learning environment