1. 概述
在之前的文章中说到,一种材质对应一次绘制调用的指令。即使是这种情况,两个三维物体使用同一种材质,但它们使用的材质参数不一样,那么最终仍然会造成两次绘制指令。原因在于,图形工作都是一种状态机,状态发生了变化,就必须进行一次绘制调用指令。
GPU实例化用于解决这样的问题:对于像草地、树木这样的物体,它们往往是数据量很大,但同时又只存在微小的差别如位置、姿态、颜色等。如果像常规物体那样进行渲染,所使用的绘制指令必然很多,资源占用必然很大。一个合理的策略就是,我们指定一个需要绘制物体对象,以及大量该对象不同的参数,然后根据参数在一个绘制调用中绘制出来——这就是所谓的GPU实例化。
2. 详论
首先,我们创建一个空的GameObject对象,并且挂接如下脚本:
using UnityEngine;

//实例化参数
public struct InstanceParam
{
    public Color color;
    public Matrix4x4 instanceToObjectMatrix;        //实例化到物方矩阵
}

[ExecuteInEditMode]
public class Note6Main : MonoBehaviour
{
    public Mesh mesh;
    public Material material;

    int instanceCount = 200;
    Bounds instanceBounds;

    ComputeBuffer bufferWithArgs = null;
    ComputeBuffer instanceParamBufferData = null;

    // Start is called before the first frame update
    void Start()
    {
        instanceBounds = new Bounds(new Vector3(0, 0, 0), new Vector3(100, 100, 100));

        uint[] args = new uint[5] { 0, 0, 0, 0, 0 };
        bufferWithArgs = new ComputeBuffer(1, args.Length * sizeof(uint), ComputeBufferType.IndirectArguments);
        int subMeshIndex = 0;
        args[0] = mesh.GetIndexCount(subMeshIndex);
        args[1] = (uint)instanceCount;
        args[2] = mesh.GetIndexStart(subMeshIndex);
        args[3] = mesh.GetBaseVertex(subMeshIndex);
        bufferWithArgs.SetData(args);

        InstanceParam[] instanceParam = new InstanceParam[instanceCount];

        for (int i = 0; i < instanceCount; i++)
        {
            Vector3 position = Random.insideUnitSphere * 5;
            Quaternion q =  Quaternion.Euler(Random.Range(0.0f, 90.0f), Random.Range(0.0f, 90.0f), Random.Range(0.0f, 90.0f));
            float s = Random.value;
            Vector3 scale = new Vector3(s, s, s);

            instanceParam[i].instanceToObjectMatrix = Matrix4x4.TRS(position, q, scale);
            instanceParam[i].color = Random.ColorHSV();
        }

        int stride = System.Runtime.InteropServices.Marshal.SizeOf(typeof(InstanceParam));
        instanceParamBufferData = new ComputeBuffer(instanceCount, stride);
        instanceParamBufferData.SetData(instanceParam);
        material.SetBuffer("dataBuffer", instanceParamBufferData);
        material.SetMatrix("ObjectToWorld", Matrix4x4.identity);
    }

    // Update is called once per frame
    void Update()
    {
        if(bufferWithArgs != null)
        {
            Graphics.DrawMeshInstancedIndirect(mesh, 0, material, instanceBounds, bufferWithArgs, 0);
        }
    }

    private void OnDestroy()
    {
        if (bufferWithArgs != null)
        {
            bufferWithArgs.Release();
        }

        if(instanceParamBufferData != null)
        {
            instanceParamBufferData.Release();
        }
    }
}
这个脚本的意思是,设置一个网格和一个材质,通过随机获取的实例化参数,渲染这个网格的多个实例: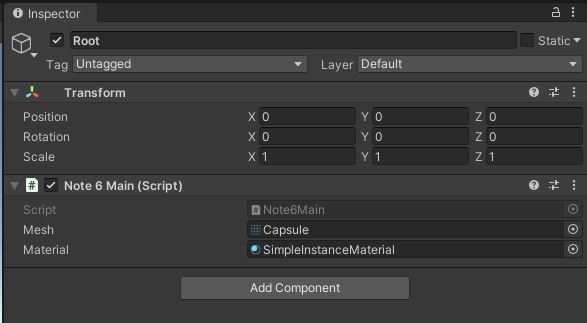
GPU实例化的关键接口是Graphics.DrawMeshInstancedIndirect()。Graphics对象的一系列接口是Unity的底层API,它是需要每一帧调用的。Graphics.DrawMeshInstanced()也可以实例绘制,但是最多只能绘制1023个实例。所以还是Graphics.DrawMeshInstancedIndirect()比较好。
实例化参数InstanceParam和GPU缓冲区参数bufferWithArgs都是存储于一个ComputeBuffer对象中。ComputeBuffe定义了一个GPU数据缓冲区对象,能够映射到Unity Shader中的 StructuredBuffer
Shader "Custom/SimpleInstanceShader"
{
    Properties
    {
    }
    SubShader
    {
		Tags{"Queue" = "Geometry"}

		Pass
		{
			CGPROGRAM
			#include "UnityCG.cginc"
			#pragma vertex vert
			#pragma fragment frag
			#pragma target 4.5

			sampler2D _MainTex;

			float4x4 ObjectToWorld;

			struct InstanceParam
			{
				float4 color;
				float4x4 instanceToObjectMatrix;
			};

		#if SHADER_TARGET >= 45
			StructuredBuffer<InstanceParam> dataBuffer;
		#endif

			//顶点着色器输入
			struct a2v
			{
				float4  position : POSITION;
				float3  normal: NORMAL;
				float2  texcoord : TEXCOORD0;
 			};

			//顶点着色器输出
			struct v2f
			{
				float4 position: SV_POSITION;
				float2 texcoord: TEXCOORD0;
				float4 color: COLOR;
			};

			v2f vert(a2v v, uint instanceID : SV_InstanceID)
			{
			#if SHADER_TARGET >= 45
				float4x4 instanceToObjectMatrix = dataBuffer[instanceID].instanceToObjectMatrix;
				float4 color = dataBuffer[instanceID].color;
			#else
				float4x4 instanceToObjectMatrix = float4x4(1, 0, 0, 0, 0, 1, 0, 0, 0, 0, 1, 0, 0, 0, 0, 1);
				float4 color = float4(1.0f, 1.0f, 1.0f, 1.0f);
			#endif

				float4 localPosition = mul(instanceToObjectMatrix, v.position);
				//float4 localPosition = v.position;
				float4 worldPosition = mul(ObjectToWorld, localPosition);

				v2f o;
				//o.position = UnityObjectToClipPos(v.position);
				o.position = mul(UNITY_MATRIX_VP, worldPosition);
				o.texcoord = v.texcoord;
				o.color = color;

				return o;
			}

			fixed4 frag(v2f i) : SV_Target
			{
				return i.color;
			}

            ENDCG
        }
    }

	Fallback "Diffuse"
}
这是一个改进自《Unity3D学习笔记3——Unity Shader的初步使用》的简单实例化着色器。实例化绘制往往位置并不是固定的,这意味着Shader中获取的模型矩阵UNITY_MATRIX_M一般是不正确的。因而实例化绘制的关键就在于对模型矩阵的重新计算,否则绘制的位置是不正确的。实例化的数据往往位置比较接近,所以可以先传入一个基准位置(矩阵ObjectToWorld),然后实例化数据就可以只传入于这个位置的相对矩阵(instanceToObjectMatrix)。
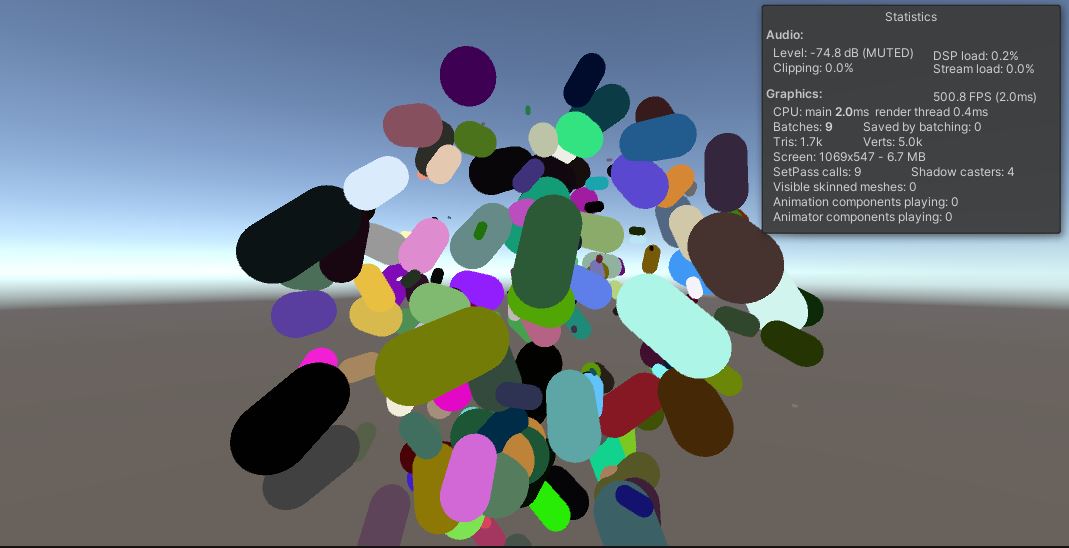
最终的运行结果如下,绘制了大量不同位置、不同姿态、不同大小以及不同颜色的胶囊体,并且性能基本上不受影响。
