当前位置:网站首页>Measure the voltage with analog input (taking Arduino as an example, the range is about 1KV)
Measure the voltage with analog input (taking Arduino as an example, the range is about 1KV)
2022-07-08 01:14:00 【Silicon organism】
Statement : I am a freshman majoring in Vehicle Engineering , The technical level of posting is not high , And this method has long been shared , This post only shares one experience , Please do not carry out some dangerous operations according to the content of this post , In case of accident , Nothing to do with me !
Premise of instructions :
arduino Of A0、A1、、 The waiting port is the analog signal input port ,arduino The board is measured A0 The potential of the mouth A0 Port data , The range of pressure measurement is 0~5V, The resulting value is 0~1023. When measuring potential with analog input , The negative pole of the tested object shall be connected with GND Connect , Otherwise, it cannot be measured , And a series of wrong values are generated due to floating .
The core idea :
1、arduino Read voltage function of analog input .
2、 Resistance partial voltage of series resistor .
3、 The analog input value is calculated to obtain the voltage value .
example :
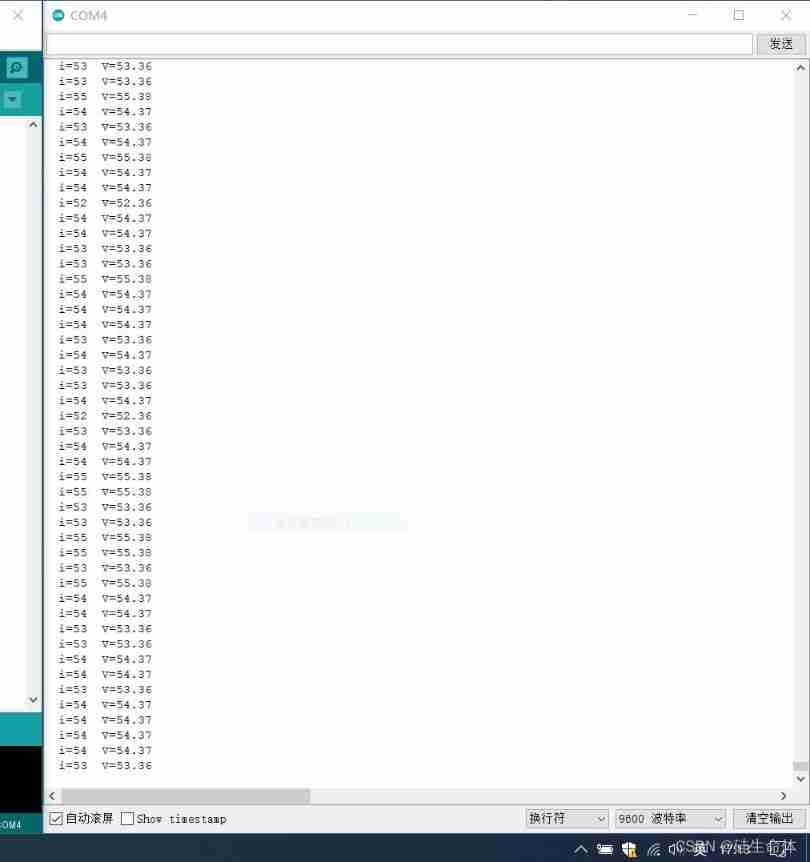
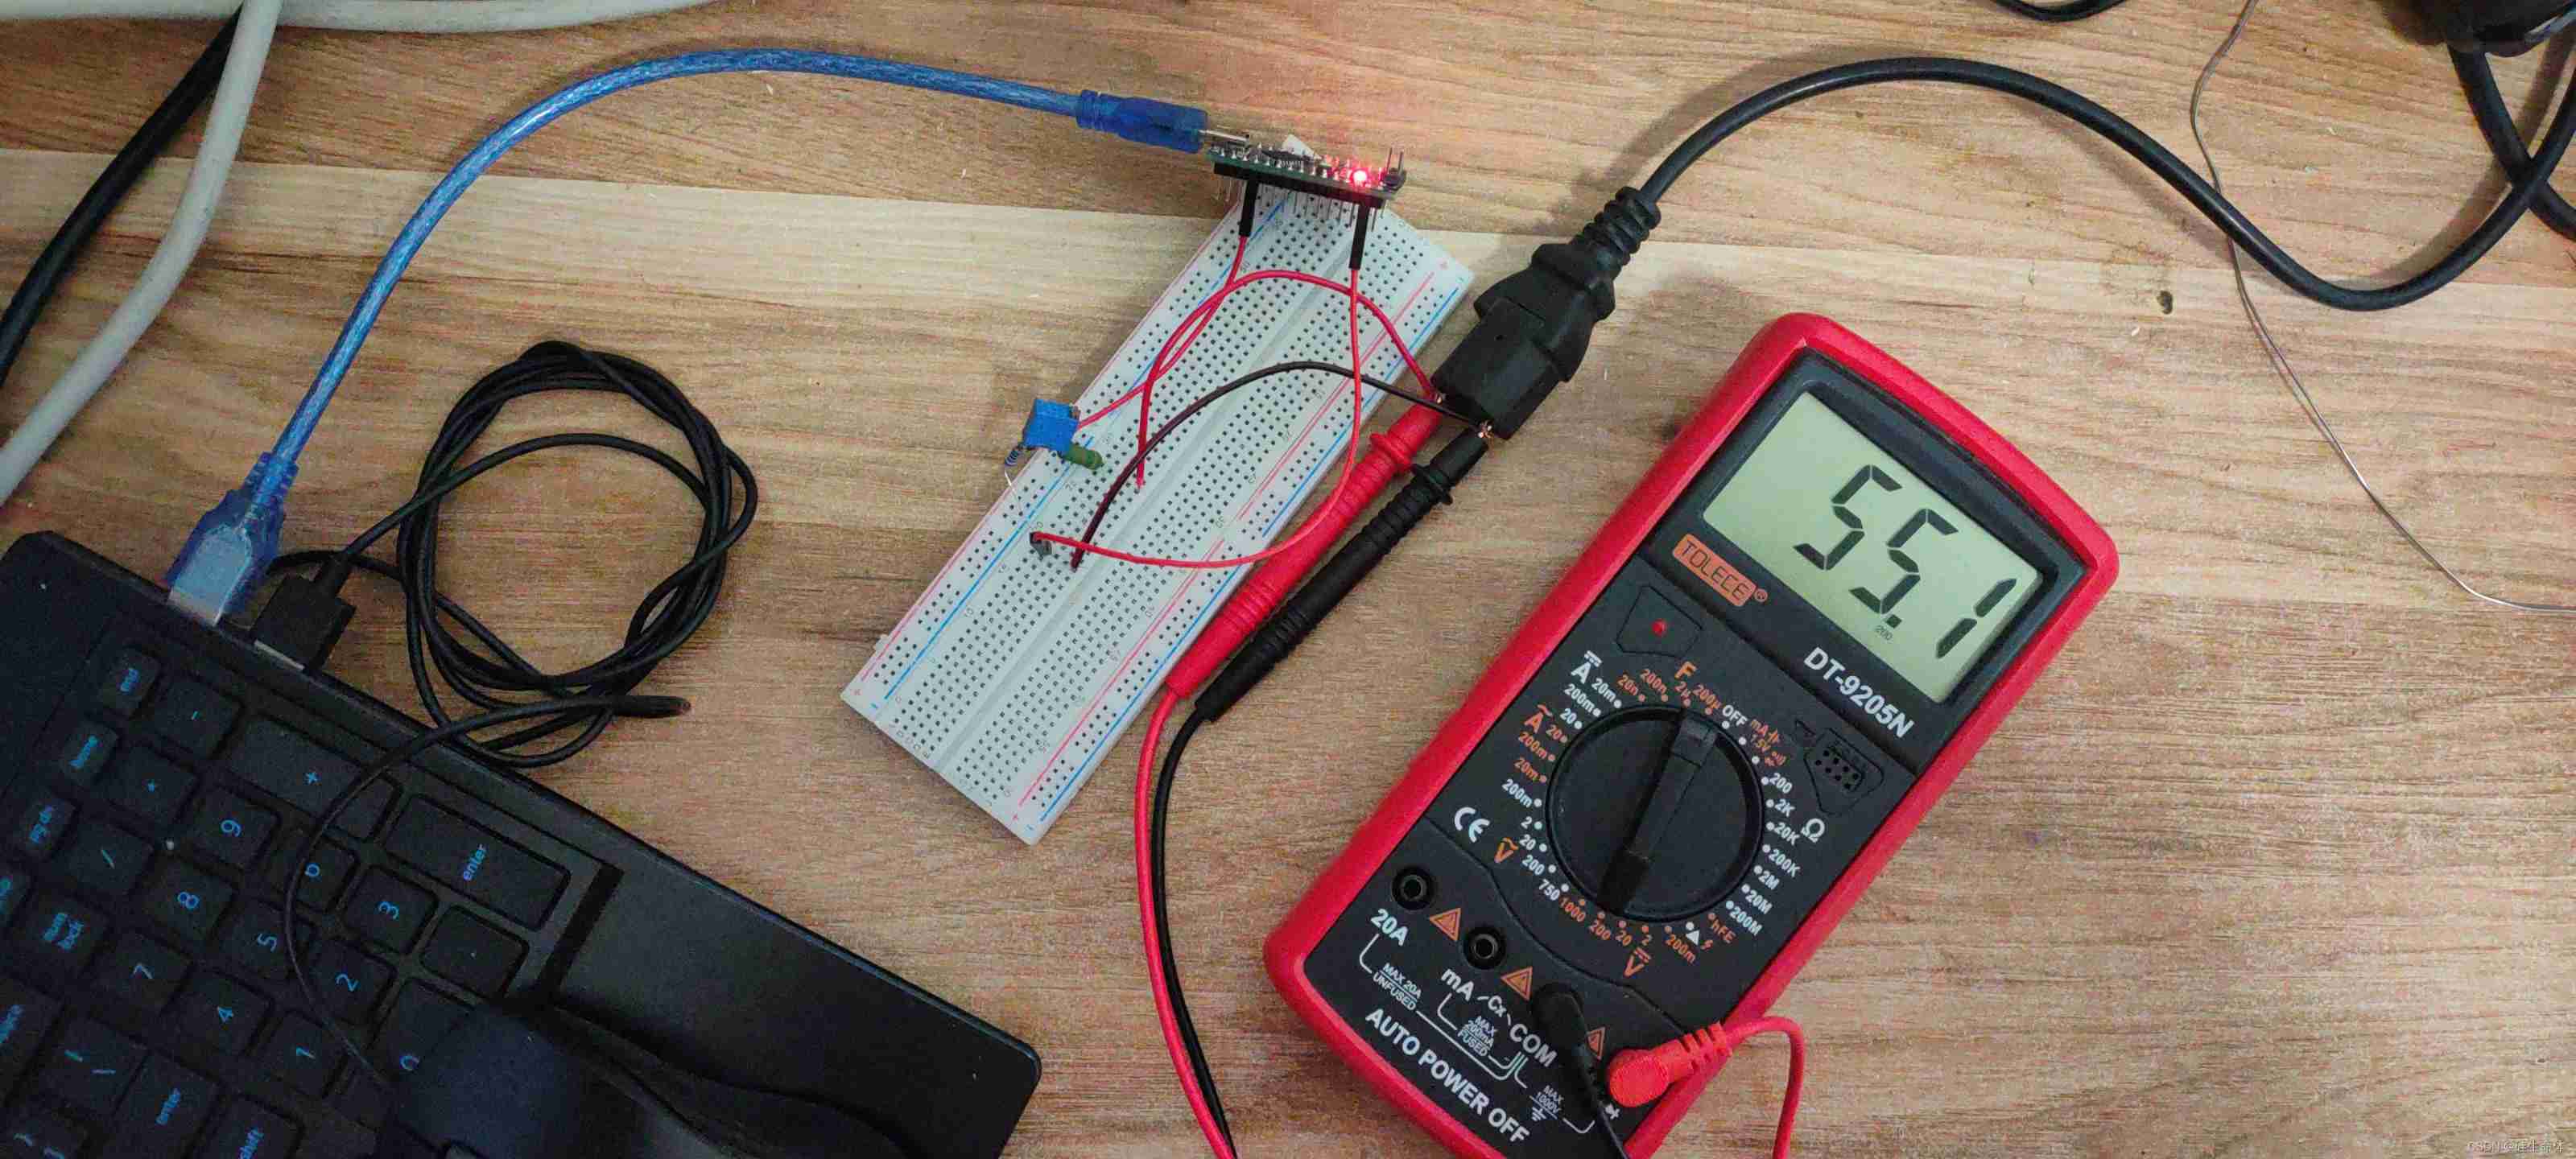
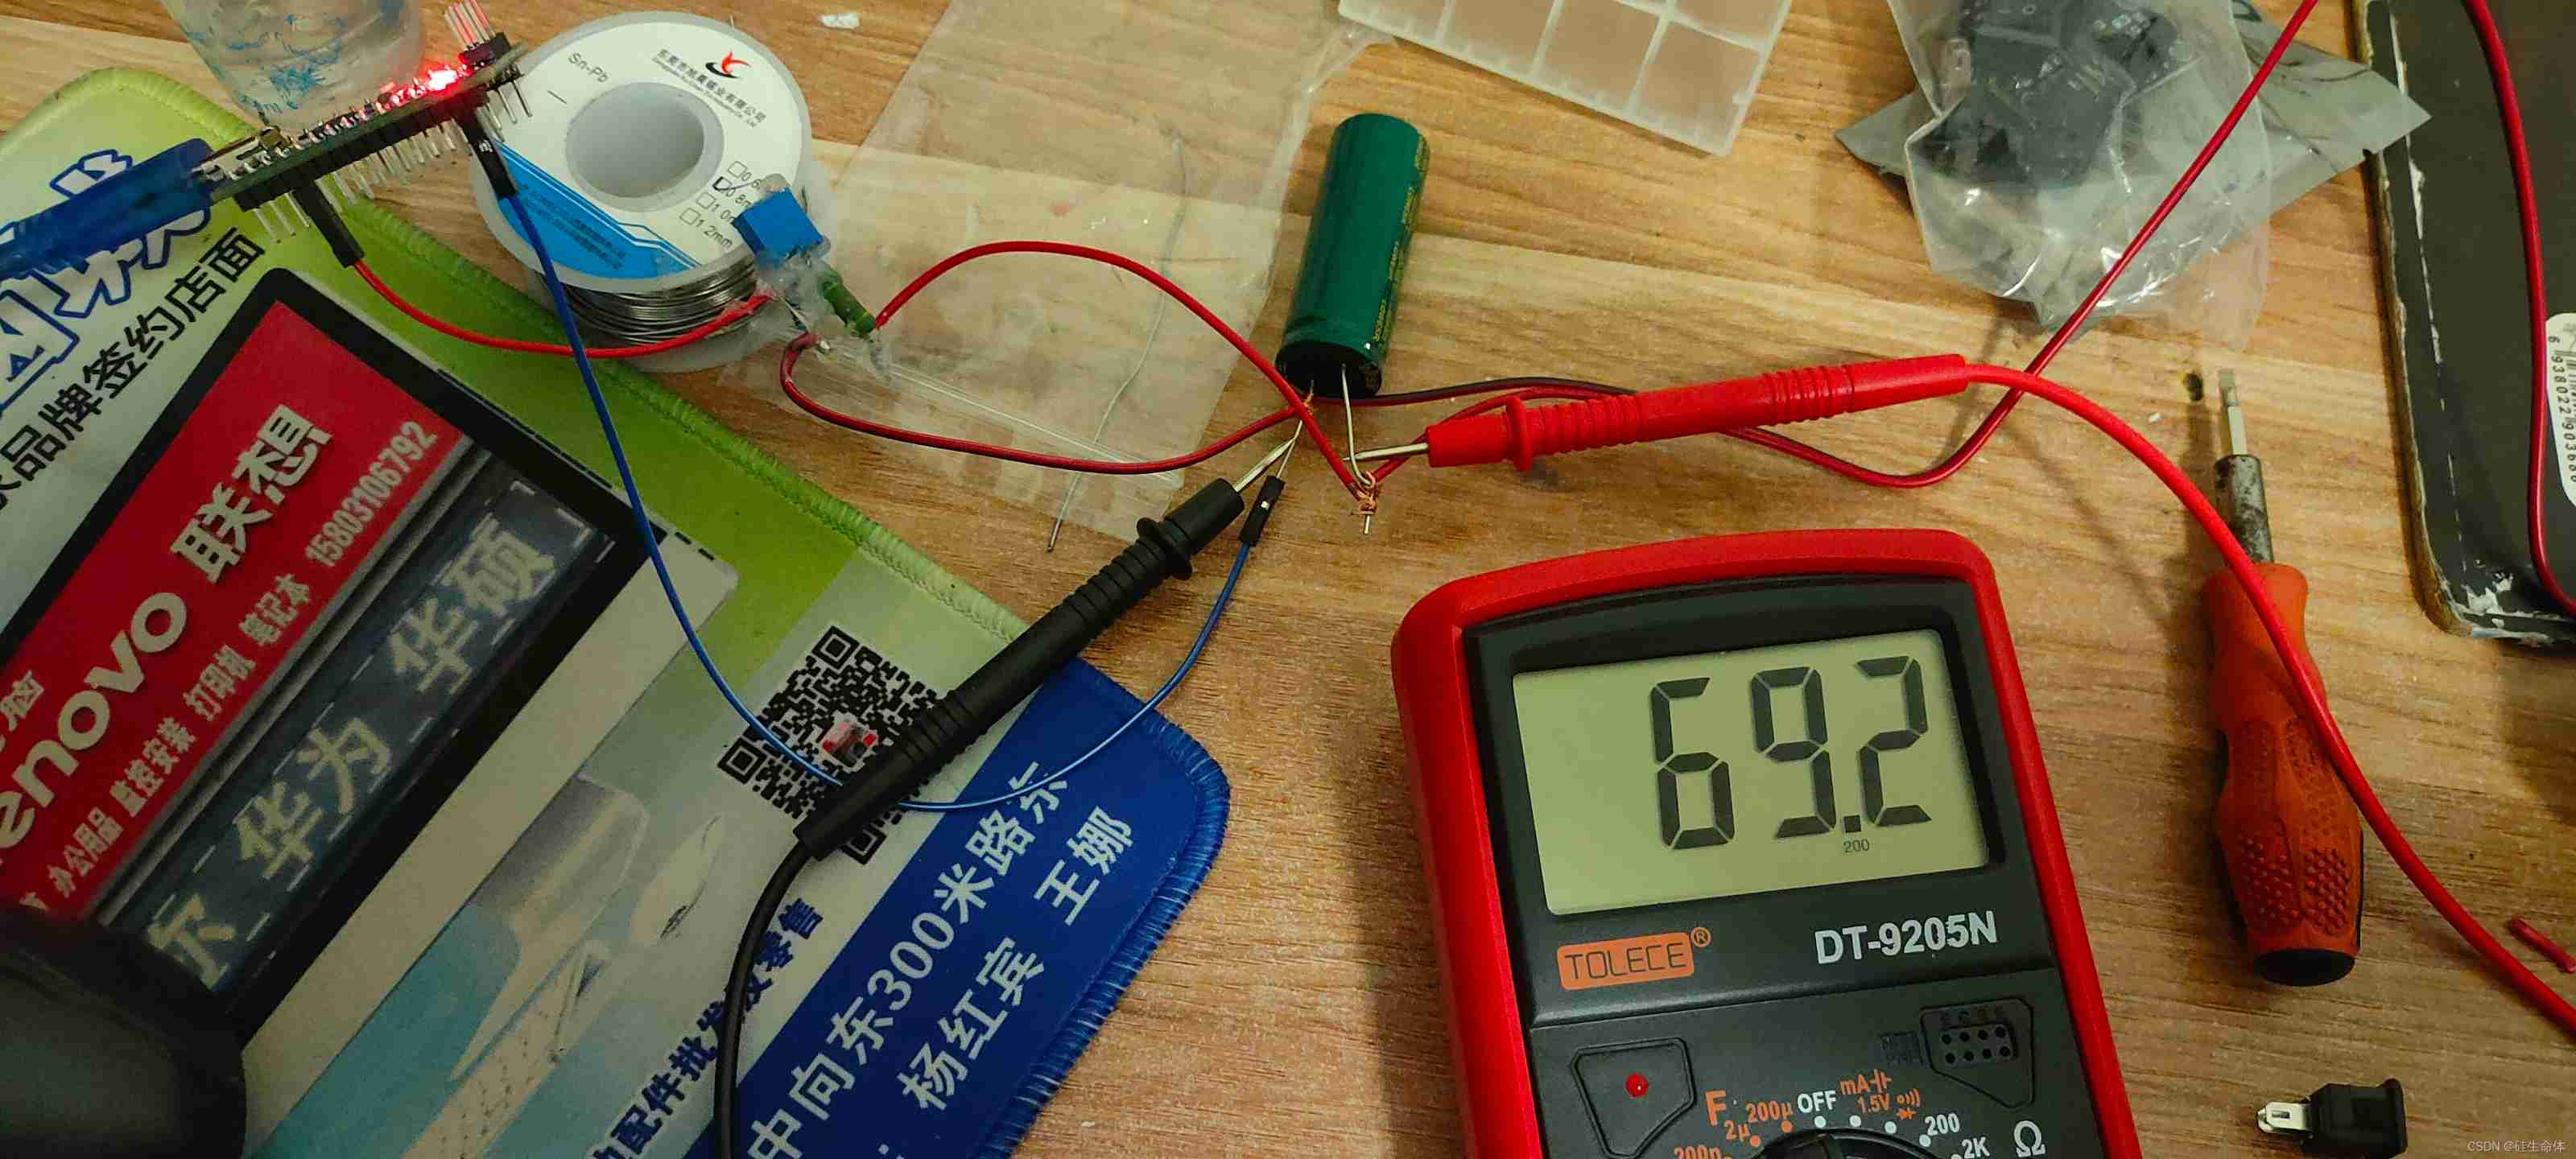
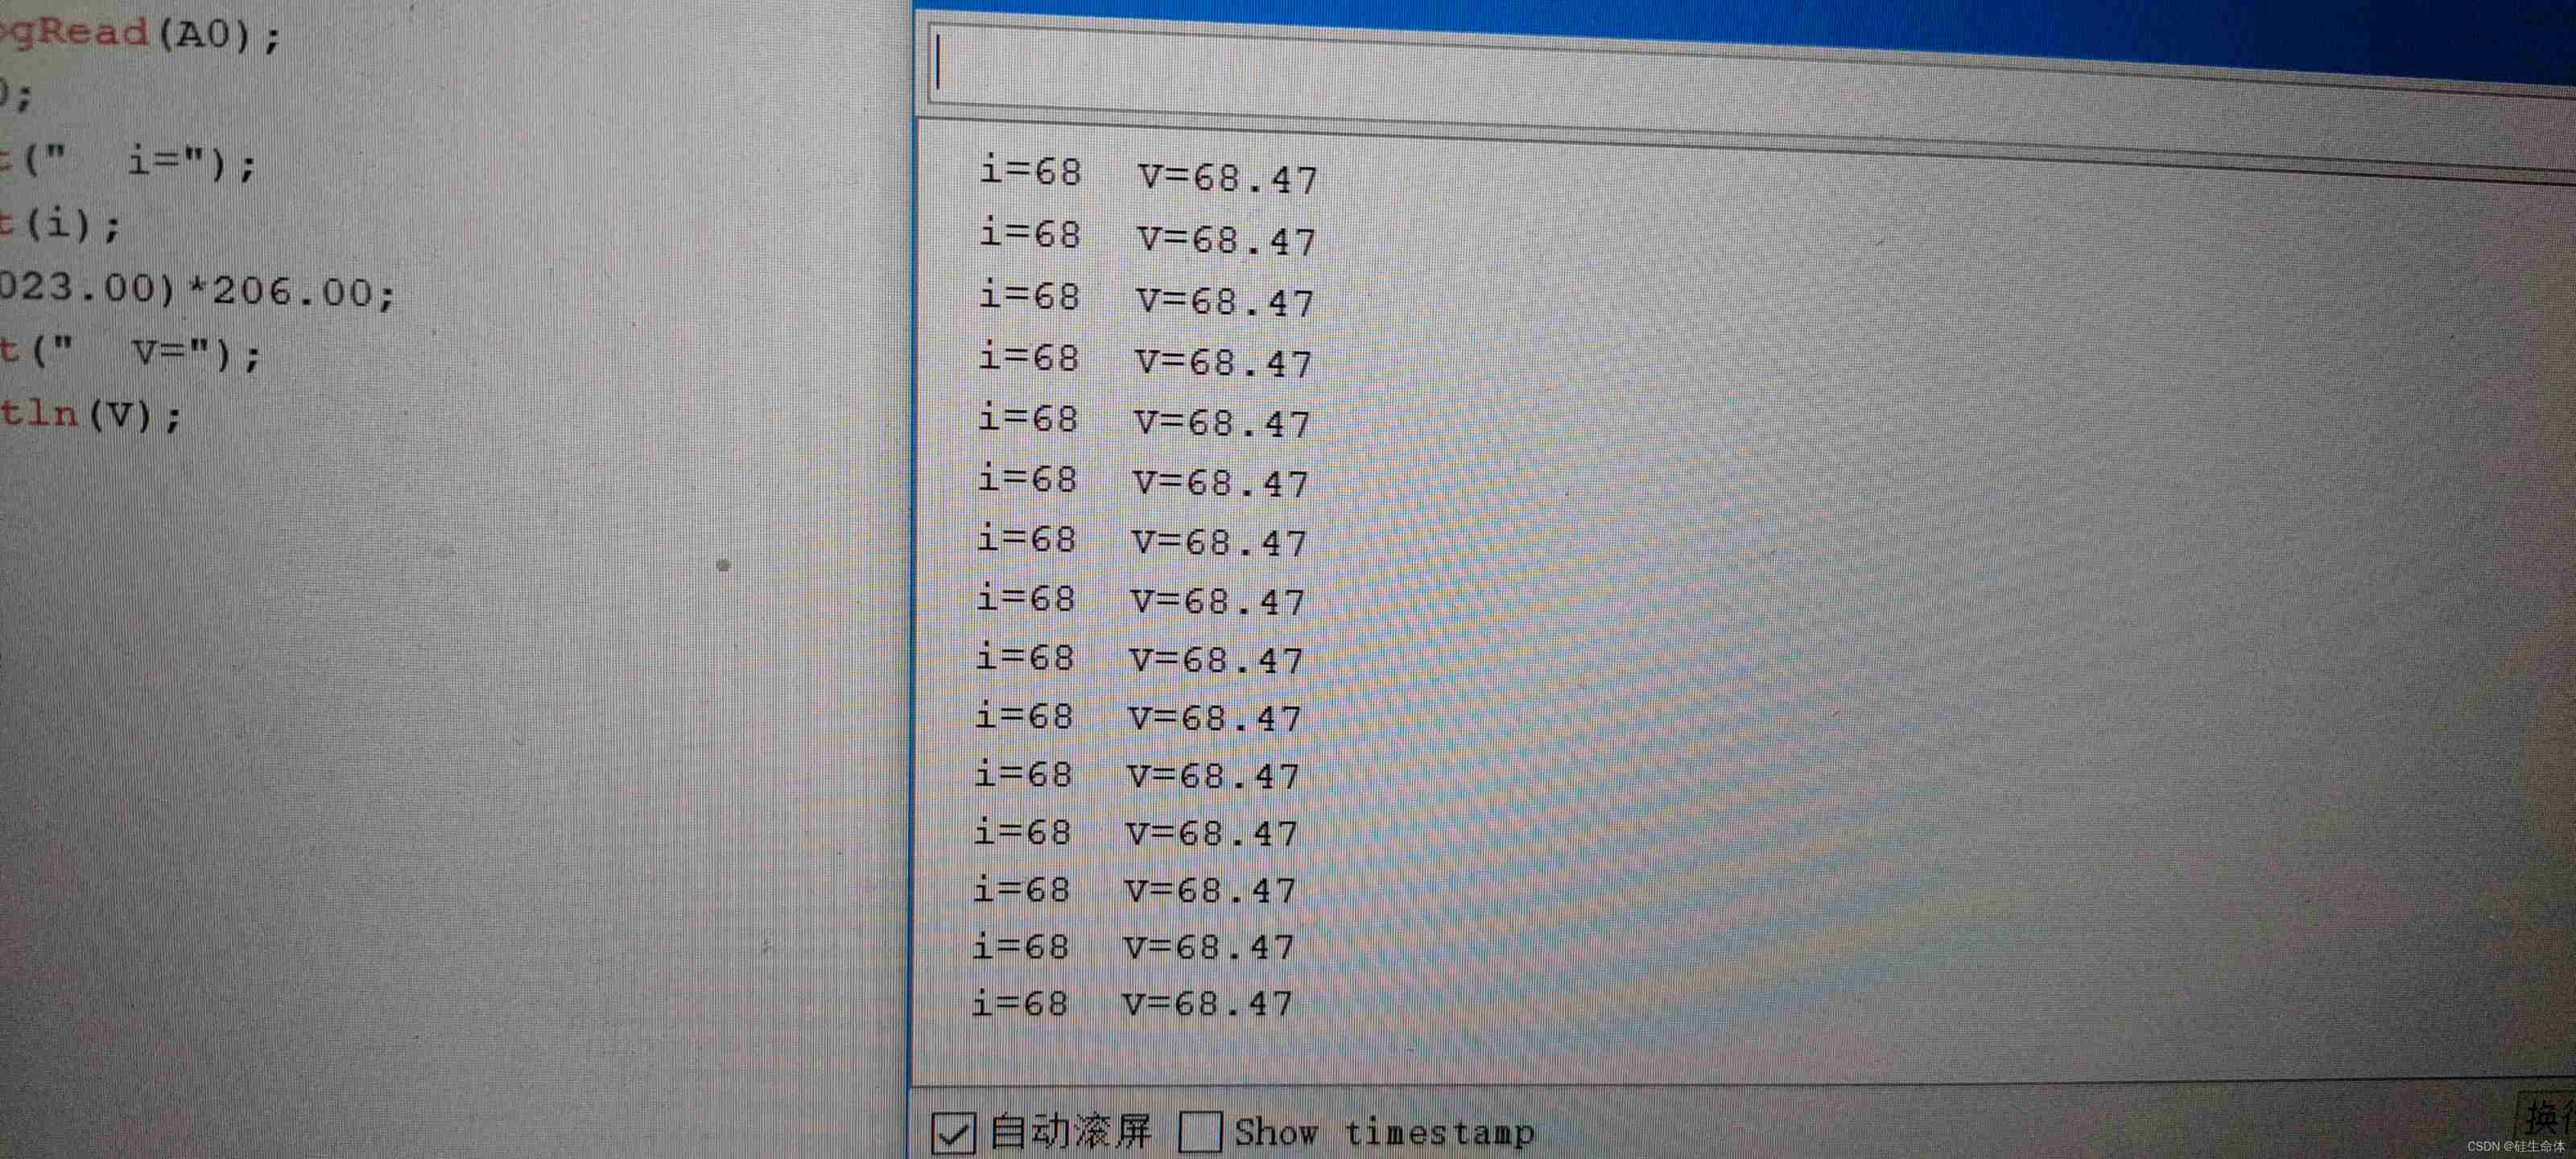
The left side is the serial port monitor output value , On the right is the measured value of voltmeter .
The design of this example is 0~1030V Measuring circuit of measuring range .
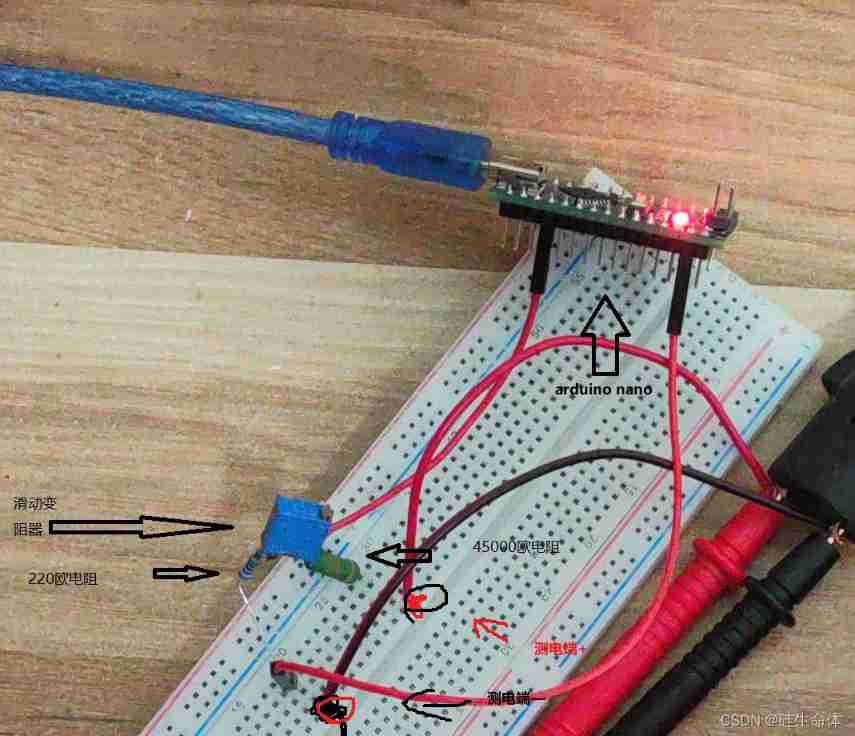
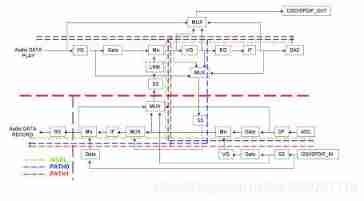
Circuit diagram :
Just look at the picture on the left , The right side is a little messy .
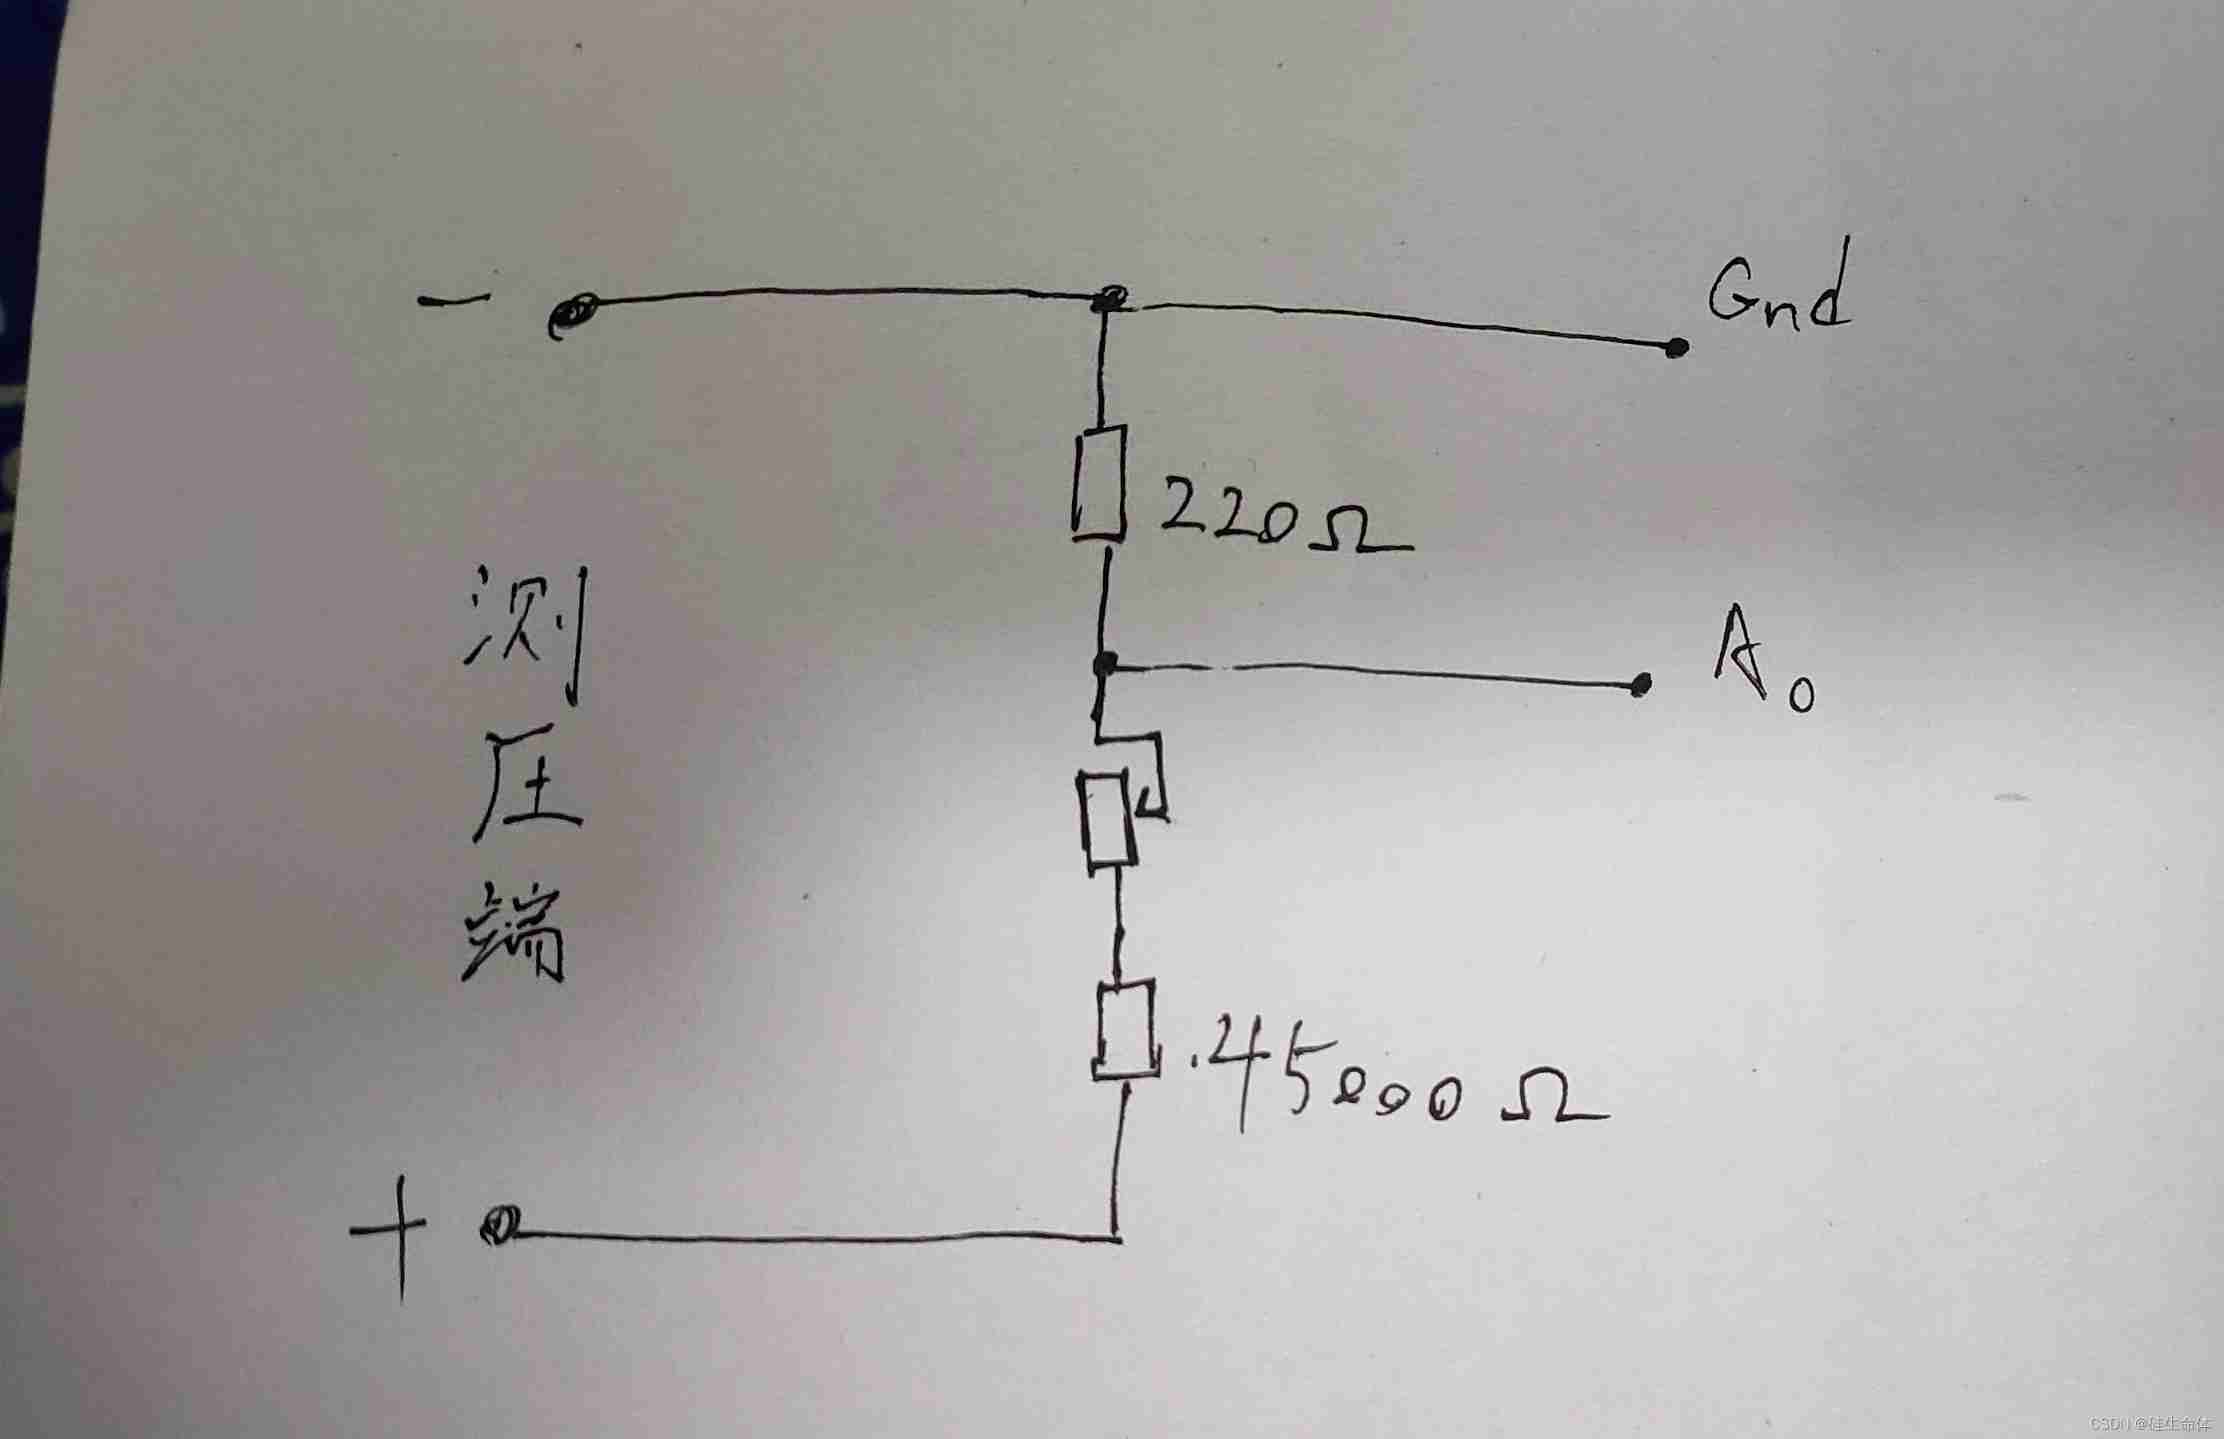
Because the resistance is often not as accurate as the value measured by the mark or multimeter , therefore , The design of the circuit should be flexible . We can connect a variable resistor in series on the circuit to adjust the test accuracy . There is another way to adjust the accuracy , That is, modify some parameters in the calculation program , The value in this example has been debugged like this .
About the choice of variable resistance , Total value of personal suggestions 10k Ohmic , At the time of calculation , It can be calculated by making the large partial voltage resistance take a value slightly smaller than the actual value , After that, it is compensated by sliding rheostat . such as 47k resistance , Value for 45k Calculate , If it is not enough, it can be compensated by adjusting the value resistance .
Calculation :
We know that the resistance partial voltage ratio of the series resistance is directly proportional to the resistance specific range , So we can calculate our original 5v How many times has the range been enlarged .
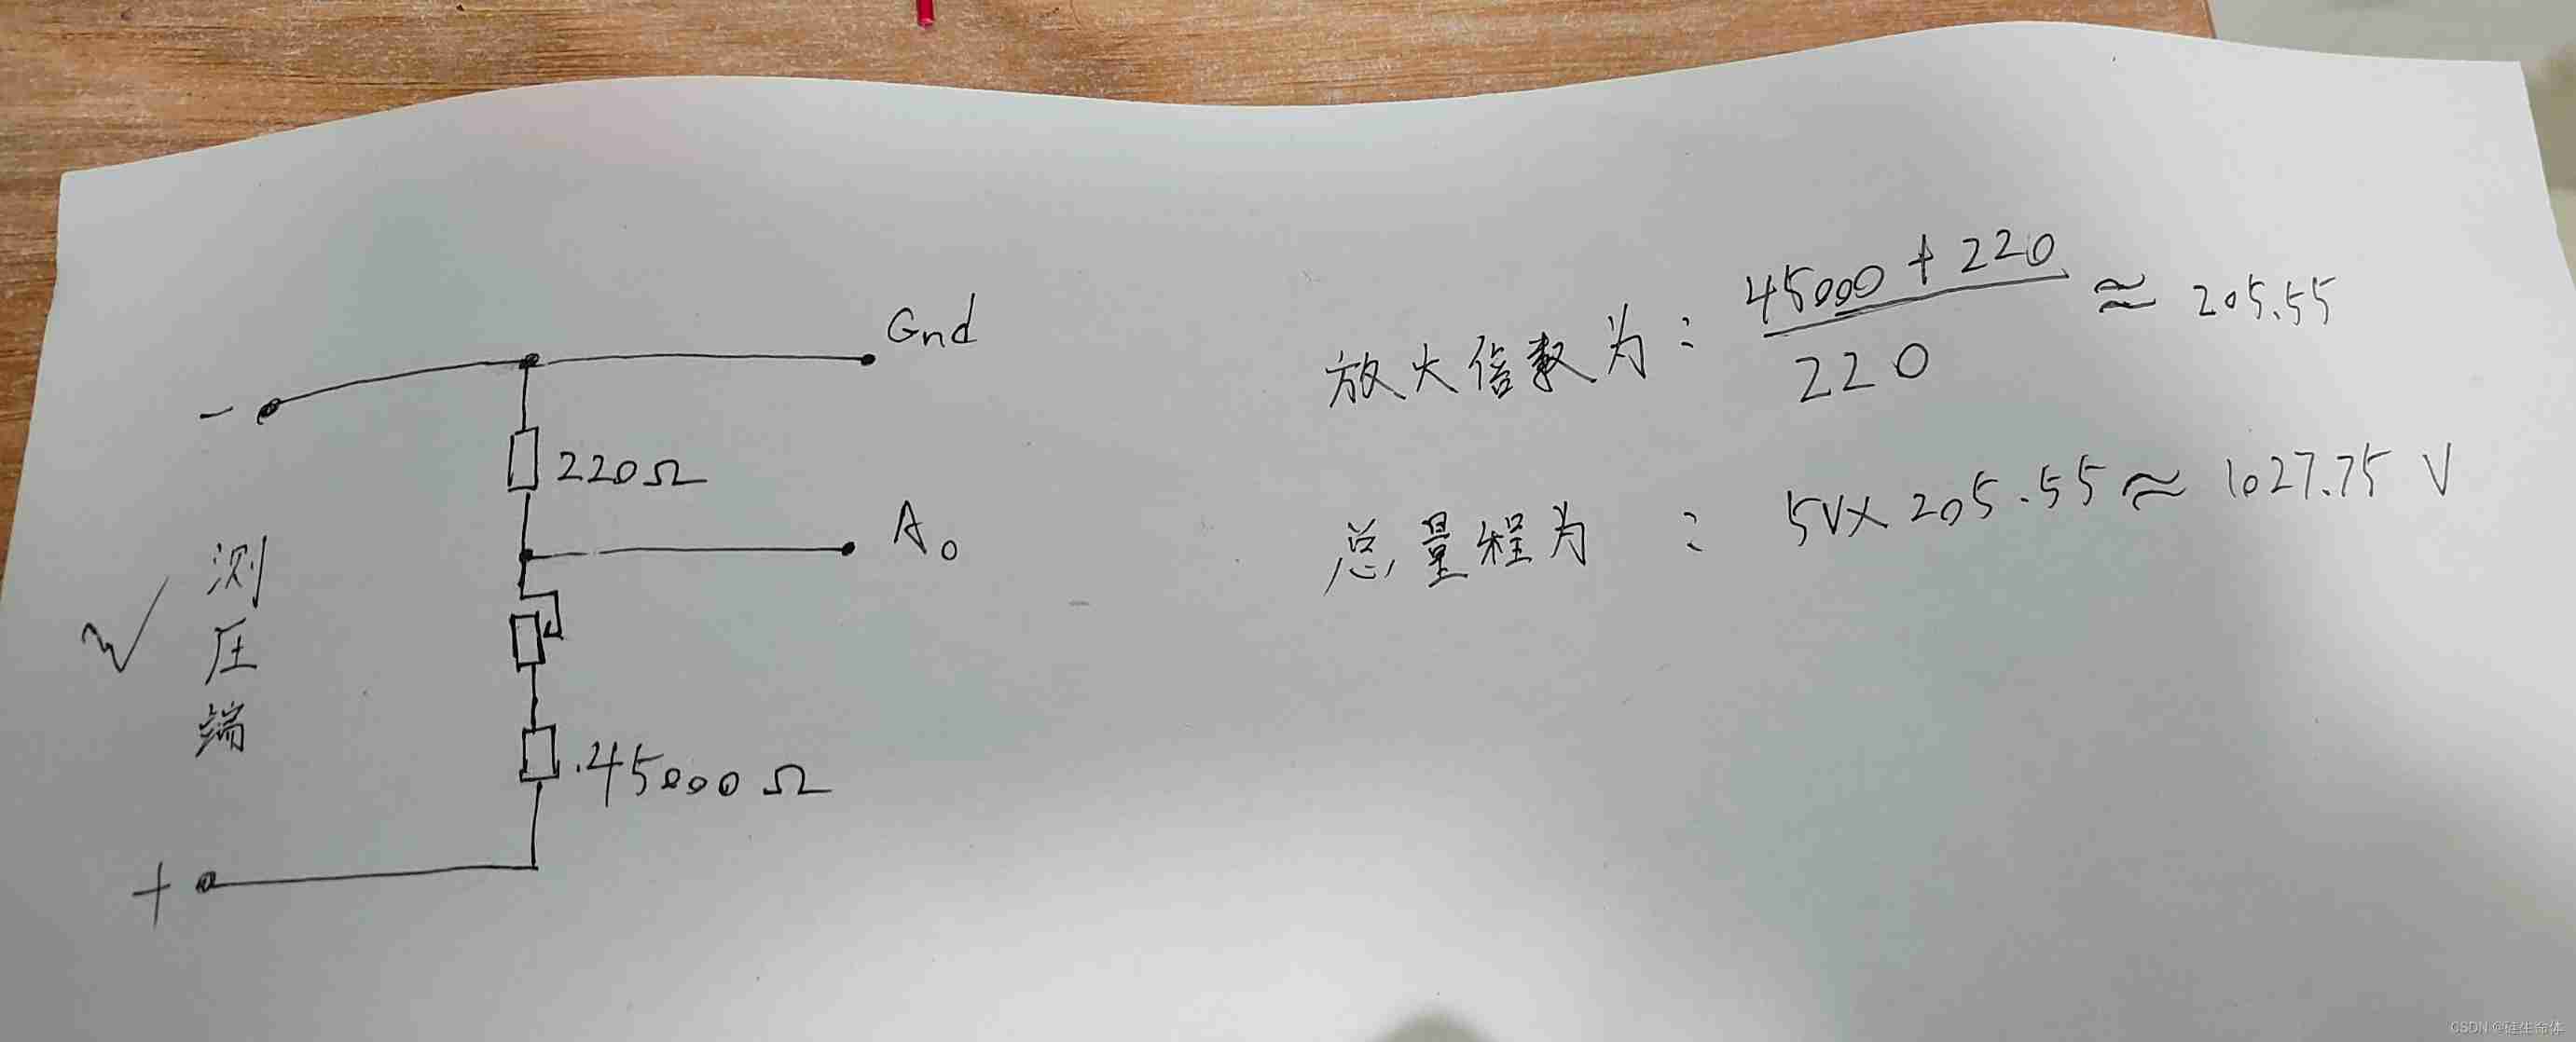
Be careful : We mentioned earlier that the resistance of electronic components is not completely accurate , So there is a problem in the value of resistance , Subsequently, the variable resistance and adjustment value will be used to calibrate , So this is a rough calculation .
Program :
If only one voltage is measured , The procedure is very simple , But when designing other projects , If you want to measure the voltage somewhere , This method can be used .
void setup() {
pinMode(A0,INPUT);                       // Make A0 For analog input
Serial.begin(9600);
}

void loop() {
int i =analogRead(A0);                   // Make A0 Port readout voltage , But this is 0~1023 The number of .
float V=0.00;
Serial.print("  i=");
Serial.print(i);                         // Efferent i Size .
V=i*(5.00/1023.00)*206.00;               //206.00 Is the magnification of the test voltage ( Adjust according to the actual situation , The original number is 205.55)
Serial.print("  V="); Serial.println(V); // Outgoing voltage V Size
delay(100);
}
This procedure will A0 Oral value i And the final calculation result V Output to computer , among i*(5.00/1023.00) It's to make A0 Mouth measured 0~1023 The number of becomes the actual measured voltage ( This operation can also be used map Function mapping implementation ). after , Multiply 206.00( Magnification ) You can get the voltage at the pressure measuring end V.
calibration :
It is also mentioned repeatedly above , We leave elastic space in circuit design . Here is a brief description of the specific operation :
1, Using variable resistance . After connecting the circuit , Adjust the variable resistance to 0, Then the pressure measuring end is connected to the measured object , At the same time, the measured object is connected to a finished voltmeter ,arduino Connecting to a computer , And turn on the serial monitor . Observe the value of the finished voltmeter and the... Returned from the serial port monitor V value . Adjust the variable resistance repeatedly , Until the two readings are basically consistent . Try more groups .
2,( It's not necessary ) If the adjustment through variable resistance is still not calibrated , You can modify the multiple we calculated above .
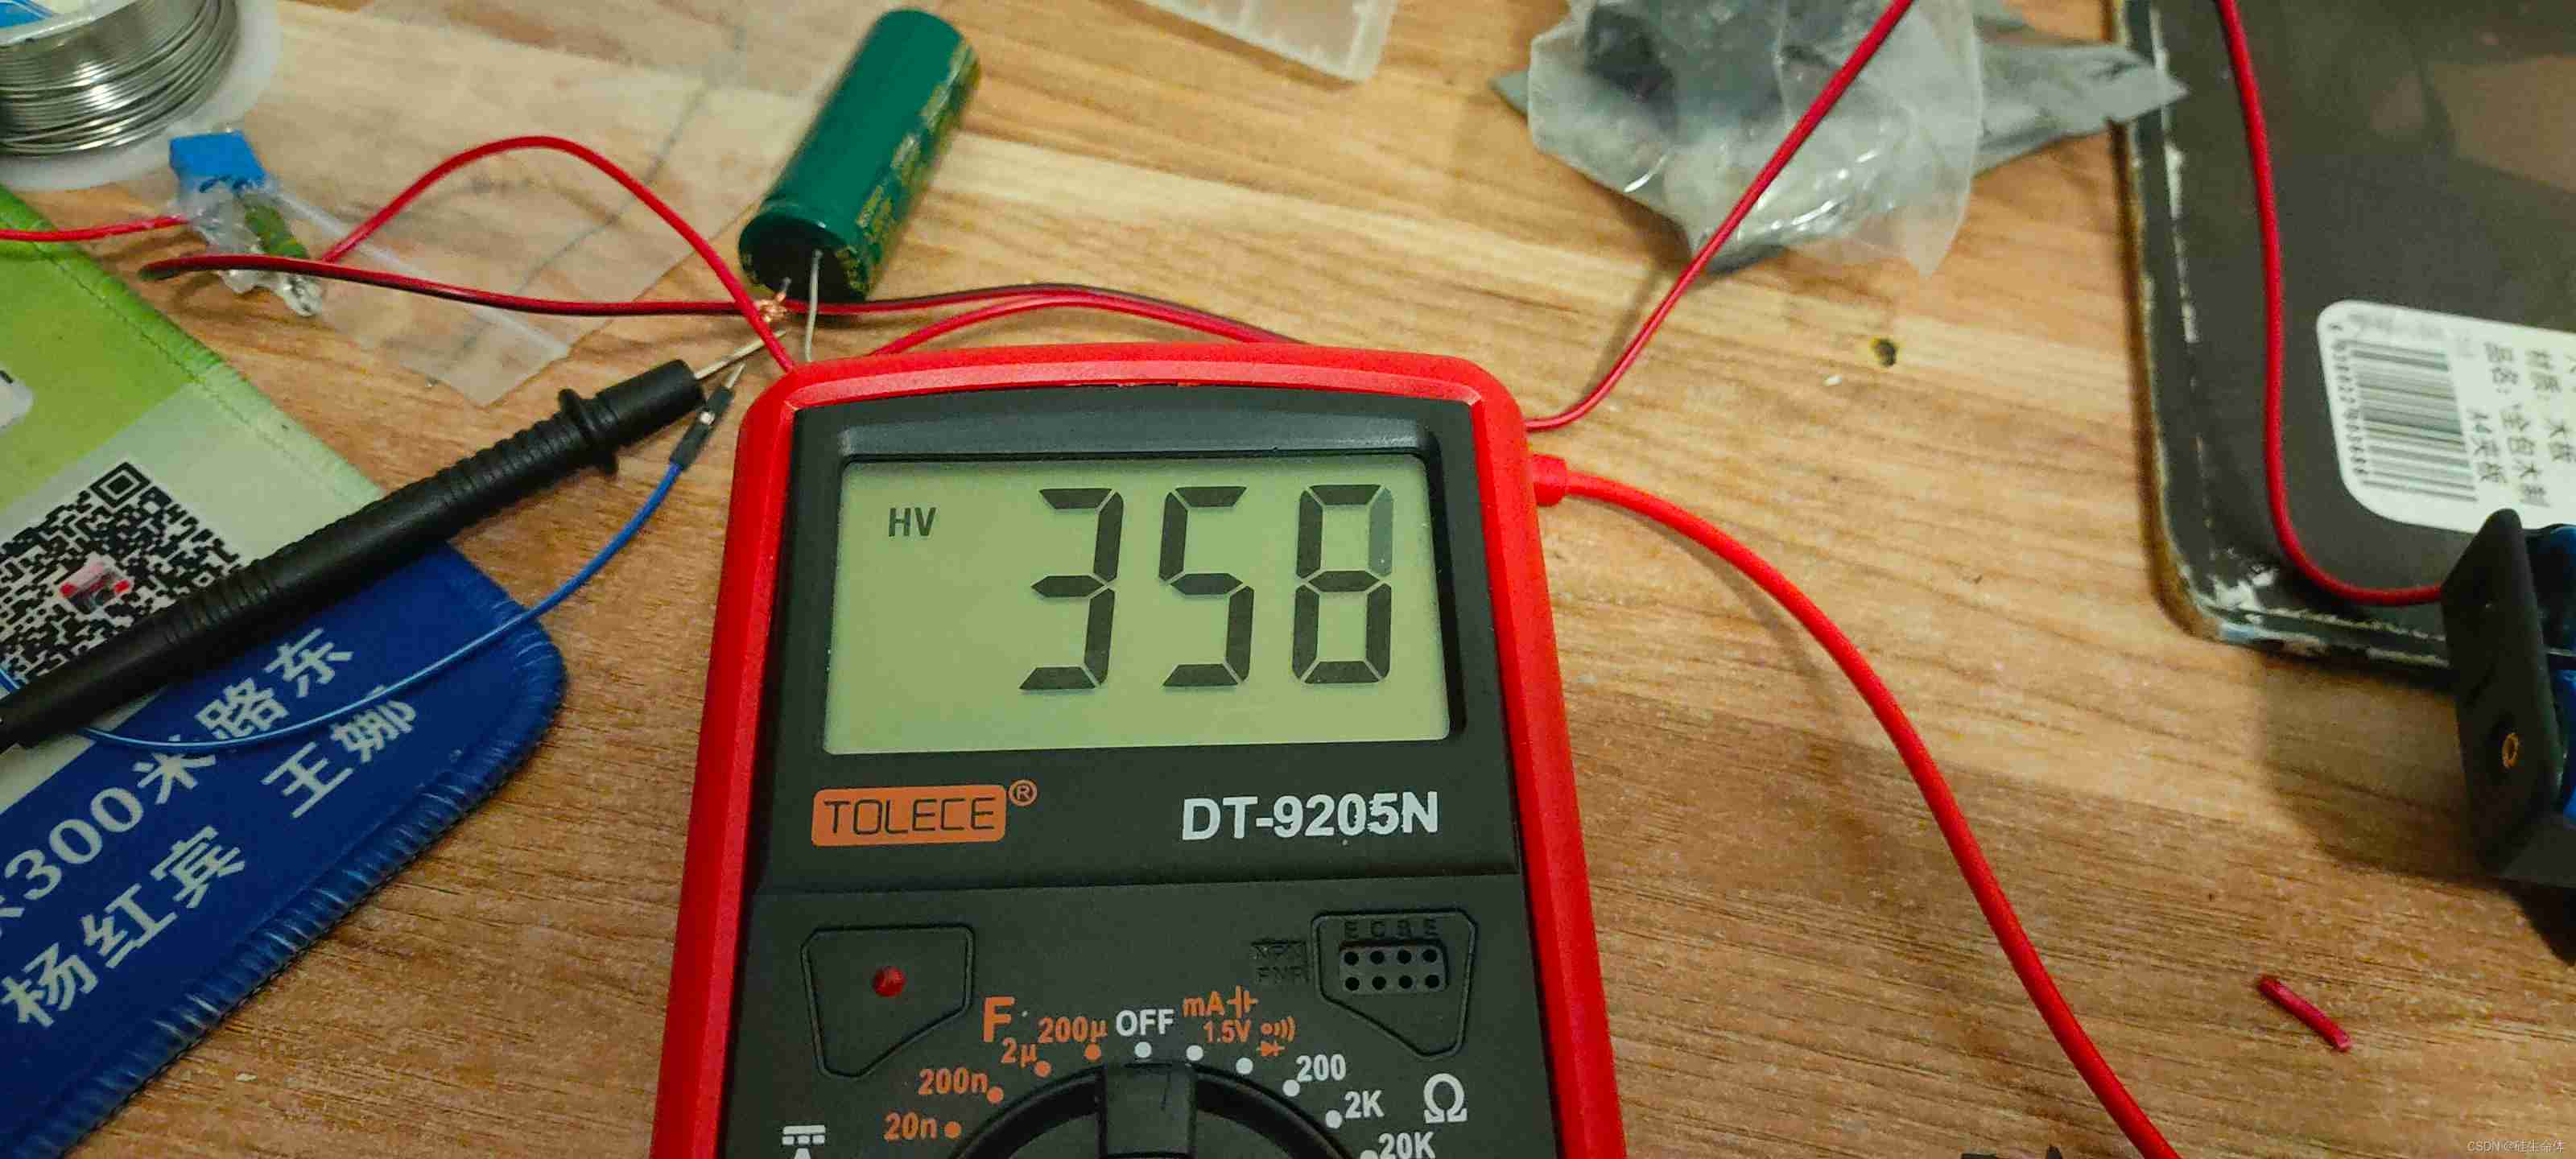
Final , We can make arduino Calculate the exact value , however , Definitely not 100% accurate . The following figure shows some of my pressure measurement results .
The first group
The second group
The third group

边栏推荐
- Prediction of the victory or defeat of the League of heroes -- simple KFC Colonel
- Ag7120 and ag7220 explain the driving scheme of HDMI signal extension amplifier | ag7120 and ag7220 design HDMI signal extension amplifier circuit reference
- The weight of the product page of the second level classification is low. What if it is not included?
- 4.交叉熵
- Saving and reading of network model
- Cs5261type-c to HDMI alternative ag9310 | ag9310 alternative
- 基础篇——整合第三方技术
- Vs code configuration latex environment nanny level configuration tutorial (dual system)
- Definition and classification of energy
- Study notes of single chip microcomputer and embedded system
猜你喜欢
Taiwan Xinchuang sss1700 latest Chinese specification | sss1700 latest Chinese specification | sss1700datasheet Chinese explanation
y59.第三章 Kubernetes从入门到精通 -- 持续集成与部署(三二)
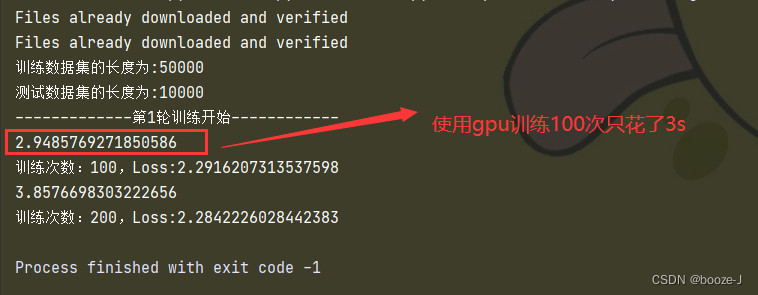
利用GPU训练网络模型
6. Dropout application

Markdown learning (entry level)
11.递归神经网络RNN
Cs5212an design display to VGA HD adapter products | display to VGA Hd 1080p adapter products
High quality USB sound card / audio chip sss1700 | sss1700 design 96 kHz 24 bit sampling rate USB headset microphone scheme | sss1700 Chinese design scheme explanation
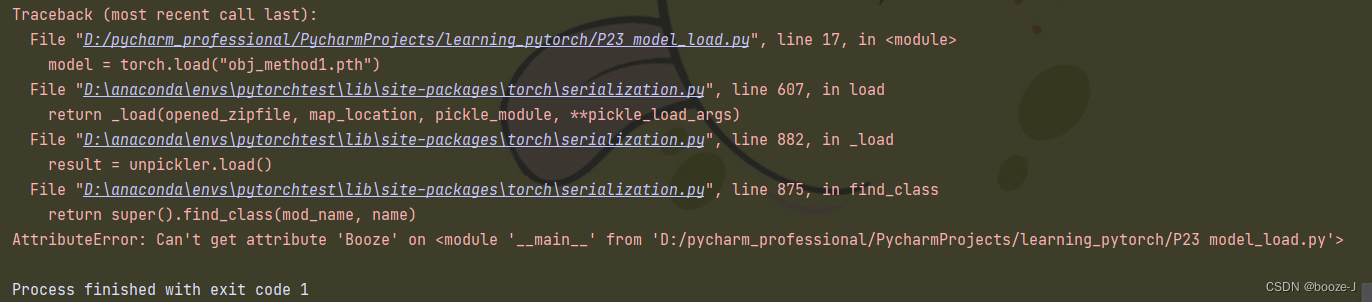
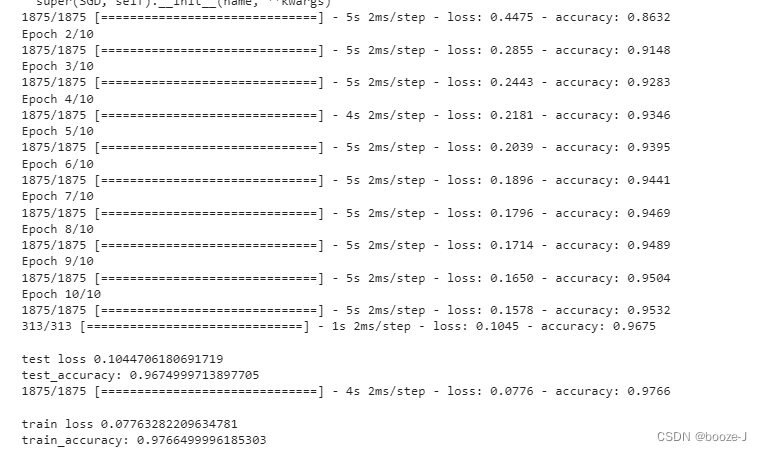
Saving and reading of network model
Y59. Chapter III kubernetes from entry to proficiency - continuous integration and deployment (III, II)
随机推荐
Fofa attack and defense challenge record
New library online | information data of Chinese journalists
130. 被围绕的区域
Ag9310 same function alternative | cs5261 replaces ag9310type-c to HDMI single switch screen alternative | low BOM replaces ag9310 design
Vs code configuration latex environment nanny level configuration tutorial (dual system)
EDP to LVDS conversion design circuit | EDP to LVDS adapter board circuit | capstone/cs5211 chip circuit schematic reference
New library launched | cnopendata China Time-honored enterprise directory
FIR filter of IQ signal after AD phase discrimination
Design method and reference circuit of type C to hdmi+ PD + BB + usb3.1 hub (rj45/cf/tf/ sd/ multi port usb3.1 type-A) multifunctional expansion dock
NTT template for Tourism
13.模型的保存和载入
swift获取url参数
Codeforces Round #804 (Div. 2)
Redis, do you understand the list
Common configurations in rectangular coordinate system
Common effects of line chart
Chapter improvement of clock -- multi-purpose signal modulation generation system based on ambient optical signal detection and custom signal rules
5.过拟合,dropout,正则化
图像数据预处理
2.非线性回归