当前位置:网站首页>Fabrication of fairygui simple Backpack
Fabrication of fairygui simple Backpack
2022-07-06 12:38:00 【SQ Liu】
FairyGUI Making of simple Backpack
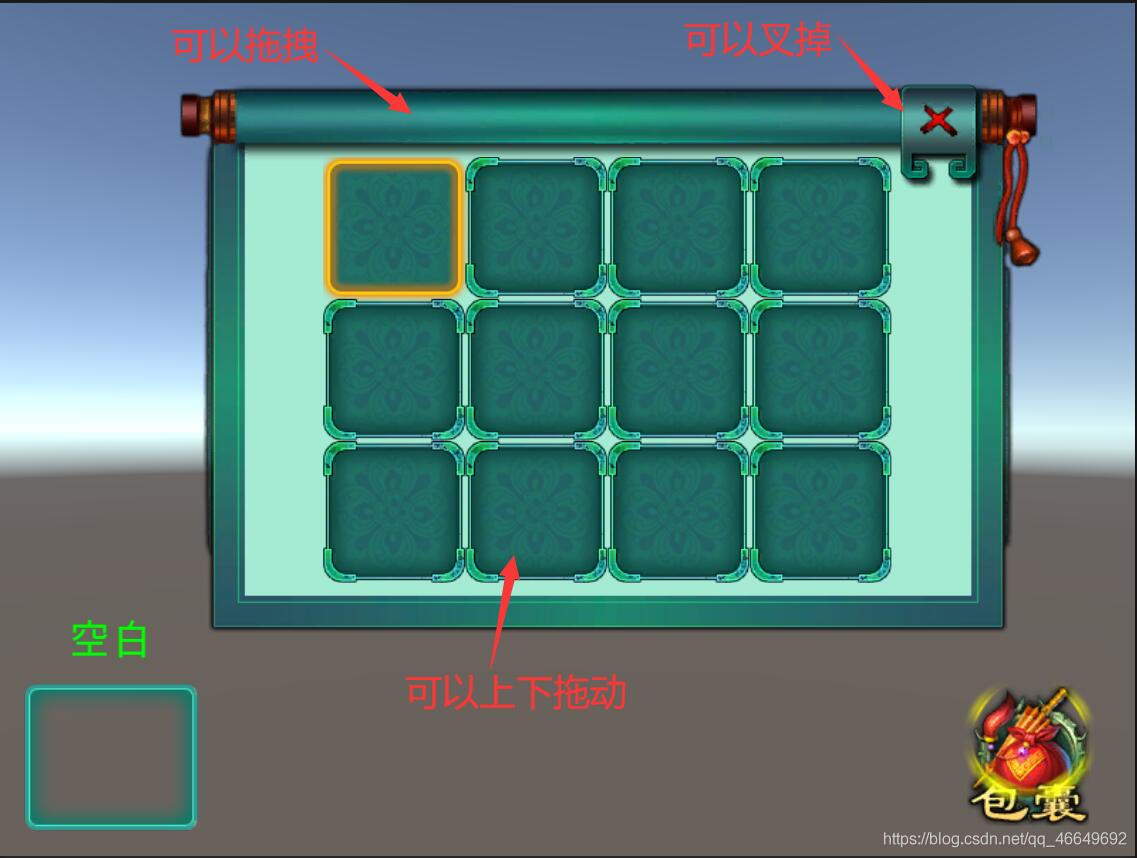
Results the preview :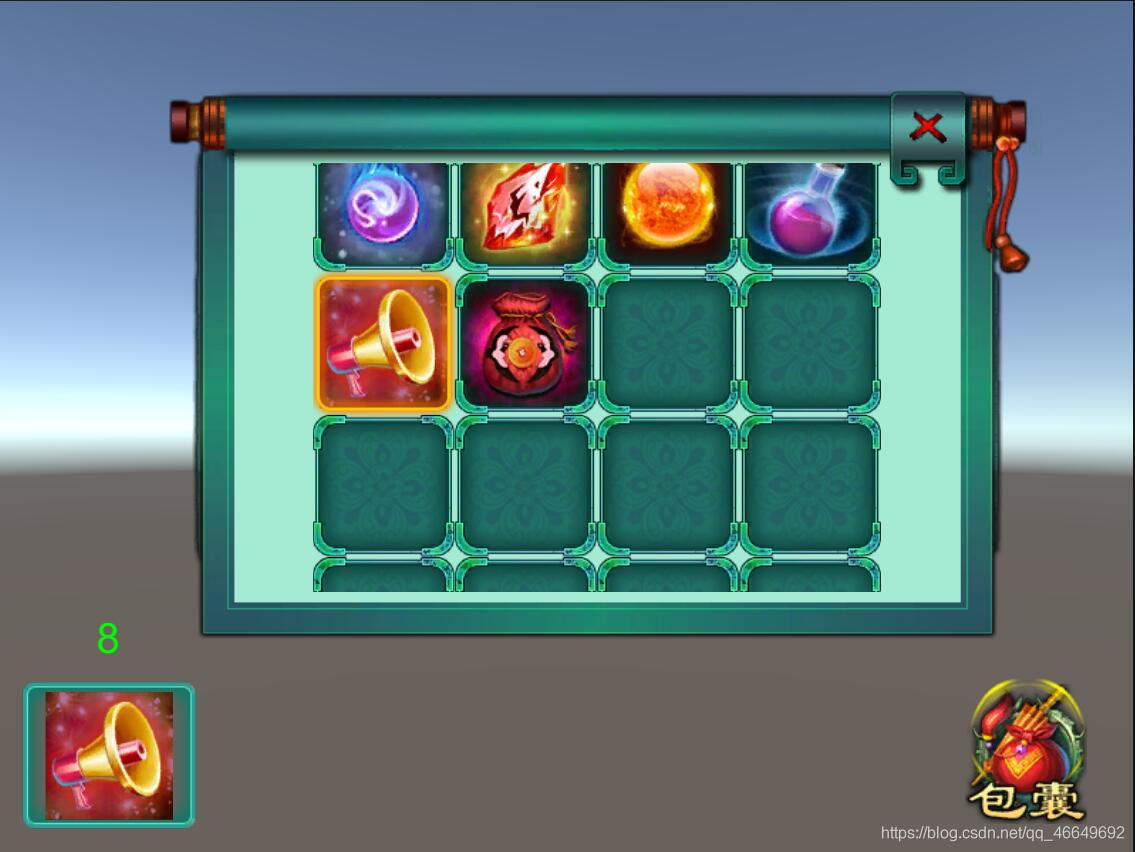
One 、 Create a new project
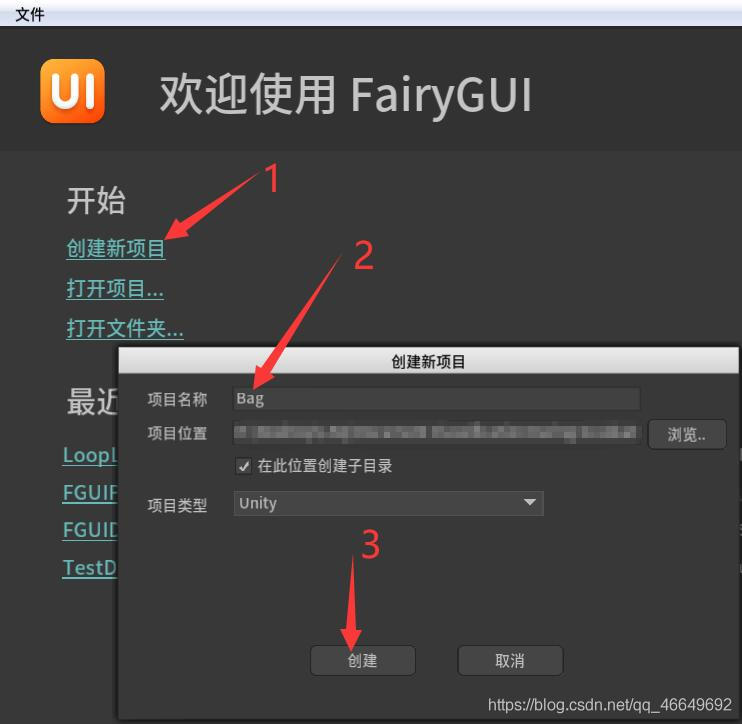
Rename it 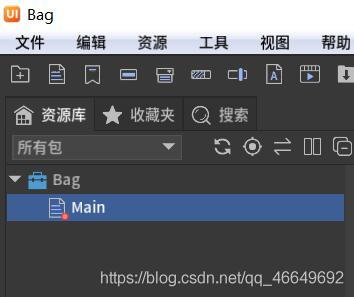
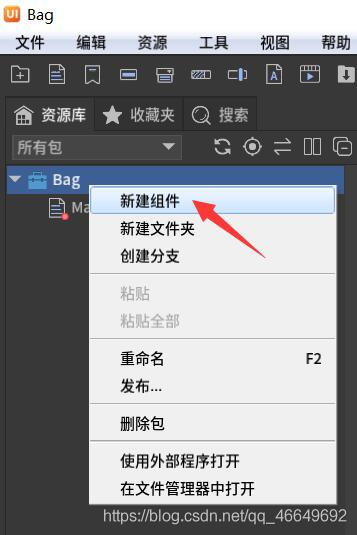
Two 、 Make backpack pop-up
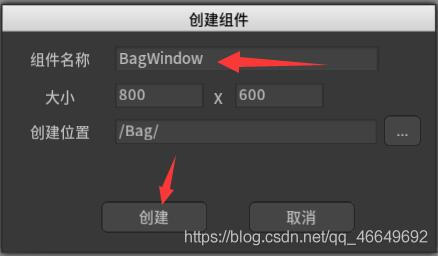
1、 Create a new container component for the backpack (BagWindow)
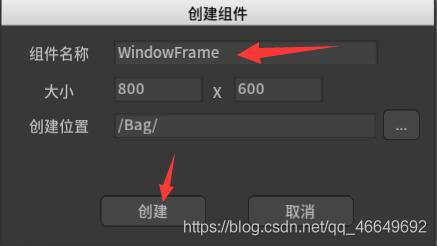
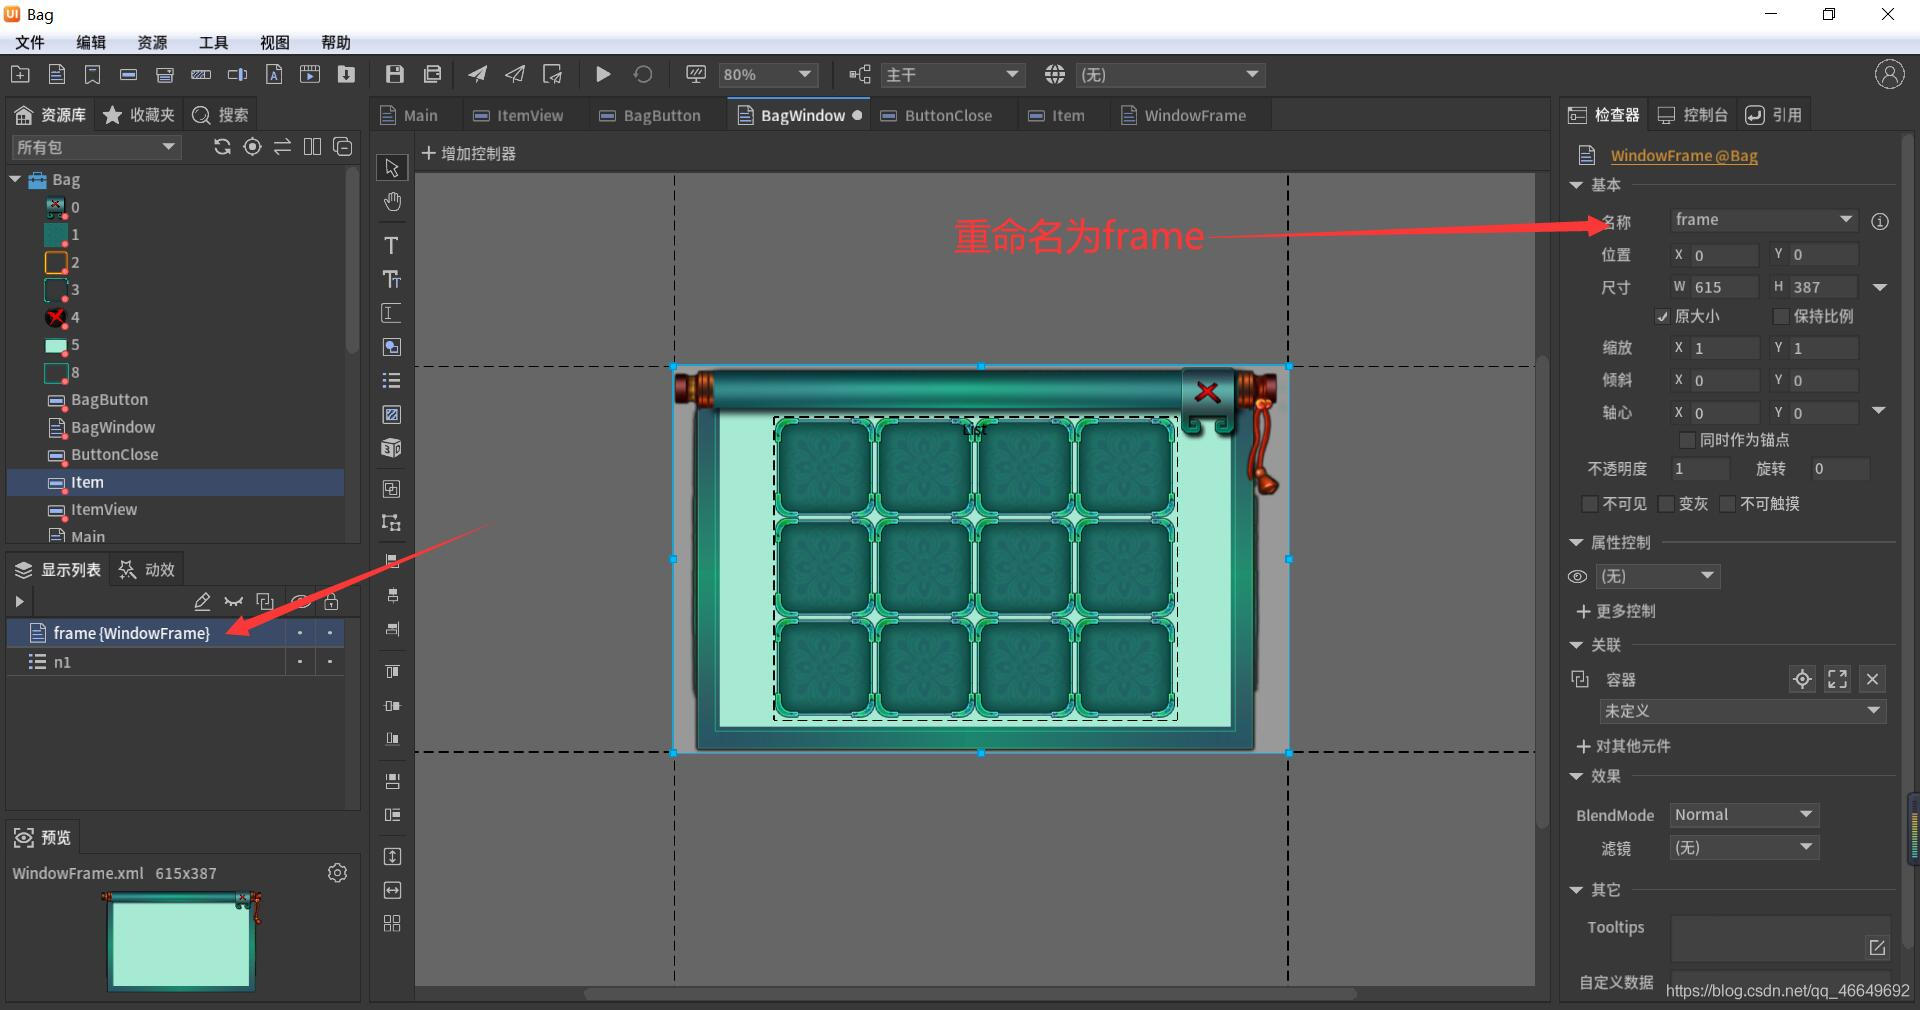
2、 Create a new window frame component (WindowFrame)
3、 Import material resources
4、 stay WindowFrame In the operation
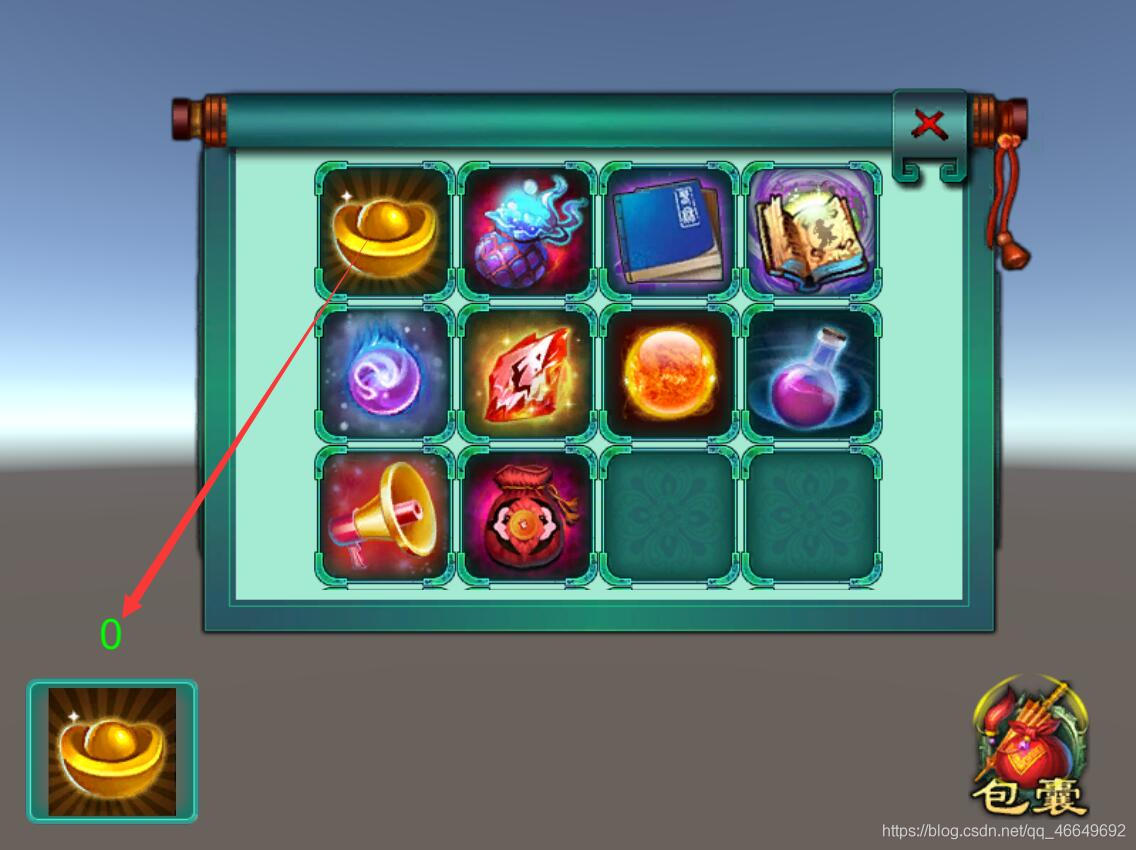
(1) Drag into the background of the backpack
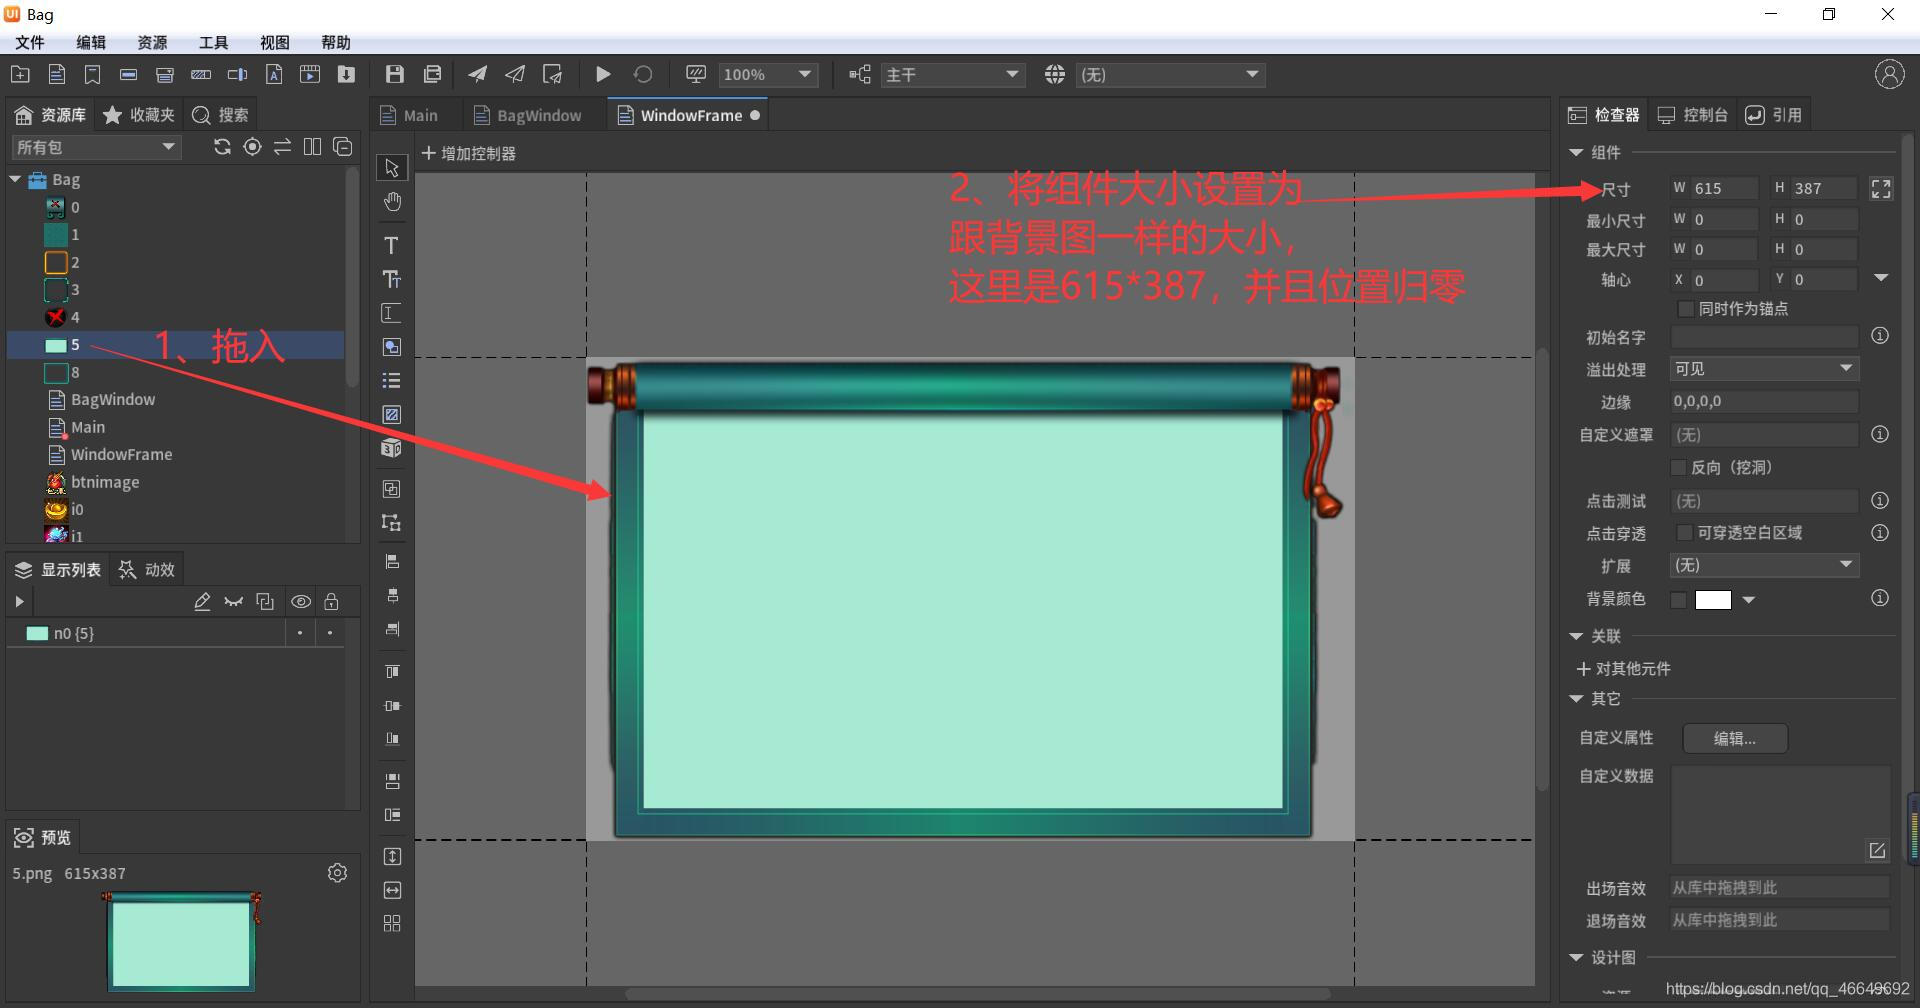
And will n0 Rename it to BG( Backpack background )
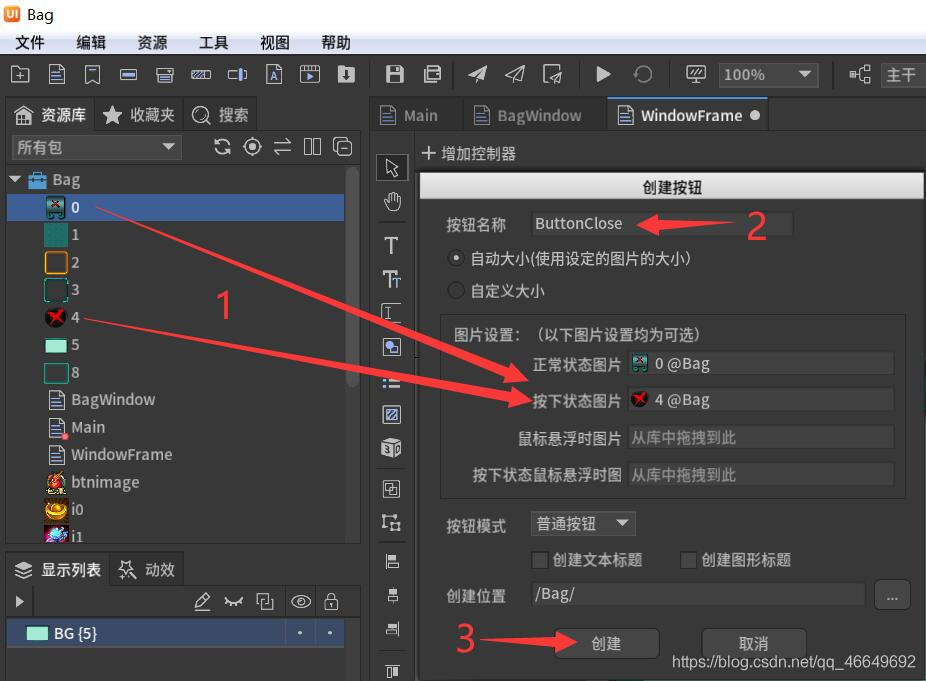
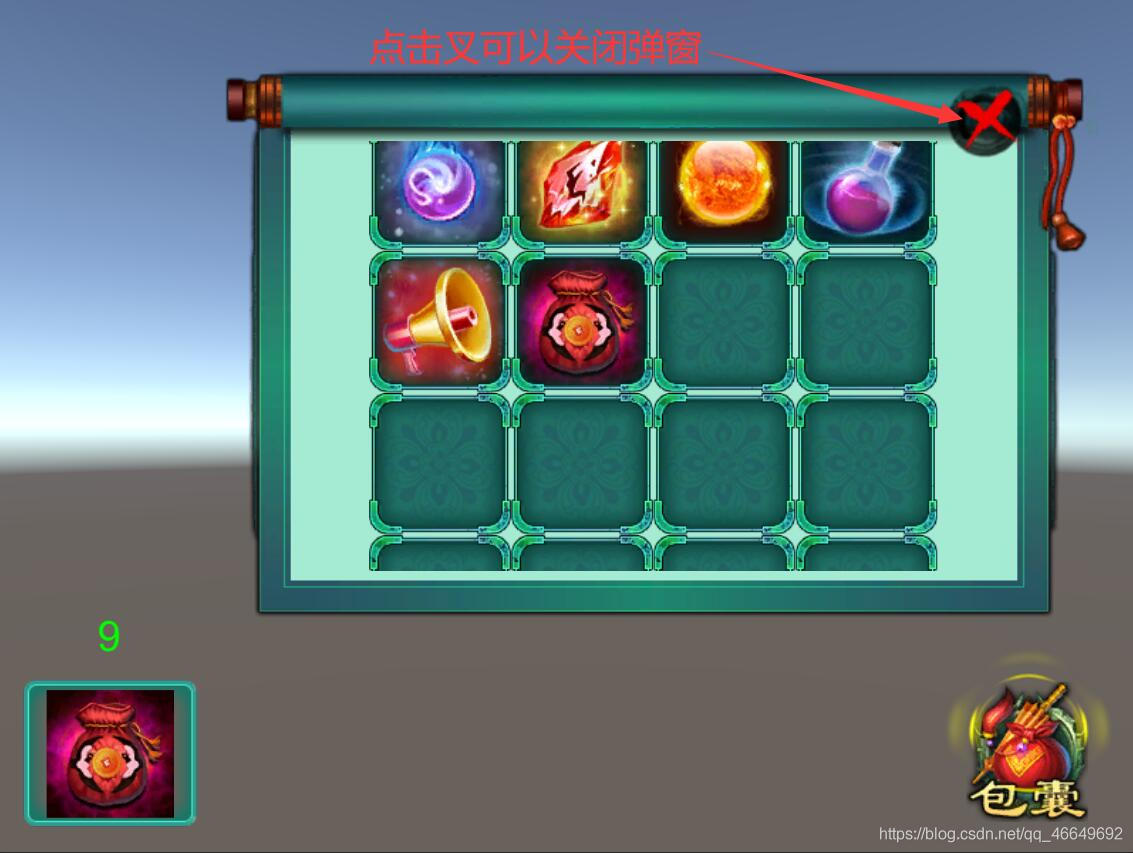
(2) New close button (ButtonClose)
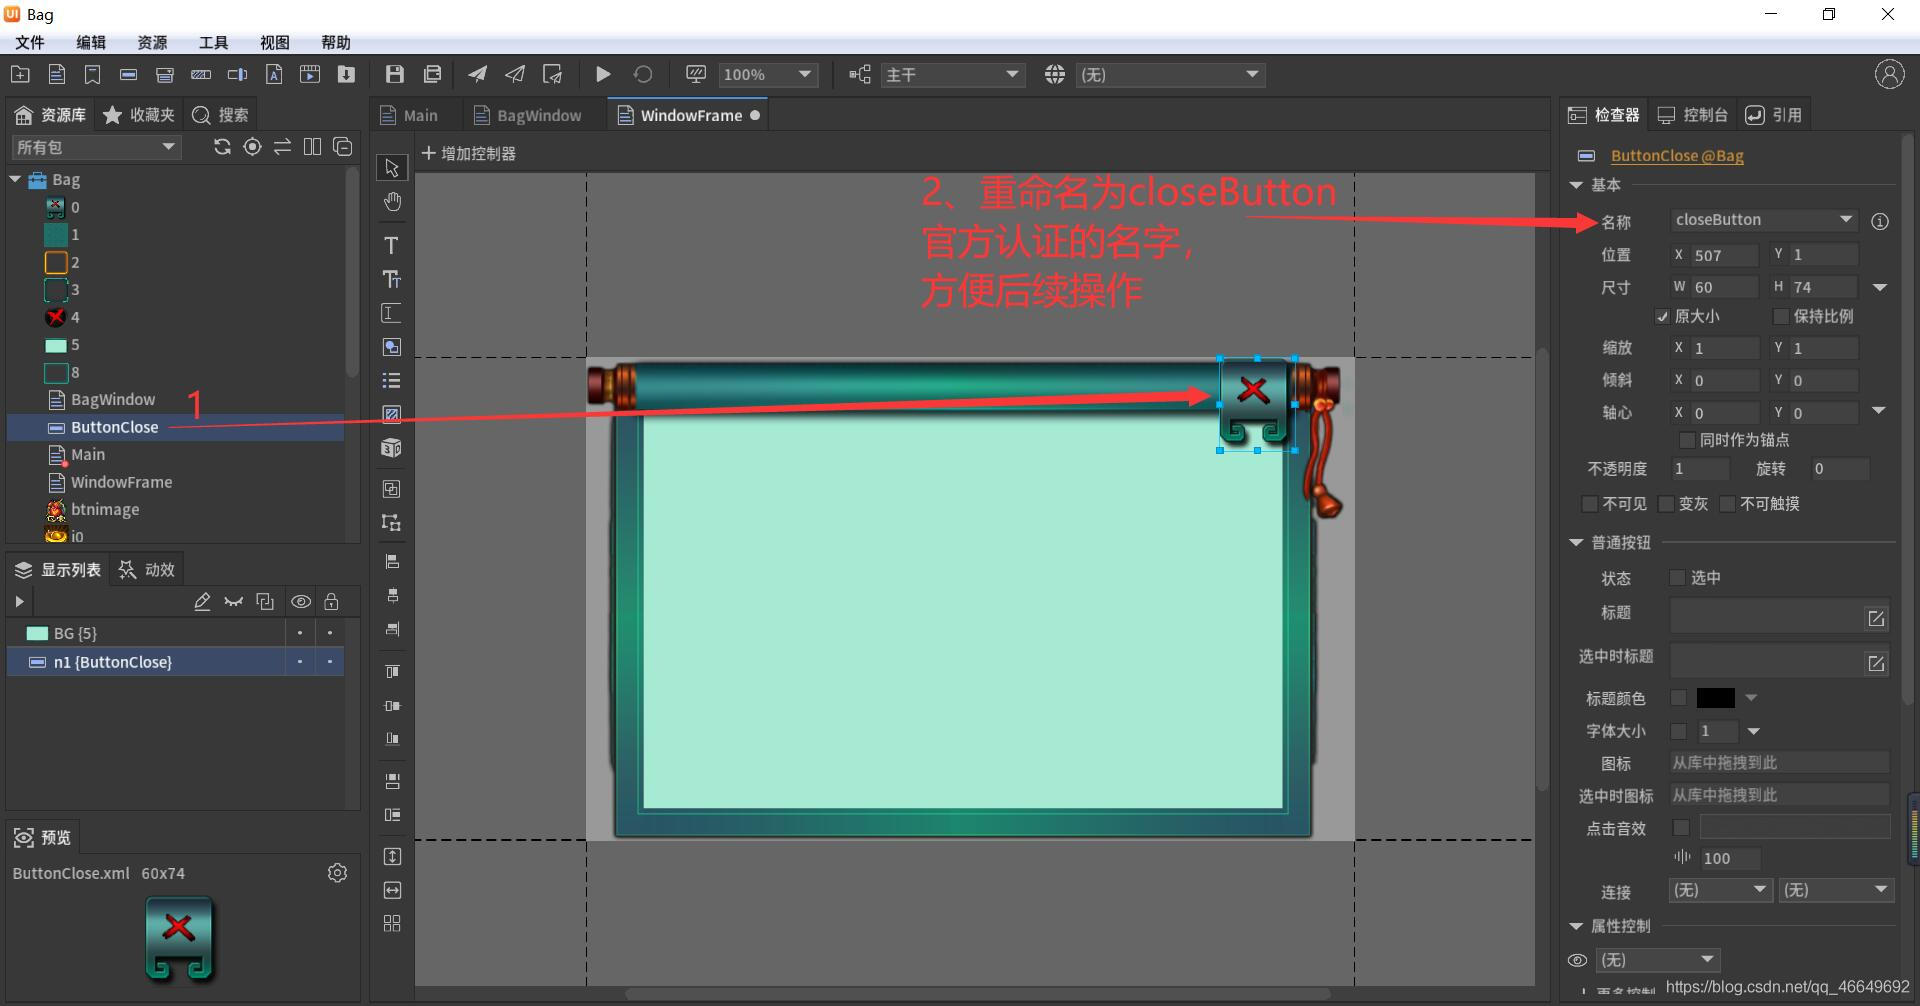
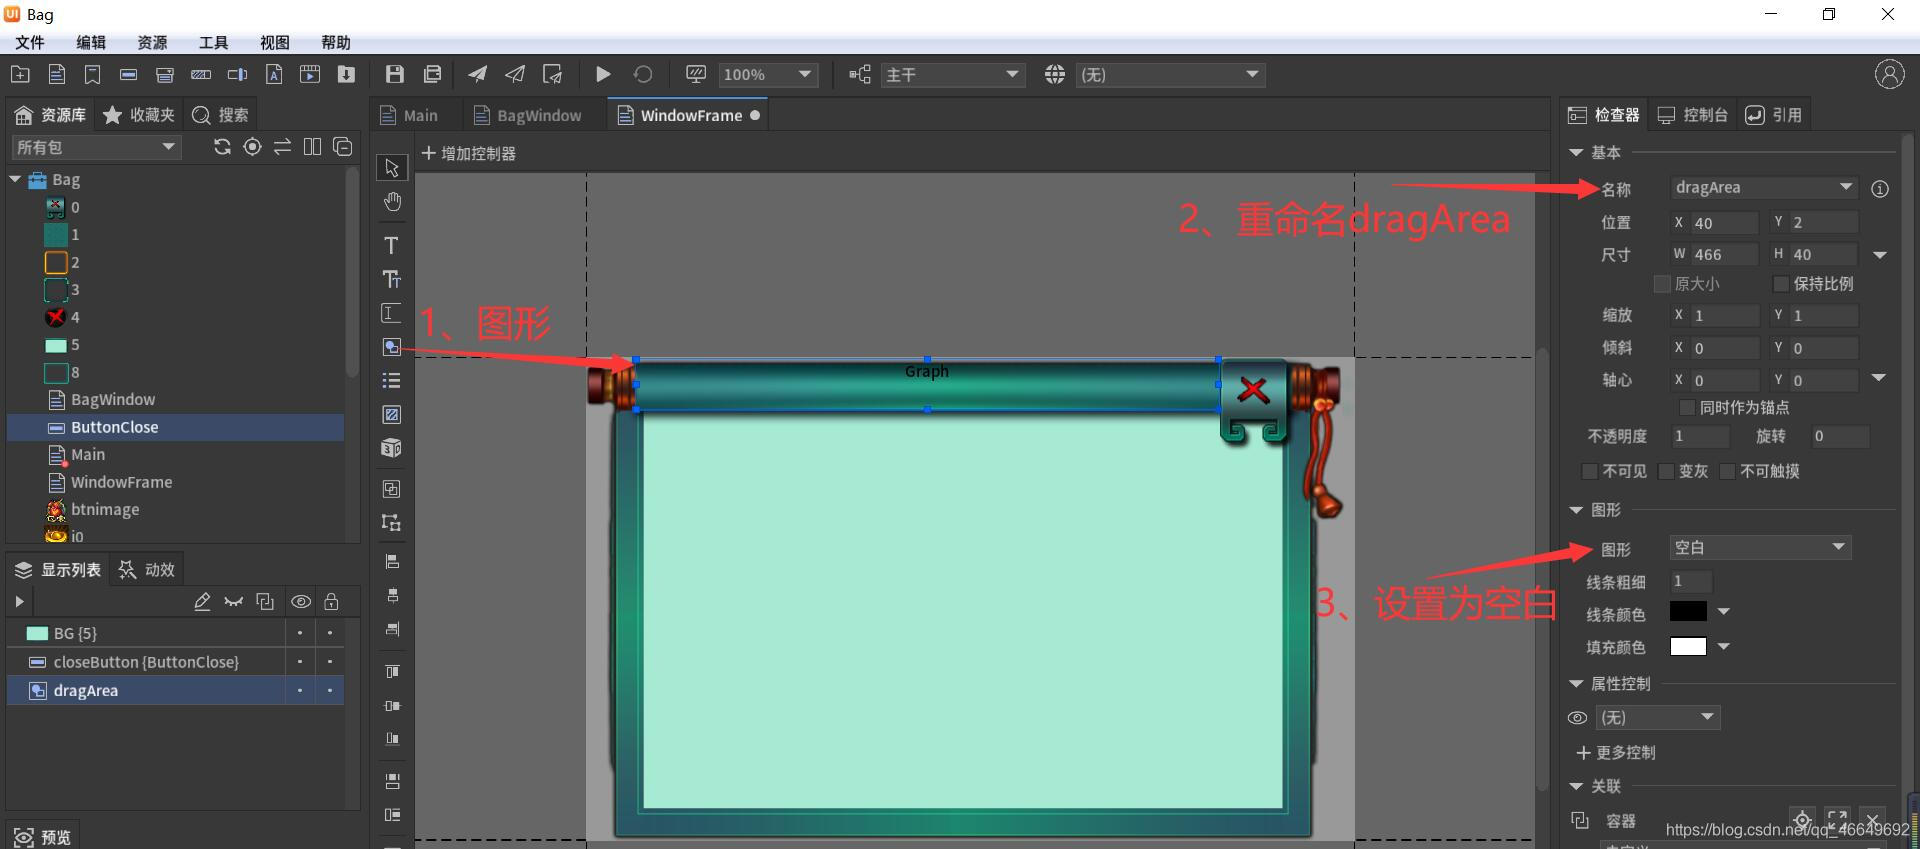
(3) Create a new graphic as a placeholder (dragArea—— Drag area )
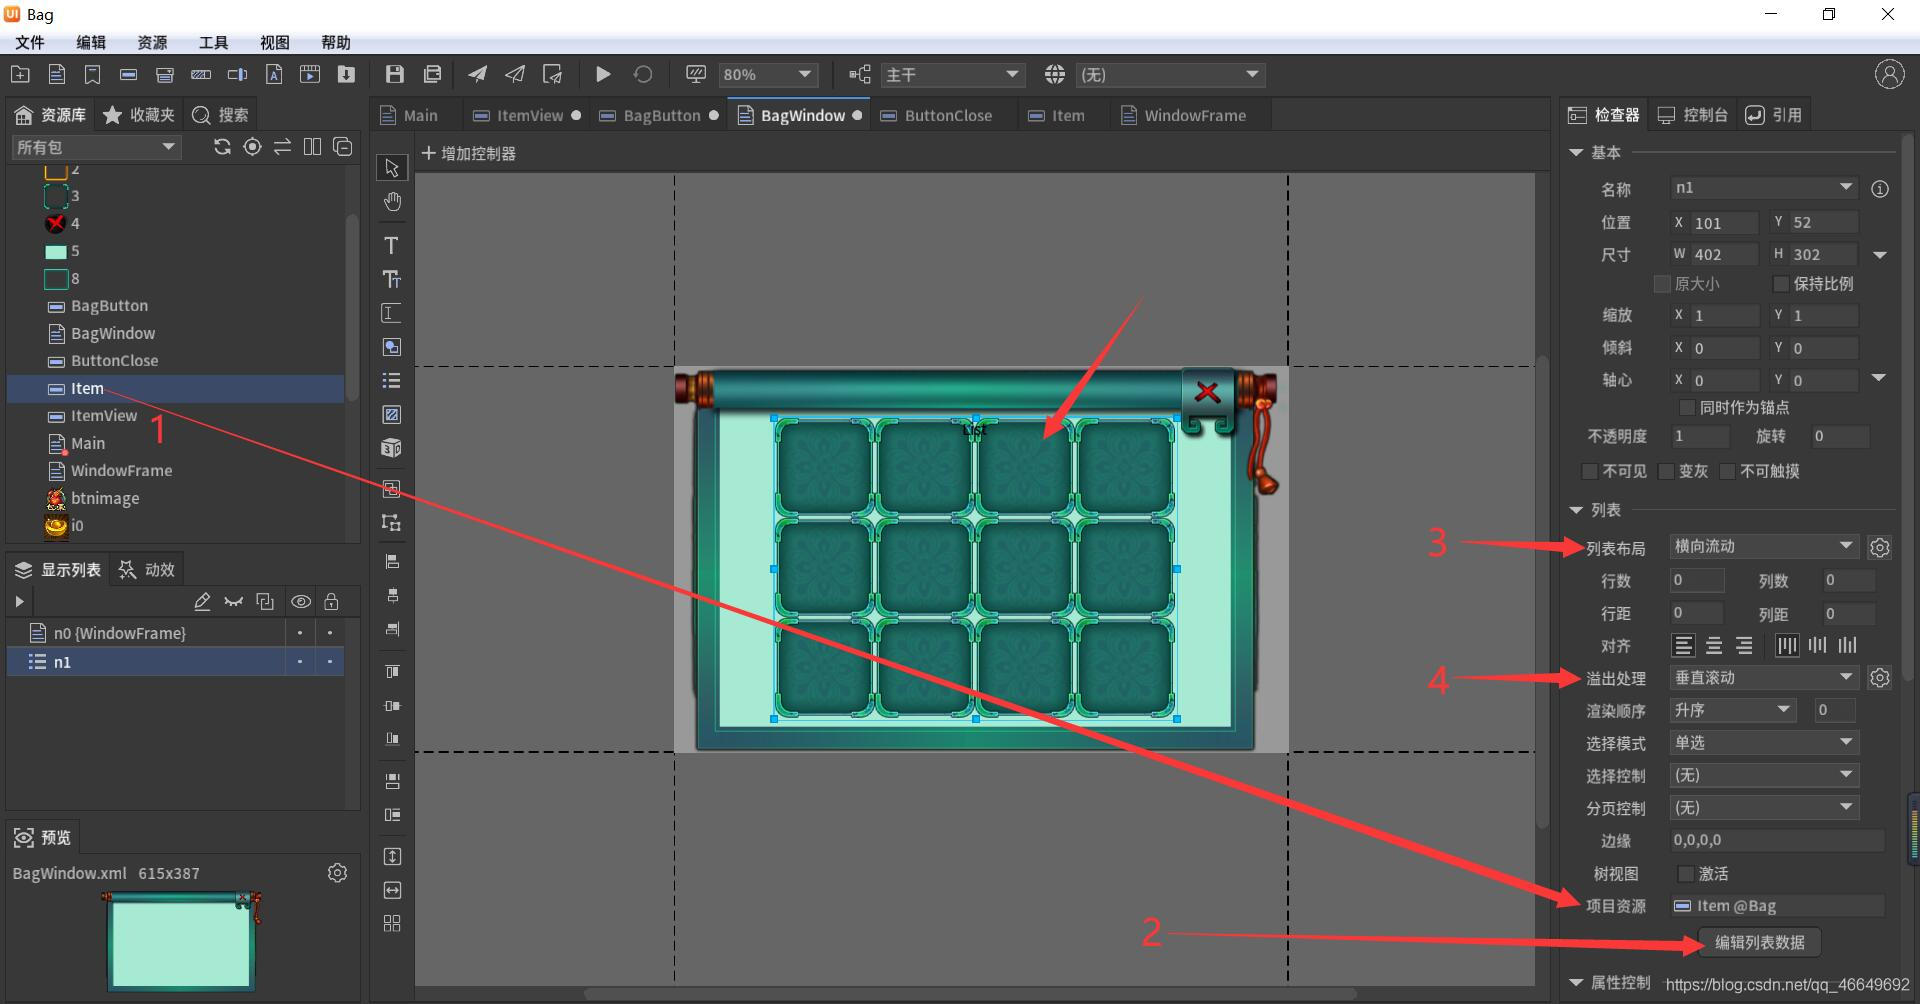
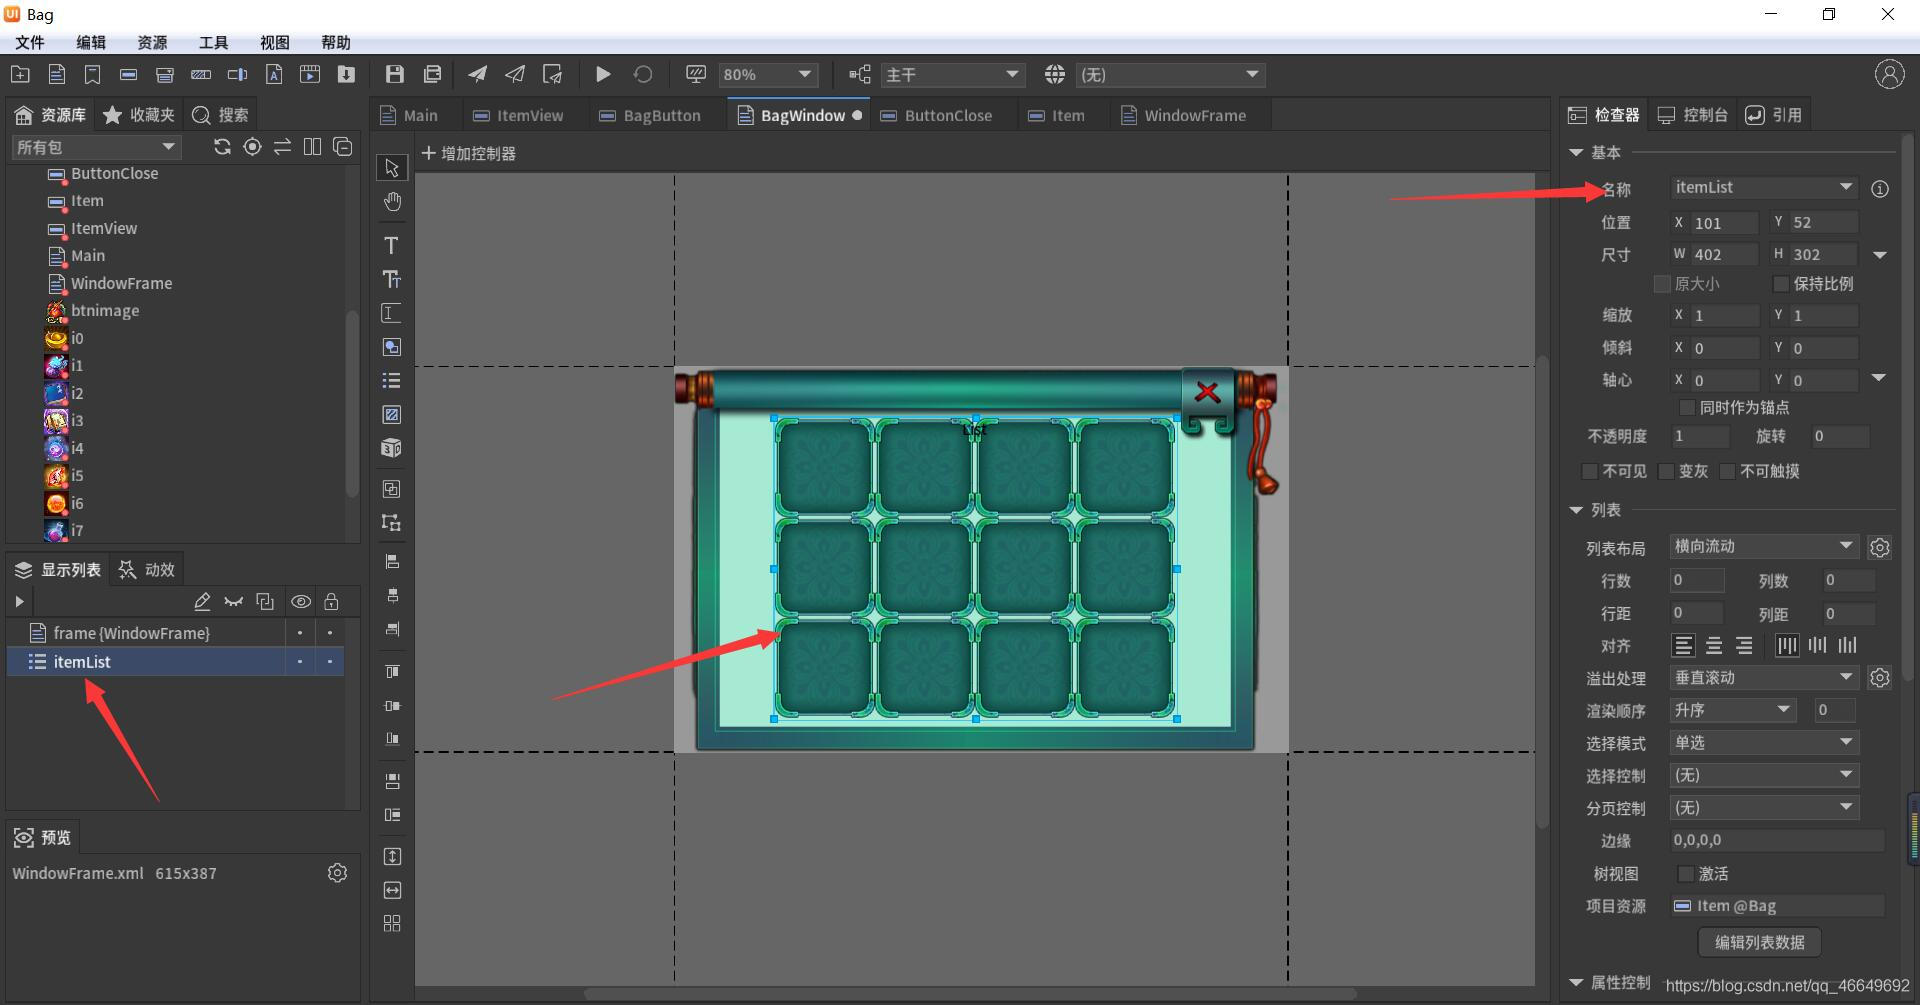
5、 stay BagWindow In the operation
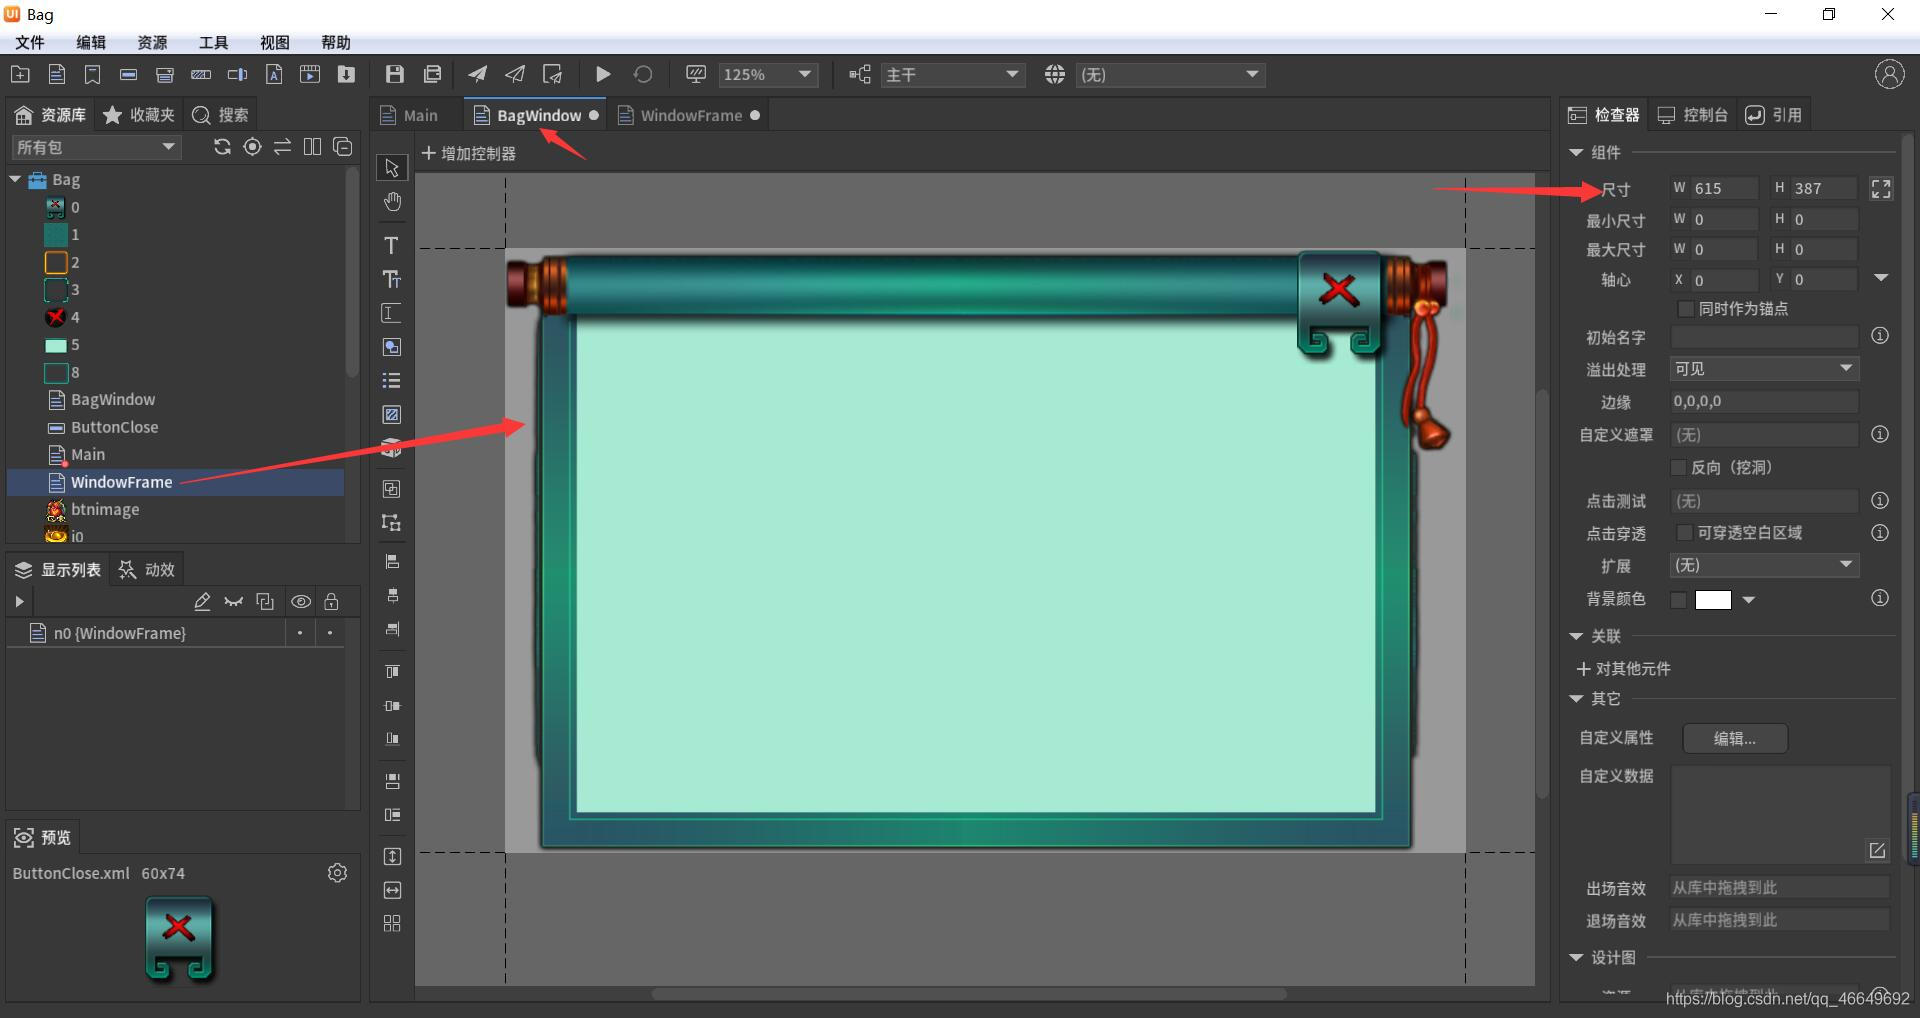
(1) take WindowFrame Drag in BagWindow, And set its component size
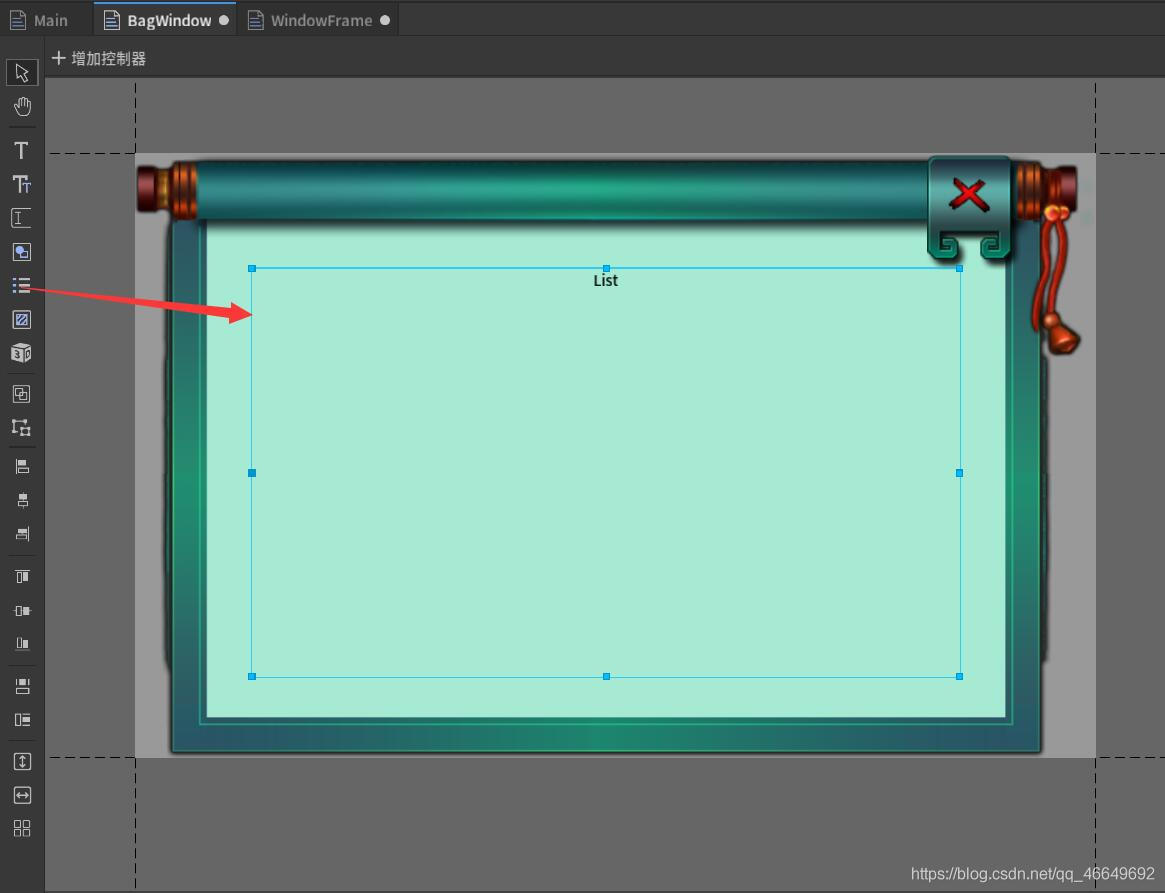
(2) Drag into the list to load game objects
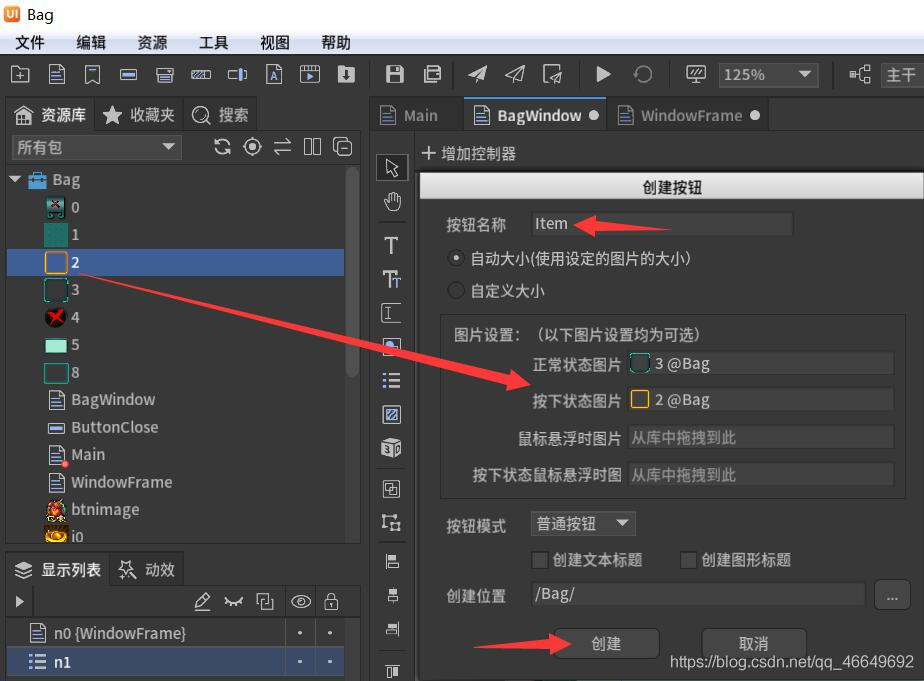
(3) Make a grid in the list —— The new button Item
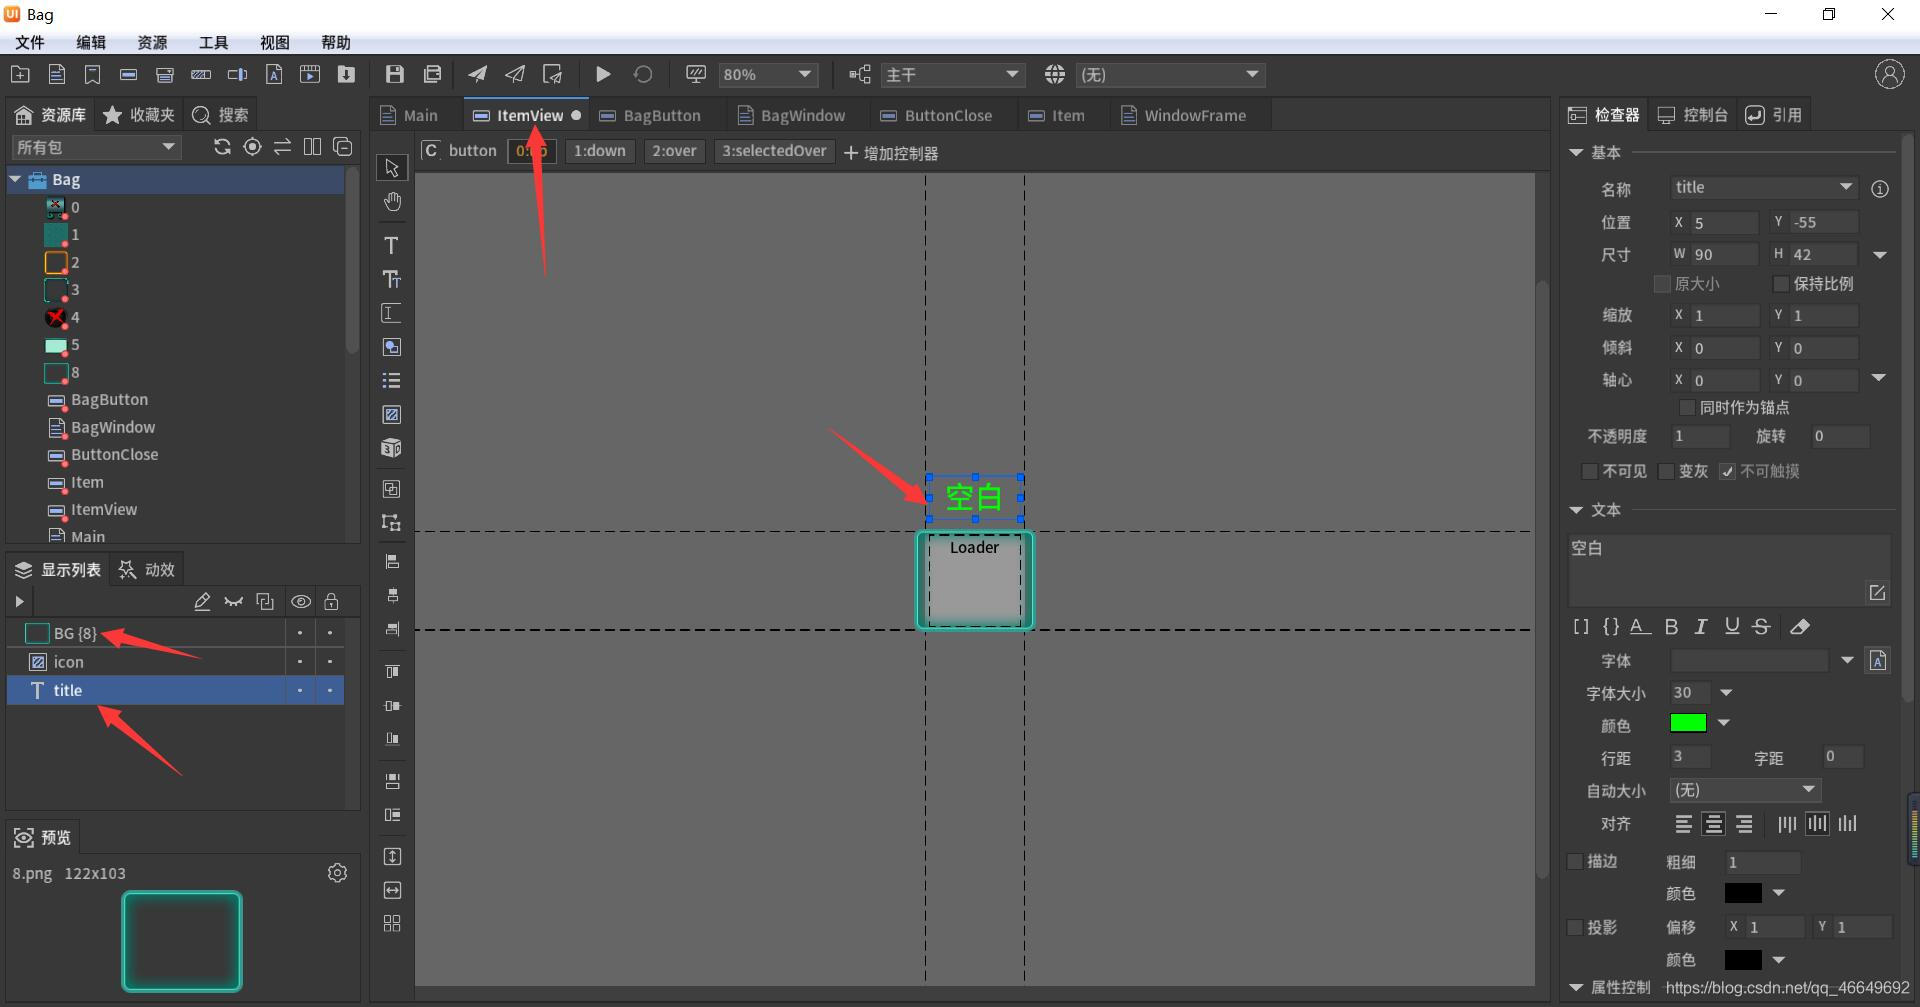
(4) edit Item
Drag into the background 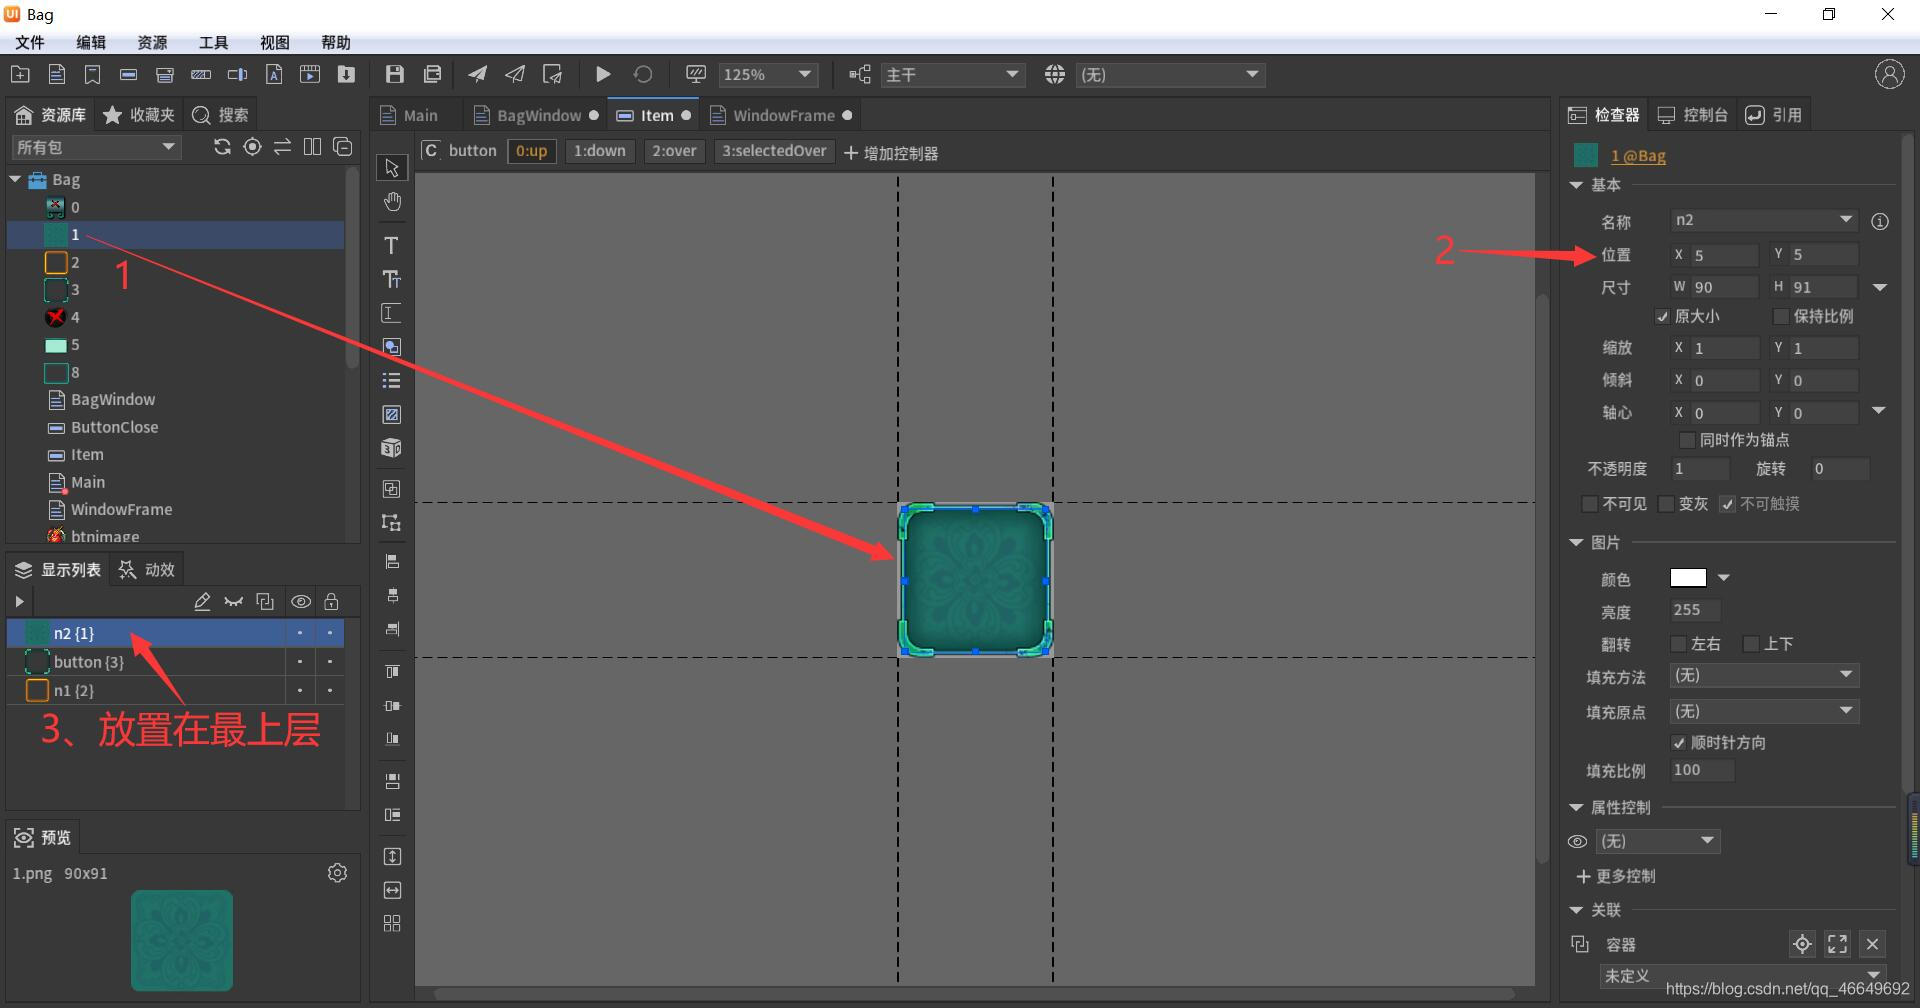
Drag in Title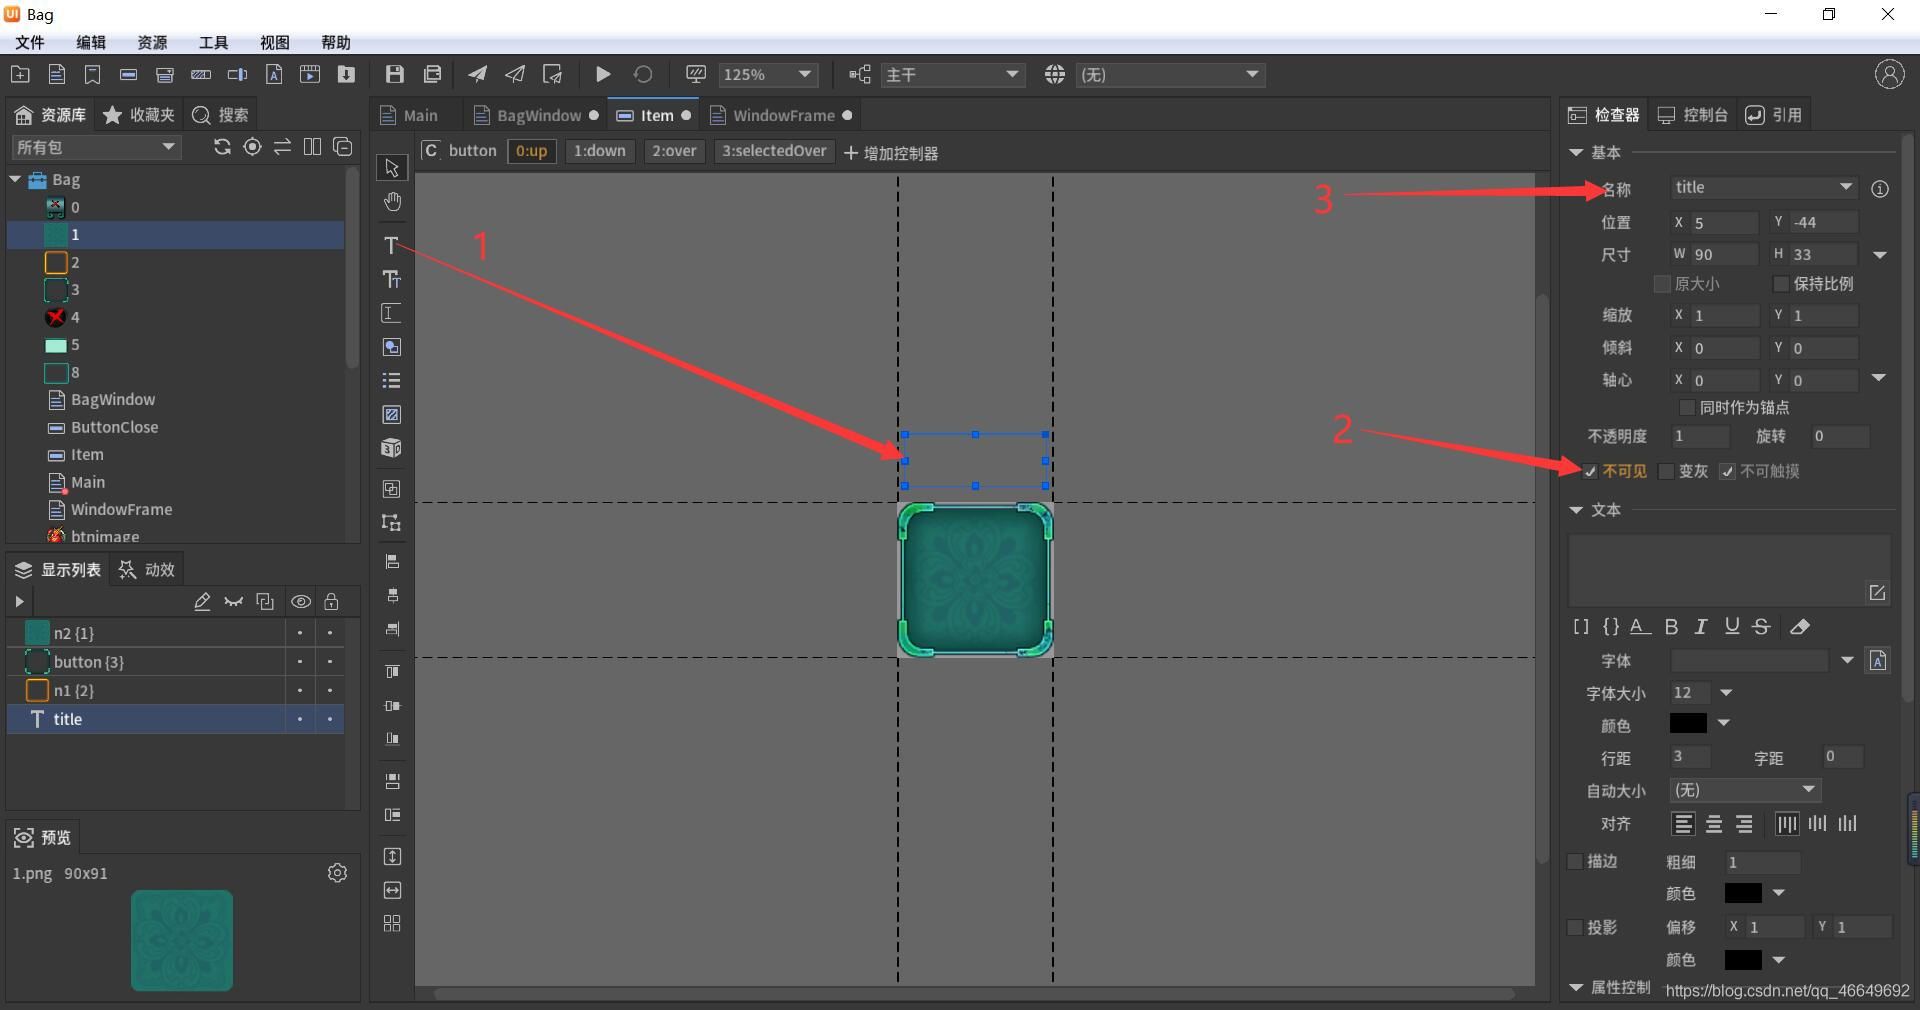
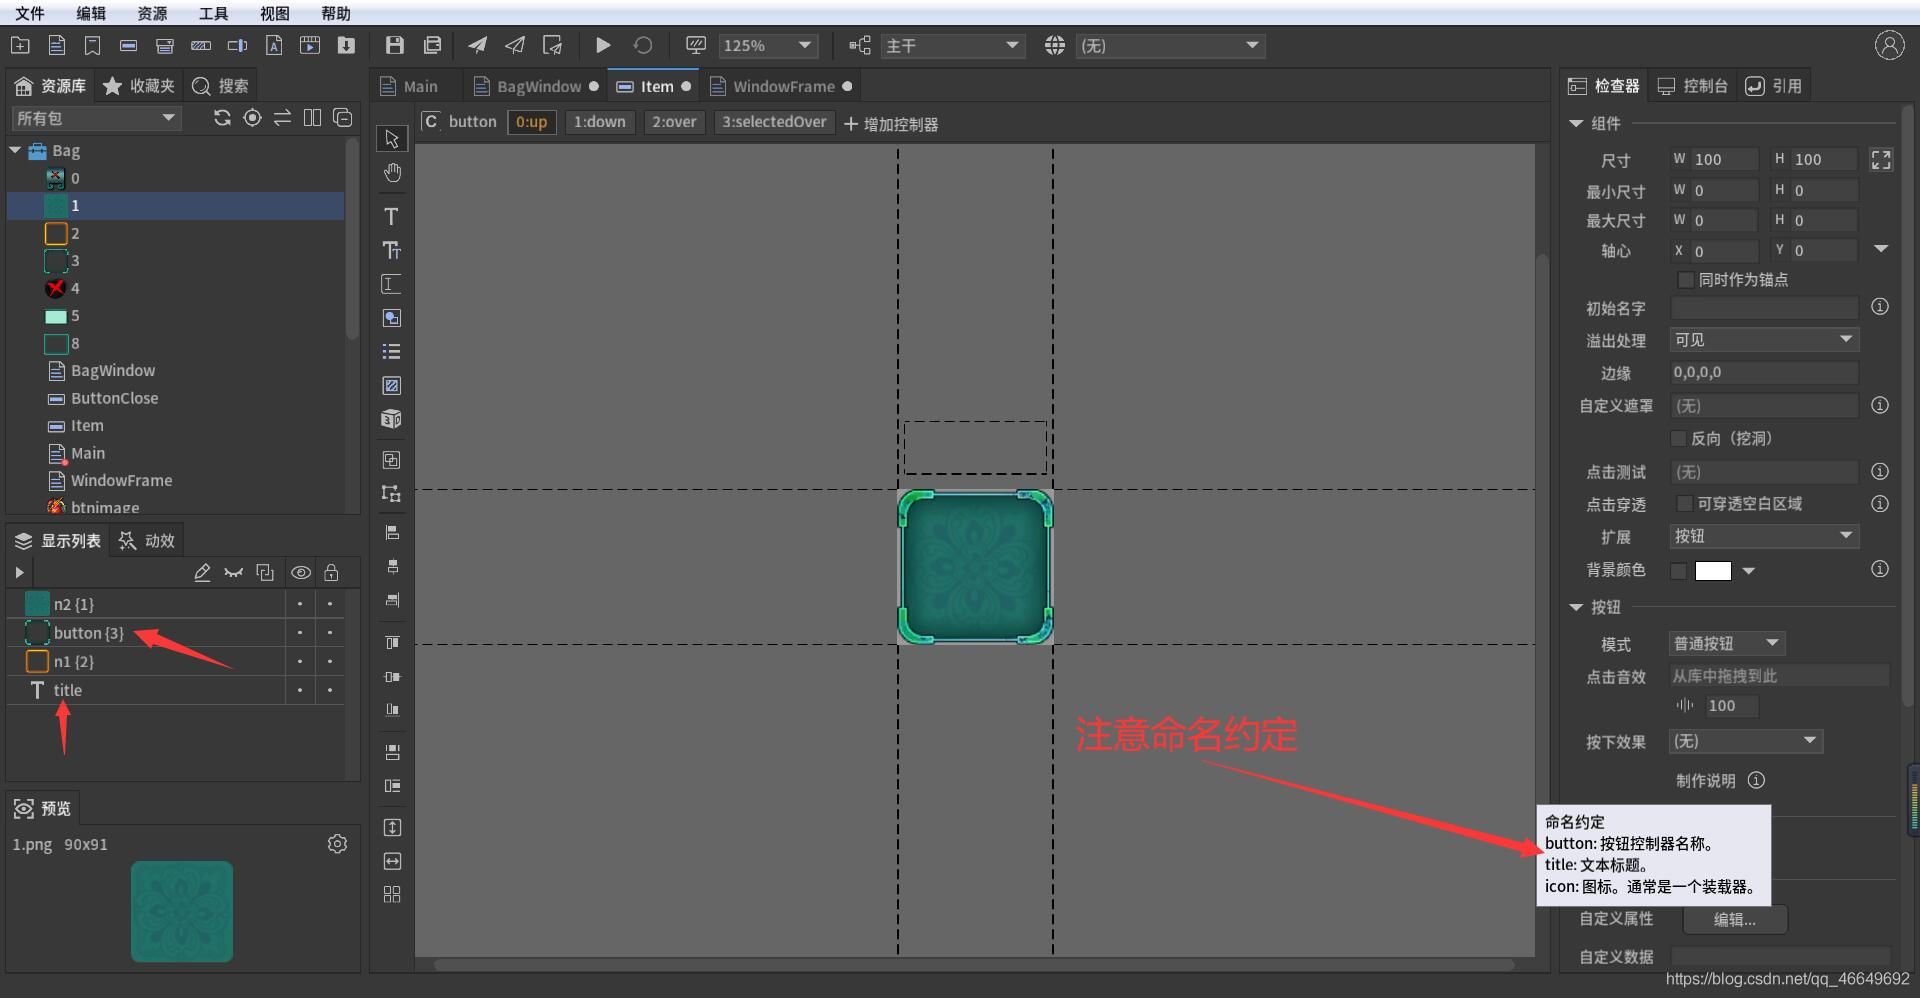
Drag loader 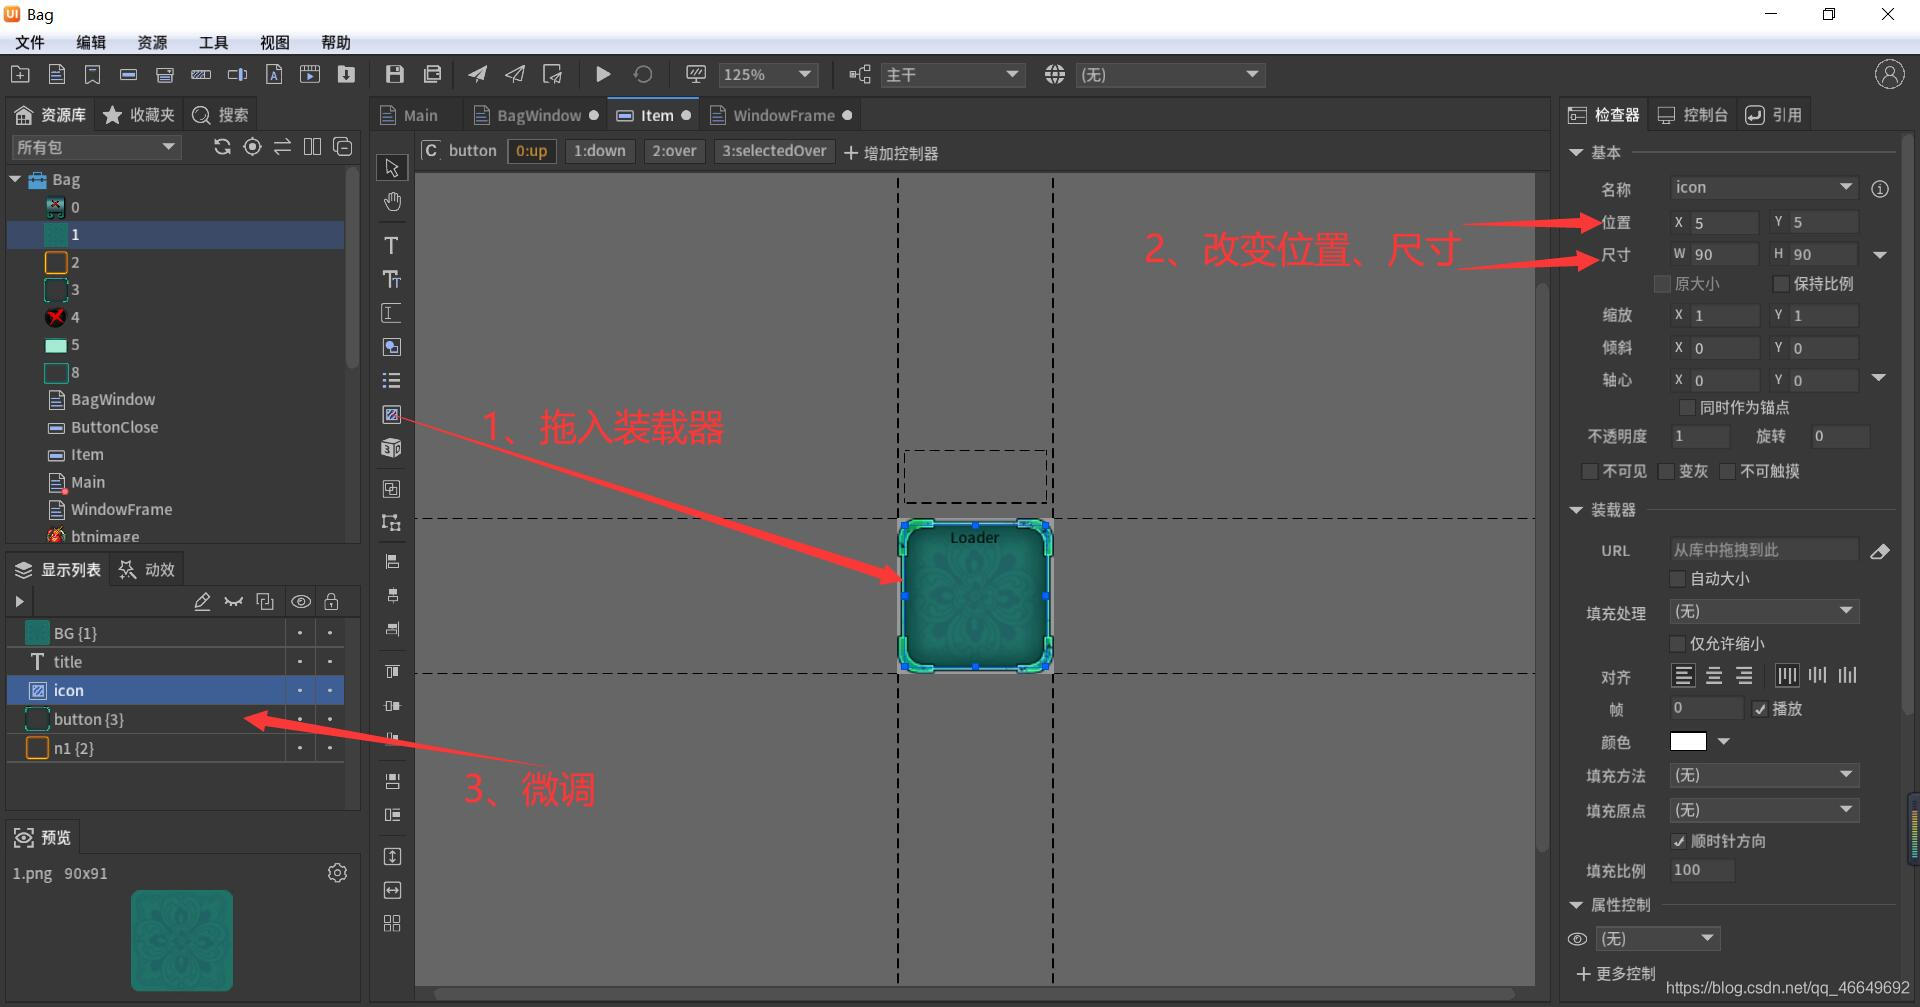
6、 stay Main In the operation
(1) Make a picture display button ItemView
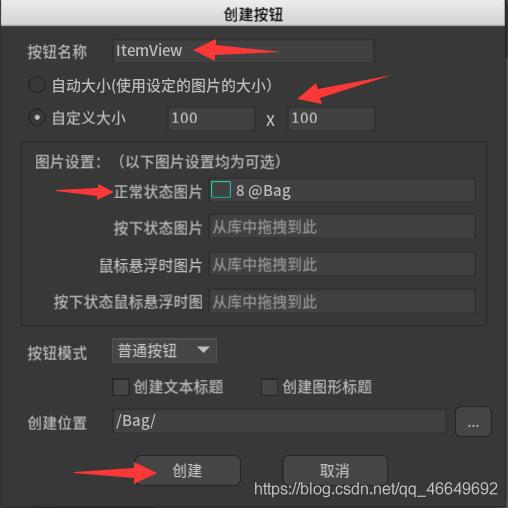
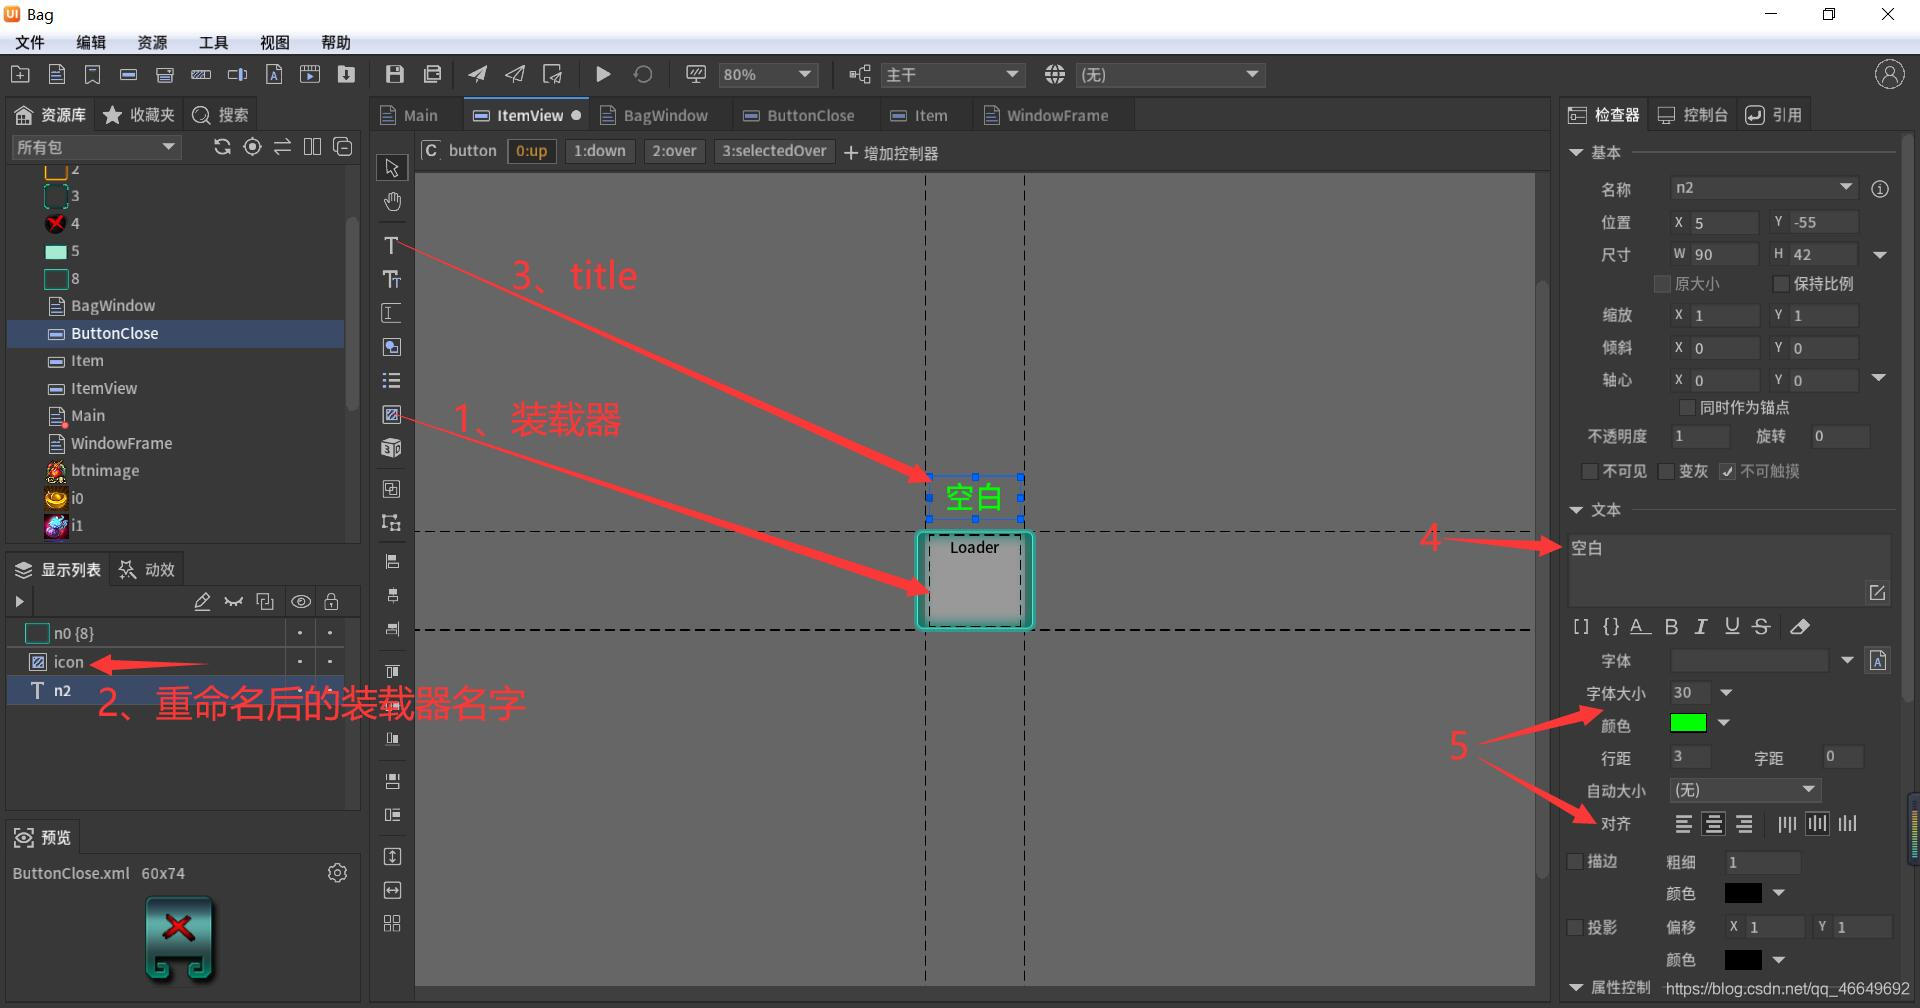
(2) Yes ItemView Make some improvements
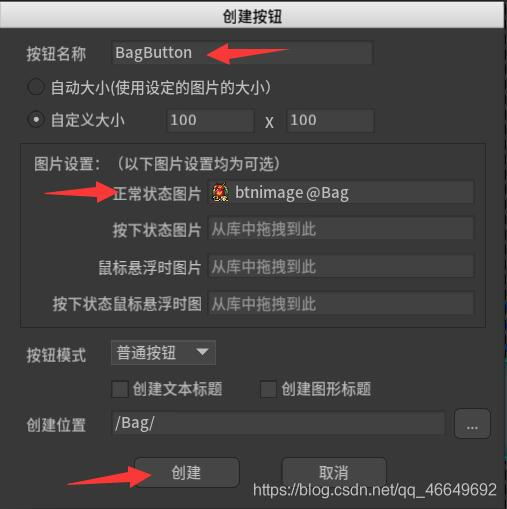
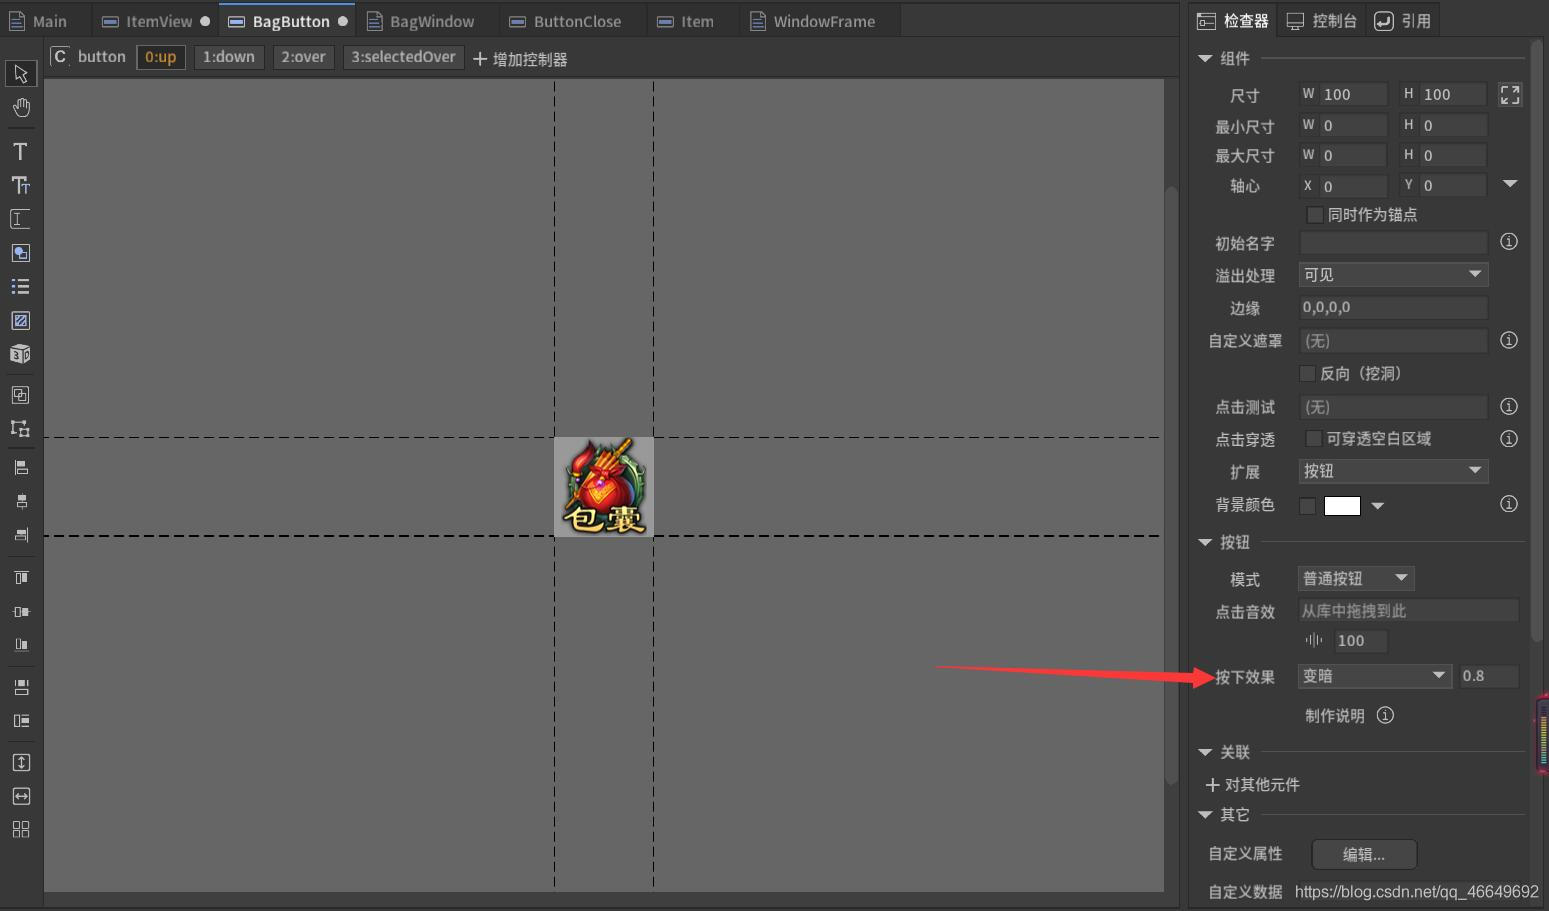
(3) New backpack pop-up button BagButton
(4) double-click BagButton Button to edit it
7、 go back to BagWindow, Assign a value to
rename , Make some small changes .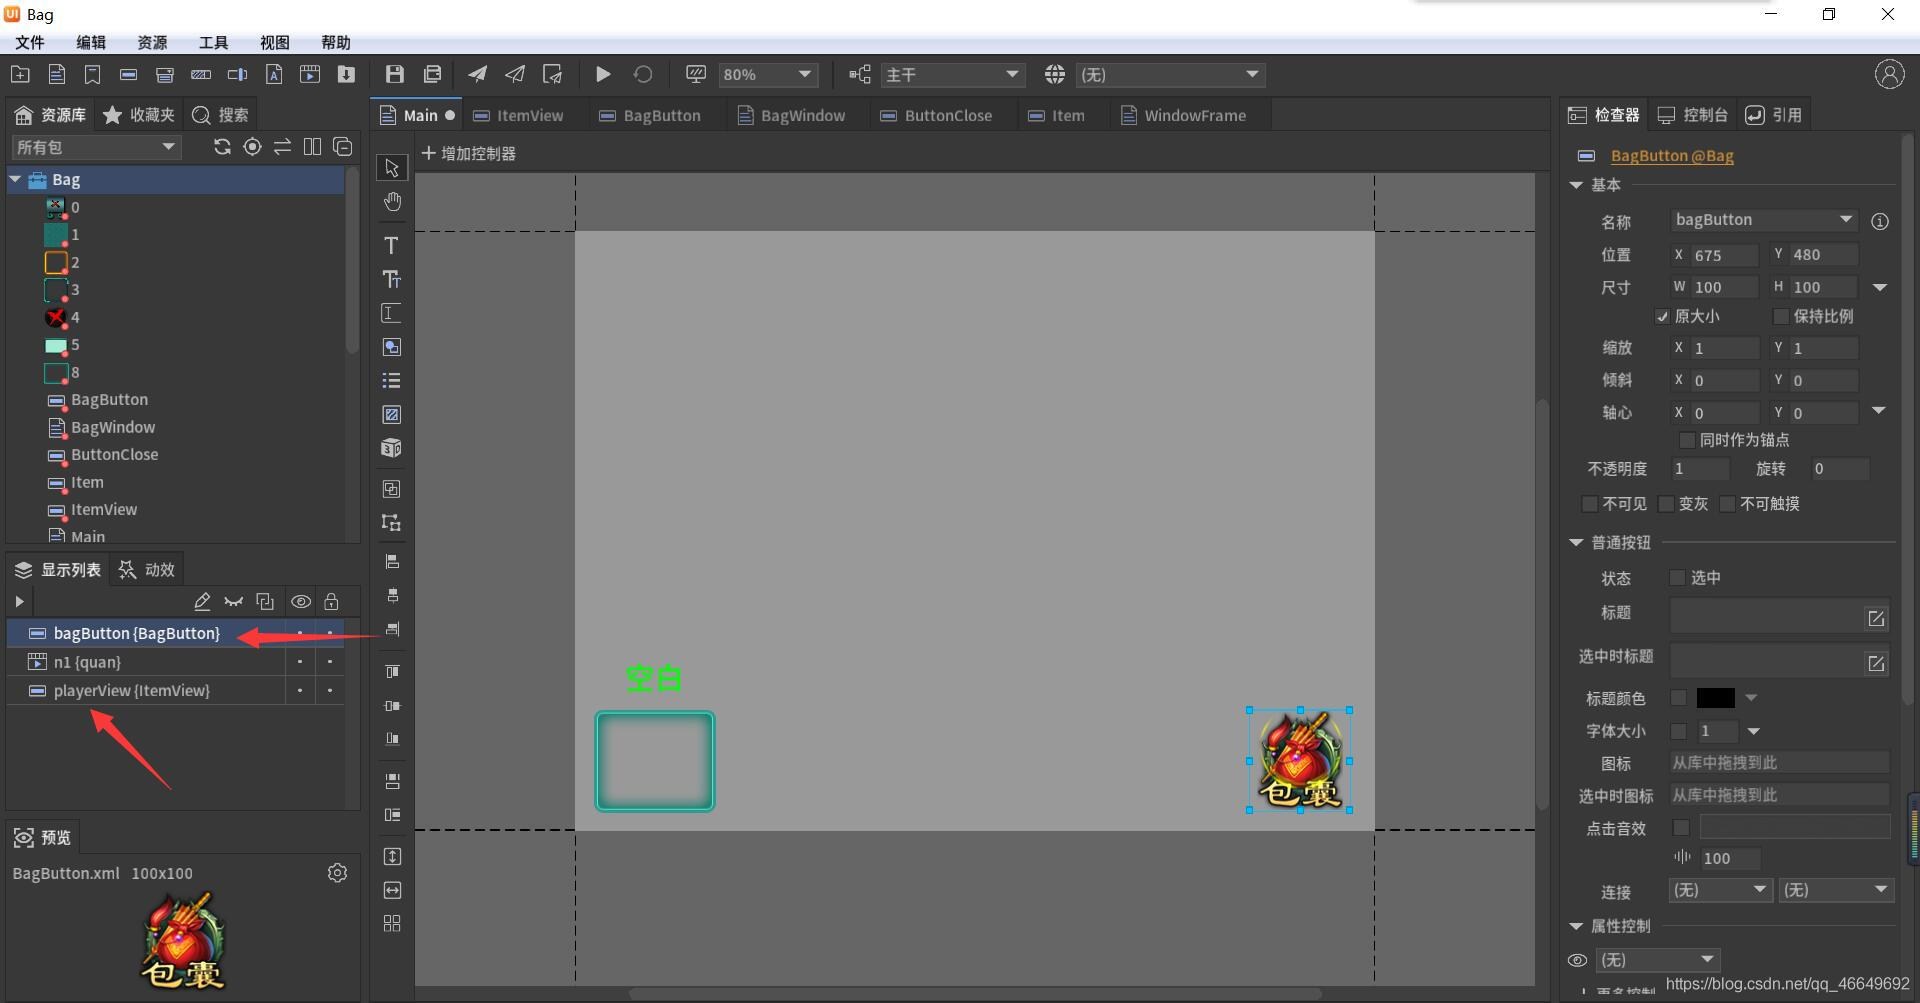
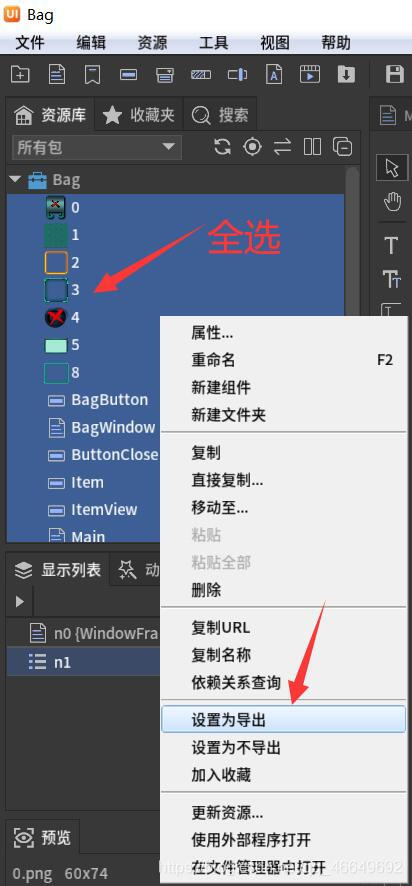
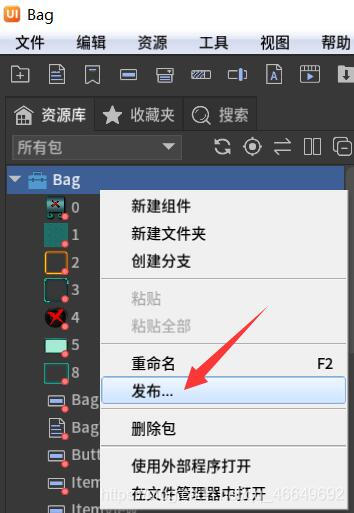
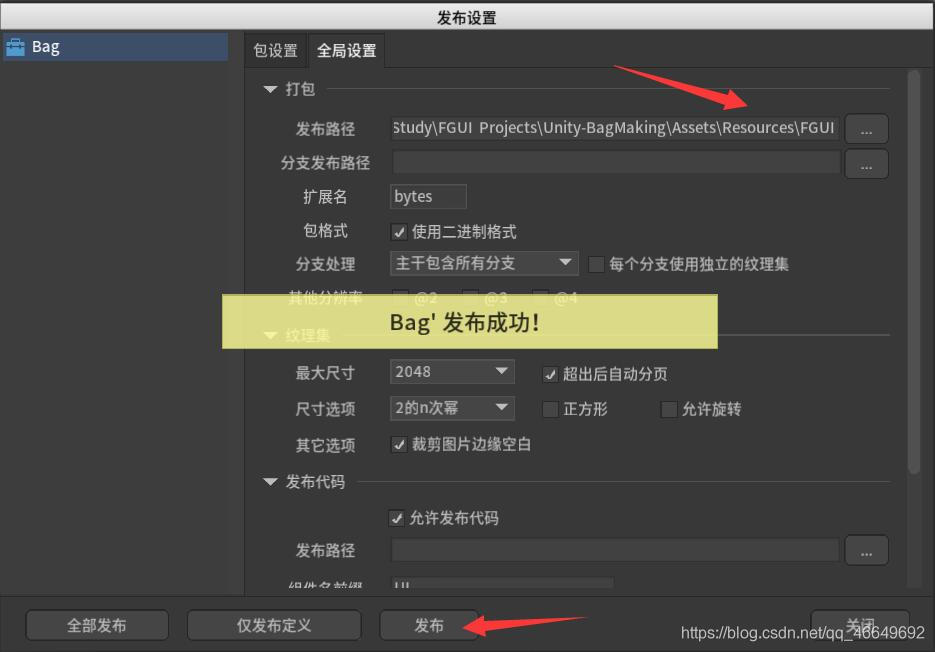
3、 ... and 、 Package, export and publish
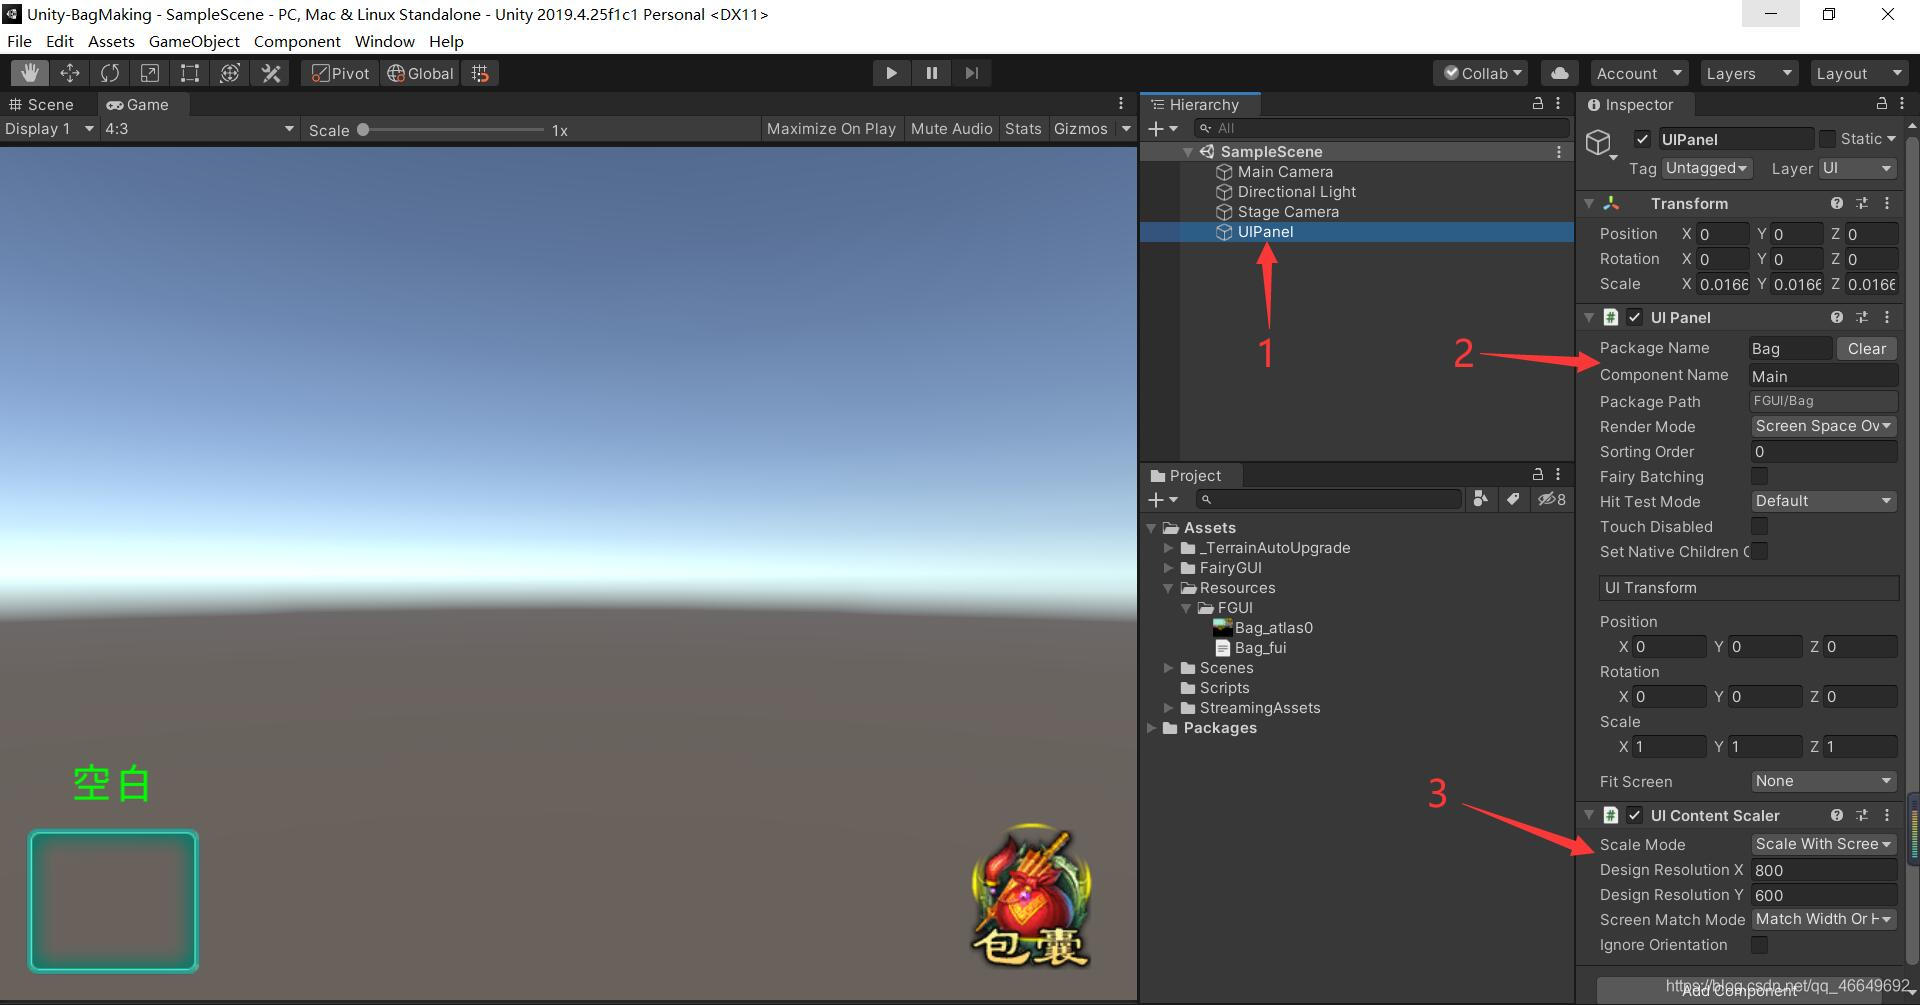
Four 、Unity It shows that
1、 newly build Unity project

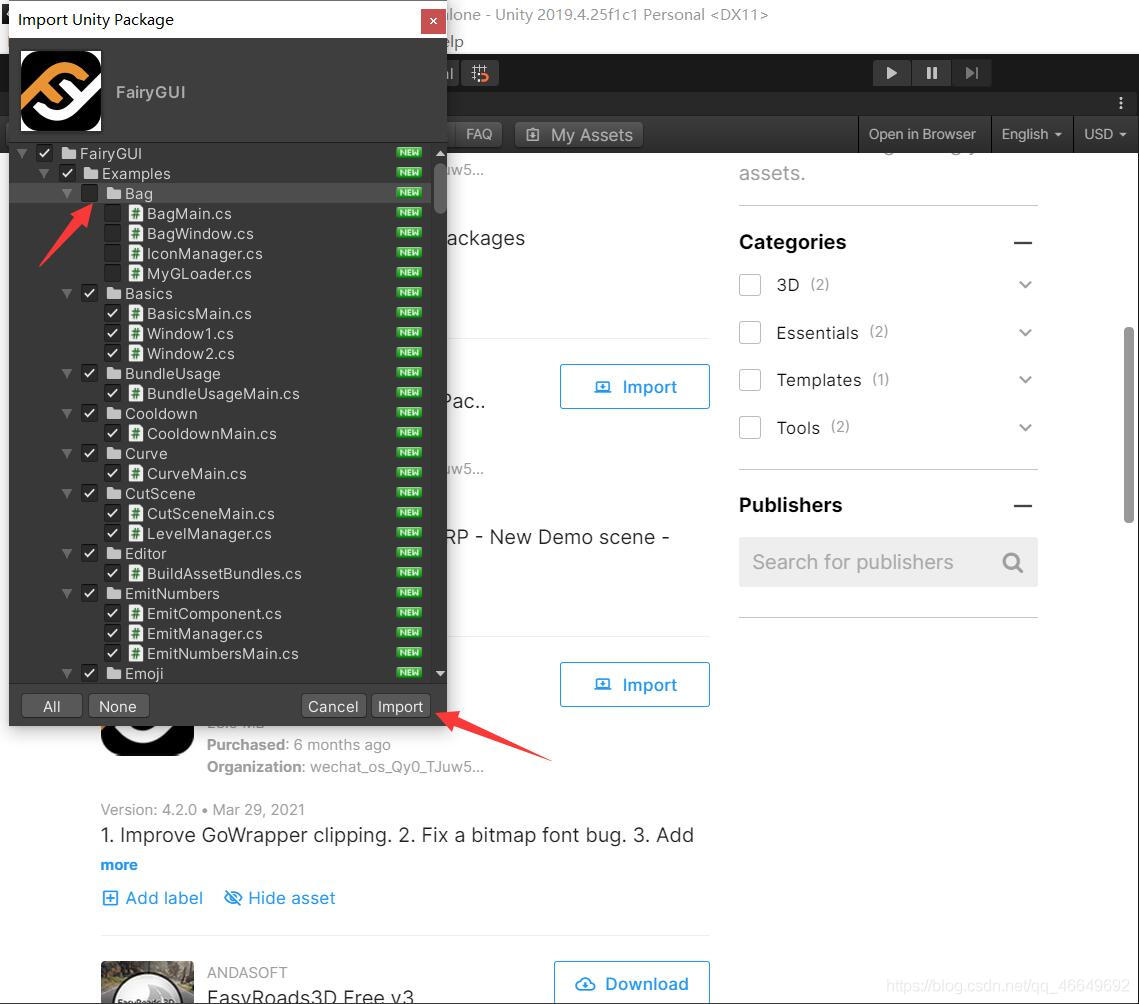
2、 Download from the resource store FairyGUI
When importing after downloading , You need to pay attention to , To put Examples Below Bag Delete the . Because it was not deleted before importing , It leads to some strange phenomena behind .
3、Unity It shows that
5、 ... and 、 Code control
1、 Create two new scripts
One is the backpack pop-up script BagWindow, One is the main script Bag.

2、 Edit script
using System.Collections;
using System.Collections.Generic;
using UnityEngine;
using FairyGUI;

public class BagWindow : Window
{

    public  BagWindow()
    {


    }

    protected override void OnInit()
    {

        this.contentPane = UIPackage.CreateObject("Bag", "BagWindow").asCom;
    }
}
using System.Collections;
using System.Collections.Generic;
using UnityEngine;
using FairyGUI;

public class Bag : MonoBehaviour
{

    private GComponent mainUI;
    private GButton playerView;
    private BagWindow bagWindow;
    void Start()
    {

        mainUI = GetComponent<UIPanel>().ui;
        playerView = mainUI.GetChild("playerView").asButton;
        playerView.onClick.Add(UseItem);
        bagWindow = new BagWindow();
        mainUI.GetChild("bagButton").onClick.Add(() => {
     bagWindow.Show(); });
    }

    // Update is called once per frame
    void Update()
    {


    }

    private void UseItem()
    {


    }
}
3、 Running effect
4、 Load the contents of the backpack
(1) Change my BagWindow List names in :itemList, as well as ItemView Inside title, And redistribute
(2) Continue coding to realize the function
using System.Collections;
using System.Collections.Generic;
using UnityEngine;
using FairyGUI;

public class BagWindow : Window
{

    private GList list;
    private GButton playerView;
    public BagWindow(GButton targetButton)
    {

        playerView = targetButton;
    }

    protected override void OnInit()
    {

        this.contentPane = UIPackage.CreateObject("Bag", "BagWindow").asCom;
        list = this.contentPane.GetChild("itemList").asList;
        list.itemRenderer = RenderListItem;
        list.numItems = 20;
        for (int i = 0; i < list.numItems - 10; i++)
        {

            GButton button = list.GetChildAt(i).asButton;
            button.onClick.Add(() => {
     ClickItem(button); });
        }
    }

    private void RenderListItem(int index, GObject obj)
    {

        GButton button = obj.asButton;
        button.icon = UIPackage.GetItemURL("Bag", "i" + index);
        button.title = index.ToString();
    }

    private void ClickItem(GButton button)
    {

        playerView.title = button.title;
        playerView.icon = button.icon;
    }
}
using System.Collections;
using System.Collections.Generic;
using UnityEngine;
using FairyGUI;

public class Bag : MonoBehaviour
{

    private GComponent mainUI;
    private GButton playerView;
    private BagWindow bagWindow;

    void Start()
    {

        mainUI = GetComponent<UIPanel>().ui;
        playerView = mainUI.GetChild("playerView").asButton;
        playerView.onClick.Add(UseItem);
        bagWindow = new BagWindow(playerView);
        bagWindow.SetXY(121, 63);  // Set the initial position where the backpack pop-up window appears
        mainUI.GetChild("bagButton").onClick.Add(() => {
     bagWindow.Show(); });
    }

    private void UseItem()
    {

        playerView.icon = null;
        playerView.title = " blank ";
    }
}
6、 ... and 、 Final rendering
边栏推荐
- [Offer18]删除链表的节点
- Unity3D,阿里云服务器,平台配置
- Pytorch: tensor operation (I) contiguous
- Arduino JSON data information parsing
- (the first set of course design) sub task 1-5 317 (100 points) (dijkstra: heavy edge self loop)
- (五)R语言入门生物信息学——ORF和序列分析
- 2022.2.12 resumption
- ESP8266连接onenet(旧版MQTT方式)
- Mysqldump error1066 error solution
- Redis based distributed ID generator
猜你喜欢
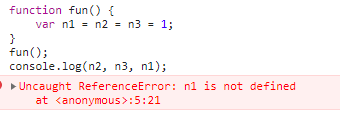
JS function promotion and declaration promotion of VaR variable
Vscode basic configuration
Stm32f1+bc20+mqtt+freertos system is connected to Alibaba cloud to transmit temperature and humidity and control LED lights
(四)R语言的数据可视化——矩阵图、柱状图、饼图、散点图与线性回归、带状图
Force buckle 1189 Maximum number of "balloons"
Latex learning
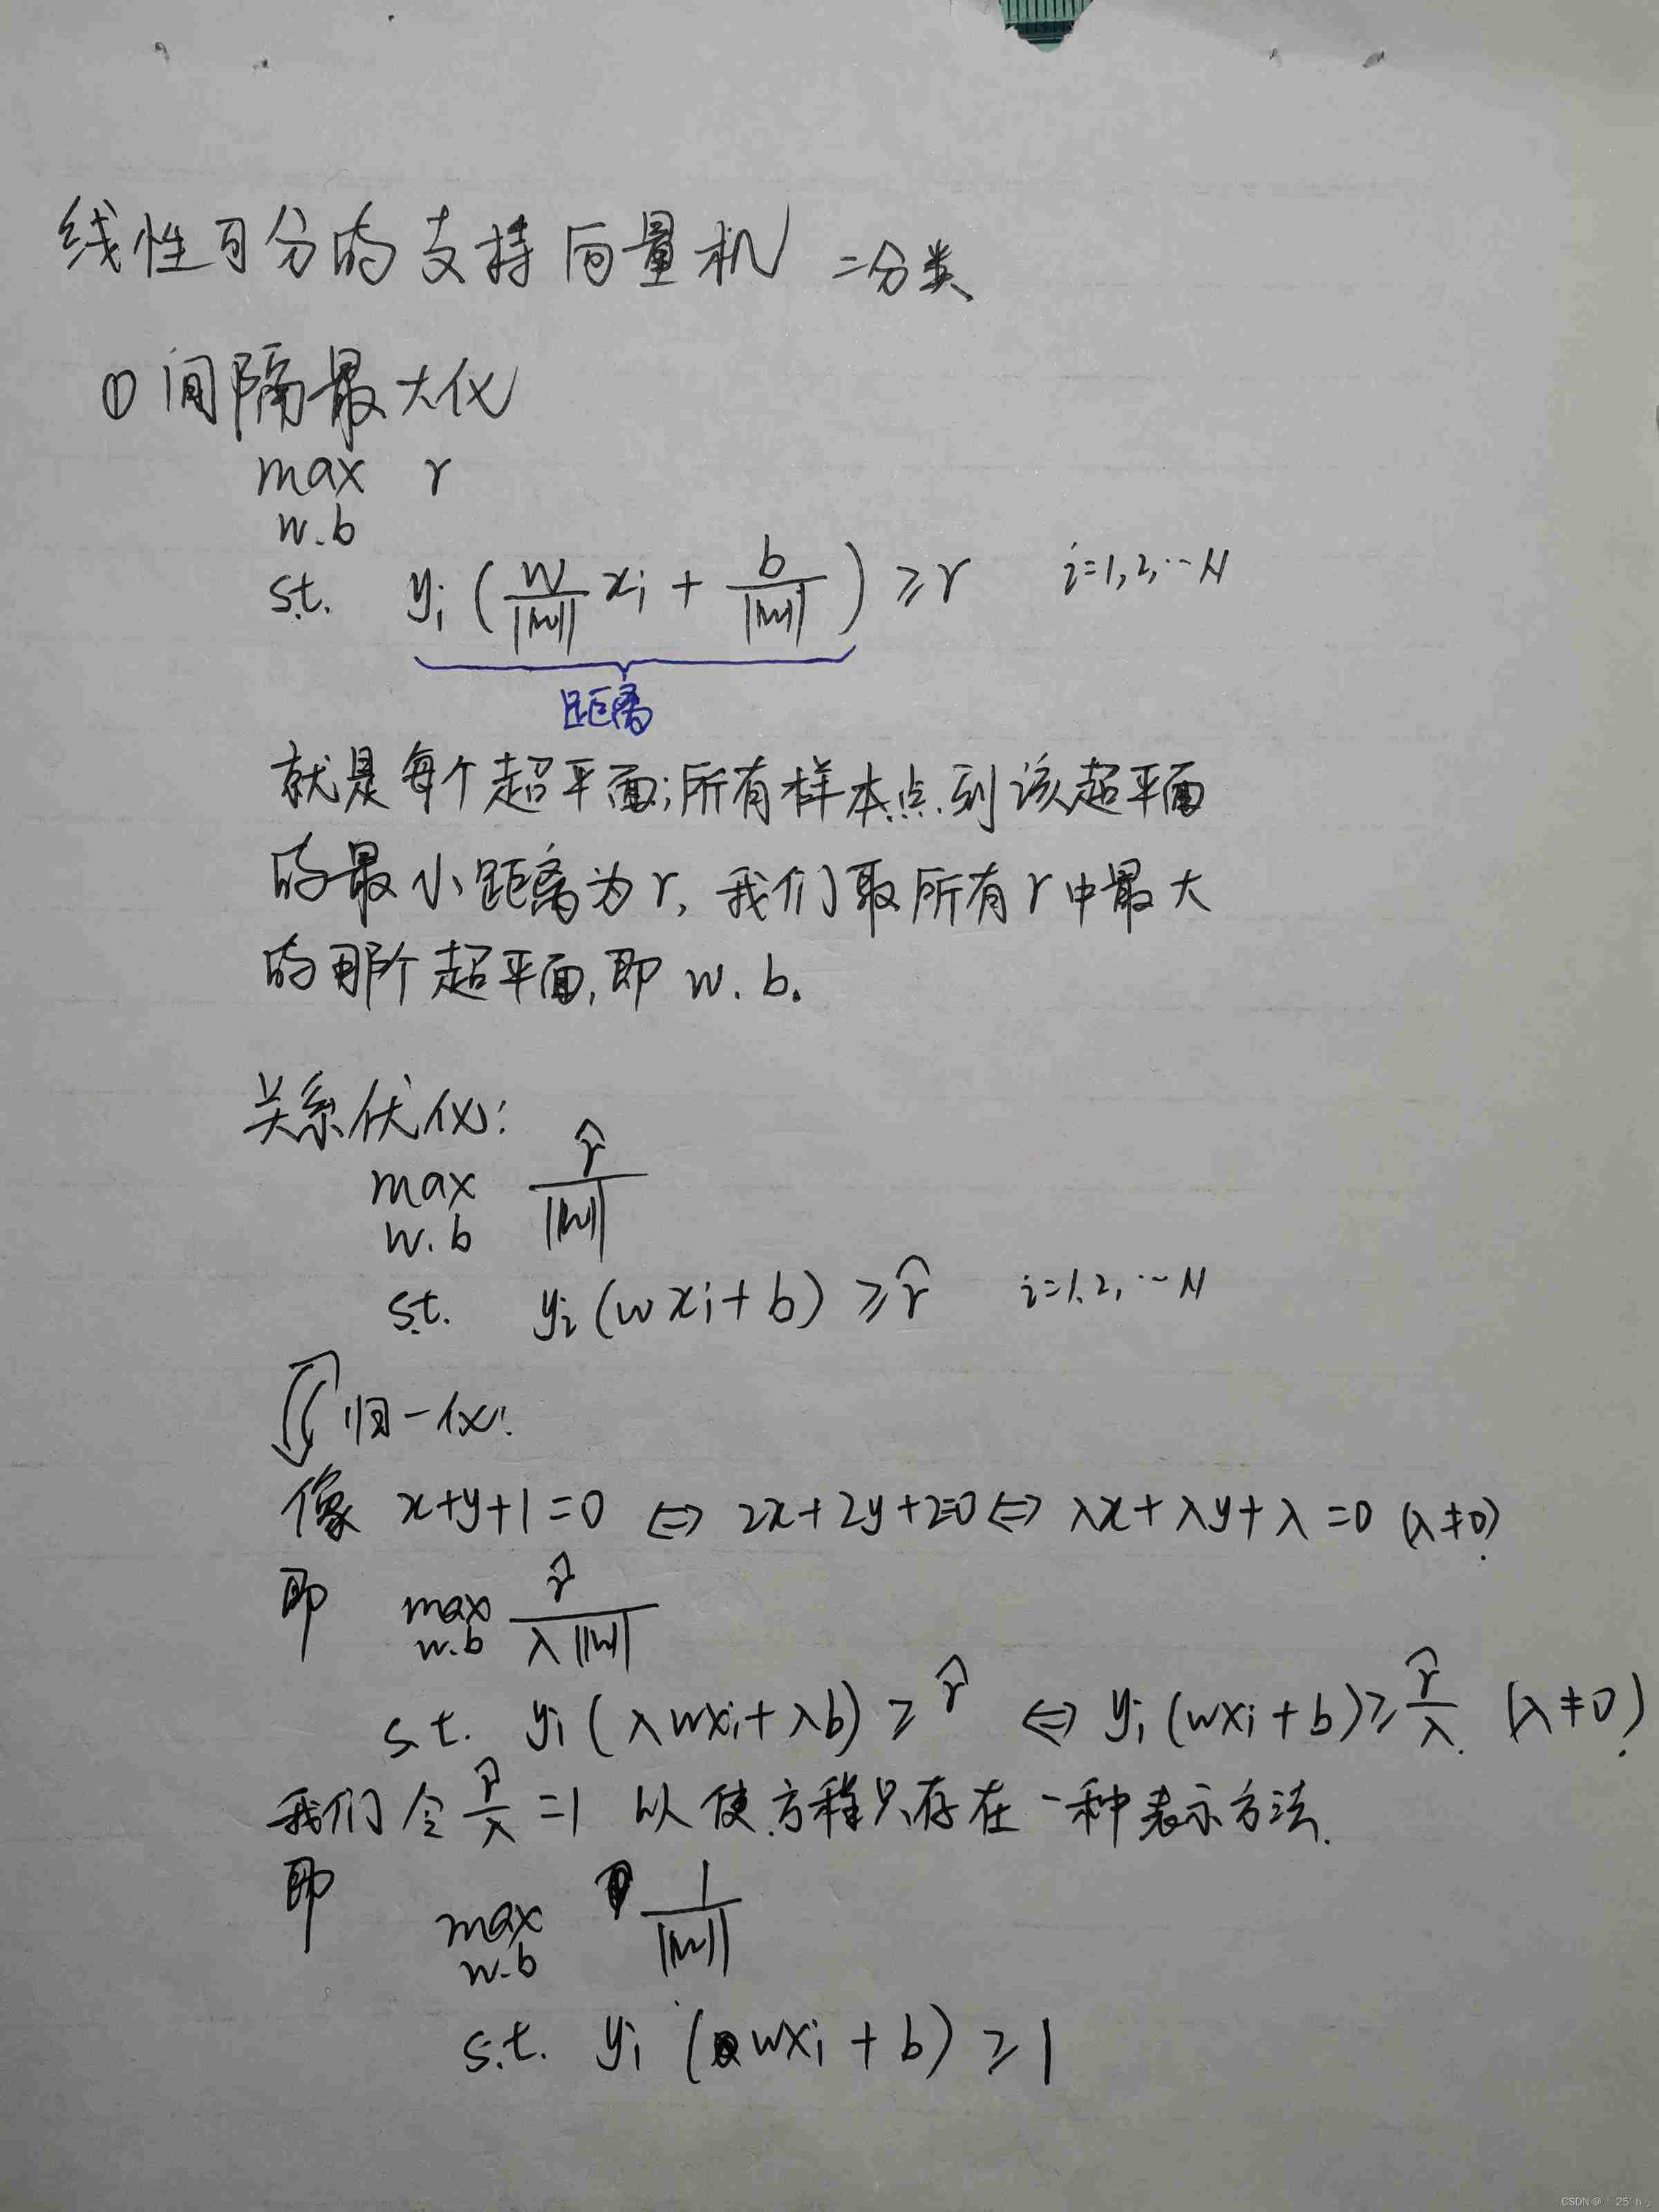
Theoretical derivation of support vector machine
![Intermediate use tutorial of postman [environment variables, test scripts, assertions, interface documents, etc.]](/img/b0/176bf6dea2201afc892d6750c5974b.png)
Intermediate use tutorial of postman [environment variables, test scripts, assertions, interface documents, etc.]
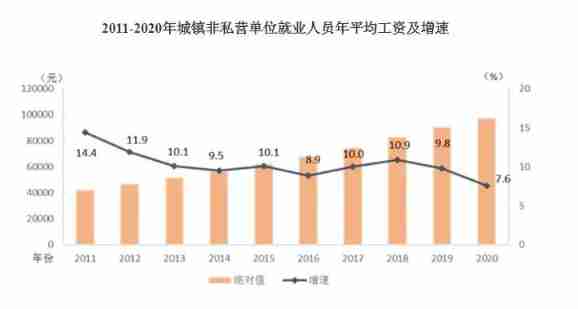
In 2020, the average salary of IT industry exceeded 170000, ranking first
Lock wait timeout exceeded try restarting transaction
随机推荐
NRF24L01故障排查
JS 函数提升和var变量的声明提升
Flink late data processing (3)
Teach you to release a DeNO module hand in hand
程序设计大作业:教务管理系统(C语言)
Générateur d'identification distribué basé sur redis
JS正则表达式基础知识学习
Unity3D制作注册登录界面,并实现场景跳转
Arduino gets the length of the array
[899]有序队列
MySQL占用内存过大解决方案
MySQL error warning: a long semaphore wait
Basic operations of databases and tables ----- classification of data
Conditional probability
[Clickhouse kernel principle graphic explanation] about the collaborative work of partitioning, indexing, marking and compressed data
Latex learning
@Autowired 和 @Resource 的区别
[Nodejs] 20. Koa2 onion ring model ----- code demonstration
Compilation principle: preprocessing of source program and design and implementation of lexical analysis program (including code)
[offer29] sorted circular linked list