当前位置:网站首页>MOOSE平台使用入门攻略——如何运行官方教程的例子
MOOSE平台使用入门攻略——如何运行官方教程的例子
2022-08-04 05:30:00 【nuomi666】
本文仅介绍如何运行MOOSE平台官方给出的几个例子(Examples and Tutorials | MOOSE),如何安装MOOSE平台可以参考官方教程(Install MOOSE | MOOSE),本文是基于windows10系统的Ubuntu 20.04虚拟机进行的。
运行这些例子,可以使用自己构建的app,也可以编译官方给出的例子文件夹的app,为了尽快的跑通例子,这里直接编译例子文件夹中的app。
1、切换moose环境
首先打开Ubuntu,输入
conda activate moose如果还没有构建moose环境,可以参考(Conda MOOSE Environment | MOOSE),
此时命令行的开头base将转变为moose

2、编译app
以Ee01为例,这里推荐大家把原始文件在同目录下复制一次,切换工作目录至复制后的文件夹~\projects\moose\examples\ex01_inputfile_copy,然后运行make -j 4编译该目录下的app即可,其中j后面的数字是多少线程进行编译的意思,-j4即为4线程。
cd ~/projects/moose/examples/ex01_inputfile_copy
make -j 4
编译的过程
编译的过程较慢,耐心等待完成即可。
3、运行例子
在app编译完成后,我们就能使用生成的appname-opt文件运行相应的执行文件(name.i),这里使用在ex01_inputfile_copy目录下刚编译的app:ex01-opt,去运行ex01.i,输入命令
./ex01-opt -i ./ex01.i耐心等待结果即可,求解的模型信息
Framework Information:
MOOSE Version:           git commit cddfe1453b on 2021-12-14
LibMesh Version:
PETSc Version:           3.15.1
SLEPc Version:           3.15.1
Current Time:            Tue May 10 13:34:47 2022
Executable Timestamp:    Tue May 10 13:32:14 2022

Parallelism:
  Num Processors:          1
  Num Threads:             1

Mesh:
  Parallel Type:           replicated
  Mesh Dimension:          3
  Spatial Dimension:       3
  Nodes:                   3774
  Elems:                   2476
  Num Subdomains:          1

Nonlinear System:
  Num DOFs:                3774
  Num Local DOFs:          3774
  Variables:               "diffused"
  Finite Element Types:    "LAGRANGE"
  Approximation Orders:    "FIRST"

Execution Information:
  Executioner:             Steady
  Solver Mode:             Preconditioned JFNK
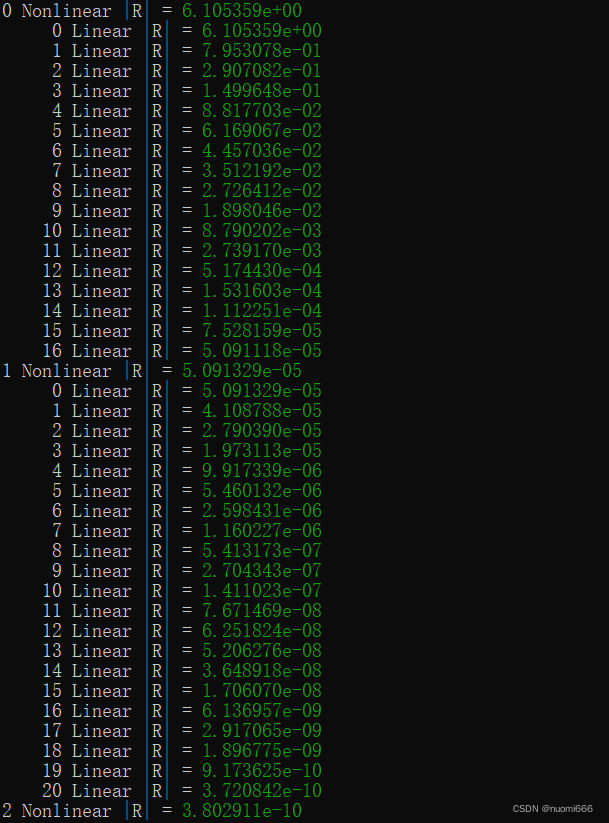
求解的过程,残差输出
4、结果查看
在本例中,最终输出的文件是ex01_out.e,采用Exodus II格式,该格式可以使用Paraview(Download | ParaView)查看,或者使用Moose平台自带的Peacock(Peacock | MOOSE)。
使用Paraview打开后,第一步在默认界面左下方的Properties选项卡中勾选要查看的变量名称,第二步点击Apply按钮。
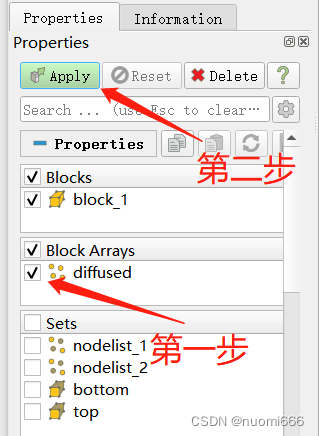
第三步在界面上方选择显示的变量,第四步显示求解域的类型(表面、网格或者节点等),对于瞬态模型,还可以对时间步进行调整。

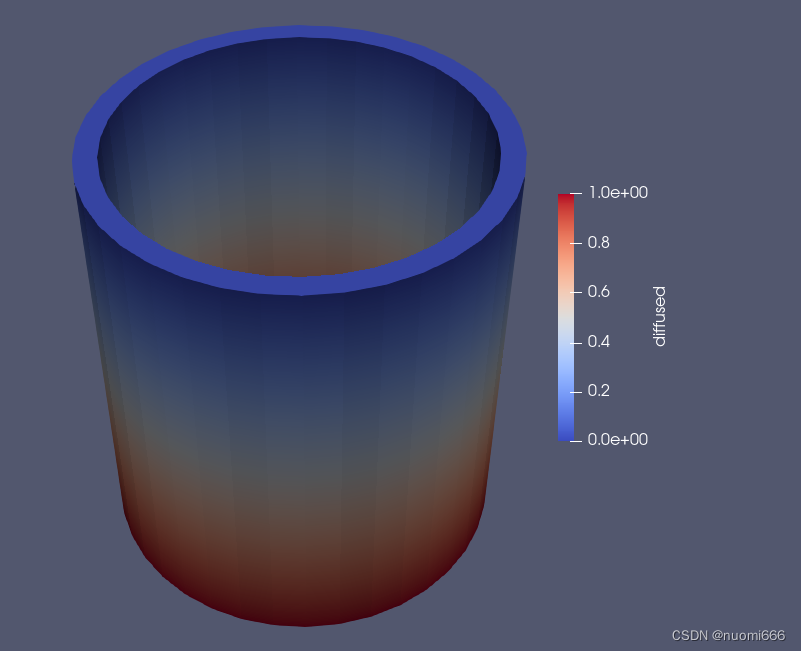
最终的结果展示:
5、备注
在初次编译的过程中,出现错误代码
MAKEFILE:11:*** MISSING SEPARATOR. STOP.后面打开脚本文件Makefile进行查看,发现为空白,应该是之前使用的过程中,操作失误删除了里面的内容导致。
解决办法:打开MOOSE官网的GitHub库,找到损坏文件的链接,使用GitHub文件下载器(GitHub 文件加速),下载相应的文件,然后替换已经损坏的文件。
边栏推荐
- 中国联通、欧莱雅和钉钉都在争相打造的秘密武器?虚拟IP未来还有怎样的可能
- 0, deep learning 21 days learning challenge 】 【 set up learning environment
- latex-写论文时一些常用设置
- 【CV-Learning】卷积神经网络
- 逻辑回归---简介、API简介、案例:癌症分类预测、分类评估法以及ROC曲线和AUC指标
- Comparison of oracle's number and postgresql's numeric
- 简单说Q-Q图;stats.probplot(QQ图)
- read and study
- The difference between oracle temporary table and pg temporary table
- tensorRT教程——tensor RT OP理解(实现自定义层,搭建网络)
猜你喜欢
随机推荐
BatchNorm&&LayerNorm
Various commands such as creating a new user in postgresql
Data reading in yolov3 (1)
[CV-Learning] Semantic Segmentation
【CV-Learning】Image Classification
[Deep Learning 21 Days Learning Challenge] 2. Complex sample classification and recognition - convolutional neural network (CNN) clothing image classification
WARNING: sql version 9.2, server version 11.0. Some psql features might not work.
Android foundation [Super detailed android storage method analysis (SharedPreferences, SQLite database storage)]
字典特征提取,文本特征提取。
【深度学习21天学习挑战赛】备忘篇:我们的神经网模型到底长啥样?——model.summary()详解
【深度学习日记】第一天:Hello world,Hello CNN MNIST
度量学习(Metric learning)—— 基于分类损失函数(softmax、交叉熵、cosface、arcface)
Copy攻城狮信手”粘“来 AI 对对联
卷积神经网络入门详解
空洞卷积
Transformer
【CV-Learning】语义分割
【论文阅读】Exploring Spatial Significance via Hybrid Pyramidal Graph Network for Vehicle Re-identificatio
安卓连接mysql数据库,使用okhttp
sklearn中的学习曲线learning_curve函数
