当前位置:网站首页>【Flask】官方教程(Tutorial)-part2:蓝图-视图、模板、静态文件
【Flask】官方教程(Tutorial)-part2:蓝图-视图、模板、静态文件
2022-07-06 01:26:00 【科皮子菊】
前序文章:
官方教程(Tutorial)-part1:项目布局、应用程序设置、定义和访问数据库
蓝图-视图
视图函数是您为响应应用程序请求而编写的代码。Flask 使用模式将传入的请求 URL 与应该处理它的视图相匹配。视图返回 Flask 转换为传出响应的数据。 Flask 也可以换一种方式,根据视图的名称和参数生成视图的 URL。
创建一个蓝图
蓝图是一种组织一组相关视图和其他代码的方式。与其将视图和其他代码直接注册到应用程序,不如将它们注册到蓝图。然后蓝图在工厂函数中可用时向应用程序注册。
Flaskr 将有两个蓝图,一个用于身份验证功能,一个用于博客文章功能。每个蓝图的代码将放在一个单独的模块中。由于博客需要了解身份验证,因此将首先编写身份验证。
编写flaskr/auth.py脚本。
import functools

from flask import (
    Blueprint, flash, g, redirect, render_template, request, session, url_for
)
from werkzeug.security import check_password_hash, generate_password_hash

from flaskr.db import get_db

bp = Blueprint('auth', __name__, url_prefix='/auth')
上面创建了一个名为auth的蓝图。类似于应用对象,蓝图也是需要知道在哪里创建的,所以需要传入__name__作为第二个参数。至于url_prefix将添加到与蓝图关联的所有 URL。
使用 app.register_blueprint() 从工厂导入并注册蓝图。在返回应用程序之前,将新代码放在工厂函数(flaskr/__init__.py)的末尾。如下:
def create_app():
    app = ...
    # existing code omitted

    from . import auth
    app.register_blueprint(auth.bp)

    return app
身份验证蓝图将具有注册新用户以及登录和注销的视图。
第一个视图:注册
当用户访问/auth/registerURL链接时,注册视图将会返回供其填写的form表单html。当他们提交这个表单是,它将验证他们的输入并再次显示带有错误消息的表单或创建新用户并转到登录页面。对应的视图代码如下:
flaskr/auth.py
@bp.route('/register', methods=('GET', 'POST'))
def register():
    if request.method == 'POST':
        username = request.form['username']
        password = request.form['password']
        db = get_db()
        error = None

        if not username:
            error = 'Username is required.'
        elif not password:
            error = 'Password is required.'

        if error is None:
            try:
                db.execute(
                    "INSERT INTO user (username, password) VALUES (?, ?)",
                    (username, generate_password_hash(password)),
                )
                db.commit()
            except db.IntegrityError:
                error = f"User {
      username} is already registered."
            else:
                return redirect(url_for("auth.login"))

        flash(error)

    return render_template('auth/register.html')
视图函数功能工作:
@bp.route链接URL/register和这个注册视图的函数。当Flask接受/auth/register的请求时,它将调用这个register视图以及使用返回值作为响应;- 如果用户提交这个form表单,
request.method将会是POST。这种情况下,就开始校验输入内容; request.form是一个特殊类型的dict,它是form表单中key和value的映射字典。用户将会填写username和password- 然后就是验证username和password是否为空
- 如果验证成功的话:将会向数据库中插入一个新的user;
db.execute使用 ? 作为 SQL 查询任何用户输入的占位符,以及用于替换占位符的值元组。数据库库将负责转义值,因此您不会受到 SQL 注入攻击。- 为了安全起见,永远不要将密码直接存储在数据库中。
generate_password_hash()用于安全地散列密码,并存储该散列。由于此查询修改了数据,因此之后需要调用db.commit()来保存更改。 - 如果用户名已经存在,则会发生
sqlite3.IntegrityError,这应该作为另一个验证错误向用户显示。
- 存储用户后,他们被重定向到登录页面。
url_for()根据其名称生成登录视图的 URL。这比直接编写 URL 更可取,因为它允许您稍后更改 URL,而无需更改链接到它的所有代码。redirect()生成对生成的 URL 的重定向响应。 - 如果验证失败,则会向用户显示错误。
flash()存储在呈现模板时可以检索的消息。 - 当用户最初导航到
auth/register或出现验证错误时,应显示带有注册表单的 HTML 页面。render_template()将呈现一个包含 HTML 的模板,您将在本教程的下一步中编写该模板。
登陆
这个功能实现的前提是,你已经把注册完成了。代码如下:flaskr/auth.py
@bp.route('/login', methods=('GET', 'POST'))
def login():
    if request.method == 'POST':
        username = request.form['username']
        password = request.form['password']
        db = get_db()
        error = None
        user = db.execute(
            'SELECT * FROM user WHERE username = ?', (username,)
        ).fetchone()

        if user is None:
            error = 'Incorrect username.'
        elif not check_password_hash(user['password'], password):
            error = 'Incorrect password.'

        if error is None:
            session.clear()
            session['user_id'] = user['id']
            return redirect(url_for('index'))

        flash(error)

    return render_template('auth/login.html')
这里有很多与register视图不同的地方:
- 首先查询用户并将其存储在变量中以供以后使用。
fetchone()从查询中返回一行。如果查询未返回任何结果,则返回 None。稍后,将使用fetchall(),它返回所有结果的列表。 check_password_hash()以与存储的哈希相同的方式对提交的密码进行哈希处理,并安全地比较它们。如果它们匹配,则密码有效。- session 是一个存储跨请求数据的字典。当验证成功时,用户的 id 被存储在一个新的会话中。数据存储在发送到浏览器的 cookie 中,然后浏览器将其与后续请求一起发送回来。 Flask 对数据进行安全签名,使其无法被篡改。
现在用户的 id 存储在会话中,它将在后续请求中可用。在每个请求开始时,如果用户登录,他们的信息应该被加载并提供给其他视图。实现如下(flaskr/auth.py):
@bp.before_app_request
def load_logged_in_user():
    user_id = session.get('user_id')

    if user_id is None:
        g.user = None
    else:
        g.user = get_db().execute(
            'SELECT * FROM user WHERE id = ?', (user_id,)
        ).fetchone()
bp.before_app_request() 注册一个在视图函数之前运行的函数,无论请求什么 URL。load_logged_in_user 检查用户 ID 是否存储在会话中,并从数据库中获取该用户的数据,并将其存储在 g.user 中,该数据持续请求的长度。如果没有用户 id,或者 id 不存在,g.user 将为 None.
注销登陆
要注销,您需要从会话中删除用户 ID。然后 load_logged_in_user 不会在后续请求中加载到用户。
flaskr/auth.py增加代码如下:
@bp.route('/logout')
def logout():
    session.clear()
    return redirect(url_for('index'))
在其他视图中需要身份验证
有些视图页面有些时候也需要对登陆有所要求,创建、编辑和删除博客文章需要用户登录。装饰器可用于检查它应用到的每个视图。
flaskr/auth.py
def login_required(view):
    @functools.wraps(view)
    def wrapped_view(**kwargs):
        if g.user is None:
            return redirect(url_for('auth.login'))

        return view(**kwargs)

    return wrapped_view
这个装饰器返回一个新的视图函数,它包装了它应用到的原始视图。新功能检查用户是否已加载,否则重定向到登录页面。如果加载了用户,则调用原始视图并正常继续。您将在编写博客视图时使用此装饰器。
端点和 URL
url_for() 函数根据名称和参数生成视图的 URL。与视图关联的名称也称为端点,默认情况下与视图函数的名称相同。
例如,本教程前面添加到应用程序工厂的hello()视图具有名称“hello”,并且可以使用 url_for('hello') 链接到。如果它带有一个参数,稍后您会看到,它将与使用 url_for('hello', who='World') 相关联。
使用蓝图时,蓝图的名称会添加到函数名称的前面,因此您在上面编写的登录函数的端点是“auth.login”,因为您已将其添加到“auth”蓝图中。
模板Templates
您已经为您的应用程序编写了身份验证视图,但如果您正在运行服务器并尝试访问任何 URL,您将看到 TemplateNotFound 错误。那是因为视图正在调用 render_template(),但您还没有编写模板。模板文件将存储在 flaskr 包内的模板目录中。
模板是包含静态数据以及动态数据占位符的文件。使用特定数据呈现模板以生成最终文档。 Flask 使用 Jinja 模板库来渲染模板。
在您的应用程序中,您将使用模板来呈现 HTML,该 HTML 将显示在用户的浏览器中。在 Flask 中,Jinja 被配置为自动转义 HTML 模板中呈现的任何数据。这意味着呈现用户输入是安全的;他们输入的任何可能与 HTML 混淆的字符,例如 < 和 > 都将被转义为安全值,这些值在浏览器中看起来相同,但不会造成不良影响。
Jinja 的外观和行为大多类似于 Python。特殊分隔符用于区分 Jinja 语法和模板中的静态数据。{ { 和 }} 之间的任何内容都是将输出到最终文档的表达式。 {% 和 %} 表示类似 if 和 for 的控制流语句。与 Python 不同,块由开始和结束标记而不是缩进表示,因为块内的静态文本可能会改变缩进。
基本布局
应用程序中的每个页面都将围绕不同的主体具有相同的基本布局。不是在每个模板中编写整个 HTML 结构,而是每个模板将扩展一个基本模板并覆盖特定部分。
flaskr/templates/base.html
<!doctype html>
<title>{% block title %}{% endblock %} - Flaskr</title>
<link rel="stylesheet" href="{
     { url_for('static', filename='style.css') }}">
<nav>
  <h1>Flaskr</h1>
  <ul>
    {% if g.user %}
      <li><span>{
   { g.user['username'] }}</span>
      <li><a href="{
     { url_for('auth.logout') }}">Log Out</a>
    {% else %}
      <li><a href="{
     { url_for('auth.register') }}">Register</a>
      <li><a href="{
     { url_for('auth.login') }}">Log In</a>
    {% endif %}
  </ul>
</nav>
<section class="content">
  <header>
    {% block header %}{% endblock %}
  </header>
  {% for message in get_flashed_messages() %}
    <div class="flash">{
   { message }}</div>
  {% endfor %}
  {% block content %}{% endblock %}
</section>
g 在模板中自动可用。根据是否设置了 g.user(来自 load_logged_in_user),要么显示用户名和注销链接,要么显示注册和登录链接。url_for() 也是自动可用的,用于生成视图的 URL,而不是手动写出它们。
在页面标题之后和内容之前,模板循环遍历 get_flashed_messages() 返回的每条消息。您在视图中使用了 flash() 来显示错误消息,这是显示错误消息的代码。
这里定义的三个块将在其他模板中被覆盖:
- {% block title %} 将改变浏览器标签和窗口标题中显示的标题。
- {% block header %} 与title类似,但会改变页面上显示的标题。
- {% block content %} 是每个页面的内容所在的位置,例如登录表单或博客文章。
基本模板直接位于模板目录中。为了让其他人保持井井有条,蓝图的模板将放置在与蓝图同名的目录中。
注册页面
flaskr/templates/auth/register.html
{
    % extends 'base.html' %}

{
    % block header %}
  <h1>{
    % block title %}Register{
    % endblock %}</h1>
{
    % endblock %}

{
    % block content %}
  <form method="post">
    <label for="username">Username</label>
    <input name="username" id="username" required>
    <label for="password">Password</label>
    <input type="password" name="password" id="password" required>
    <input type="submit" value="Register">
  </form>
{
    % endblock %}
{% extends ‘base.html’ %} 告诉 Jinja 这个模板应该替换基本模板中的块。所有呈现的内容必须出现在覆盖基本模板中的块的 {% block %} 标记内。
这里使用的一个有用的模式是将 {% block title %} 放在 {% block header %} 中。这将设置标题块,然后将其值输出到标题块中,以便窗口和页面共享相同的标题,而无需两次写入。
input标签在此处使用 required 属性。这告诉浏览器在填写这些字段之前不要提交表单。如果用户使用的是不支持该属性的旧浏览器,或者如果他们使用浏览器之外的其他东西来发出请求,您仍然需要在 Flask 视图中验证数据。始终完全验证服务器上的数据很重要,即使客户端也进行了一些验证。
登陆页面
除了标题和提交按钮外,这与注册模板相同。
flaskr/templates/auth/login.html
{
    % extends 'base.html' %}

{
    % block header %}
  <h1>{
    % block title %}Log In{
    % endblock %}</h1>
{
    % endblock %}

{
    % block content %}
  <form method="post">
    <label for="username">Username</label>
    <input name="username" id="username" required>
    <label for="password">Password</label>
    <input type="password" name="password" id="password" required>
    <input type="submit" value="Log In">
  </form>
{
    % endblock %}
注册一个用户
现在验证模板已经编写完成,您可以注册一个用户。确保服务器仍在运行,然后转到 http://target_server:5000/auth/register。
继续在我的虚拟机上启动服务,如下:
主机浏览器访问情况如下: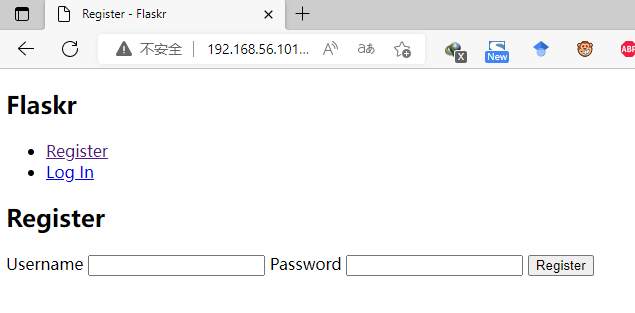
填写注册信息提交后就到了登陆界面: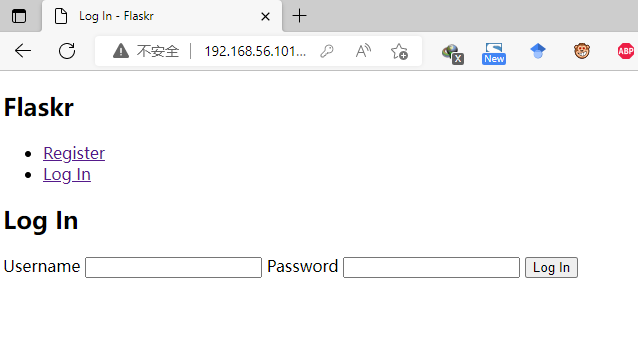
当然,可以尝试在不填写表格的情况下单击“注册”按钮,然后查看浏览器显示错误消息。尝试从 register.html 模板中删除所需的属性,然后再次单击“注册”。浏览器不会显示错误,而是会重新加载页面并显示视图中来自flash()的错误。这里就不演示了。
填写用户名和密码,您将被重定向到登录页面。尝试输入错误的用户名,或正确的用户名和错误的密码。如果你登录你会得到一个错误,因为还没有索引视图可以重定向到。
静态文件
身份验证视图和模板有效,但它们现在看起来很简单。可以添加一些 CSS 来为您构建的 HTML 布局添加样式。样式不会改变,所以它是一个静态文件而不是模板。
Flask 自动添加一个静态视图,该视图采用相对于 flaskr/static 目录的路径并为其提供服务。 base.html 模板已经有一个指向 style.css 文件的链接:
{
   { url_for('static', filename='style.css') }}
除了 CSS 之外,其他类型的静态文件可能是带有 JavaScript 函数的文件或徽标图像。它们都放在 flaskr/static 目录下,并用 url_for('static', filename='...') 引用。
本教程不关注如何编写 CSS,因此您只需将以下内容复制到 flaskr/static/style.css 文件中:
html {
     font-family: sans-serif; background: #eee; padding: 1rem; }
body {
     max-width: 960px; margin: 0 auto; background: white; }
h1 {
     font-family: serif; color: #377ba8; margin: 1rem 0; }
a {
     color: #377ba8; }
hr {
     border: none; border-top: 1px solid lightgray; }
nav {
     background: lightgray; display: flex; align-items: center; padding: 0 0.5rem; }
nav h1 {
     flex: auto; margin: 0; }
nav h1 a {
     text-decoration: none; padding: 0.25rem 0.5rem; }
nav ul  {
     display: flex; list-style: none; margin: 0; padding: 0; }
nav ul li a, nav ul li span, header .action {
     display: block; padding: 0.5rem; }
.content {
     padding: 0 1rem 1rem; }
.content > header {
     border-bottom: 1px solid lightgray; display: flex; align-items: flex-end; }
.content > header h1 {
     flex: auto; margin: 1rem 0 0.25rem 0; }
.flash {
     margin: 1em 0; padding: 1em; background: #cae6f6; border: 1px solid #377ba8; }
.post > header {
     display: flex; align-items: flex-end; font-size: 0.85em; }
.post > header > div:first-of-type {
     flex: auto; }
.post > header h1 {
     font-size: 1.5em; margin-bottom: 0; }
.post .about {
     color: slategray; font-style: italic; }
.post .body {
     white-space: pre-line; }
.content:last-child {
     margin-bottom: 0; }
.content form {
     margin: 1em 0; display: flex; flex-direction: column; }
.content label {
     font-weight: bold; margin-bottom: 0.5em; }
.content input, .content textarea {
     margin-bottom: 1em; }
.content textarea {
     min-height: 12em; resize: vertical; }
input.danger {
     color: #cc2f2e; }
input[type=submit] {
     align-self: start; min-width: 10em; }
刷新一下之前的页面,效果就是酱紫的了。
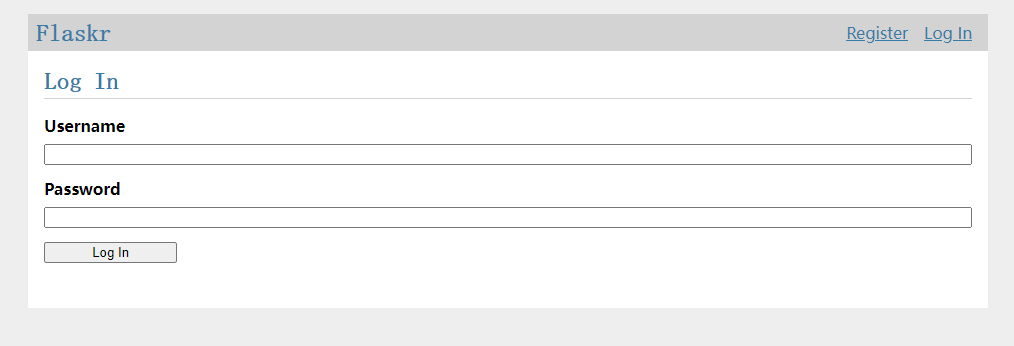
应该是比之前的好看一些了。
边栏推荐
- ThreeDPoseTracker项目解析
- [detailed] several ways to quickly realize object mapping
- Recommended areas - ways to explore users' future interests
- ClickOnce does not support request execution level 'requireAdministrator'
- internship:项目代码所涉及陌生注解及其作用
- In the era of industrial Internet, we will achieve enough development by relying on large industrial categories
- Five challenges of ads-npu chip architecture design
- FFT 学习笔记(自认为详细)
- Electrical data | IEEE118 (including wind and solar energy)
- 一圖看懂!為什麼學校教了你Coding但還是不會的原因...
猜你喜欢
Recursive method to realize the insertion operation in binary search tree
干货!通过软硬件协同设计加速稀疏神经网络
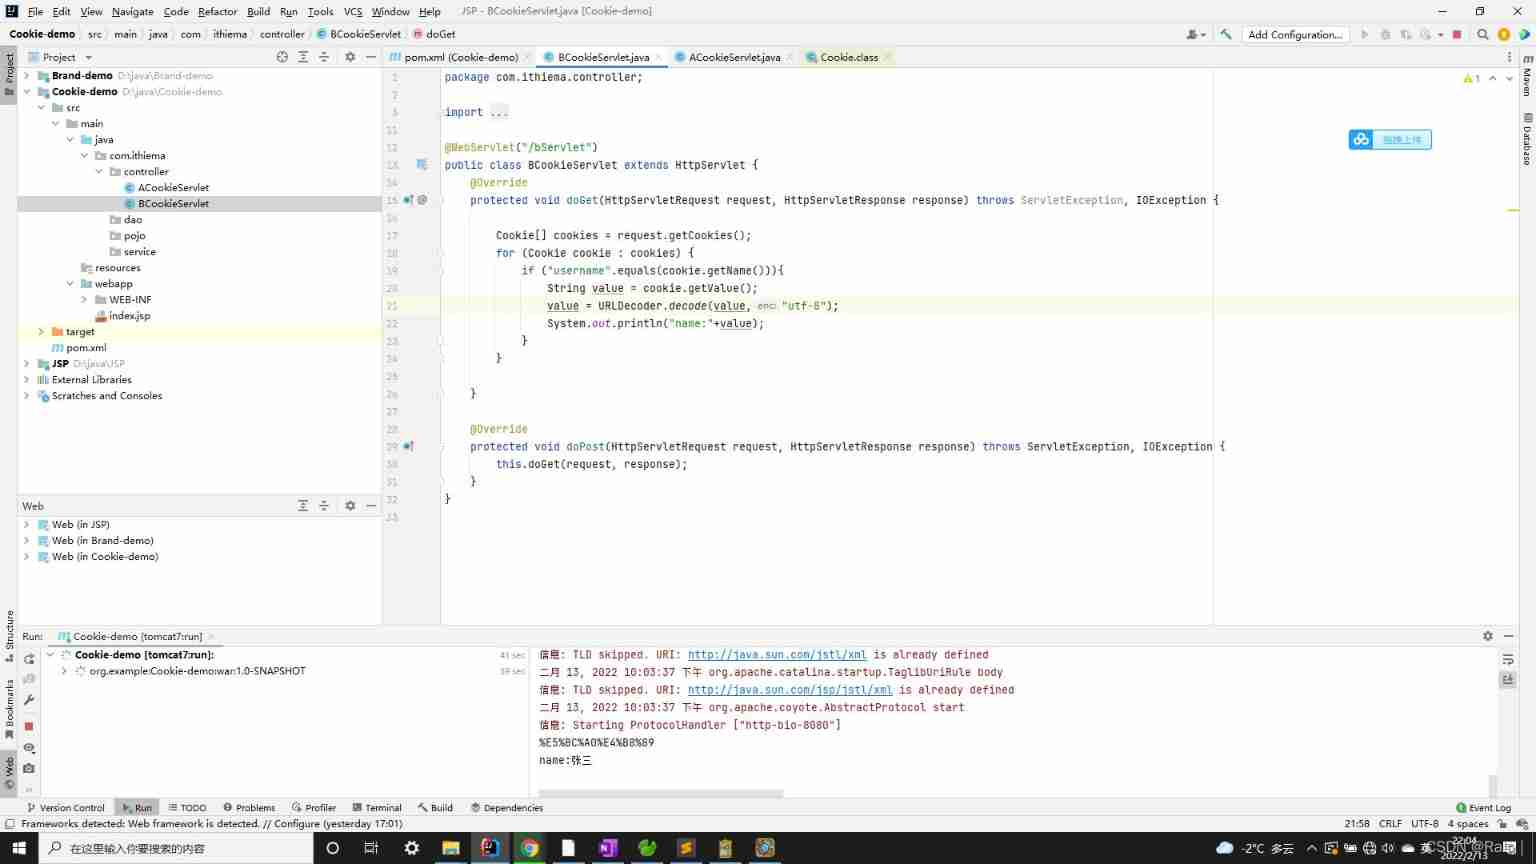
Cookie concept, basic use, principle, details and Chinese transmission
![[detailed] several ways to quickly realize object mapping](/img/e5/70c7f8fee4556d14f969fe33938971.gif)
[detailed] several ways to quickly realize object mapping
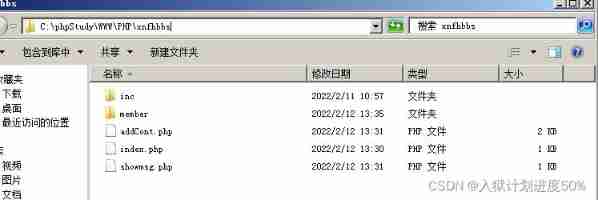
037 PHP login, registration, message, personal Center Design
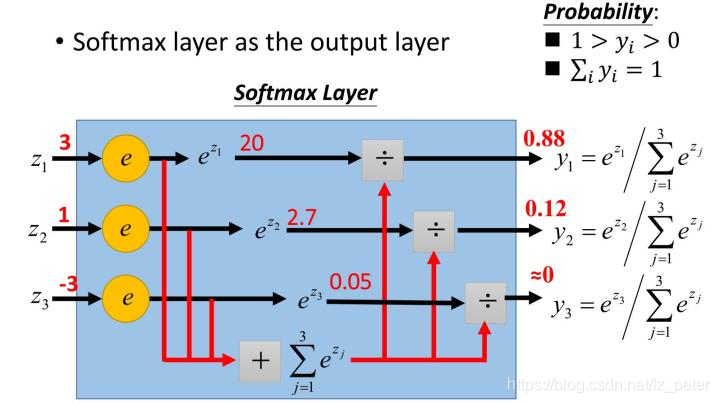
关于softmax函数的见解
Unity | 实现面部驱动的两种方式

ADS-NPU芯片架构设计的五大挑战
Yii console method call, Yii console scheduled task
3D model format summary
随机推荐
Blue Bridge Cup embedded stm32g431 - the real topic and code of the eighth provincial competition
【已解决】如何生成漂亮的静态文档说明页
[the most complete in the whole network] |mysql explain full interpretation
3D模型格式汇总
VMware Tools安装报错:无法自动安装VSock驱动程序
A Cooperative Approach to Particle Swarm Optimization
3D视觉——4.手势识别(Gesture Recognition)入门——使用MediaPipe含单帧(Singel Frame)和实时视频(Real-Time Video)
ClickOnce does not support request execution level 'requireAdministrator'
Force buckle 9 palindromes
Dedecms plug-in free SEO plug-in summary
Docker compose配置MySQL并实现远程连接
The basic usage of JMeter BeanShell. The following syntax can only be used in BeanShell
[technology development -28]: overview of information and communication network, new technology forms, high-quality development of information and communication industry
Leetcode 208. 实现 Trie (前缀树)
Alibaba-Canal使用详解(排坑版)_MySQL与ES数据同步
Four commonly used techniques for anti aliasing
Huawei Hrbrid interface and VLAN division based on IP
[pat (basic level) practice] - [simple mathematics] 1062 simplest fraction
ORA-00030
JMeter BeanShell的基本用法 一下语法只能在beanshell中使用