当前位置:网站首页>Detailed explanation of express framework
Detailed explanation of express framework
2022-07-06 11:36:00 【Advanced diary】
Express
Use express You can quickly create web Web server or API Interface server
1. establish express Of web The server
//  Import express
const express = require("express")
//  establish web The server
const app = express()
//  start-up web The server
app.listen(8088,()=>{
	console.log('http://127.0.0.1:8088');
})
2. monitor get/post request
//  monitor GET Request and return the response content , The first parameter is the requested url
app.get('/get',(req,res)=>{
	//req.query Get request is the parameter sent
	console.log(req.query)//http://127.0.0.1:8088/get?name=zs&age=18
	//{ name: 'zs', age: '18' }
	//  call express Provided res.send() Method , Set the returned JSON object
	res.send({name:"zs",age:20,gender:" male "})
 })

//  monitor POST Request and return the response content , The first parameter is the requested url
app.post('/post',(req,res)=>{
	//  call express Provided res.send() Method , Set the returned JSON object
	res.send({name:"zs",age:20,gender:" male "})
})

 towards http://127.0.0.1:8088/post The return value of the send request is
{   "name": "zs",
    "age": 20,
    "gender": " male "}
3. To obtain parameters
// Static parameters
app.get('/get',(req,res)=>{
	//req.query Get request is the parameter sent
	//http://127.0.0.1:8088/get?name=zs&age=18
	res.send(req.query)
	//{ name: 'zs', age: '18' }
 })

// Dynamic parameters
app.get('/getId/:id',(req,res)=>{
	//req.query Get request is the parameter sent
	//http://127.0.0.1:8088/getId/12
	res.send(req.params)
 })
 // return
 {
    "id": "12"
}
// Multiple dynamic parameters
app.get('/getId/:id/:name',(req,res)=>{
	//req.query Get request is the parameter sent
	//http://127.0.0.1:8088/getId/12/zs
	res.send(req.params)
 })
 // return
 {
    "id": "12"
    "name":"zs"
}
4. middleware
//app.use() The function is to register the global middleware ,app.use('path',function()) The first parameter is the path. If it is / Omission

express There are three kinds of middleware
1. Built in middleware  static
2. Custom middleware
3. Third-party middleware  (body-parser) ( Interceptor )

app.use(express.static('public'))
app.use(express.static('dome'))
// You can directly access
http://127.0.0.1:8088/index.html
http://127.0.0.1:8088/index.css
http://127.0.0.1:8088/index.js

// Will prioritize public In the document index file , If you can't find it, find dome Medium index file

app.use('/public',express.static('public'))
// To access http://127.0.0.1:8088/public/index.html

// Customize the middleware with global effect   Multiple middleware can be defined , The middleware will be called in sequence
app.use(function (req, res, next) {/* Indicates that it matches any route */
    console.log(new Date())
    next()/* Indicates that the middleware will continue to execute after the matching is completed .*/
})
// Local middleware
let func = function (req, res, next) {/* Indicates that it matches any route */
    console.log(new Date())
    next()/* Indicates that the middleware will continue to execute after the matching is completed .*/
}
// Multiple local middleware can be defined
app.get('/',func1,func2,(req,res)=>{
	res.send('get router by :/')
})

// Use middleware to process request data
app.use(express.json())
app.use(express.urlencoded({extended:false})

// Use third-party middleware  (body-parser) ( Interceptor )
1. npm install body-parser
// To middleware
const parser = require("body-parser")
// Register middleware
app.use(parser.urlencoded({extended:false})

//nodejs built-in querystring The module processes the query string and converts the query string into object format
const qs = require("querystring")
console.log(qs.parse(str))
5. nodemon
 It can start the modified project less frequently ,nodemon It will automatically restart the project to facilitate development and testing
npm install -g nodemon

 Use nodemon app.js To run the project , no need node app.js
6. route
1.  Mount in the original way
const express = require("express")

const app = express();

//  Mount route
app.get('/',(req,res)=>{
	res.send('get router by :/')
})

app.post('/',(req,res)=>{
	res.send('post router by :/')
})

app.listen(8088,()=>{
	console.log("http://127.0.0.1:8088");
})

2. Use express route
// stay router.js Create a routing object in
const express = require("express")
const router = express.Router();

//  Mount specific routes
router.get('/user/list',(rep,res)=>{
	res.send("GER user list")
})

router.post("/user/add",(req,res)=>{
	res.send("POST user add")
})

//  Export routing objects out
module.exports = router

// stay index.js Reference route in
const express = require("express")
const app = express()
//  Import routing module
const router = require("./router")
//  Register routing module
app.use(router)

app.listen(8088,()=>{
	console.log("http://127.0.0.1:8088");
})

//app.use('/api',router)// Add a uniform prefix to the route http://127.0.0.1:8088/api/user/add
7. To write get/post Interface
const express = require("express");

const app = express()

const router = express.Router()
app.use(express.urlencoded({extended:false}))
router.get('/get',(req,res)=>{
	//  Request data sent by the client
	const query = req.query;

	res.send({
		status:0,//0 It means success ,1 It means failure
		msg:"GET The request is successful ",// Description of the State
		data:query// Data that needs to be responded to the client
	})
})

router.post('/post',(req,res)=>{
	//  Request data sent by the client
	const body = req.body;
	//  Configure the middle price of parsing form data
	res.send({
		status:0,//0 It means success ,1 It means failure
		msg:"POST The request is successful ",// Description of the State
		data:body// Data that needs to be responded to the client
	})
})
app.use(router);
app.listen(8088,()=>{
	console.log("get request ");
})
8.cors Cross domain solution
const express = require("express");
const cors = require("cors")
const app = express()
// Use third-party middleware to solve cross domain
app.use(cors())

// Customize cors Set up cross domain requests
var cors = function(req,res,next()){
  res.header('Access-Control-Allow-Origin', 'http://localhost:8088');// Request address
  res.header('Access-Control-Allow-Methods', 'GET,PUT,POST,DELETE');// Request mode
  res.header('Access-Control-Allow-Headers', 'Content-Type');// Request header
  next()
  }
app.use(cors)
边栏推荐
猜你喜欢
Mysql的索引实现之B树和B+树

Cookie setting three-day secret free login (run tutorial)
![[CDH] cdh5.16 configuring the setting of yarn task centralized allocation does not take effect](/img/e7/a0d4fc58429a0fd8c447891c848024.png)
[CDH] cdh5.16 configuring the setting of yarn task centralized allocation does not take effect
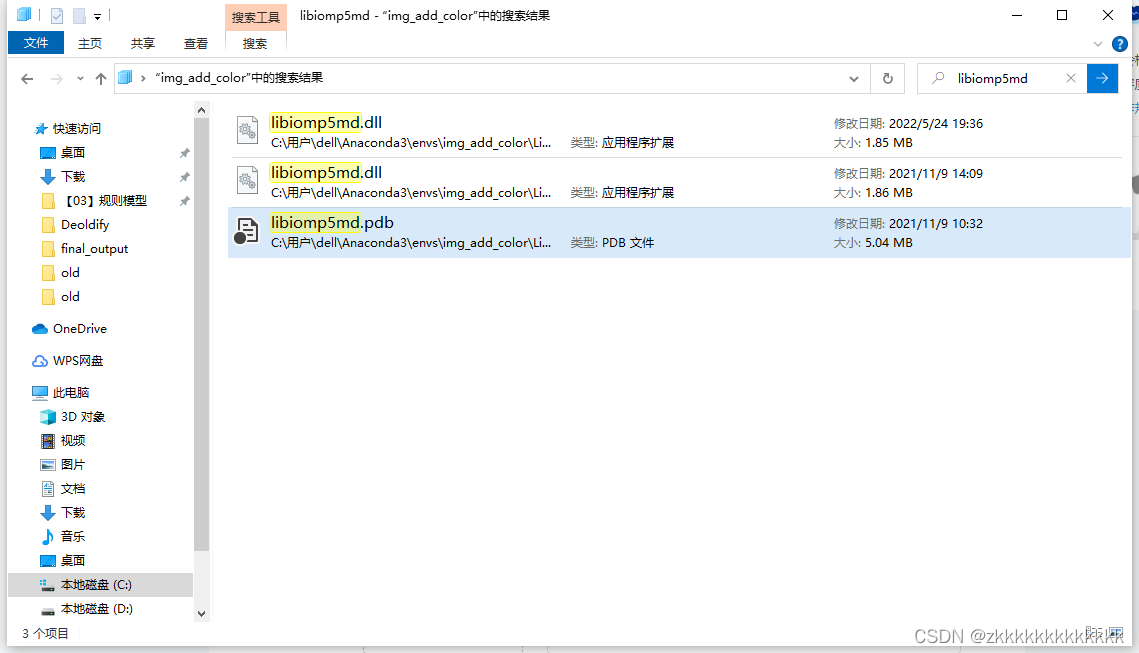
Deoldify project problem - omp:error 15:initializing libiomp5md dll,but found libiomp5md. dll already initialized.
C语言读取BMP文件
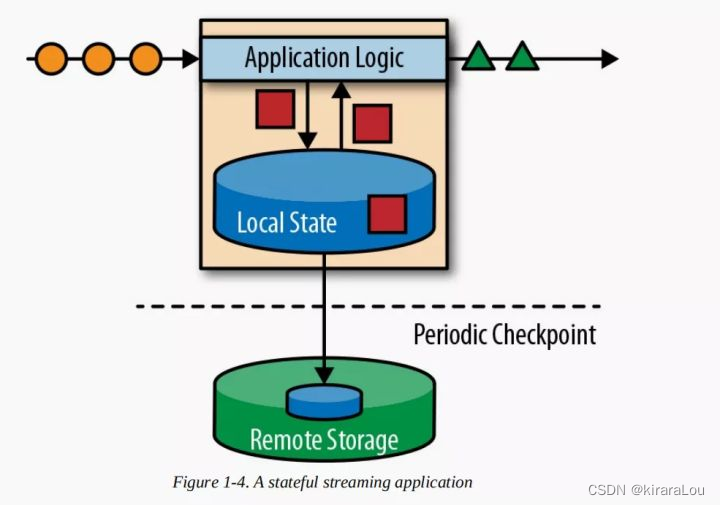
【flink】flink学习
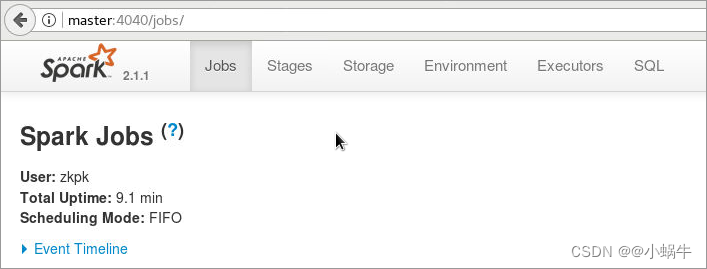
4、安装部署Spark(Spark on Yarn模式)
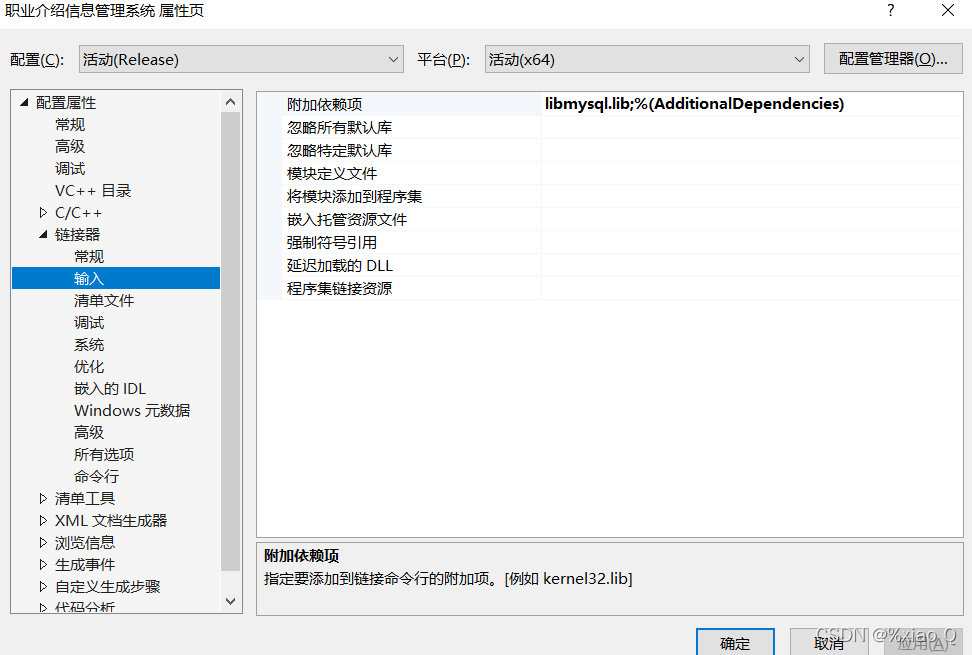
MySQL and C language connection (vs2019 version)
Learn winpwn (2) -- GS protection from scratch

小L的试卷

随机推荐
Connexion sans mot de passe du noeud distribué
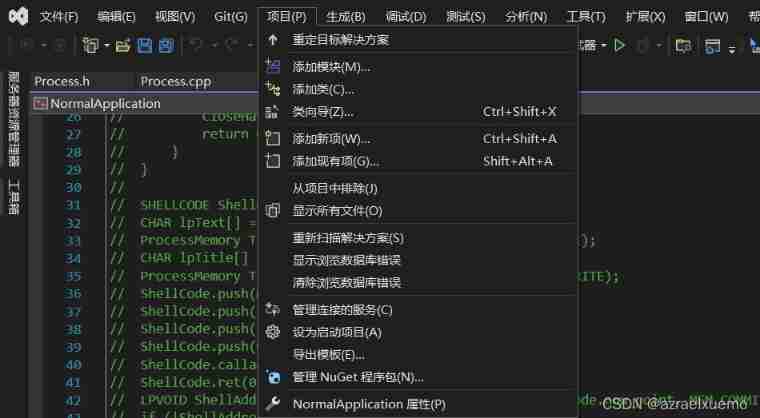
vs2019 使用向导生成一个MFC应用程序
In the era of DFI dividends, can TGP become a new benchmark for future DFI?
error C4996: ‘strcpy‘: This function or variable may be unsafe. Consider using strcpy_ s instead
Codeforces Round #771 (Div. 2)
ImportError: libmysqlclient. so. 20: Cannot open shared object file: no such file or directory solution
Password free login of distributed nodes
Punctual atom stm32f103zet6 download serial port pin
Image recognition - pyteseract TesseractNotFoundError: tesseract is not installed or it‘s not in your path
ES6 let and const commands
【flink】flink学习
Codeforces Round #771 (Div. 2)
jS数组+数组方法重构
机器学习笔记-Week02-卷积神经网络
Are you monitored by the company for sending resumes and logging in to job search websites? Deeply convinced that the product of "behavior awareness system ba" has not been retrieved on the official w
Project practice - background employee information management (add, delete, modify, check, login and exit)
DICOM: Overview
4、安装部署Spark(Spark on Yarn模式)
Neo4j installation tutorial
Antlr4 uses keywords as identifiers