当前位置:网站首页>WeNet:面向工业落地的E2E语音识别工具
WeNet:面向工业落地的E2E语音识别工具
2022-07-05 04:21:00 【王小希ww】
WeNet:面向工业落地的E2E语音识别工具
文章目录
一、WeNet语音识别平台搭建
1、参考资料
2、快速搭建WeNet平台
参考 WeNet中文文档
下载官方提供的预训练模型,并启动 docker 服务,加载模型,提供 websocket 协议的语音识别服务。
wget https://wenet-1256283475.cos.ap-shanghai.myqcloud.com/models/aishell2/20210618_u2pp_conformer_libtorch.tar.gz
tar -xf 20210618_u2pp_conformer_libtorch.tar.gz
model_dir=$PWD/20210618_u2pp_conformer_libtorch
docker run --rm -it -p 10086:10086 -v $model_dir:/home/wenet/model wenetorg/wenet-mini:latest bash /home/run.sh
Note:
这里的
$PWD = "/home/wenet/model"。一定要保证预训练模型文件的存储位置要正确,即解压在
$PWD下,执行如下命令model_dir=$PWD/20210618_u2pp_conformer_libtorch进行变量赋值,否则会报: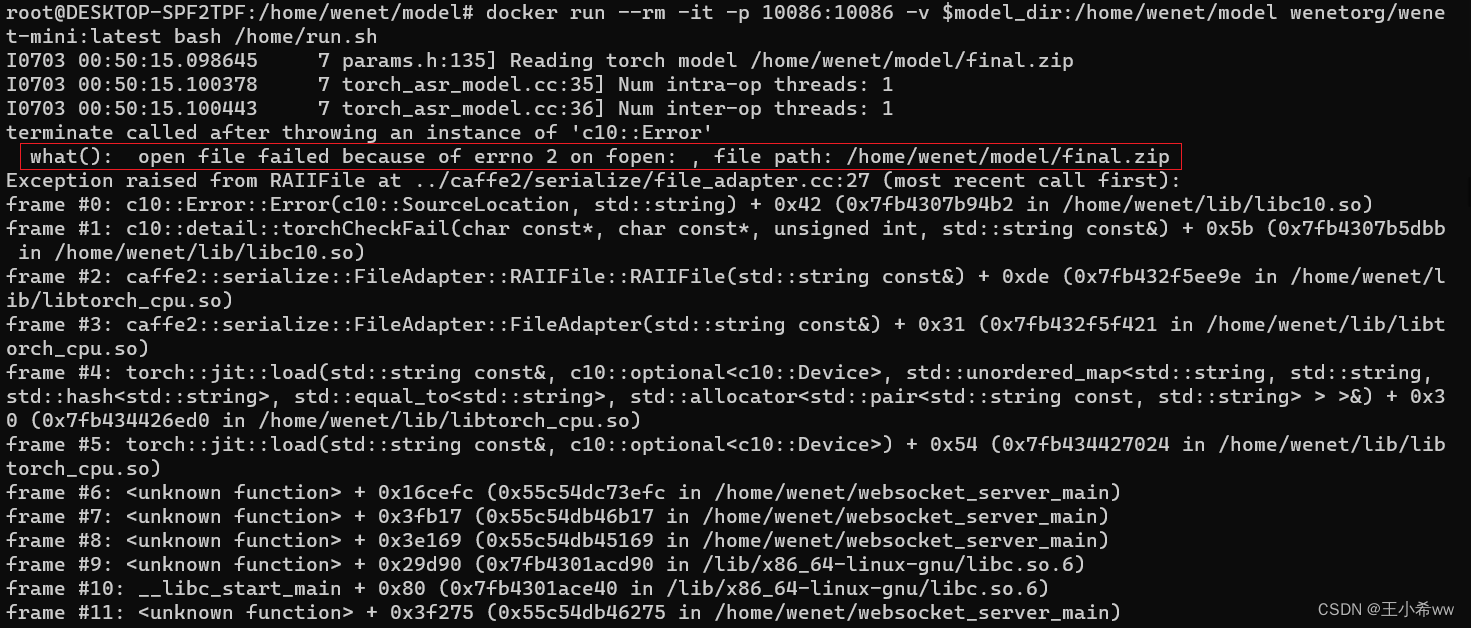
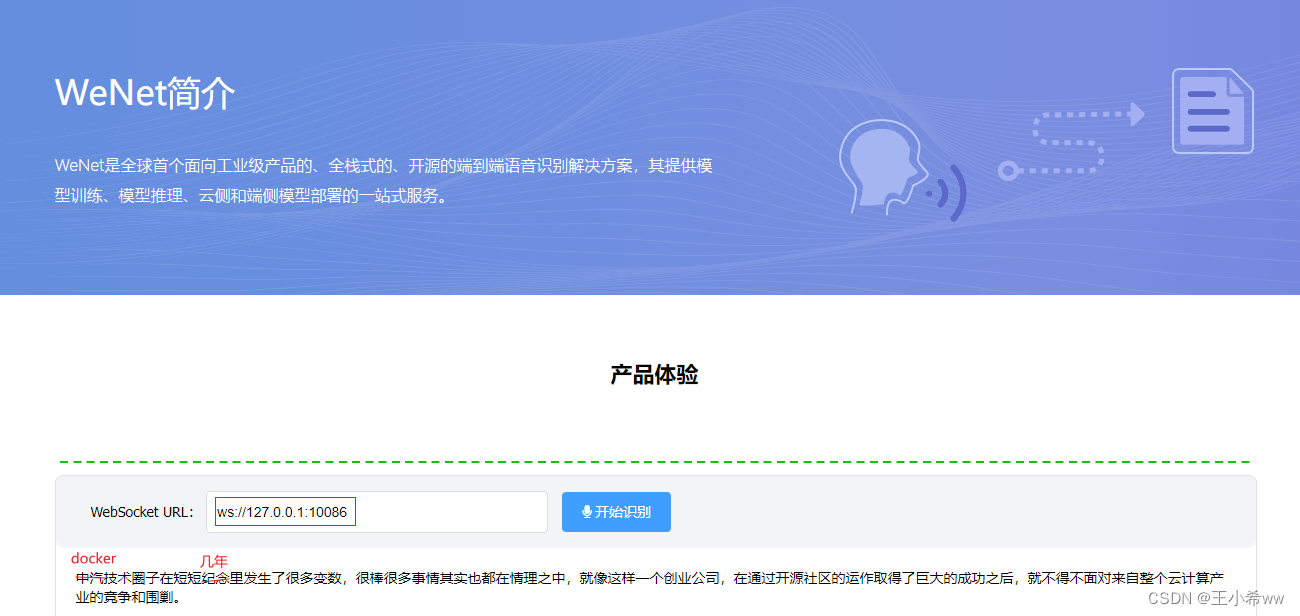
实时识别
使用浏览器打开文件**index.html,在 WebSocket URL 中填入 ws://127.0.0.1:10086 (若在windows下通过wsl2**运行docker, 则使用ws://localhost:10086) , 允许浏览器弹出的请求使用麦克风,即可通过麦克风进行实时语音识别。
这里使用wsl2下的docker进行演示:如果靠近麦克风,误检率比较低。
二、WeNet实现推理(暂时无法使用onnx cpu版本进行推理)
Note:
如果仅使用wenet/bin/recognize.py,使用libTorch模型进行推理,可以在windows中搭建环境,具体搭建过程参考WeNet官网
如果要使用wenet/bin/recognize_onnx.py进行推理,需要先下载ctc_encoder,这里要注意pypi上的ctc_encoder只有2020的版本(WeNet1.0),和当前的WeNet3.0版本不一致,因此需要到https://github.com/Slyne/ctc_decoder下载并编译。由于编译swig_encoder过程中需要用到bash命令,所以尝试在linux系统中运行,这里使用WSL + ubuntu作为解决方案。
其实windows安装git就可以执行bash命令,只不过这里在安装好
wget.exe,swig.exe,git clone相应的package(kenlm,ThreadPool)之后,对于下载的openfst-1.6.3,即使在VC中补全了.h文件,无法编译成功。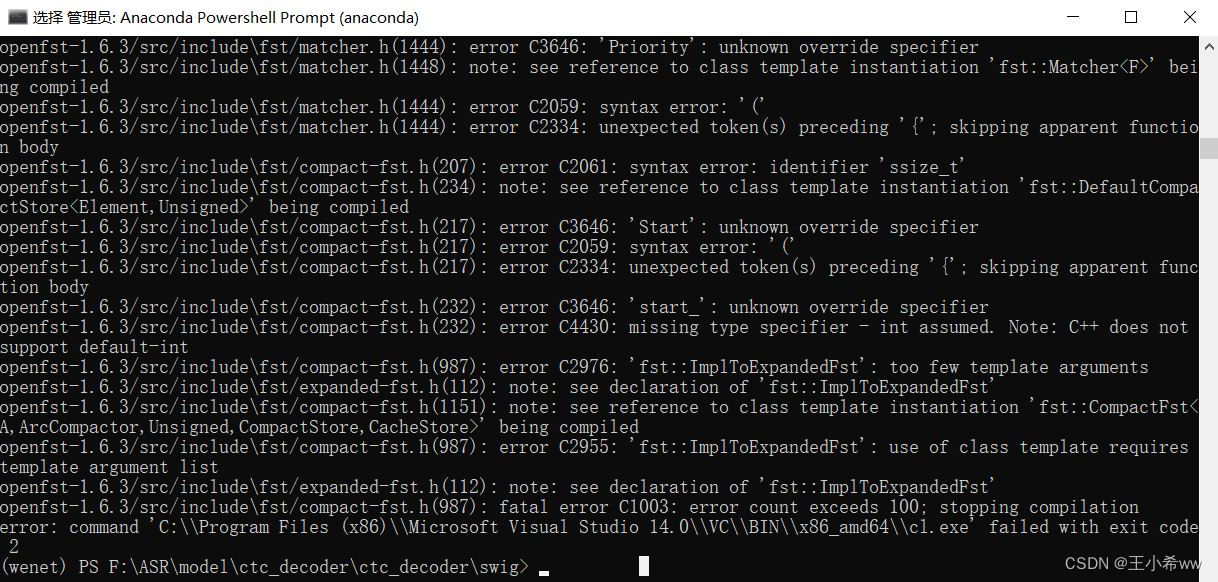
1、搭建WeNet环境
这里由于要尝试使用onnx推理模型,因此使用WSL + ubuntu作为解决方案
WSL + Docker Desktop 的使用教程参考 WSL Ubuntu + Docker Desktop搭建python环境
在完成好WSL和Docker Desktop安装之后,WeNet环境配置步骤如下:
实例化anaconda容器
docker run -it --name="anaconda" -p 8888:8888 continuumio/anaconda3 /bin/bash如果退出了,可以重启anaconda容器
#重启 docker start anaconda docker exec -it anaconda /bin/bash在base环境下配置wenet环境(不要创建虚拟环境,方便之后打包成镜像,供pycharm使用)
将WSL中的wenet项目拷贝到docker容器中(假设在WSL的
/home/usr下有wenet项目)docker cp /home/usr/wenet/requirements.txt 9cf7b3c196f3:/home/ #9cf7b3c196f3为anaconda容器id进入anaconda容器内,在
/home/使用pip安装所有包(conda源修改参考 ubuntu更换conda源 )pip install -r requirements.txt -i https://pypi.tuna.tsinghua.edu.cn/simple conda install pytorch=1.10.0 torchvision torchaudio=0.10.0 cudatoolkit=11.1 -c pytorch -c conda-forge下载ctc_encoder项目(让conformer进行语音识别时能够使用beam_search方法)
ctc_encoder官网如下:https://github.com/Slyne/ctc_decoder.
由于
github clone在ubuntu中可能不好使,所以在windows中进入swig/setup.sh:#!/usr/bin/env bash if [ ! -d kenlm ]; then git clone https://github.com/kpu/kenlm.git echo -e "\n" fi if [ ! -d openfst-1.6.3 ]; then echo "Download and extract openfst ..." wget http://www.openfst.org/twiki/pub/FST/FstDownload/openfst-1.6.3.tar.gz --no-check-certificate tar -xzvf openfst-1.6.3.tar.gz echo -e "\n" fi if [ ! -d ThreadPool ]; then git clone https://github.com/progschj/ThreadPool.git echo -e "\n" fi echo "Install decoders ..." # python3 setup.py install --num_processes 10 python3 setup.py install --user --num_processes 10将必要的包安装好后(在
git bash中使用setup.sh中的命令,wget,swig直接安装exe即可),整体文件结构如下(多了这四个文件):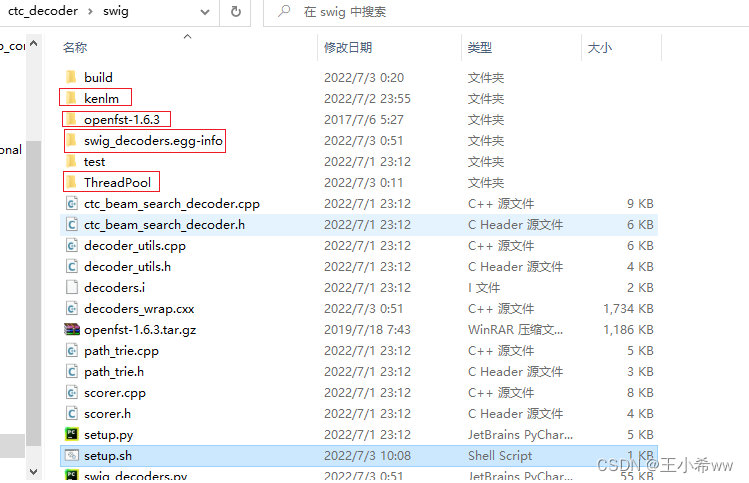
再把完整的ctc_encoder复制到anaconda容器中,直接进行编译即可。
编译ctc_encoder:
假设现在在anaconda容器中,ctc_encoder项目在
/home目录下,进入swig文件夹后,运行bash setup.sh即可完成编译(需要先apt install gcc,apt install g++)配置onnx,onnxruntime环境
pip install onnx==1.9.0 -i https://pypi.tuna.tsinghua.edu.cn/simple pip install onnxruntime==1.9.0 -i https://pypi.tuna.tsinghua.edu.cn/simple将Docker运行时容器打包成镜像
将anaconda容器运行时的环境打包成镜像,给pycharm专业版调用,参考Pycharm使用docker容器内的环境开发
#OPTIONS说明:
# -a :提交的镜像作者;
# -c :使用Dockerfile指令来创建镜像;
# -m :提交时的说明文字;
# -p :在commit时,将容器暂停。

#2b1ad7022d19为anaconda容器运行时的id
docker commit -a "wangxiaoxi" -m "wenet_env" 2b1ad7022d19  wenet_env:v1
2、模型训练
3、基于libTorch模型的推理
下载aishell2 sample数据集进行wenet模型的推理,官网如下:希尔贝壳
下载WeNet的预训练模型(下载Checkpoint model - conformer)
将测试数据集和预训练模型放在项目路径下,比如:
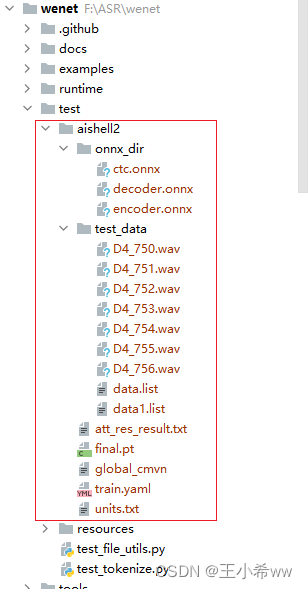
修改train.yaml中的cmvn_file的位置(如果使用docker容器中的python环境,建议使用相对路径)
cmvn_file: ../../test/aishell2/global_cmvn #这里使用相对路径
将aishell2数据集修改成wenet数据格式
{
    "key": "D4_753", "wav": "../../test/aishell2/test_data/D4_750.wav", "txt": ""}
{
    "key": "D4_754", "wav": "../../test/aishell2/test_data/D4_751.wav", "txt": ""}
{
    "key": "D4_755", "wav": "../../test/aishell2/test_data/D4_752.wav", "txt": ""}
{
    "key": "D4_753", "wav": "../../test/aishell2/test_data/D4_753.wav", "txt": ""}
{
    "key": "D4_754", "wav": "../../test/aishell2/test_data/D4_754.wav", "txt": ""}
{
    "key": "D4_755", "wav": "../../test/aishell2/test_data/D4_755.wav", "txt": ""}
{
    "key": "D4_756", "wav": "../../test/aishell2/test_data/D4_756.wav", "txt": ""}
使用wenet/bin/recognize.py,输入如下命令
python recognize
--config=../../test/aishell2/train.yaml \
--dict=../../test/aishell2/units.txt \
--checkpoint=../../test/aishell2/final.pt \
--result_file=../../test/aishell2/att_res_result.txt \
--test_data=../../test/aishell2/test_data/data.list \
输出结果如下:
Namespace(batch_size=16, beam_size=10, bpe_model=None, checkpoint='../../test/aishell2/final.pt', config='../../test/aishell2/train.yaml', connect_symbol='', ctc_weight=0.0, data_type='raw', decoding_chunk_size=-1, dict='../../test/aishell2/units.txt', gpu=-1, mode='attention', non_lang_syms=None, num_decoding_left_chunks=-1, override_config=[], penalty=0.0, result_file='../../test/aishell2/att_res_result.txt', reverse_weight=0.0, simulate_streaming=False, test_data='../../test/aishell2/test_data/data1.list')
2022-07-04 15:54:22,441 INFO Checkpoint: loading from checkpoint ../../test/aishell2/final.pt for CPU
F:\ASR\wenet\wenet\transformer\asr_model.py:266: UserWarning: __floordiv__ is deprecated, and its behavior will change in a future version of pytorch. It currently rounds toward 0 (like the 'trunc' function NOT 'floor'). This results in incorrect rounding for negative values. To keep the current behavior, use torch.div(a, b, rounding_mode='trunc'), or for actual floor division, use torch.div(a, b, rounding_mode='floor').
  best_hyps_index = best_k_index // beam_size
2022-07-04 15:54:27,189 INFO D4_753 中国人民保险集团股份有限公司闽宁营销服务部
2022-07-04 15:54:27,189 INFO D4_755 中国电信闽宁镇合作营业厅
2022-07-04 15:54:27,189 INFO D4_754 闽宁镇卫生院
2022-07-04 15:54:27,189 INFO D4_756 闽宁镇客运站
2022-07-04 15:54:27,189 INFO D4_753 第六十一集
2022-07-04 15:54:27,189 INFO D4_755 第六十三集
2022-07-04 15:54:27,189 INFO D4_754 第六十二集
4、WeNet导出onnx模型
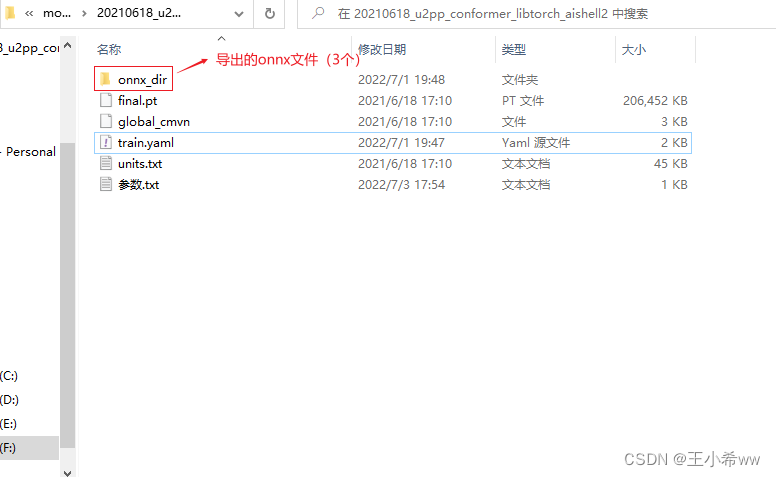
这里先下载WeNet的预训练模型(下载Checkpoint model - conformer),接着使用wenet/bin/export_onnx_cpu.py, 设置如下参数,即可将libtorch的pt文件转换成onnx文件
python export_onnx_cpu.py
 --config F:/ASR/model/20210618_u2pp_conformer_libtorch_aishell2/train.yaml \
 --checkpoint F:/ASR/model/20210618_u2pp_conformer_libtorch_aishell2/final.pt \
 --chunk_size 16 \
 --output_dir F:/ASR/model/20210618_u2pp_conformer_libtorch_aishell2/onnx_dir \
 --num_decoding_left_chunks -1
如果onnx导出成功,会在输出文件夹中生成如下3个文件:encoder.onnx,ctc.onnx, decoder.onnx。
5、使用recognize_onnx进行推理(未解决)
参考 https://github.com/wenet-e2e/wenet/pull/761.
先下载conformer模型的权重文件(checkpoint model),https://wenet.org.cn/wenet/pretrained_models.html
解压好权重文件之后,文件夹目录如下
修改train.yaml中的cmvn_file的位置
#cmvn_file: F:/ASR/model/20210618_u2pp_conformer_libtorch_aishell2/global_cmvn
cmvn_file: ../../test/aishell2/global_cmvn     #这里使用相对路径
转换成wenet的json数据格式:假设现在有音频文件D4_750.wav,通过格式转换成如下json格式, 参考https://wenet.org.cn/wenet/tutorial_librispeech.html?highlight=test_data#stage-0-prepare-training-data
{
    "key": "D4_753", "wav": "../../test/aishell2/test_data/D4_750.wav", "txt": "而对楼市成交抑制作用最大的限购"}
接着运行:
python3 wenet/bin/recognize_onnx.py --config=20210618_u2pp_conformer_exp/train.yaml --test_data=raw_wav/test/data.list --gpu=0 --dict=20210618_u2pp_conformer_exp/words.txt --mode=attention_rescoring --reverse_weight=0.4 --ctc_weight=0.1 --result_file=./att_res_result.txt --encoder_onnx=onnx_model/encoder.onnx --decoder_onnx=onnx_model/decoder.onnx
注意这里最好使用相对路径,因为使用的是docker里的python环境,如果在读取文件时使用windows下的绝对路径,会导致如下错误。解决思路参考https://github.com/microsoft/onnxruntime/issues/8735(反正我解决不了)
{
    FileNotFoundError}[Errno 2] No such file or directory: 'F:/ASR/model/20210618_u2pp_conformer_libtorch_aishell2/train.yaml'
这里使用export_onnx_cpu导出的onnx模型,使用recognize_onnx进行推理
encoder_ort_session=onnxruntime.InferenceSession(encoder_outpath, providers=['CPUExecutionProvider']);
ort_inputs = {

    encoder_ort_session.get_inputs()[0].name: feats.astype('float32'),
    encoder_ort_session.get_inputs()[1].name: feats_lengths.astype('int64'),
    encoder_ort_session.get_inputs()[2].name: np.zeros((12,4,0,128)).astype('float32'),
    encoder_ort_session.get_inputs()[3].name: np.zeros((12,1,256,7)).astype('float32')
}
encoder_ort_session.run(None, ort_inputs)
会抛出错误
{
    Fail}[ONNXRuntimeError] : 1 : FAIL : Non-zero status code returned while running Slice node. Name:'Slice_49' Status Message: slice.cc:153 FillVectorsFromInput Starts must be a 1-D array
应该是cuda和onnxruntime版本不一致导致的,参考 OnnxRunTime遇到FAIL : Non-zero status code returned while running BatchNormalization node.
后来发现recognize_onnx是对export_onnx_gpu.py导出的模型进行推理,而不是export_onnx_cpu.py。要使用export_onnx_gpu.py还得 安装nividia_docker和onnxruntime_gpu,否则会报错:
/opt/conda/lib/python3.9/site-packages/onnxruntime/capi/onnxruntime_inference_collection.py:53: UserWarning: Specified provider 'CUDAExecutionProvider' is not in available provider names.Available providers: 'CPUExecutionProvider'
  warnings.warn("Specified provider '{}' is not in available provider names."
Traceback (most recent call last):
  File "/opt/project/wenet/bin/export_onnx_gpu.py", line 574, in <module>
    onnx_config = export_enc_func(model, configs, args, logger, encoder_onnx_path)
  File "/opt/project/wenet/bin/export_onnx_gpu.py", line 334, in export_offline_encoder
    test(to_numpy([o0, o1, o2, o3, o4]), ort_outs)
NameError: name 'test' is not defined
这里就不费这个力了,等wenet项目完善吧。
边栏推荐
- Looking back on 2021, looking forward to 2022 | a year between CSDN and me
- Study notes 7
- The development of mobile IM based on TCP still needs to keep the heartbeat alive
- This is an age of uncertainty
- 机器学习 --- 神经网络
- Machine learning decision tree
- 函数(基本:参数,返回值)
- Hexadecimal to decimal
- Mixed compilation of C and CC
- Seven join join queries of MySQL
猜你喜欢

mysql的七种join连接查询
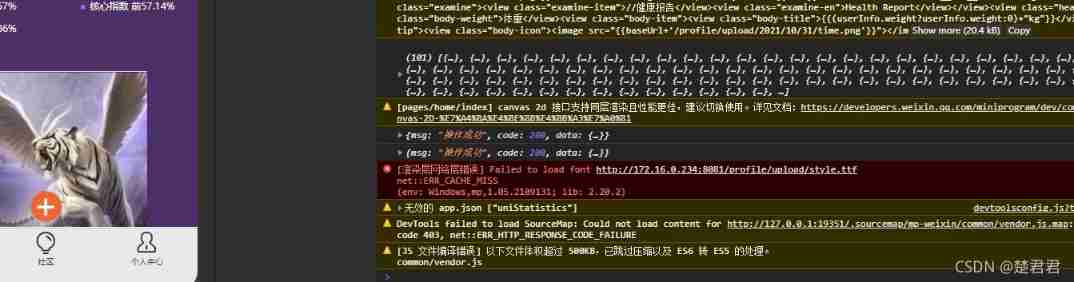
How does the applet solve the rendering layer network layer error?
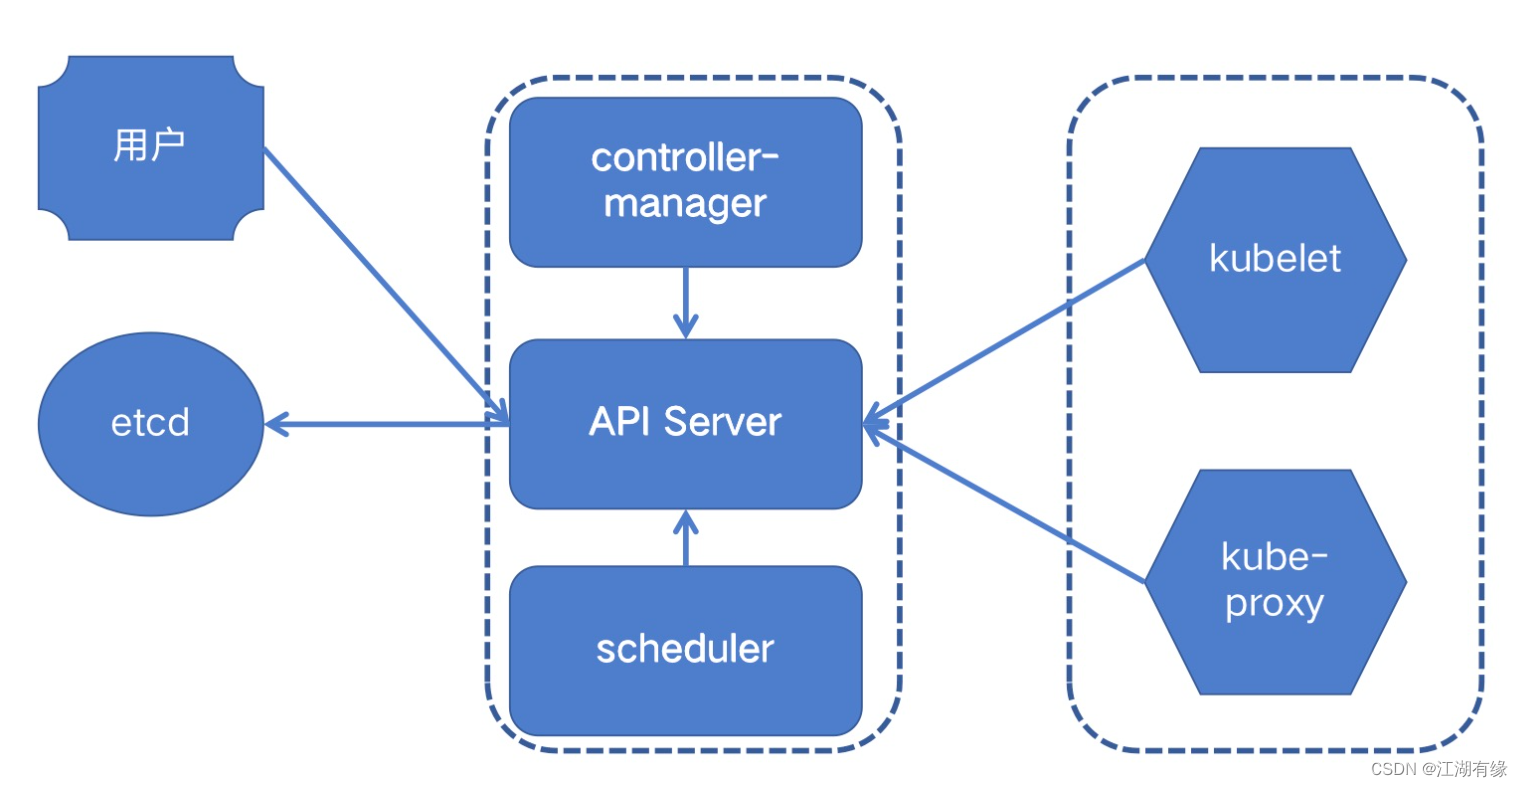
Scheduling system of kubernetes cluster
![[popular science] basic knowledge of thermal design: heat dissipation analysis of 5g optical devices](/img/45/380e739f5eed33626c363756f814d3.png)
[popular science] basic knowledge of thermal design: heat dissipation analysis of 5g optical devices
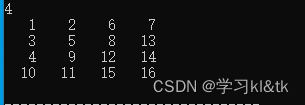
蛇形矩阵
How to realize real-time audio and video chat function
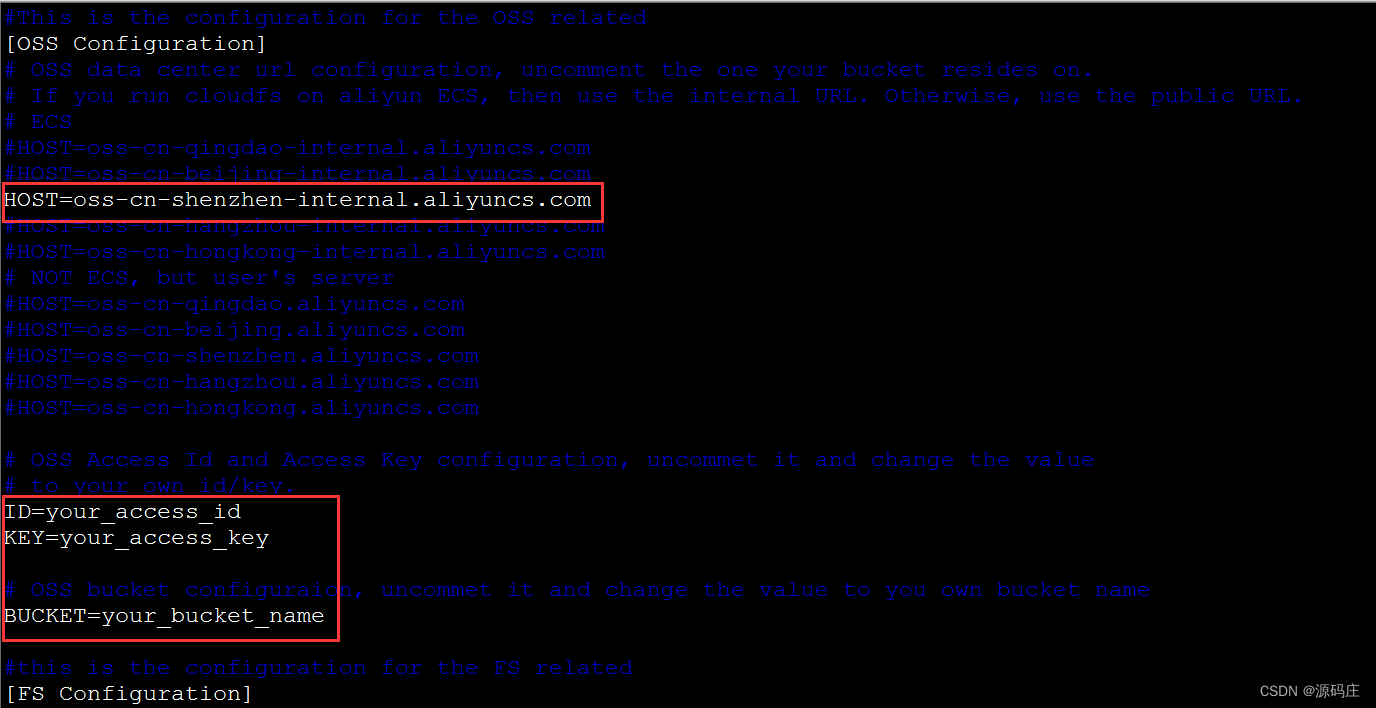
Alibaba cloud ECS uses cloudfs4oss to mount OSS

Learning notes 8
Rome chain analysis
【虚幻引擎UE】实现UE5像素流部署仅需六步操作少走弯路!(4.26和4.27原理类似)
随机推荐
电源管理总线 (PMBus)
技术教程:如何利用EasyDSS将直播流推到七牛云?
Introduction to RT thread kernel (4) -- clock management
Threejs Internet of things, 3D visualization of farm (III) model display, track controller setting, model moving along the route, model adding frame, custom style display label, click the model to obt
Bit operation skills
Differences among 10 addressing modes
Common features of ES6
Sequelize. JS and hasmany - belongsto vs hasmany in serialize js
Sequence diagram of single sign on Certification Center
User behavior collection platform
MySQL: view with subquery in the from clause limit
Kwai, Tiktok, video number, battle content payment
【虚幻引擎UE】打包报错出现!FindPin错误的解决办法
NetSetMan pro (IP fast switching tool) official Chinese version v5.1.0 | computer IP switching software download
A应用唤醒B应该快速方法
Fuel consumption calculator
函數(易錯)
长度为n的入栈顺序的可能出栈顺序种数
Function (basic: parameter, return value)
【虚幻引擎UE】实现背景模糊下近景旋转操作物体的方法及踩坑记录