当前位置:网站首页>Deep learning environment configuration jupyter notebook
Deep learning environment configuration jupyter notebook
2022-07-07 00:41:00 【Peng Xiang】
today , Bo mainly systematically studies the relevant contents of in-depth learning , Record your learning process here , Make progress with everyone .
Content introduction
- Fundamentals of deep learning : Linear neural networks . Multilayer perceptron
- Convolutional neural networks :LeNet , AlexNet , VGG , Inception , ResNet
- Cyclic neural network :RNN , GRU , LSTM , seq2seq
- Attention mechanism : Attention , Transformer
- optimization algorithm : SGD , Adam , Momentum
- High performance computing : parallel , many GPU , Distributed
- Computer vision : object detection , Semantic segmentation
- Computer language processing : Word embedding ,BERT
Deep learning is a very “ Fantasy ” The process of , The reason why the model he generates is excellent or how it works is sometimes incomprehensible to us humans , Don't get too tangled here .
The first is the configuration of the environment , Bloggers have already installed PyCharm and Anaconda And configure the relevant environment , Therefore, only a common package is installed here d2l
For related installation tutorials, you can read my previous blog :
Anaconda Installation and PyCharm To configure 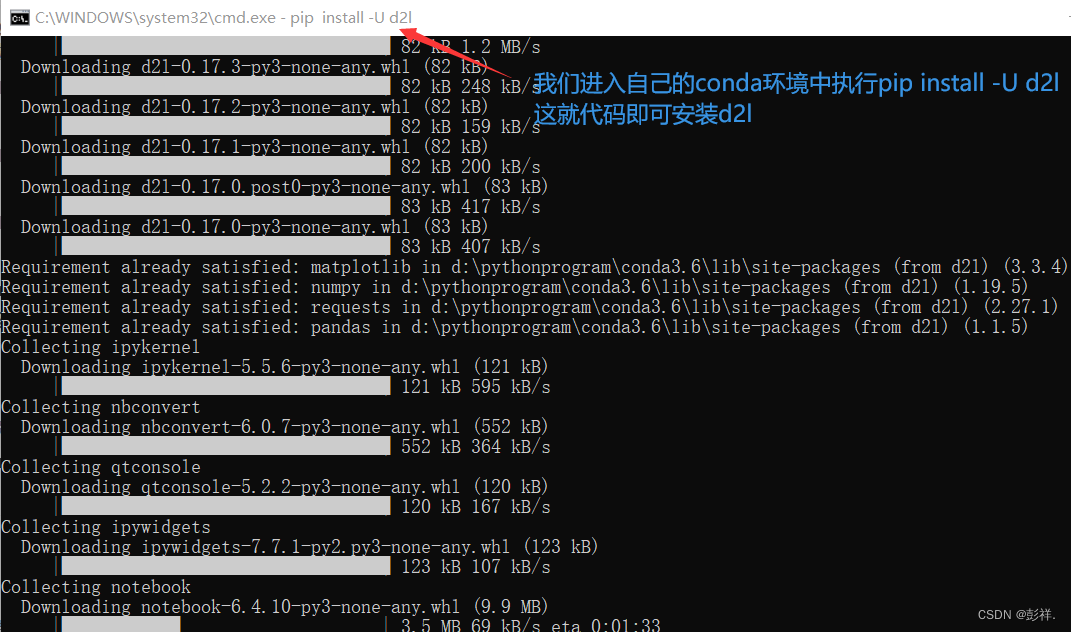
This process may take a few minutes , Because there are many packages to install
After installation , Let's start learning
jupyter notebook Use
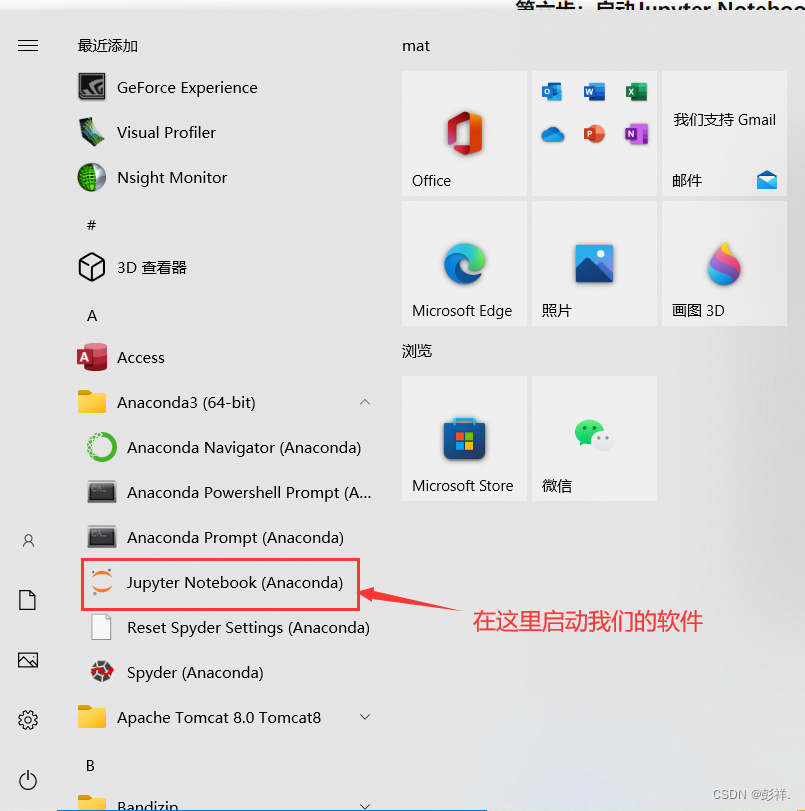
What we use here is jupyter notebook, After we installed Anaconda Generally, it will be installed for us by default .
Input... At the terminal jupyter notebook --generate-config enter , The location of the configuration document is shown below .
We can modify its default installation path , It's convenient for us to use 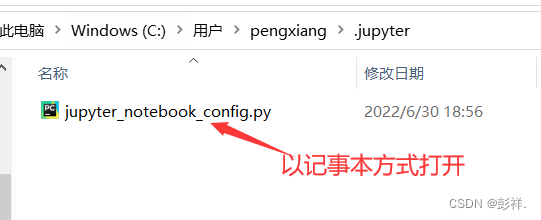
Look in Notepad (Ctrl+F)NotebookApp.notebook_dir The position of , Change the folder in the back to your favorite folder location .

Open it in the browser 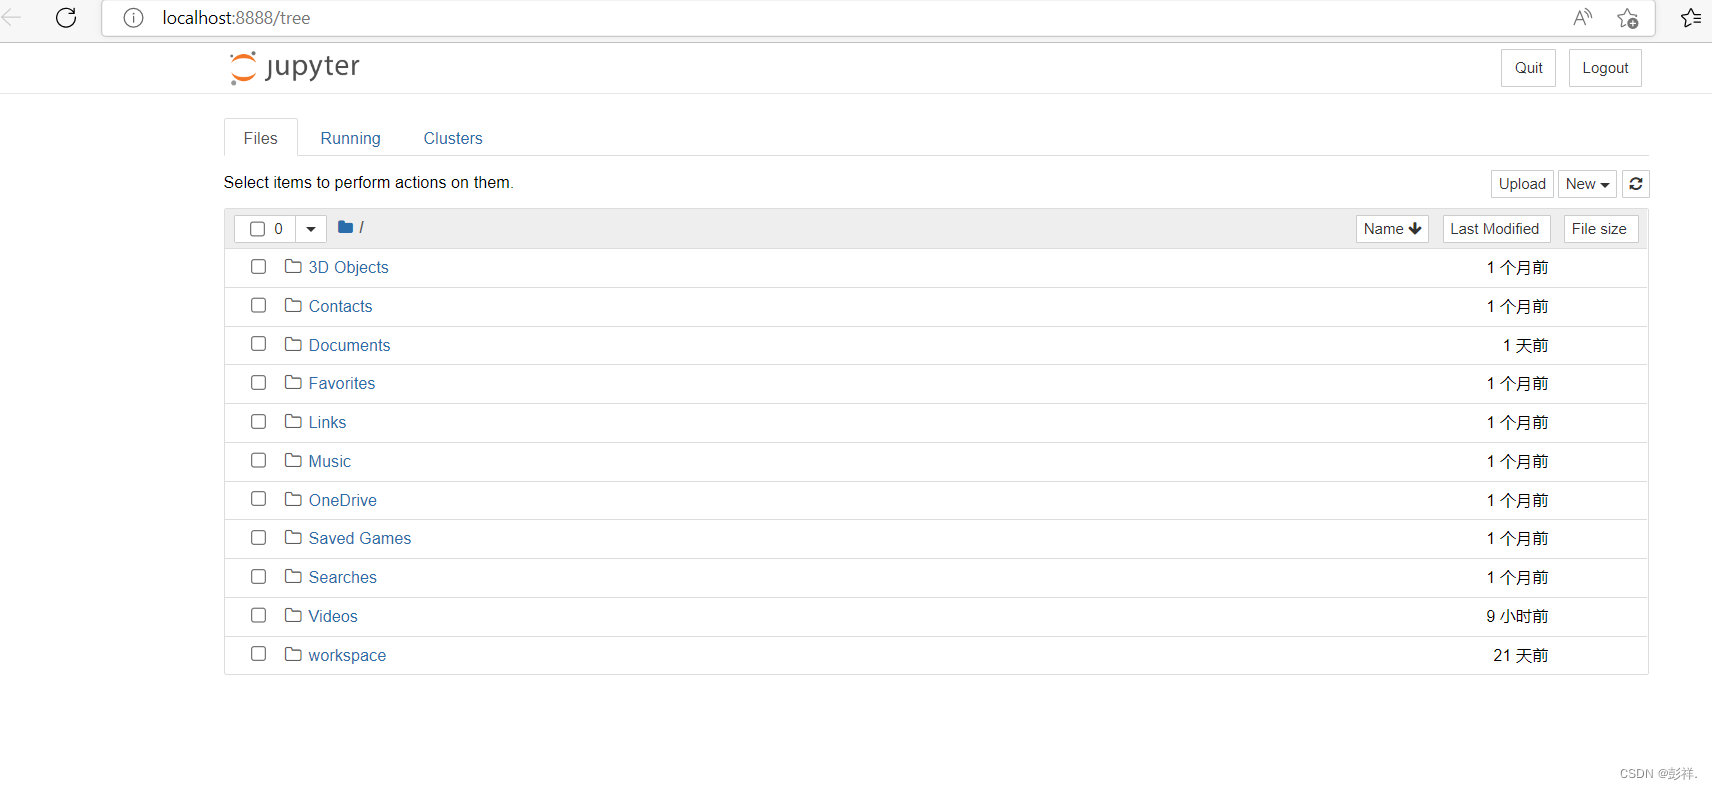
Run a code and find no corresponding package , It turns out that the default is Anaconda Of base, In this environment, we have not installed the corresponding environment before , Then we need to switch our environment , Or we want to use it in a different environment jupyter notebook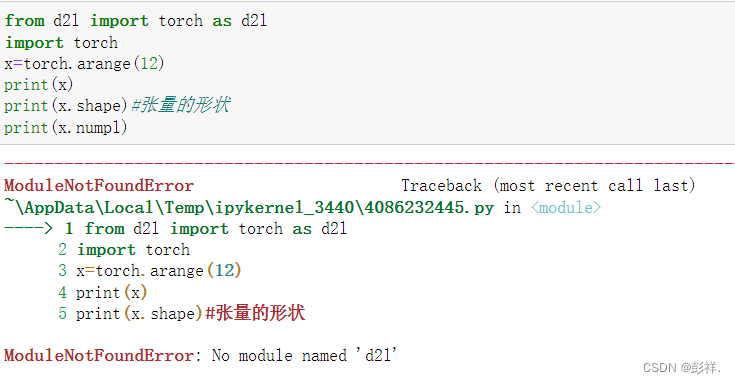
Single environment creation
The specific way is as follows :
conda create -n my-conda-env # Create a virtual environment
conda activate my-conda-env # Activate our virtual environment
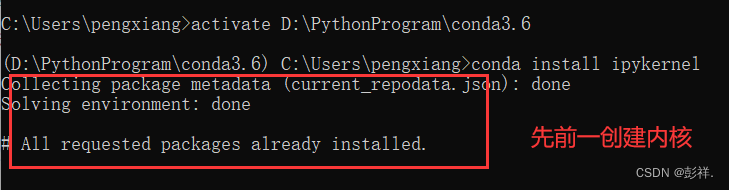
conda install ipykernel # install python kernel
ipython kernel install --user --name=my-conda-env-kernel # python -m ipykernel install --user --name Name of the environment --display-name " stay jupyter The name of the environment shown in "
jupyter notebook # Start operation
conda install ipykernel
ipython kernel install --user --name=my-conda-env-kernel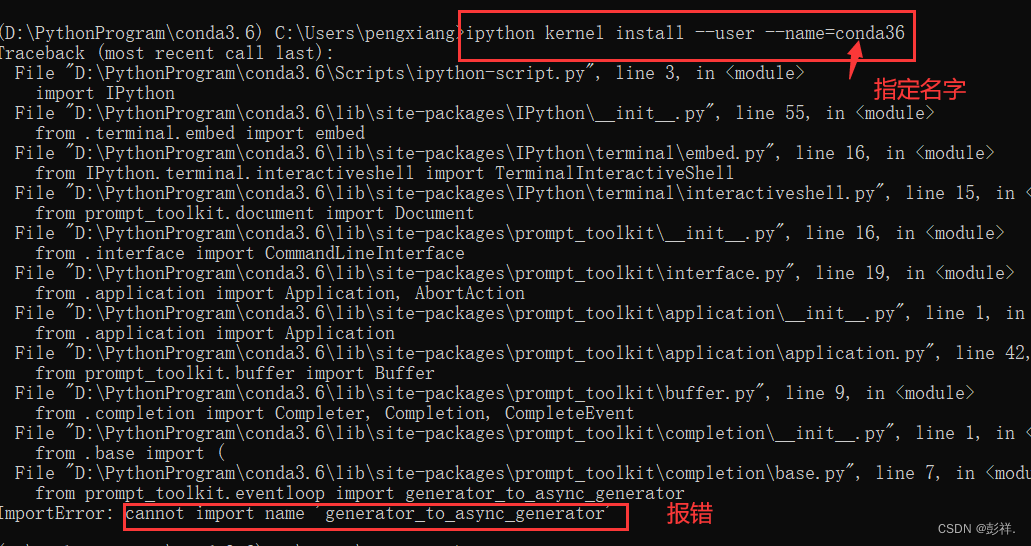
BUG explain :
ImportError: cannot import name 'generator_to_async_generator'
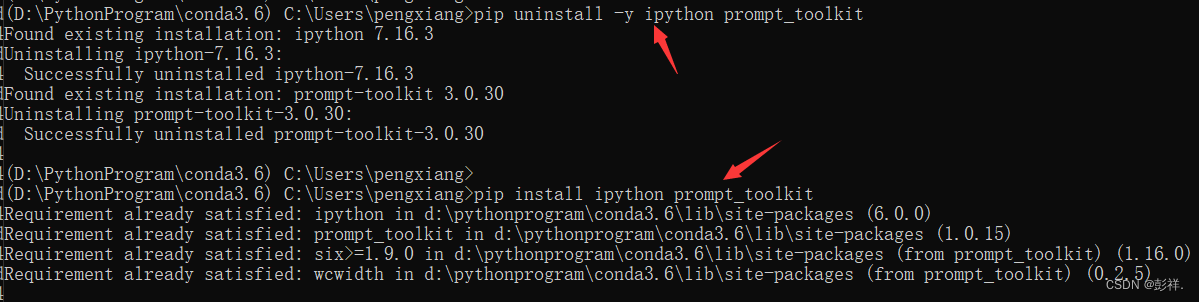
BUG solve :
pip uninstall -y ipython prompt_toolkit
pip install ipython prompt_toolkit
Re install 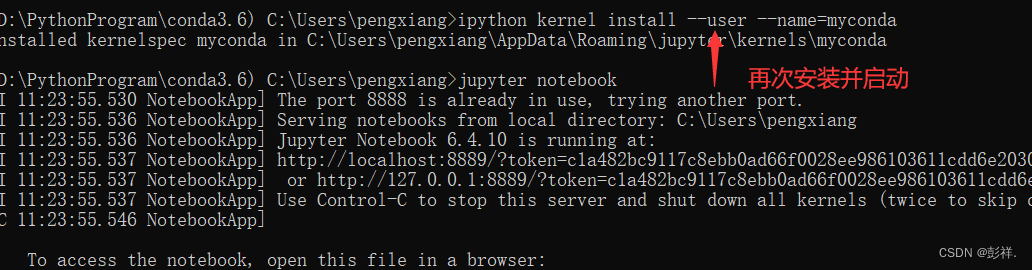

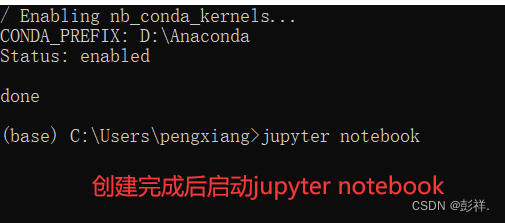
Create for all environments
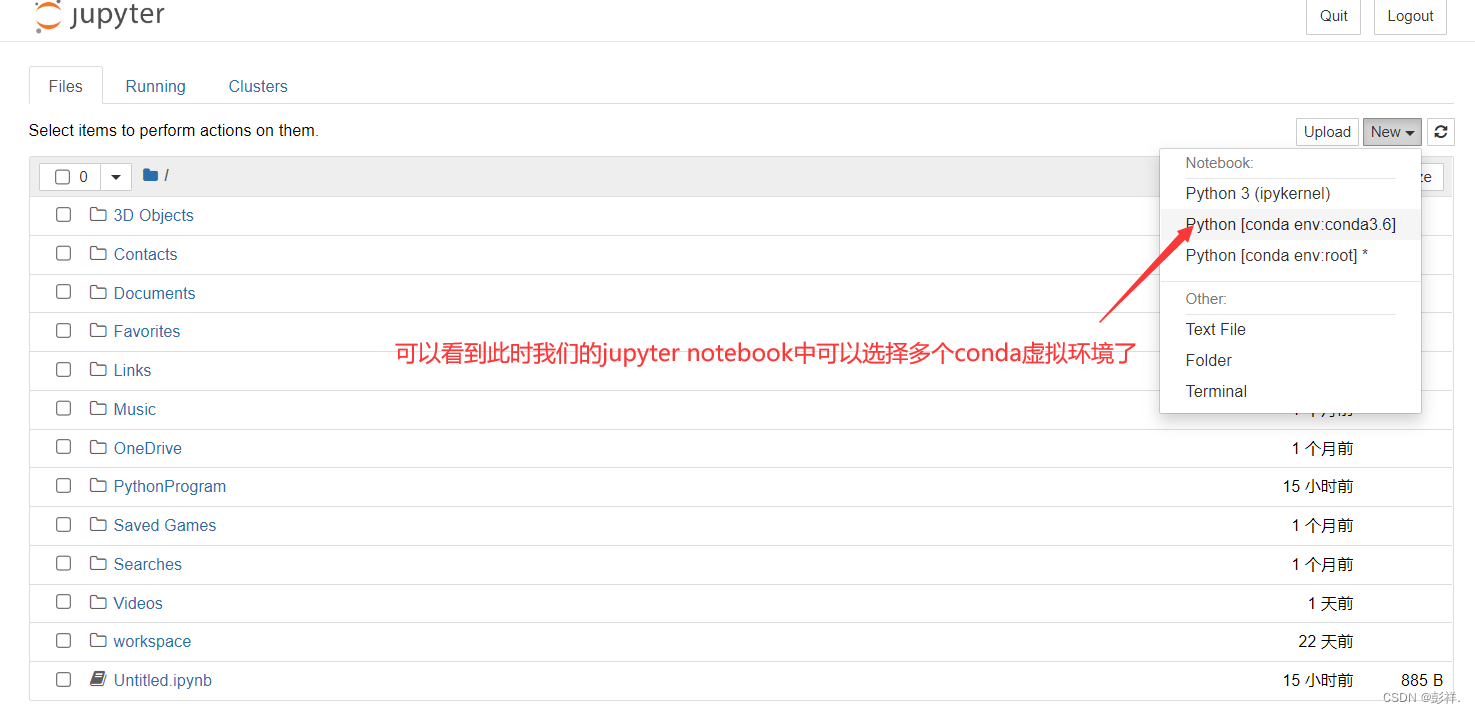
Of course, the above method can only be one conda The environment create , We use conda install nb_conda_kernels For all conda The environment create jupyter, Thus, there are many choices .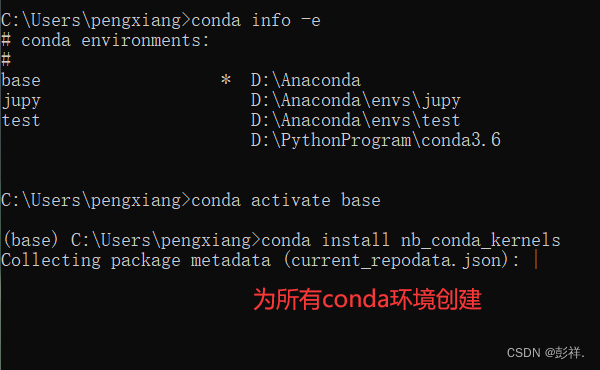
Install code prompt function
At this time, it cannot prompt code after installation , We just need to perform the following steps
1、 Start menu running Anaconda Prompt (Anaconda3), Enter commands one by one
pip install jupyter_contrib_nbextensions

jupyter contrib nbextension install

pip install jupyter_nbextensions_configurator

jupyter nbextensions_configurator enable
2、 Open again notebook, The successful implementation will be in http://localhost:8888/tree It appears that Nbextensions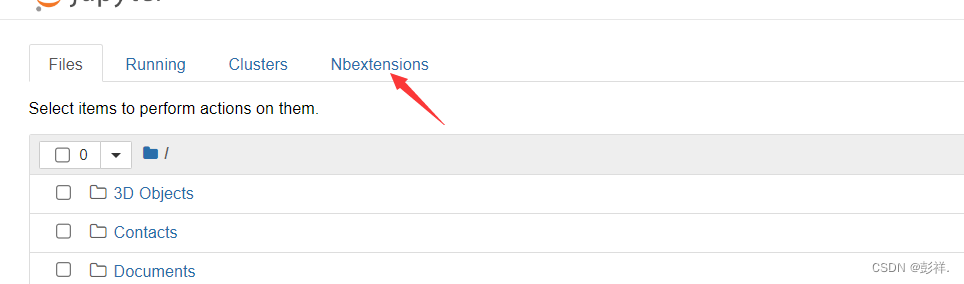
Check Hinterland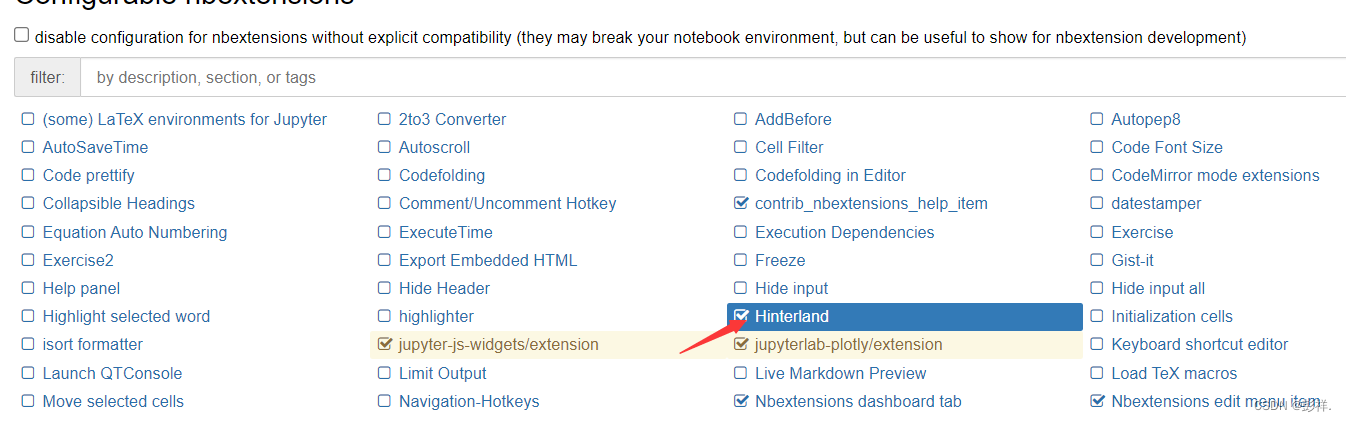
Open one again python You can see the code prompt in the file 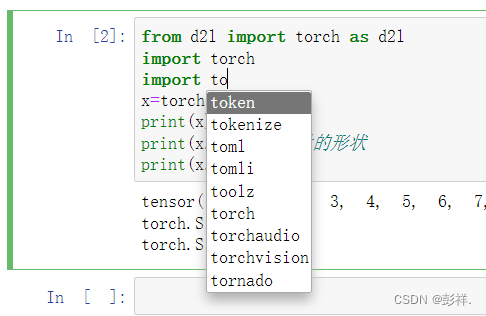
This completes our environment configuration
边栏推荐
- Advanced learning of MySQL -- basics -- transactions
- Article management system based on SSM framework
- ldap创建公司组织、人员
- Uniapp uploads and displays avatars locally, and converts avatars into Base64 format and stores them in MySQL database
- Personal digestion of DDD
- @TableId can‘t more than one in Class: “com.example.CloseContactSearcher.entity.Activity“.
- Google, Baidu and Yahoo are general search engines developed by Chinese companies_ Baidu search engine URL
- Three application characteristics of immersive projection in offline display
- Are you ready to automate continuous deployment in ci/cd?
- Matlab learning notes
猜你喜欢

On February 19, 2021ccf award ceremony will be held, "why in Hengdian?"
Idea automatically imports and deletes package settings
uniapp实现从本地上传头像并显示,同时将头像转化为base64格式存储在mysql数据库中
学习使用代码生成美观的接口文档!!!
What is a responsive object? How to create a responsive object?
alexnet实验偶遇:loss nan, train acc 0.100, test acc 0.100情况

Liuyongxin report | microbiome data analysis and science communication (7:30 p.m.)
ldap创建公司组织、人员
Imeta | Chen Chengjie / Xia Rui of South China Agricultural University released a simple method of constructing Circos map by tbtools
【vulnhub】presidential1
随机推荐
kubernetes部署ldap
互动滑轨屏演示能为企业展厅带来什么
Idea automatically imports and deletes package settings
Three application characteristics of immersive projection in offline display
Interesting wine culture
St table
2022年PMP项目管理考试敏捷知识点(9)
Hero League | King | cross the line of fire BGM AI score competition sharing
沉浸式投影在线下展示中的三大应用特点
Advanced learning of MySQL -- basics -- multi table query -- joint query
Encryption algorithm - password security
Stm32f407 ------- DAC digital to analog conversion
Advanced learning of MySQL -- basics -- multi table query -- external connection
集合(泛型 & List & Set & 自定义排序)
C language input / output stream and file operation [II]
Lombok makes ⽤ @data and @builder's pit at the same time. Are you hit?
Data operation platform - data collection [easy to understand]
Advanced learning of MySQL -- basics -- multi table query -- self join
Business process testing based on functional testing
Uniapp uploads and displays avatars locally, and converts avatars into Base64 format and stores them in MySQL database