当前位置:网站首页>Web APIs DOM节点
Web APIs DOM节点
2022-07-05 05:12:00 【黑马程序员官方】
前期更新笔记内容: Web API 基本认知 / 获取DOM元素 / 设置/修改DOM元素内容和元素属性 / 定时器-间歇函数 / 事件基础 / 高阶函数 / 环境对象 / 综合案例-Tab栏切换
一、DOM节点
DOM树里每一个内容都称之为节点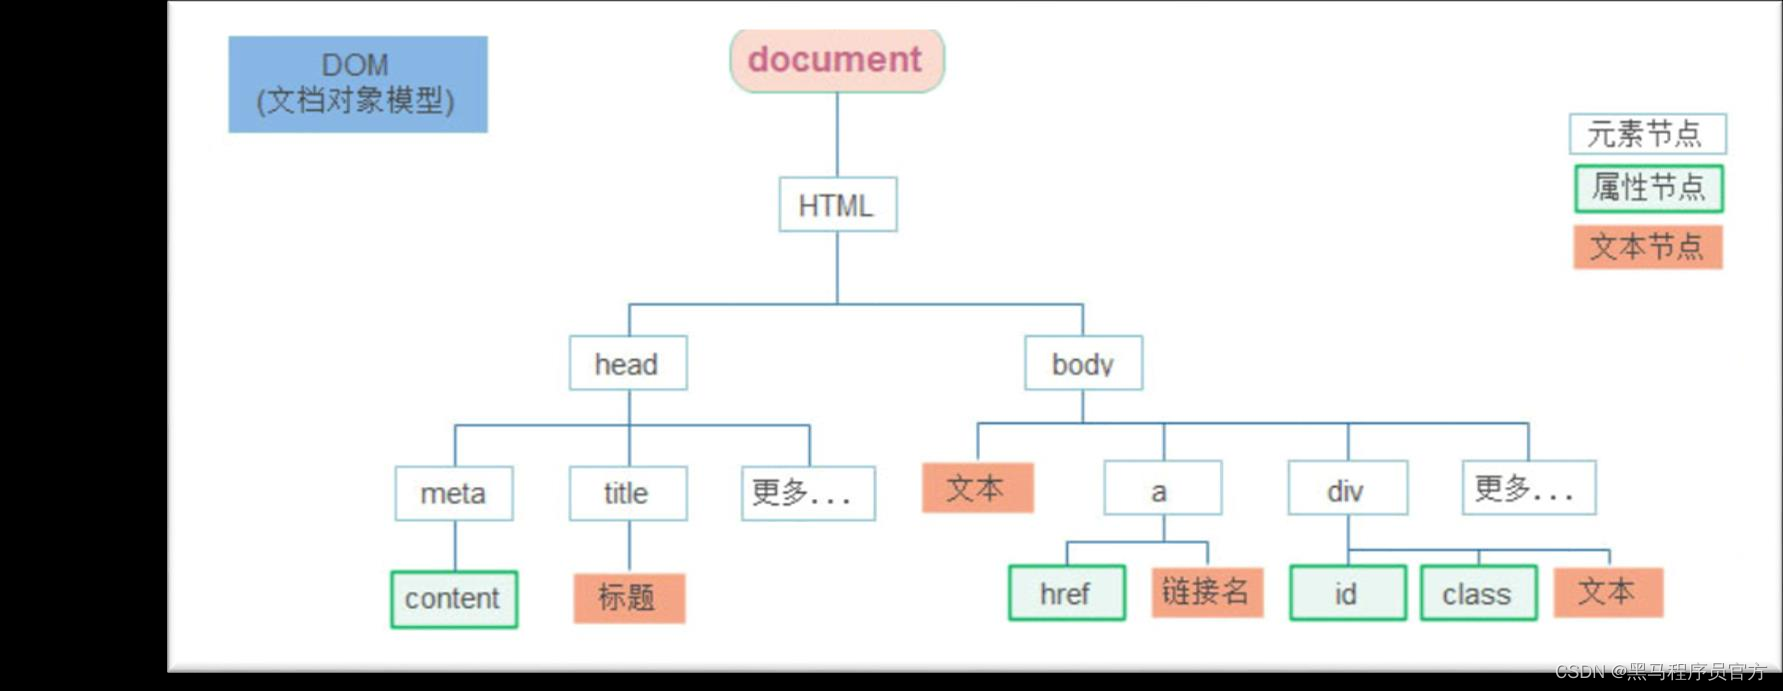
1.1 节点类型
- 元素节点(重点记元素节点 可以更好的让我们理清标签元素之间的关系)
所有的标签 比如 body、 div
html 是根节点
- 属性节点
所有的属性 比如 href
- 文本节点
所有的文本
- 其他
1.2 查找节点
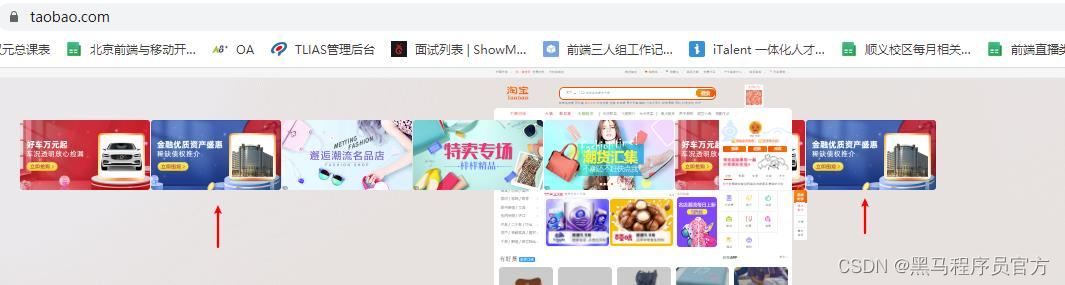
关闭二维码案例:
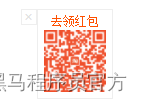
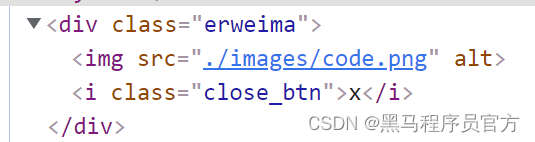
点击关闭按钮, 关闭的是二维码的盒子, 还要获取erweima盒子
思考:
- 关闭按钮 和 erweima 是什么关系呢?
- 父子关系
- 所以,我们完全可以这样做:
- 点击关闭按钮, 直接关闭它的爸爸,就无需获取erweima元素了
1.2.1 节点关系:
- 父节点
- 子节点
- 兄弟节点
1.2.2 父节点查找:
- parentNode 属性
- 返回最近一级的父节点 找不到返回为null

代码:
<!DOCTYPE html>
<html lang="en">

<head>
    <meta charset="UTF-8">
    <meta http-equiv="X-UA-Compatible" content="IE=edge">
    <meta name="viewport" content="width=device-width, initial-scale=1.0">
    <title>Document</title>
</head>

<body>
    <div class="father">
        <div class="son">儿子</div>
    </div>
    <script>
        let son = document.querySelector('.son')
        // 找爸爸
        // console.log(son.parentNode)
        son.parentNode.style.display = 'none'
    </script>
</body>

</html>
1.2.3 关闭二维码案例

代码:
<!DOCTYPE html>
<html lang="en">

<head>
  <meta charset="UTF-8" />
  <meta name="viewport" content="width=device-width, initial-scale=1.0" />
  <title>Document</title>
  <style>
    .erweima {
      width: 149px;
      height: 152px;
      border: 1px solid #000;
      background: url(./images/456.png) no-repeat;
      position: relative;
    }

    .close {
      position: absolute;
      right: -52px;
      top: -1px;
      width: 50px;
      height: 50px;
      background: url(./images/bgs.png) no-repeat -159px -102px;
      cursor: pointer;
      border: 1px solid #000;

    }
  </style>
</head>

<body>
  <div class="erweima">
    <span class="close"></span>
  </div>
  <div class="erweima">
    <span class="close"></span>
  </div>
  <div class="erweima">
    <span class="close"></span>
  </div>
  <div class="erweima">
    <span class="close"></span>
  </div>
  <div class="erweima">
    <span class="close"></span>
  </div>

  <script>
    // 1. 获取元素  关闭按钮
    let close_btn = document.querySelectorAll('.close')
    // 2. 绑定多个点击事件给close
    for (let i = 0; i < close_btn.length; i++) {
      close_btn[i].addEventListener('click', function () {
        // 3. 关闭当前的那个二维码  点击谁,就关闭谁的爸爸
        this.parentNode.style.visibility = 'hidden'
      })
    }
  </script>
</body>

</html>
1.2.4 子节点查找:
childNodes : 获得所有子节点、包括文本节点(空格、换行)、注释节点等
children (重点)
- 仅获得所有元素节点
- 返回的还是一个伪数组

代码:
<!DOCTYPE html>
<html lang="en">

<head>
    <meta charset="UTF-8">
    <meta http-equiv="X-UA-Compatible" content="IE=edge">
    <meta name="viewport" content="width=device-width, initial-scale=1.0">
    <title>Document</title>
</head>

<body>
    <button>点击</button>
    <ul>
        <li>我是孩纸</li>
        <li>我是孩纸</li>
        <li>我是孩纸</li>
        <li>我是孩纸</li>
        <li>我是孩纸</li>
        <li>我是孩纸</li>
    </ul>
    <script>
        let btn = document.querySelector('button')
        let ul = document.querySelector('ul')
        btn.addEventListener('click', function () {
            // console.log(ul.children)
            for (let i = 0; i < ul.children.length; i++) {
                ul.children[i].style.color = 'red'
            }
        })
        ul.children[0].style.color = 'green'
        // console.log(ul.childNodes)
    </script>
</body>

</html>
1.2.5 兄弟关系查找:
1. 下一个兄弟节点
* nextElementSibling 属性
2. 上一个兄弟节点
* previousElementSibling 属性
代码:
<!DOCTYPE html>
<html lang="en">
<head>
<meta charset="UTF-8">
<meta http-equiv="X-UA-Compatible" content="IE=edge">
<meta name="viewport" content="width=device-width, initial-scale=1.0">
<title>Document</title>
</head>
<body>
<button>点击</button>
<ul>
<li>第1个</li>
<li class="two">第2个</li>
<li>第3个</li>
<li>第4个</li>
</ul>
<script>
let btn = document.querySelector('button')
let two = document.querySelector('.two')
btn.addEventListener('click', function () {
// two.style.color = 'red'
two.nextElementSibling.style.color = 'red'
two.previousElementSibling.style.color = 'red'
})
</script>
</body>
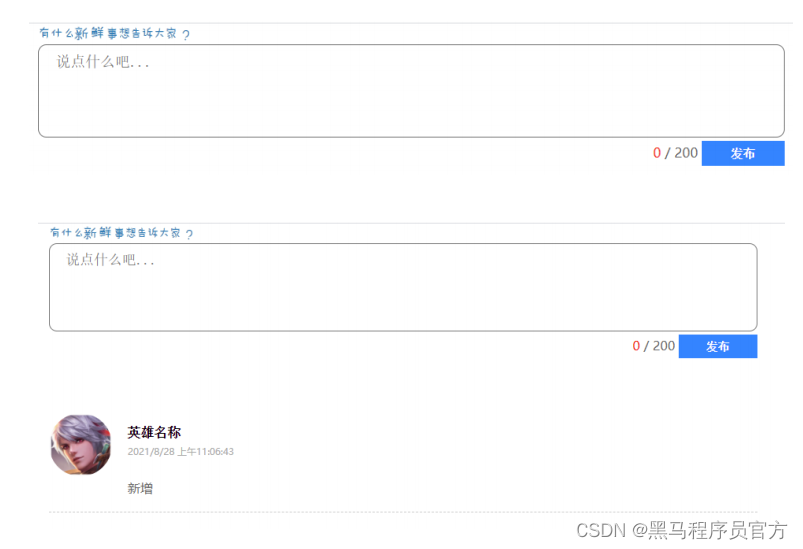
</html>1.3 增加节点
比如,点击发布按钮,可以新增一条信息
- 一般情况下,我们新增节点,按照如下操作:
- 创建一个新的节点
- 把创建的新的节点放入到指定的元素内部
 代码:
代码:
<!DOCTYPE html>
<html lang="en">

<head>
    <meta charset="UTF-8">
    <meta http-equiv="X-UA-Compatible" content="IE=edge">
    <meta name="viewport" content="width=device-width, initial-scale=1.0">
    <title>Document</title>
</head>

<body>
    <ul>
        <li>我是大毛</li>
        <li>我是二毛</li>
    </ul>
    <script>
        // 二毛   ul.children[1]
        // 1. 创建新的标签节点
        // let div = document.createElement('div')
        // div.className = 'current'
        let ul = document.querySelector('ul')
        let li = document.createElement('li')

        li.innerHTML = '我是xiao ming'
        // 2. 追加节点  父元素.appendChild(子元素) 后面追加
        // ul.appendChild(li)
        // 3. 追加节点  父元素.insertBefore(子元素, 放到那个元素的前面)
        ul.insertBefore(li, ul.children[0])
    </script>
</body>

</html>
1.3.1创建节点
- 即创造出一个新的网页元素,再添加到网页内,一般先创建节点,然后插入节点
- 创建元素节点方法:

1.3.2.追加节点
- 要想在界面看到,还得插入到某个父元素中
- 插入到父元素的最后一个子元素:

学成在线案例渲染 需求:按照数据渲染页面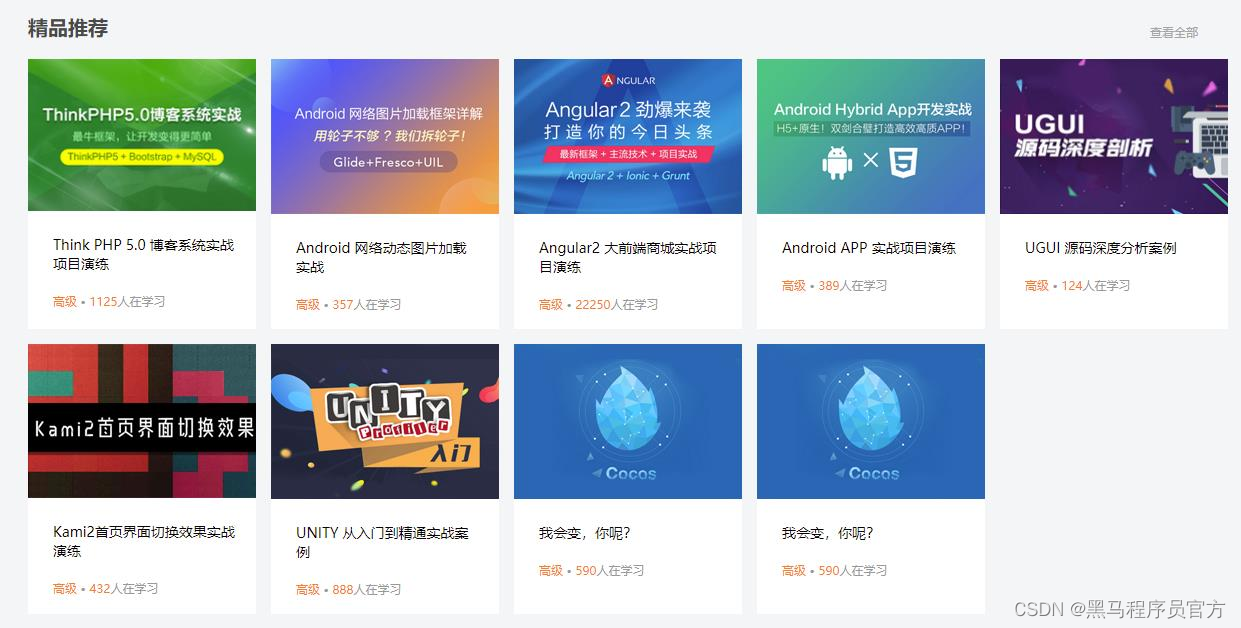
- 复制一个原有的节点
- 把复制的节点放入到指定的元素内部
index.html 代码:
<!DOCTYPE html>
<html lang="en">
<head>
<meta charset="UTF-8">
<meta name="viewport" content="width=device-width, initial-scale=1.0">
<meta http-equiv="X-UA-Compatible" content="ie=edge">
<title>学车在线首页</title>
<link rel="stylesheet" href="style.css">
</head>
<body>
<!-- 4. box核心内容区域开始 -->
<div class="box w">
<div class="box-hd">
<h3>精品推荐</h3>
<a href="#">查看全部</a>
</div>
<div class="box-bd">
<ul class="clearfix">
<!-- <li>
<img src="./images/course01.png" alt="">
<h4>
Think PHP 5.0 博客系统实战项目演练
</h4>
<div class="info">
<span>高级</span> • <span> 1125</span>人在学习
</div>
</li> -->
</ul>
</div>
</div>
<script>
let data = [
{
src: 'images/course01.png',
title: 'Think PHP 5.0 博客系统实战项目演练',
num: 1125
},
{
src: 'images/course02.png',
title: 'Android 网络动态图片加载实战',
num: 357
},
{
src: 'images/course03.png',
title: 'Angular2 大前端商城实战项目演练',
num: 22250
},
{
src: 'images/course04.png',
title: 'Android APP 实战项目演练',
num: 389
},
{
src: 'images/course05.png',
title: 'UGUI 源码深度分析案例',
num: 124
},
{
src: 'images/course06.png',
title: 'Kami2首页界面切换效果实战演练',
num: 432
},
{
src: 'images/course07.png',
title: 'UNITY 从入门到精通实战案例',
num: 888
},
{
src: 'images/course08.png',
title: '我会变,你呢?',
num: 590
},
{
src: 'images/course08.png',
title: '我会变,你呢?',
num: 590
}
]
let ul = document.querySelector('ul')
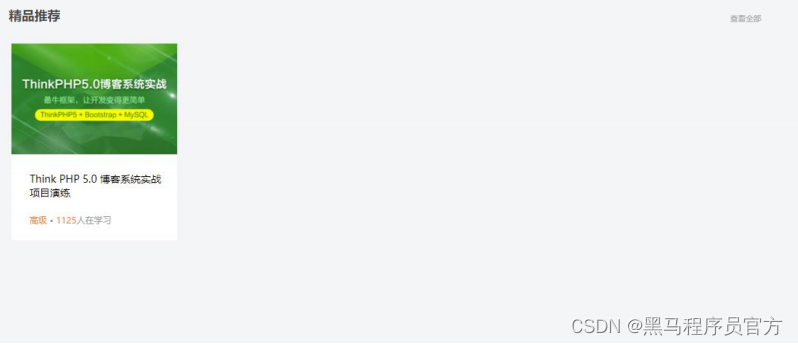
// 1. 根据数据的个数,决定这小li的个数
for (let i = 0; i < data.length; i++) {
// 2. 创建小li
let li = document.createElement('li')
// console.log(li)
// 4. 先准备好内容,再追加
li.innerHTML = `
<img src=${data[i].src} alt="">
<h4>
${data[i].title}
</h4>
<div class="info">
<span>高级</span> • <span> ${data[i].num}</span>人在学习
</div>
`
// 3. 追加给ul 父元素.appendChild(子元素)
ul.appendChild(li)
}
</script>
</body>
</html>css代码:
* {
    margin: 0;
    padding: 0;
}
.w {
    width: 1200px;
    margin: auto;
}
body {
    background-color: #f3f5f7;
}
li {
    list-style: none;
}
a {
    text-decoration: none;
}
.clearfix:before,.clearfix:after {
    content:"";
    display:table;
  }
  .clearfix:after {
    clear:both;
  }
  .clearfix {
     *zoom:1;
  }

.header {
    height: 42px;
    /* background-color: pink; */
    /* 注意此地方会层叠 w 里面的margin */
    margin: 30px auto;
}
.logo {
    float: left;
    width: 198px;
    height: 42px;
}
.nav {
    float: left;
    margin-left: 60px;
}
.nav ul li {
    float: left;
    margin: 0 15px;
}
.nav ul li a {
    display: block;
    height: 42px;
    padding: 0 10px;
    line-height: 42px;
    font-size: 18px;
    color: #050505;
}
.nav ul li a:hover {
    border-bottom: 2px solid #00a4ff;
    color: #00a4ff;
}
/* search搜索模块 */
.search {
    float: left;
    width: 412px;
    height: 42px;
    margin-left: 70px;
}
.search input {
    float: left;
    width: 345px;
    height: 40px;
    border: 1px solid #00a4ff;
    border-right: 0;
    color: #bfbfbf;
    font-size: 14px;
    padding-left: 15px;
}
.search button {
    float: left;
    width: 50px;
    height: 42px;
    /* 按钮button默认有个边框需要我们手动去掉 */
    border: 0;
    background: url(images/btn.png);
}
.user {
    float: right;
    line-height: 42px;
    margin-right: 30px;
    font-size: 14px;
    color: #666;
}
/* banner区域 */
.banner {
    height: 421px;
    background-color: #1c036c;
}
.banner .w {
    height: 421px;
    background: url(images/banner2.png) no-repeat top center;
}
.subnav {
    float: left;
    width: 190px;
    height: 421px;
    background: rgba(0,0,0, 0.3);
}
.subnav ul li {
    height: 45px;
    line-height: 45px;
    padding: 0 20px;
}
.subnav ul li a {
    font-size: 14px;
    color: #fff;
}
.subnav ul li a span {
    float: right;
}
.subnav ul li a:hover {
    color: #00a4ff;
}
.course {
    float: right;
    width: 230px;
    height: 300px;
    background-color: #fff;
    /* 浮动的盒子不会有外边距合并的问题 */
    margin-top: 50px;
}
.course h2 {
    height: 48px;
    background-color: #9bceea;
    text-align: center;
    line-height: 48px;
    font-size: 18px;
    color: #fff;
}
.bd {
    padding: 0 20px;
}
.bd ul li {
    padding: 14px 0;
    border-bottom: 1px solid #ccc;
}
.bd ul li h4 {
    font-size: 16px;
    color: #4e4e4e;
}
.bd ul li p {
    font-size: 12px;
    color: #a5a5a5;
}
.bd .more {
    display: block;
    height: 38px;
    border: 1px solid #00a4ff;
    margin-top: 5px;
    text-align: center;
    line-height: 38px;
    color: #00a4ff;
    font-size: 16px;
    font-weight: 700;
}
/* 精品推荐模块 */
.goods {
    height: 60px;
    background-color: #fff;
    margin-top: 10px;
    box-shadow: 0 2px 3px 3px rgba(0,0,0, 0.1);
    /* 行高会继承, 会继承给3个孩子 */
    line-height: 60px;
}
.goods h3 {
    float: left;
    margin-left: 30px;
    font-size: 16px;
    color: #00a4ff;
}
.goods ul {
    float: left;
    margin-left: 30px;
}
.goods ul li {
    float: left;
}
.goods ul li a {
    padding: 0 30px;
    font-size: 16px;
    color: #050505;
    border-left: 1px solid #ccc;
}
.mod {
    float: right;
    margin-right: 30px;
    font-size: 14px;
    color: #00a4ff;
}
.box {
    margin-top: 30px;
}
.box-hd {
    height: 45px;
}
.box-hd h3 {
    float: left;
    font-size: 20px;
    color: #494949;
}
.box-hd a {
    float: right;
    font-size: 12px;
    color: #a5a5a5;
    margin-top: 10px;
    margin-right: 30px;
}
/* 把li 的父亲ul 修改的足够宽一行能装开5个盒子就不会换行了 */
.box-bd ul {
    width: 1225px;
}
.box-bd ul li {
    position: relative;
    top: 0;
    float: left;
    width: 228px;
    height: 270px;
    background-color: #fff;
    margin-right: 15px;
    margin-bottom: 15px;
    transition: all .3s;

}
.box-bd ul li:hover {
    top: -8px;
    box-shadow: 2px 2px 2px 2px rgba(0,0,0,.3);
}
.box-bd ul li img {
    width: 100%;
}
.box-bd ul li h4 {
    margin: 20px 20px 20px 25px;
    font-size: 14px;
    color: #050505;
    font-weight: 400;
}
.box-bd .info {
    margin: 0 20px 0 25px;
    font-size: 12px;
    color: #999;
}
.box-bd .info span {
    color: #ff7c2d;
}
/* footer 模块 */
.footer {
    height: 415px;
    background-color: #fff;
}
.footer .w {
    padding-top: 35px;
}
.copyright {
    float: left;
}
.copyright p {
    font-size: 12px;
    color: #666;
    margin: 20px 0 15px 0;
}
.copyright .app {
    display: block;
    width: 118px;
    height: 33px;
    border: 1px solid #00a4ff;
    text-align: center;
    line-height: 33px;
    color: #00a4ff;
    font-size: 16px;
}
.links {
    float: right;
}
.links dl {
    float: left;
    margin-left: 100px;
}
.links dl dt {
    font-size: 16px;
    color: #333;
    margin-bottom: 5px;
}
.links dl dd a {
    color: #333;
    font-size: 12px;
}
js综合案例数据代码:
let data = [
                        {
                            src: 'images/course01.png',
                            title: 'Think PHP 5.0 博客系统实战项目演练',
                            num: 1125
                        },
                        {
                            src: 'images/course02.png',
                            title: 'Android 网络动态图片加载实战',
                            num: 357
                        },
                        {
                            src: 'images/course03.png',
                            title: 'Angular2 大前端商城实战项目演练',
                            num: 22250
                        },
                        {
                            src: 'images/course04.png',
                            title: 'Android APP 实战项目演练',
                            num: 389
                        },
                        {
                            src: 'images/course05.png',
                            title: 'UGUI 源码深度分析案例',
                            num: 124
                        },
                        {
                            src: 'images/course06.png',
                            title: 'Kami2首页界面切换效果实战演练',
                            num: 432
                        },
                        {
                            src: 'images/course07.png',
                            title: 'UNITY 从入门到精通实战案例',
                            num: 888
                        },
                        {
                            src: 'images/course08.png',
                            title: 'Cocos 深度学习你不会错过的实战',
                            num: 590
                        },
                    ]
1.3.3 克隆节点

cloneNode会克隆出一个跟原标签一样的元素,括号内传入布尔值
- 若为true,则代表克隆时会包含后代节点一起克隆
- 若为false,则代表克隆时不包含后代节点
- 默认为false
代码:
<!DOCTYPE html>
<html lang="en">

<head>
    <meta charset="UTF-8">
    <meta http-equiv="X-UA-Compatible" content="IE=edge">
    <meta name="viewport" content="width=device-width, initial-scale=1.0">
    <title>Document</title>
</head>

<body>
    <ul>
        <li>我是内容11111</li>
    </ul>
    <script>
        let ul = document.querySelector('ul')
        // 括号为空则默认为false 如果是false则不克隆后代节点
        // 如果是true则克隆后代节点
        let newUl = ul.cloneNode(true)
        document.body.appendChild(newUl)
    </script>
</body>

</html>
1.4 删除节点
- 若一个节点在页面中已不需要时,可以删除它
- 在 JavaScript 原生DOM操作中,要删除元素必须通过父元素删除
- 语法

- 注:
如不存在父子关系则删除不成功
删除节点和隐藏节点(display:none) 有区别的: 隐藏节点还是存在的,但是删除,则从html中删除节点
代码:
<!DOCTYPE html>
<html lang="en">

<head>
    <meta charset="UTF-8">
    <meta http-equiv="X-UA-Compatible" content="IE=edge">
    <meta name="viewport" content="width=device-width, initial-scale=1.0">
    <title>Document</title>
</head>

<body>
    <button>点击</button>
    <ul>
        <li>我是内容11111</li>
    </ul>
    <script>
        // 需求,点击按钮,删除小li
        let btn = document.querySelector('button')
        let ul = document.querySelector('ul')
        btn.addEventListener('click', function () {
            // 删除的语法 父元素.removeChild(子元素)
            ul.removeChild(ul.children[0])
        })
    </script>
</body>

</html>
黑马前端专栏干货多多,关注再学,好方便~
2022年前端学习路线图:课程、源码、笔记,技术栈 另外此线路图实时更新!需要课后资料的友友们,可以直接告诉我。
边栏推荐
猜你喜欢

Use of snippets in vscode (code template)
2021-10-29
Do a small pressure test with JMeter tool
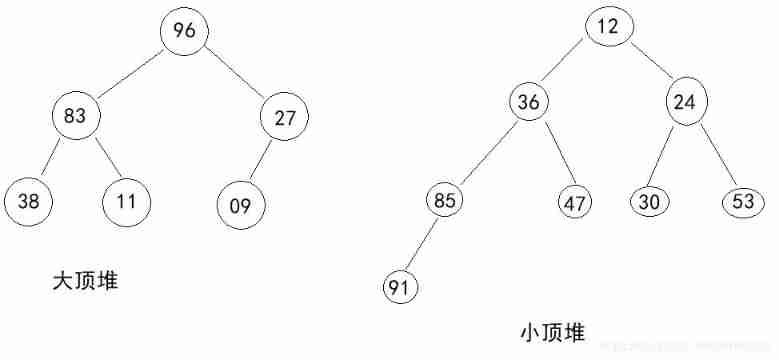
Heap sort summary

Applet Live + e - commerce, si vous voulez être un nouveau e - commerce de détail, utilisez - le!
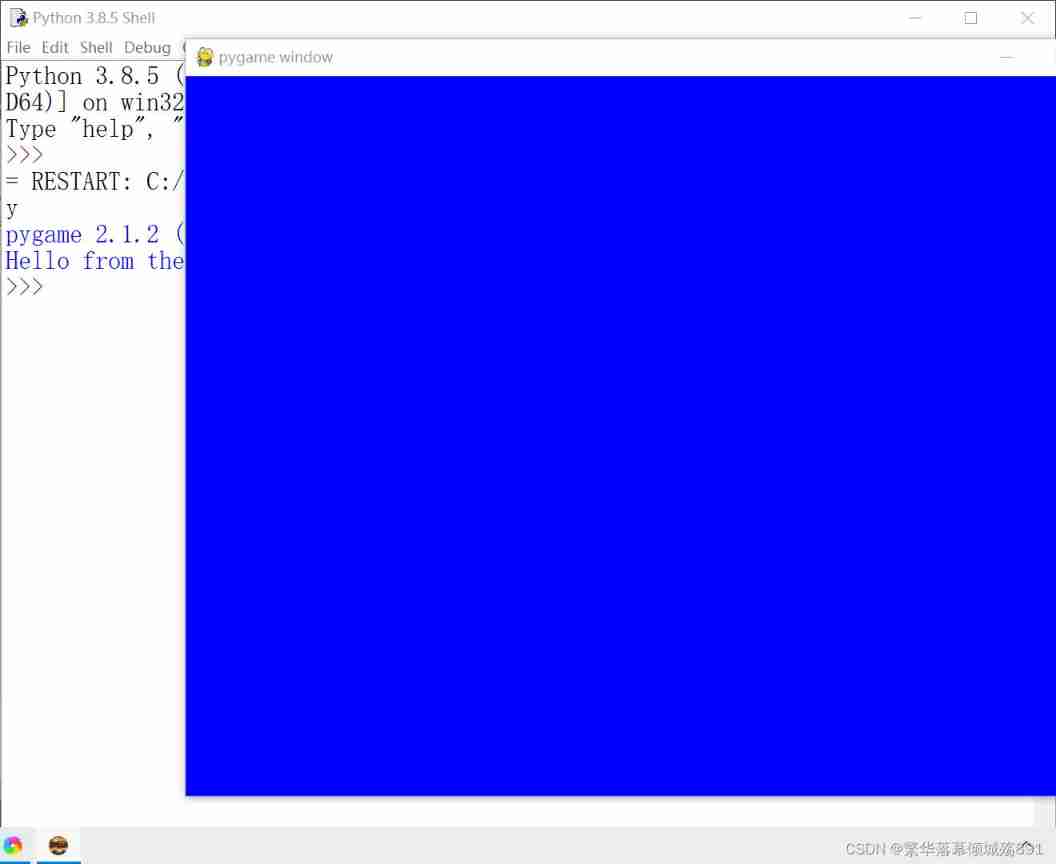
Create a pyGame window with a blue background

AutoCAD - set layer
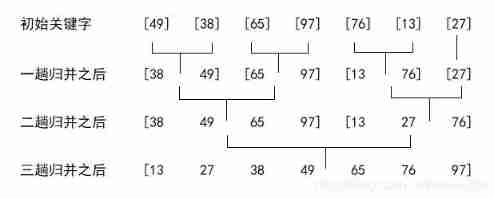
Merge sort
《动手学深度学习》学习笔记
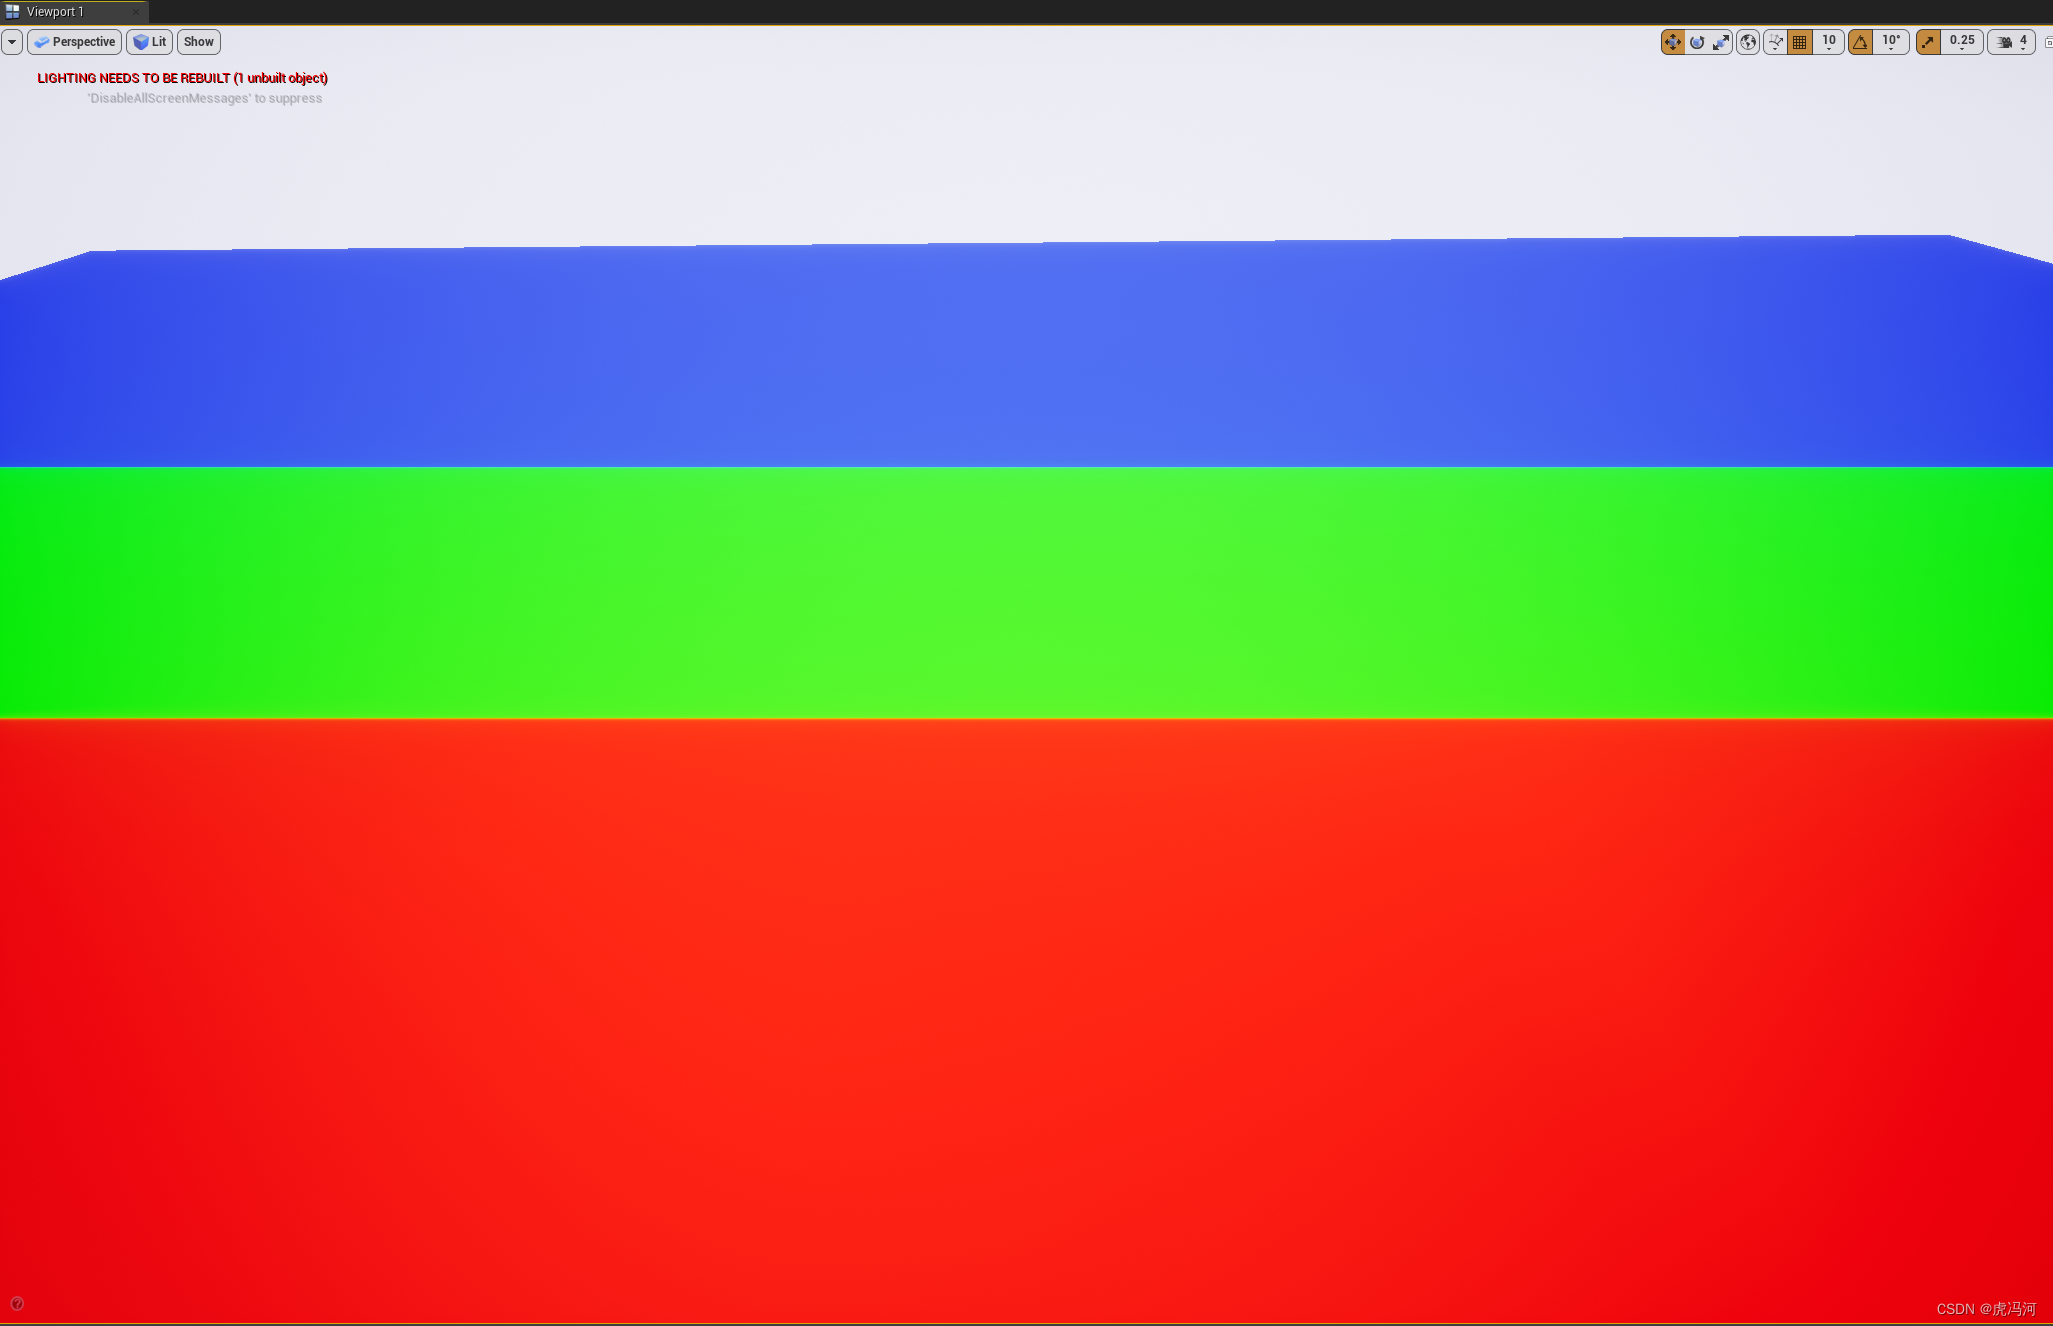
UE4/UE5 虚幻引擎,材质篇(三),不同距离的材质优化
随机推荐
Ue4/ue5 illusory engine, material part (III), material optimization at different distances
2020-10-27
Transport connection management of TCP
【论文笔记】Multi-Goal Reinforcement Learning: Challenging Robotics Environments and Request for Research
Unity parallax infinite scrolling background
Basic knowledge points of dictionary
Cocos create Jiugongge pictures
Basic knowledge points
Applet live + e-commerce, if you want to be a new retail e-commerce, use it!
Unity ugui source code graphic
Use of snippets in vscode (code template)
《动手学深度学习》学习笔记
Quick sort summary
Redis 排查大 key 的4种方法,优化必备
嵌入式数据库开发编程(零)
China polyurethane rigid foam Market Research and investment forecast report (2022 Edition)
中国溶聚丁苯橡胶(SSBR)行业研究与预测报告(2022版)
【Leetcode】1352. 最后 K 个数的乘积
Learning notes of "hands on learning in depth"
Generate filled text and pictures